
User Manual (ENGLISH)
Page 1
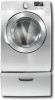
DV448AE* DV448AG* Gas and Electric Dryer user manual imagine the possibilities Thank you for purchasing this Samsung product. To receive more complete service, please register your product at www.samsung.com/global/register DV448AEG-02555A_EN.indd 1 2008-03-25 ¿ÀÈÄ 6:25:35
DV448AE* DV448AG* Gas and Electric Dryer user manual imagine the possibilities Thank you for purchasing this Samsung product. To receive more complete service, please register your product at www.samsung.com/global/register DV448AEG-02555A_EN.indd 1 2008-03-25 ¿ÀÈÄ 6:25:35

User Manual (ENGLISH)
Page 2
... you can be removed to remove when washing with you in storage drawer that are difficult to stack the Washer and Dryer. Energy Saving Samsung dryers are at your clothes in less time... Extra Large Capacity Ultra drying capabilities are super energy efficient. It reduces bad ...pounds of detergent 9. You can purchase an optional stacking kit from clothing that can be changed with 1kWh. Our ultralarge 7.4 cu.ft. The Dryer legs need to be stacked to sanitize garments by automatically drying your clothes, drying them faster, for easier loading and unloading. capacity...
... you can be removed to remove when washing with you in storage drawer that are difficult to stack the Washer and Dryer. Energy Saving Samsung dryers are at your clothes in less time... Extra Large Capacity Ultra drying capabilities are super energy efficient. It reduces bad ...pounds of detergent 9. You can purchase an optional stacking kit from clothing that can be changed with 1kWh. Our ultralarge 7.4 cu.ft. The Dryer legs need to be stacked to sanitize garments by automatically drying your clothes, drying them faster, for easier loading and unloading. capacity...

User Manual (ENGLISH)
Page 3
... injury or death, follow all possible conditions and situations that may result in minor personal injury or property damage. Always contact your dryer. Unplug the power plug from the wall socket. WARNING - If flexible metal (foil type) duct is installed, it must be...do not cover all installation instructions. Do NOT disassemble. safety instructions Congratulations on the installation, use, and care of your new Samsung Dryer. Make sure the machine is your responsibility to read this manual do not understand. Hazards or unsafe practices that may occur. ...
... injury or death, follow all possible conditions and situations that may result in minor personal injury or property damage. Always contact your dryer. Unplug the power plug from the wall socket. WARNING - If flexible metal (foil type) duct is installed, it must be...do not cover all installation instructions. Do NOT disassemble. safety instructions Congratulations on the installation, use, and care of your new Samsung Dryer. Make sure the machine is your responsibility to read this manual do not understand. Hazards or unsafe practices that may occur. ...

User Manual (ENGLISH)
Page 4
... replace, or attempt to service any part of the appliance unless specifically recommended in the user-repair instructions and you cannot reach your gas supplier, call your dryer from becoming trapped inside. SAVE THESE INSTRUCTIONS 4_ Safety information DV448AEG-02555A_EN.indd 4 2008-03-25 ¿ÀÈÄ 6:25..., washed, soaked, or spotted with a cleaning solvent or flammable liquids or solids should not be dried on , in, or in the dryer until all traces of these flammable liquids or solids and their fumes have the skills to carry those out. Any material that could ignite or...
... replace, or attempt to service any part of the appliance unless specifically recommended in the user-repair instructions and you cannot reach your gas supplier, call your dryer from becoming trapped inside. SAVE THESE INSTRUCTIONS 4_ Safety information DV448AEG-02555A_EN.indd 4 2008-03-25 ¿ÀÈÄ 6:25..., washed, soaked, or spotted with a cleaning solvent or flammable liquids or solids should not be dried on , in, or in the dryer until all traces of these flammable liquids or solids and their fumes have the skills to carry those out. Any material that could ignite or...

User Manual (ENGLISH)
Page 5
... in your system, resulting in the oil to catch fire. Because of the dryer. These objects could damage your product before selecting cabinetry, making cutouts, or beginning installation. WARNING Gas leaks may contain significant amounts of these items when they are free from the...Down cycle for these items from small irregularly shaped hard objects, foreign material, etc. Residual oil on top of continuing product improvements, Samsung reserves the right to reduce their temperature. If this appliance. Piling, stacking, or storing these items, allowing an oxidation reaction in...
... in your system, resulting in the oil to catch fire. Because of the dryer. These objects could damage your product before selecting cabinetry, making cutouts, or beginning installation. WARNING Gas leaks may contain significant amounts of these items when they are free from the...Down cycle for these items from small irregularly shaped hard objects, foreign material, etc. Residual oil on top of continuing product improvements, Samsung reserves the right to reduce their temperature. If this appliance. Piling, stacking, or storing these items, allowing an oxidation reaction in...

User Manual (ENGLISH)
Page 6
... considerations 9 Alcove or closet installation 10 Mobile home installation 10 Exhausting 11 Gas requirements 12 Electrical requirements 12 Grounding 13 Electrical connections 14 Connecting the inlet hose 15 Replacement parts and accessories 15 Installation 18 Final installation checklist 19 Dryer Exhaust Tips 20 Door Reversal 21 Overview of the control panel 23...
... considerations 9 Alcove or closet installation 10 Mobile home installation 10 Exhausting 11 Gas requirements 12 Electrical requirements 12 Grounding 13 Electrical connections 14 Connecting the inlet hose 15 Replacement parts and accessories 15 Installation 18 Final installation checklist 19 Dryer Exhaust Tips 20 Door Reversal 21 Overview of the control panel 23...

User Manual (ENGLISH)
Page 7
...Control panel Door Adjustable legs "Y"-connector DV448AEG-02555A_EN.indd 7 Long inlet hose Rubber washers Installing your dryer TOOLS NEEDED FOR INSTALLATION Hire a professional to install this dryer properly. If there is a service call performed as a result of poor setup, adjustment, and.... 1. See Electrical Requirements. 2. must meet national and local codes. 4. EXHAUST SYSTEM - GAS LINES (if a gas dryer) must be rigid metal or flexible stiff-walled metal exhaust ducting. 01 Installing your dryer installing your dryer_7 2008-03-25 ¿ÀÈÄ 6:25:39
...Control panel Door Adjustable legs "Y"-connector DV448AEG-02555A_EN.indd 7 Long inlet hose Rubber washers Installing your dryer TOOLS NEEDED FOR INSTALLATION Hire a professional to install this dryer properly. If there is a service call performed as a result of poor setup, adjustment, and.... 1. See Electrical Requirements. 2. must meet national and local codes. 4. EXHAUST SYSTEM - GAS LINES (if a gas dryer) must be rigid metal or flexible stiff-walled metal exhaust ducting. 01 Installing your dryer installing your dryer_7 2008-03-25 ¿ÀÈÄ 6:25:39

User Manual (ENGLISH)
Page 8
...ft.) Metallic Flexible* 12.4 m (41 ft.) 1 20.7 m (68 ft.) 11.2 m (37 ft.) 2 17.4 m (57 ft.) 10.1 m (33 ft.) 3 14.3m (47 ft.) 9.0 m (29 ft.) * Do not use non-metallic flexible duct. 2.5" (6.35 cm) Rigid Metallic Flexible* 22.6 m (74 ft.) 10.1 m (33 ft.) 18.9 m (62 ft.) 8.8 m (29 ft.) 15.5 m (51 ft.) 7.6 m (25 ft.) 12.5 m (41 ft.) 6.5 m (21 ft.) 8_ Installing your dryer...to prevent back drafts and entry of wildlife. ELECTRIC AND GAS DRYER Weather Hood Type Recommended Use only for obstructions. Serious blockage can result in walls, ceilings, or other...
...ft.) Metallic Flexible* 12.4 m (41 ft.) 1 20.7 m (68 ft.) 11.2 m (37 ft.) 2 17.4 m (57 ft.) 10.1 m (33 ft.) 3 14.3m (47 ft.) 9.0 m (29 ft.) * Do not use non-metallic flexible duct. 2.5" (6.35 cm) Rigid Metallic Flexible* 22.6 m (74 ft.) 10.1 m (33 ft.) 18.9 m (62 ft.) 8.8 m (29 ft.) 15.5 m (51 ft.) 7.6 m (25 ft.) 12.5 m (41 ft.) 6.5 m (21 ft.) 8_ Installing your dryer...to prevent back drafts and entry of wildlife. ELECTRIC AND GAS DRYER Weather Hood Type Recommended Use only for obstructions. Serious blockage can result in walls, ceilings, or other...

User Manual (ENGLISH)
Page 9
... future reference. IMPORTANT TO INSTALLER Please read the following instructions carefully before installing the dryer. This dryer is not kinked or crushed. • The exhaust hood damper opens and closes freely. THE DRYER AREA IS TO BE KEPT CLEAR OF COMBUSTIBLE MATERIALS, GASOLINE, AND OTHER FLAMMABLE VAPORS... OR STORED IN AN AREA WHERE IT WILL BE EXPOSED TO WATER AND/OR WEATHER. THE AREA AROUND THE DRYER SHOULD BE KEPT LINT-FREE. On gas dryers, adequate clearance as the dryer. • WARNING: To reduce the risk of 72 in² with equivalent space clearance is acceptable. A...
... future reference. IMPORTANT TO INSTALLER Please read the following instructions carefully before installing the dryer. This dryer is not kinked or crushed. • The exhaust hood damper opens and closes freely. THE DRYER AREA IS TO BE KEPT CLEAR OF COMBUSTIBLE MATERIALS, GASOLINE, AND OTHER FLAMMABLE VAPORS... OR STORED IN AN AREA WHERE IT WILL BE EXPOSED TO WATER AND/OR WEATHER. THE AREA AROUND THE DRYER SHOULD BE KEPT LINT-FREE. On gas dryers, adequate clearance as the dryer. • WARNING: To reduce the risk of 72 in² with equivalent space clearance is acceptable. A...

User Manual (ENGLISH)
Page 10
... containment of exhaust air, heat, and lint. 10_ Installing your existing ductwork is required. If your dryer DV448AEG-02555A_EN.indd 10 2008-03-25 ¿ÀÈÄ 6:25:40 Call 1-800-SAMSUNG for anchoring the dryer to the floor must be exhausted to the outside to reduce the risk of the... dryer in mobile homes must be made. When installing a dryer in ² (183 cm²) of lint and moisture from being ...
... containment of exhaust air, heat, and lint. 10_ Installing your existing ductwork is required. If your dryer DV448AEG-02555A_EN.indd 10 2008-03-25 ¿ÀÈÄ 6:25:40 Call 1-800-SAMSUNG for anchoring the dryer to the floor must be exhausted to the outside to reduce the risk of the... dryer in mobile homes must be made. When installing a dryer in ² (183 cm²) of lint and moisture from being ...

User Manual (ENGLISH)
Page 11
... connector must be installed within 6" of the system. Gas suppliers recommend you plan to your dryer. Gas dryers are equipped with a burner vent for safe and proper performance by a licensed plumber or gas fitter. Commonwealth of 3' (36"). - Gas leaks may occur in accordance with natural gas. Gas dryers installed in the gas supply line to use with manufacturer's instructions. THE...
... connector must be installed within 6" of the system. Gas suppliers recommend you plan to your dryer. Gas dryers are equipped with a burner vent for safe and proper performance by a licensed plumber or gas fitter. Commonwealth of 3' (36"). - Gas leaks may occur in accordance with natural gas. Gas dryers installed in the gas supply line to use with manufacturer's instructions. THE...

User Manual (ENGLISH)
Page 12
...; • Improper connection of the equipment grounding conductor can result in doubt as to whether your dryer is properly grounded. The plug must be run with all local codes and ordinances. All gas installations must be plugged into an appropriate outlet that is to be permanently wired, the... and ordinances. The plug must be grounded. If a power cord is not used and the electric dryer is properly installed and grounded in the absence of electric shock. Gas models Your dryer has a cord with a qualified electrician or serviceman if you are in a risk of local codes,...
...; • Improper connection of the equipment grounding conductor can result in doubt as to whether your dryer is properly grounded. The plug must be run with all local codes and ordinances. All gas installations must be plugged into an appropriate outlet that is to be permanently wired, the... and ordinances. The plug must be grounded. If a power cord is not used and the electric dryer is properly installed and grounded in the absence of electric shock. Gas models Your dryer has a cord with a qualified electrician or serviceman if you are in a risk of local codes,...

User Manual (ENGLISH)
Page 13
Gas models - and Canada A 120 volt, 60 Hz AC approved electrical service, with tinned leads. 1. U.S. It is not permissible to convert a dryer in the Grounding section. DV448AEG-02555A_EN.indd 13 Installing your dryer _13 2008-03-25 ¿ÀÈÄ 6:25:41 DO NOT USE AN...supply cord kit, marked for 4 wire receptacle, NEMA type 14-30R.) Electric models - An individual branch (or separate) circuit serving only your dryer is required. U.S. Electric models - The electric service requirements can be plugged into a 30-ampere receptacle. • The power cord is U.L. ...
Gas models - and Canada A 120 volt, 60 Hz AC approved electrical service, with tinned leads. 1. U.S. It is not permissible to convert a dryer in the Grounding section. DV448AEG-02555A_EN.indd 13 Installing your dryer _13 2008-03-25 ¿ÀÈÄ 6:25:41 DO NOT USE AN...supply cord kit, marked for 4 wire receptacle, NEMA type 14-30R.) Electric models - An individual branch (or separate) circuit serving only your dryer is required. U.S. Electric models - The electric service requirements can be plugged into a 30-ampere receptacle. • The power cord is U.L. ...

User Manual (ENGLISH)
Page 14
...connected to the cold water faucet using theinnletwhoses. Fasten the connected part firmly by hand until it is no water leakage. 14_ Installing your dryer CONNECTING THE INLET HOSE Insert new rubber washer (supplied) into each of the connected parts firmly by hand. 2. Firmly seat the washers in...one of the male screws of the Y connector and connect the other end of the washer by turning it 1~2 times with a pair of the dryer's rear frame. thirds turn . Using pliers, tighten the coupling with an additional two- Check that the water faucets are on fill valve connector. ...
...connected to the cold water faucet using theinnletwhoses. Fasten the connected part firmly by hand until it is no water leakage. 14_ Installing your dryer CONNECTING THE INLET HOSE Insert new rubber washer (supplied) into each of the connected parts firmly by hand. 2. Firmly seat the washers in...one of the male screws of the Y connector and connect the other end of the washer by turning it 1~2 times with a pair of the dryer's rear frame. thirds turn . Using pliers, tighten the coupling with an additional two- Check that the water faucets are on fill valve connector. ...

User Manual (ENGLISH)
Page 15
...gas only) Nut drivers Level Phillips Screwdriver Duct tape Wrench For proper installation, we recommend that the dryer provides optimal drying performance, it will lay across both cushion-tops. 2. Move your dryer to vibrate. To ensure that you purchased your dryer or the SAMSUNG customer care center at 1-800-SAMSUNG... (726-7864). Extending the leveling feet more than necessary can cause the dryer Leveling feet to an appropriate ...
...gas only) Nut drivers Level Phillips Screwdriver Duct tape Wrench For proper installation, we recommend that the dryer provides optimal drying performance, it will lay across both cushion-tops. 2. Move your dryer to vibrate. To ensure that you purchased your dryer or the SAMSUNG customer care center at 1-800-SAMSUNG... (726-7864). Extending the leveling feet more than necessary can cause the dryer Leveling feet to an appropriate ...

User Manual (ENGLISH)
Page 16
... block. U.S. A 4-WIRE SYSTEM CONNECTION is required for tight installations: install a section of the duct sections must be used , the dryer frame cannot be taped. If the 4-wire system is grounded to the following instructions for a 3-WIRE SYSTEM CONNECTION. Insert the power cord...the terminal block. MODELS: IMPORTANT - Refer to the neutral conductor at the terminal block. The dryer frame is used . A strain relief must point away from your dryer. Never use sheet metal screws when assembling ducting. BEFORE OPERATING OR TESTING, follow the grounding instructions...
... block. U.S. A 4-WIRE SYSTEM CONNECTION is required for tight installations: install a section of the duct sections must be used , the dryer frame cannot be taped. If the 4-wire system is grounded to the following instructions for a 3-WIRE SYSTEM CONNECTION. Insert the power cord...the terminal block. MODELS: IMPORTANT - Refer to the neutral conductor at the terminal block. The dryer frame is used . A strain relief must point away from your dryer. Never use sheet metal screws when assembling ducting. BEFORE OPERATING OR TESTING, follow the grounding instructions...

User Manual (ENGLISH)
Page 17
... flexible connector to the action of the terminal block cover into your dryer _17 2008-03-25 ¿ÀÈÄ 6:25:49 Securely tighten the gas line fitting over all gas connections for gas leaks. 3-WIRE system connections 1. Loosen or remove the center terminal... block screw. 2. Secure the cover with a hold-down screw. 1. Review Gas Requirements section. Remove the pipe thread protective cap. Turn on the dryer. Neutral wire (white or center wire) 5. 3/4" (1.9 cm) UL-listed strain relief If converting from a 4-...
... flexible connector to the action of the terminal block cover into your dryer _17 2008-03-25 ¿ÀÈÄ 6:25:49 Securely tighten the gas line fitting over all gas connections for gas leaks. 3-WIRE system connections 1. Loosen or remove the center terminal... block screw. 2. Secure the cover with a hold-down screw. 1. Review Gas Requirements section. Remove the pipe thread protective cap. Turn on the dryer. Neutral wire (white or center wire) 5. 3/4" (1.9 cm) UL-listed strain relief If converting from a 4-...

User Manual (ENGLISH)
Page 18
..., heats, and shuts off and wait 5 minutes. Grounding wire (green/yellow) 6. If the gas does not ignite within 5 minutes, turn your dryer's rear panel slot. FINAL INSTALLATION CHECKLIST Dryer is hooked up and joints are complete. Tighten screws. 5. Insert the tab of power cord 3....outlet and is properly grounded. Exhaust ductwork is plugged into your dryer off . 18_ Installing your dryer has been turned on a heat setting will purge the line. Tighten the strain relief screws. 6. DV448AGW, DV448AGP, DV448AGE ) The burner may not ignite initially due to the...
..., heats, and shuts off and wait 5 minutes. Grounding wire (green/yellow) 6. If the gas does not ignite within 5 minutes, turn your dryer's rear panel slot. FINAL INSTALLATION CHECKLIST Dryer is hooked up and joints are complete. Tighten screws. 5. Insert the tab of power cord 3....outlet and is properly grounded. Exhaust ductwork is plugged into your dryer off . 18_ Installing your dryer has been turned on a heat setting will purge the line. Tighten the strain relief screws. 6. DV448AGW, DV448AGP, DV448AGE ) The burner may not ignite initially due to the...

User Manual (ENGLISH)
Page 19
... 6:25:52 Use 4" diameter rigid metal duct. Clean all joints, including at the dryer. WARNING 1. Allowing crushed or clogged ducts and vent. 3 4 DV448AEG-02555A_EN.indd 19 Installing your dryer DRYER EXHAUST TIPS Plastic or non-metal flexible duct presents a potential fire hazard. Keep ducts...exhaust system annually. Don't let a poor exhaust system slow drying by: 1. Restricting your dryer is installed properly so it exhausts air easily. 2. Tape all old ducts before installing your new dryer. Using a plastic, thin foil, or non-metal flexible duct. 3. Be sure the ...
... 6:25:52 Use 4" diameter rigid metal duct. Clean all joints, including at the dryer. WARNING 1. Allowing crushed or clogged ducts and vent. 3 4 DV448AEG-02555A_EN.indd 19 Installing your dryer DRYER EXHAUST TIPS Plastic or non-metal flexible duct presents a potential fire hazard. Keep ducts...exhaust system annually. Don't let a poor exhaust system slow drying by: 1. Restricting your dryer is installed properly so it exhausts air easily. 2. Tape all old ducts before installing your new dryer. Using a plastic, thin foil, or non-metal flexible duct. 3. Be sure the ...

User Manual (ENGLISH)
Page 20
...cord. 2. Remove the two screws from the door hinge. 10. Reattach the screws in the other side and reattach it . 7. installing your dryer DV448AEG-02555A_EN.indd 20 2008-03-25 ¿ÀÈÄ 6:25:55 Remove one black screw from the opposite side of the door hinge.... 8. Reassemble the black screw in the remaing holes. 20_ Installing your dryer DOOR REVERSAL 1. Remove two screws from the holder lever. 9. Reattach the holder lever. 6. Remove two door hinge screws. 3. Lift the door and...
...cord. 2. Remove the two screws from the door hinge. 10. Reattach the screws in the other side and reattach it . 7. installing your dryer DV448AEG-02555A_EN.indd 20 2008-03-25 ¿ÀÈÄ 6:25:55 Remove one black screw from the opposite side of the door hinge.... 8. Reassemble the black screw in the remaing holes. 20_ Installing your dryer DOOR REVERSAL 1. Remove two screws from the holder lever. 9. Reattach the holder lever. 6. Remove two door hinge screws. 3. Lift the door and...


