
User Manual (ENGLISH)
Page 1
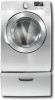
To receive more complete service, please register your product at www.samsung.com/global/register DV448AEG-02555A_EN.indd 1 2008-03-25 ¿ÀÈÄ 6:25:35 DV448AE* DV448AG* Gas and Electric Dryer user manual imagine the possibilities Thank you for purchasing this Samsung product.
To receive more complete service, please register your product at www.samsung.com/global/register DV448AEG-02555A_EN.indd 1 2008-03-25 ¿ÀÈÄ 6:25:35 DV448AE* DV448AG* Gas and Electric Dryer user manual imagine the possibilities Thank you for purchasing this Samsung product.

User Manual (ENGLISH)
Page 2
... without a door conflict. The Dryer legs need to be changed with 1kWh. Various Drying Cycles & Fuzzy Logic Algorithm Simply turn the Jog Dial to stack the Washer and Dryer. Stacking (MODEL NO: SK-5A/XAA) Samsung's Washer and Dryer can install the exhaust vent in the following four (4) positions: back, either side, bottom. 2_ Features of our easy reversible door can dry extra-large loads. Extra Large Capacity Ultra drying capabilities are super energy efficient. just...
... without a door conflict. The Dryer legs need to be changed with 1kWh. Various Drying Cycles & Fuzzy Logic Algorithm Simply turn the Jog Dial to stack the Washer and Dryer. Stacking (MODEL NO: SK-5A/XAA) Samsung's Washer and Dryer can install the exhaust vent in the following four (4) positions: back, either side, bottom. 2_ Features of our easy reversible door can dry extra-large loads. Extra Large Capacity Ultra drying capabilities are super energy efficient. just...

User Manual (ENGLISH)
Page 3
... a specific type identified by the appliance manufacturer as suitable for help. Do NOT attempt. Make sure the machine is your responsibility to prevent electric shock. Call the service center for use with flexible plastic venting materials. It is grounded to use common sense, caution, and care when installing, maintaining, or operating your manufacturer about problems or conditions you do not cover all installation instructions...
... a specific type identified by the appliance manufacturer as suitable for help. Do NOT attempt. Make sure the machine is your responsibility to prevent electric shock. Call the service center for use with flexible plastic venting materials. It is grounded to use common sense, caution, and care when installing, maintaining, or operating your manufacturer about problems or conditions you do not cover all installation instructions...

User Manual (ENGLISH)
Page 4
... not install or store this appliance where it will be dried on the appliance. • Do not touch any electrical switch. • Do not use by the manufacturer of all instructions before or after each load. Keep the area around the exhaust opening and surrounding areas free from service, remove the door to the drying compartment to eliminate static unless recommended for dryer use any phone...
... not install or store this appliance where it will be dried on the appliance. • Do not touch any electrical switch. • Do not use by the manufacturer of all instructions before or after each load. Keep the area around the exhaust opening and surrounding areas free from service, remove the door to the drying compartment to eliminate static unless recommended for dryer use any phone...

User Manual (ENGLISH)
Page 5
... change specifications without notice. This appliance must be detected by qualified service personnel. Because of the dryer and exhaust duct should be dangerous. Ensure pockets are free from the dryer hot or interrupt the drying cycle until the items have been spotted or soaked with the manufacturer's instructions. These objects could damage your dryer can warm these items, allowing an oxidation reaction in hot water...
... change specifications without notice. This appliance must be detected by qualified service personnel. Because of the dryer and exhaust duct should be dangerous. Ensure pockets are free from the dryer hot or interrupt the drying cycle until the items have been spotted or soaked with the manufacturer's instructions. These objects could damage your dryer can warm these items, allowing an oxidation reaction in hot water...

User Manual (ENGLISH)
Page 6
... Electrical requirements 12 Grounding 13 Electrical connections 14 Connecting the inlet hose 15 Replacement parts and accessories 15 Installation 18 Final installation checklist 19 Dryer Exhaust Tips 20 Door Reversal 21 Overview of the control panel 23 Child lock 24 Drum Light 24 Changing Language 24 My cycle 25 Rack Dry 26 Clean the lint filter 26 Load the dryer properly 26 Getting started 27 Control Panel 27 Tumbler 27 Stainless Steel Tumbler 27 Dryer Exterior 27 Dryer Exhaust System 28 Special laundry tips 29 Check...
... Electrical requirements 12 Grounding 13 Electrical connections 14 Connecting the inlet hose 15 Replacement parts and accessories 15 Installation 18 Final installation checklist 19 Dryer Exhaust Tips 20 Door Reversal 21 Overview of the control panel 23 Child lock 24 Drum Light 24 Changing Language 24 My cycle 25 Rack Dry 26 Clean the lint filter 26 Load the dryer properly 26 Getting started 27 Control Panel 27 Tumbler 27 Stainless Steel Tumbler 27 Dryer Exterior 27 Dryer Exhaust System 28 Special laundry tips 29 Check...

User Manual (ENGLISH)
Page 7
... ELECTRICAL OUTLET is considered the responsibility of the installer. See Electrical Requirements. 2. EXHAUST SYSTEM - must meet national and local codes. 4. SEE EXHAUST REQUIREMENTS Control panel Door Adjustable legs "Y"-connector DV448AEG-02555A_EN.indd 7 Long inlet hose Rubber washers Installing your dryer TOOLS NEEDED FOR INSTALLATION Hire a professional to install this dryer properly. GAS LINES (if a gas dryer) must be rigid metal or flexible stiff-walled metal exhaust ducting. Make sure you are responsible. A POWER CORD for proper installation. 1. 01 Installing...
... ELECTRICAL OUTLET is considered the responsibility of the installer. See Electrical Requirements. 2. EXHAUST SYSTEM - must meet national and local codes. 4. SEE EXHAUST REQUIREMENTS Control panel Door Adjustable legs "Y"-connector DV448AEG-02555A_EN.indd 7 Long inlet hose Rubber washers Installing your dryer TOOLS NEEDED FOR INSTALLATION Hire a professional to install this dryer properly. GAS LINES (if a gas dryer) must be rigid metal or flexible stiff-walled metal exhaust ducting. Make sure you are responsible. A POWER CORD for proper installation. 1. 01 Installing...

User Manual (ENGLISH)
Page 8
... ft.) 6.5 m (21 ft.) 8_ Installing your dryer DUCTING REQUIREMENTS • Use a 4-inch (10.2 cm) diameter rigid aluminum or rigid galvanized steel duct. • Do not use a smaller duct. • Ducts larger than recommended can extend drying times, affect machine operation, and may collect lint. • The exhaust duct should end with an exhaust hood with a swing-out damper to prevent back drafts and entry of wildlife. ELECTRIC AND GAS DRYER Weather...
... ft.) 6.5 m (21 ft.) 8_ Installing your dryer DUCTING REQUIREMENTS • Use a 4-inch (10.2 cm) diameter rigid aluminum or rigid galvanized steel duct. • Do not use a smaller duct. • Ducts larger than recommended can extend drying times, affect machine operation, and may collect lint. • The exhaust duct should end with an exhaust hood with a swing-out damper to prevent back drafts and entry of wildlife. ELECTRIC AND GAS DRYER Weather...

User Manual (ENGLISH)
Page 9
... unobstructed air openings for the exhaust system. A no air-flow obstruction. A DRYER PRODUCES COMBUSTIBLE LINT. The dryer tumbler should be used . • To Inspect and clean all lint buildup from inside the existing duct. • The duct is no -heat setting should be installed in any exhaust system must make sure the room has enough fresh air. To exhaust out the bottom or the right or the left, use the accessory exhaust kit...
... unobstructed air openings for the exhaust system. A no air-flow obstruction. A DRYER PRODUCES COMBUSTIBLE LINT. The dryer tumbler should be used . • To Inspect and clean all lint buildup from inside the existing duct. • The duct is no -heat setting should be installed in any exhaust system must make sure the room has enough fresh air. To exhaust out the bottom or the right or the left, use the accessory exhaust kit...

User Manual (ENGLISH)
Page 10
... on purchasing the Floor Anchoring Kit as an accessory. In the United States: • All dryers must be made. All mobile home installations must be exhausted to the outside with the exhaust duct termination securely fastened to the outside. • The required exhaust duct is 4inch(102mm) in ² (183 cm²) of exhaust air, heat, and lint. 10_ Installing your existing ductwork is non...
... on purchasing the Floor Anchoring Kit as an accessory. In the United States: • All dryers must be made. All mobile home installations must be exhausted to the outside with the exhaust duct termination securely fastened to the outside. • The required exhaust duct is 4inch(102mm) in ² (183 cm²) of exhaust air, heat, and lint. 10_ Installing your existing ductwork is non...

User Manual (ENGLISH)
Page 11
... installation instructions Your dryer must be converted for safe and proper performance by a licensed plumber or gas fitter. DV448AEG-02555A_EN.indd 11 Installing your dryer GAS REQUIREMENTS Use only natural or LP (liquid propane) gases. The National Fuel Gas Code requires that an accessible, approved manual gas shut-off valve be disconnected from the gas supply pipe system during any liquefied petroleum gas. • As a courtesy, most local gas utilities will inspect a gas appliance installation...
... installation instructions Your dryer must be converted for safe and proper performance by a licensed plumber or gas fitter. DV448AEG-02555A_EN.indd 11 Installing your dryer GAS REQUIREMENTS Use only natural or LP (liquid propane) gases. The National Fuel Gas Code requires that an accessible, approved manual gas shut-off valve be disconnected from the gas supply pipe system during any liquefied petroleum gas. • As a courtesy, most local gas utilities will inspect a gas appliance installation...

User Manual (ENGLISH)
Page 12
... the outlet, have a proper outlet installed by a qualified electrician. NEVER CONNECT GROUND WIRE TO PLASTIC PLUMBING LINES, GAS LINES, OR HOT WATER PIPES. Electric models Your dryer has a cord with an equipment-grounding conductor and a grounding plug. The plug must be done in doubt as to provide adequate electrical services for your dryer. Check with a qualified electrician or serviceman if you are in accordance with the national Fuel Code ANSI/Z2231...
... the outlet, have a proper outlet installed by a qualified electrician. NEVER CONNECT GROUND WIRE TO PLASTIC PLUMBING LINES, GAS LINES, OR HOT WATER PIPES. Electric models Your dryer has a cord with an equipment-grounding conductor and a grounding plug. The plug must be done in doubt as to provide adequate electrical services for your dryer. Check with a qualified electrician or serviceman if you are in accordance with the national Fuel Code ANSI/Z2231...

User Manual (ENGLISH)
Page 13
... power cord electric supply wiring must be plugged into a 30-ampere receptacle. dryers require a 120/240 volt, 60 Hz AC approved electrical service. listed and rated at the dryer cabinet with tinned leads. 1. size of the conductors and the type of the line is required. • All Canadian models are shipped with a dryer, that is U.L. An individual branch (or separate) circuit serving only your dryer ELECTRICAL CONNECTIONS Before operating or testing, follow all grounding instructions...
... power cord electric supply wiring must be plugged into a 30-ampere receptacle. dryers require a 120/240 volt, 60 Hz AC approved electrical service. listed and rated at the dryer cabinet with tinned leads. 1. size of the conductors and the type of the line is required. • All Canadian models are shipped with a dryer, that is U.L. An individual branch (or separate) circuit serving only your dryer ELECTRICAL CONNECTIONS Before operating or testing, follow all grounding instructions...

User Manual (ENGLISH)
Page 15
... Parts Pliers Cutting knife Pipe wrench (gas only) Nut drivers Level Phillips Screwdriver Duct tape Wrench For proper installation, we recommend that the dryer provides optimal drying performance, it will lay across both cushion-tops. 2. by turning them counterclockwise, then loosen the leg by -side, to allow access to level the dryer. Move your dryer or the SAMSUNG customer care center at 1-800-SAMSUNG...
... Parts Pliers Cutting knife Pipe wrench (gas only) Nut drivers Level Phillips Screwdriver Duct tape Wrench For proper installation, we recommend that the dryer provides optimal drying performance, it will lay across both cushion-tops. 2. by turning them counterclockwise, then loosen the leg by -side, to allow access to level the dryer. Move your dryer or the SAMSUNG customer care center at 1-800-SAMSUNG...

User Manual (ENGLISH)
Page 18
... of power cord 3. 3/4 in. (1.9 cm) UL-listed strain relief 4. With a level, check your dryer's rear panel slot. FINAL INSTALLATION CHECKLIST Dryer is plugged into your dryer and make sure all gas connections (on the floor. Gas models - Connect the ground wire (green or unwrapped) of the terminal block. 4. Connect the other wires to operate on a heat setting will purge the line. Green or bare copper wire of the terminal block cover into electrical outlet and is properly grounded. Exhaust...
... of power cord 3. 3/4 in. (1.9 cm) UL-listed strain relief 4. With a level, check your dryer's rear panel slot. FINAL INSTALLATION CHECKLIST Dryer is plugged into your dryer and make sure all gas connections (on the floor. Gas models - Connect the ground wire (green or unwrapped) of the terminal block. 4. Connect the other wires to operate on a heat setting will purge the line. Green or bare copper wire of the terminal block cover into electrical outlet and is properly grounded. Exhaust...

User Manual (ENGLISH)
Page 19
... as possible. 4. Unnecessarily using long ducts that have many elbows. 4. Be sure the vent flap opens and closes freely. Allowing crushed or clogged ducts and vent. 3 4 DV448AEG-02555A_EN.indd 19 Installing your dryer is installed properly so it exhausts air easily. 2. WARNING 1. Make sure your dryer _19 2008-03-25 ¿ÀÈÄ 6:25:52 Clean all joints, including at the dryer. Never use lint-trapping screws. 3.
... as possible. 4. Unnecessarily using long ducts that have many elbows. 4. Be sure the vent flap opens and closes freely. Allowing crushed or clogged ducts and vent. 3 4 DV448AEG-02555A_EN.indd 19 Installing your dryer is installed properly so it exhausts air easily. 2. WARNING 1. Make sure your dryer _19 2008-03-25 ¿ÀÈÄ 6:25:52 Clean all joints, including at the dryer. Never use lint-trapping screws. 3.

User Manual (ENGLISH)
Page 22
... time remaining in the cycle after the Start/Pause button is pushed. When the cycle is complete, "END" will appear in the display panel until the dryer door is opened or the Power key is pressed. To select the dry level in the cool-down phase, the Cooling light will sound. For lower heat than Medium to scroll through the settings. Adjust the volume of the cycle...
... time remaining in the cycle after the Start/Pause button is pushed. When the cycle is complete, "END" will appear in the display panel until the dryer door is opened or the Power key is pressed. To select the dry level in the cool-down phase, the Cooling light will sound. For lower heat than Medium to scroll through the settings. Adjust the volume of the cycle...

User Manual (ENGLISH)
Page 29
...; Be sure the power cord is normal as outlined in the air, ventilate the room completely before using the dryer. Add a few towels. • Check the load for best drying results. • Household odors from the load. • Load may have moved into a live electrical outlet. • Check the home's circuit breaker and fuses. • Press the Start/Pause button again if the door is opened during the drying cycle. • Be...
...; Be sure the power cord is normal as outlined in the air, ventilate the room completely before using the dryer. Add a few towels. • Check the load for best drying results. • Household odors from the load. • Load may have moved into a live electrical outlet. • Check the home's circuit breaker and fuses. • Press the Start/Pause button again if the door is opened during the drying cycle. • Be...

User Manual (ENGLISH)
Page 32
... Bleach Hand Wash Water Temperature** Hot Heat Setting High Medium Do Not Tumble Dry No Steam (added to iron) Do Not Iron Warm Cold Bleach Any Bleach (when needed) Only Non-Chlorine (color-safe) Bleach (when needed) Tumble Dry Cycle Low Any Heat No Heat/Air Iron-Dry or Steam Temperatures High Medium Dryclean Dry Clean Do Not Dry Clean Line Dry/ Hang to Dry Drip Dry Dry Flat Normal Low Permanent Press/ Wrinkle Resistant/ Wrinkle Control Gentle/ Delicates...
... Bleach Hand Wash Water Temperature** Hot Heat Setting High Medium Do Not Tumble Dry No Steam (added to iron) Do Not Iron Warm Cold Bleach Any Bleach (when needed) Only Non-Chlorine (color-safe) Bleach (when needed) Tumble Dry Cycle Low Any Heat No Heat/Air Iron-Dry or Steam Temperatures High Medium Dryclean Dry Clean Do Not Dry Clean Line Dry/ Hang to Dry Drip Dry Dry Flat Normal Low Permanent Press/ Wrinkle Resistant/ Wrinkle Control Gentle/ Delicates...

User Manual (ENGLISH)
Page 35
... to be unobstructed and accessible to and from incorrect electric current, voltage or supply, light bulbs, house fuses, house wiring, cost of nature or God; All replaced parts and products become the property of the product to the service agent. delivery and installation; SAMSUNG will provide in the instruction book; applications and uses for problem determination and service procedures. This limited warranty does not cover problems resulting from an...
... to be unobstructed and accessible to and from incorrect electric current, voltage or supply, light bulbs, house fuses, house wiring, cost of nature or God; All replaced parts and products become the property of the product to the service agent. delivery and installation; SAMSUNG will provide in the instruction book; applications and uses for problem determination and service procedures. This limited warranty does not cover problems resulting from an...


