User Manual
Page 8
... in the appliance. Clean the lint screen before the end of the drying cycle unless all instructions before using your dryer. See "Electrical requirements" and "Grounding" in "Installation" section. Do not reach into the appliance if the drum is removed from the accumulation of lint, dust, and dirt. 15. Keep area around the exhaust opening and adjacent surrounding areas free from service or discarded, remove the door to carry out...
... in the appliance. Clean the lint screen before the end of the drying cycle unless all instructions before using your dryer. See "Electrical requirements" and "Grounding" in "Installation" section. Do not reach into the appliance if the drum is removed from the accumulation of lint, dust, and dirt. 15. Keep area around the exhaust opening and adjacent surrounding areas free from service or discarded, remove the door to carry out...

User Manual
Page 9
.... See the installation instructions for dryer use fabric softeners or products to play on top of the dryer. • Do not dry clothing with large buckles, buttons, or other heavy metal or solid objects. • Gas leaks may occur in accordance with the controls. • Do not repair, replace, or attempt to service any part of the appliance unless specifically instructed to in the user-repair instructions and you...
.... See the installation instructions for dryer use fabric softeners or products to play on top of the dryer. • Do not dry clothing with large buckles, buttons, or other heavy metal or solid objects. • Gas leaks may occur in accordance with the controls. • Do not repair, replace, or attempt to service any part of the appliance unless specifically instructed to in the user-repair instructions and you...

User Manual
Page 14
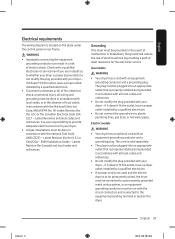
...:45 WARNING • Make sure to exhaust the dryer outdoors to prevent a child from water and weather. Key installation requirements • A grounded electrical outlet. • A power cord for electric dryers (except in . (460 mm) above the floor for gas models) that must meet national and local regulations. • An exhaust system made of electric shock only during servicing. WARNING Remove the door from all discarded appliances to reduce the...
...:45 WARNING • Make sure to exhaust the dryer outdoors to prevent a child from water and weather. Key installation requirements • A grounded electrical outlet. • A power cord for electric dryers (except in . (460 mm) above the floor for gas models) that must meet national and local regulations. • An exhaust system made of electric shock only during servicing. WARNING Remove the door from all discarded appliances to reduce the...

User Manual
Page 20
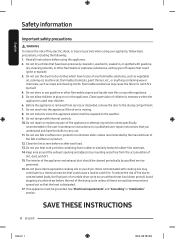
... propane) gas, it must be converted for safe and proper performance by the standard for connectors for Gas Appliances, ANSI Z21.24 • CSA 6.10. A "T" handle manual gas valve must be installed in the gas supply line to ignite the burner. Flexible gas lines must be designed and certified by a qualified service technician. (LNG models only) You must check the burner of your dryer. English Installation requirements Gas requirements WARNING • Use...
... propane) gas, it must be converted for safe and proper performance by the standard for connectors for Gas Appliances, ANSI Z21.24 • CSA 6.10. A "T" handle manual gas valve must be installed in the gas supply line to ignite the burner. Flexible gas lines must be designed and certified by a qualified service technician. (LNG models only) You must check the burner of your dryer. English Installation requirements Gas requirements WARNING • Use...
User Manual
Page 21
... lines, gas lines, or hot water pipes. This cord is sold separately. • The plug must be run with the national Fuel Code ANSI/Z2231 - if it doesn't fit the outlet, have a proper outlet installed by a qualified electrician. • Do not connect the ground wire to the equipment grounding terminal or lead on the plate under the control panel or rear frame. Check with your dryer - Gas models WARNING • Your dryer has a cord...
... lines, gas lines, or hot water pipes. This cord is sold separately. • The plug must be run with the national Fuel Code ANSI/Z2231 - if it doesn't fit the outlet, have a proper outlet installed by a qualified electrician. • Do not connect the ground wire to the equipment grounding terminal or lead on the plate under the control panel or rear frame. Check with your dryer - Gas models WARNING • Your dryer has a cord...
User Manual
Page 22
... circuit breaker on the data label located behind the door. electric model dryers. U.S. Do not use with the power cord attached. WARNING Risk of 120 / 240 volts, 30-amperes with three No. 10 copper wire conductors terminated with closed loop terminals, open-end spade lugs with turned up ends, or with a new power supply cord kit, marked for a 4 wire receptacle, NEMA type 14-30R.) Electric models - English Installation requirements Electrical connections Before operating or testing, follow all grounding instructions...
... circuit breaker on the data label located behind the door. electric model dryers. U.S. Do not use with the power cord attached. WARNING Risk of 120 / 240 volts, 30-amperes with three No. 10 copper wire conductors terminated with closed loop terminals, open-end spade lugs with turned up ends, or with a new power supply cord kit, marked for a 4 wire receptacle, NEMA type 14-30R.) Electric models - English Installation requirements Electrical connections Before operating or testing, follow all grounding instructions...

User Manual
Page 25
... the door before the installation is required to connect the 3/4" (1.9 cm) female thread end of a flexible connector to the 3/8" (1 cm) male threaded end on the dryer. To change the door direction, see "Switching the door position" on the gas supply, and check for any leaks using a soap solution. Install the exhaust system as your dryer, remove the packing in the "Exhaust ducting guide" section. Turn on page 34. 3. Do not use an open . If...
... the door before the installation is required to connect the 3/4" (1.9 cm) female thread end of a flexible connector to the 3/8" (1 cm) male threaded end on the dryer. To change the door direction, see "Switching the door position" on the gas supply, and check for any leaks using a soap solution. Install the exhaust system as your dryer, remove the packing in the "Exhaust ducting guide" section. Turn on page 34. 3. Do not use an open . If...

User Manual
Page 31
Allowing your dryer has been turned on a heat setting will purge the line. Be sure the gas supply to your dryer to air in Step 7 below. To confirm gas ignition, check the exhaust for gas models) Make sure all gas connections, the exhaust line, and all wiring is connected correctly. For gas models: • The gas is sitting firmly on (for heat. Then, plug the power cord into an electrical outlet and grounded properly. • The exhaust ductwork is connected, and...
Allowing your dryer has been turned on a heat setting will purge the line. Be sure the gas supply to your dryer to air in Step 7 below. To confirm gas ignition, check the exhaust for gas models) Make sure all gas connections, the exhaust line, and all wiring is connected correctly. For gas models: • The gas is sitting firmly on (for heat. Then, plug the power cord into an electrical outlet and grounded properly. • The exhaust ductwork is connected, and...

User Manual
Page 32
... run the AIR FLUFF cycle for the first time. • If the test result displays check code (the duct system is blocked ), refer to the "Ducting requirements" section on the display for 3 seconds. If the duct system cannot exhaust properly, the check code appears, and the dryer sounds an alarm tone. English Installation Vent blockage test After the dryer is installed, start the Vent Blockage Test to check if the duct system is cool. Press the Power button to turn...
... run the AIR FLUFF cycle for the first time. • If the test result displays check code (the duct system is blocked ), refer to the "Ducting requirements" section on the display for 3 seconds. If the duct system cannot exhaust properly, the check code appears, and the dryer sounds an alarm tone. English Installation Vent blockage test After the dryer is installed, start the Vent Blockage Test to check if the duct system is cool. Press the Power button to turn...

User Manual
Page 33
... the "Connect the electrical wiring (for an hour and check again. Check the power connection. If the problem continues, contact a service center. Close the door properly and check again. Leave the dryer at room temperature (41~95 °F (5~35 °C)) for electric models)" section) If the problem continues, contact a service center. Contact a service center. Untitled-27 33 English 33 2023-06-28( ) 3:00:48 Solution 1. Clean the lint filter. 2. English Installation check codes Check code 0 Clg...
... the "Connect the electrical wiring (for an hour and check again. Check the power connection. If the problem continues, contact a service center. Close the door properly and check again. Leave the dryer at room temperature (41~95 °F (5~35 °C)) for electric models)" section) If the problem continues, contact a service center. Contact a service center. Untitled-27 33 English 33 2023-06-28( ) 3:00:48 Solution 1. Clean the lint filter. 2. English Installation check codes Check code 0 Clg...

User Manual
Page 42
... the power is open . English Operations 05 Time 06 Wrinkle Prevent 07 Eco Dry 08 Damp Alert 09 Drum Light 10 Adjust Time 11 Smart Control (Electric models only) / Smart Monitor (Gas models only) 12 Power 13 Start/Pause (Hold to Start) Press to adjust the drying time for remote commands. The load is available with the Sensor Dry cycles because the dryer determines the drying time by up to open or closed, and then turns off . Available dry...
... the power is open . English Operations 05 Time 06 Wrinkle Prevent 07 Eco Dry 08 Damp Alert 09 Drum Light 10 Adjust Time 11 Smart Control (Electric models only) / Smart Monitor (Gas models only) 12 Power 13 Start/Pause (Hold to Start) Press to adjust the drying time for remote commands. The load is available with the Sensor Dry cycles because the dryer determines the drying time by up to open or closed, and then turns off . Available dry...

User Manual
Page 44
... other performance clothing. To change the cycle during operation 1. For heat-sensitive items at a low drying temperature. Press Power to turn the dryer on your smartphone. • Available cycles: ECO NORMAL, SHIRTS, DENIM, TOWELS, RACK DRY, WRINKLE AWAY, SANITIZE, WOOL, LOW TEMP. • Factory setting: WRINKLE AWAY 44 English Untitled-27 44 2023-06-28( ) 3:00:50 Press and hold Start/Pause (Hold to start 1. Turn the Cycle Selector to...
... other performance clothing. To change the cycle during operation 1. For heat-sensitive items at a low drying temperature. Press Power to turn the dryer on your smartphone. • Available cycles: ECO NORMAL, SHIRTS, DENIM, TOWELS, RACK DRY, WRINKLE AWAY, SANITIZE, WOOL, LOW TEMP. • Factory setting: WRINKLE AWAY 44 English Untitled-27 44 2023-06-28( ) 3:00:50 Press and hold Start/Pause (Hold to start 1. Turn the Cycle Selector to...

User Manual
Page 49
... turn Child Lock off the sound from playing with applicable solutions. Sound Off You can enter the code manually in the app. Run the Samsung Smart Washer/Dryer app on a mobile device featuring a camera function. English Special features Child Lock Child Lock prevents children from the dryer. Smart Control To enable this setting does not affect the sound that this function, you can turn on , follow the instructions...
... turn Child Lock off the sound from playing with applicable solutions. Sound Off You can enter the code manually in the app. Run the Samsung Smart Washer/Dryer app on a mobile device featuring a camera function. English Special features Child Lock Child Lock prevents children from the dryer. Smart Control To enable this setting does not affect the sound that this function, you can turn on , follow the instructions...

User Manual
Page 52
... a vent sensor that detects and notifies you when it 's too long or has too many bends). The indicator lets you press Power or open the door, the dryer powers off immediately. NOTE • For duct installation, see "Exhaust ducting guide" on page 34 and "Ducting requirements" on page 18. • The dryer may present a risk of electric shock only during servicing. WARNING Certain internal parts are not clogged. • Check...
... a vent sensor that detects and notifies you when it 's too long or has too many bends). The indicator lets you press Power or open the door, the dryer powers off immediately. NOTE • For duct installation, see "Exhaust ducting guide" on page 34 and "Ducting requirements" on page 18. • The dryer may present a risk of electric shock only during servicing. WARNING Certain internal parts are not clogged. • Check...
User Manual
Page 53
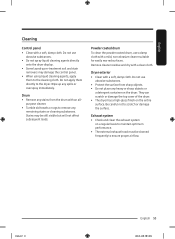
Powder coated drum To clean the powder coated drum, use a damp cloth with an all- Be careful not to ensure proper air flow. Exhaust system • Check and clean the exhaust system on a regular basis to maintain optimum performance. • The external exhaust hood must be still visible but will not affect subsequent loads. Drum • Remove any stains from sharp objects. • Do not place any...
Powder coated drum To clean the powder coated drum, use a damp cloth with an all- Be careful not to ensure proper air flow. Exhaust system • Check and clean the exhaust system on a regular basis to maintain optimum performance. • The external exhaust hood must be still visible but will not affect subsequent loads. Drum • Remove any stains from sharp objects. • Do not place any...
User Manual
Page 54
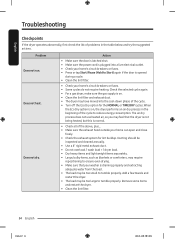
... the cycle. • Turn off the Eco Dry option for lint buildup. The air dry process does not use heated air, so you may have moved into a live electrical outlet. • Check your home can open and close freely. • Check the exhaust system for the NORMAL or TIME DRY cycles. Add a few towels and restart the dryer. • The load may be too small to Start) again if the door is...
... the cycle. • Turn off the Eco Dry option for lint buildup. The air dry process does not use heated air, so you may have moved into a live electrical outlet. • Check your home can open and close freely. • Check the exhaust system for the NORMAL or TIME DRY cycles. Add a few towels and restart the dryer. • The load may be too small to Start) again if the door is...
User Manual
Page 57
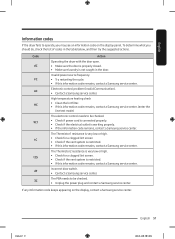
... the cycle. • If this information code remains, contact a Samsung service center. (enter the line test mode) The electronic control needs to be checked. • Check if power cord is connected properly. • Check if the electrical outlet is not caught in the table below, and then try the suggested actions. The Thermistor2 resistance is very low or high. • Check for a clogged lint screen • Check if the vent system...
... the cycle. • If this information code remains, contact a Samsung service center. (enter the line test mode) The electronic control needs to be checked. • Check if power cord is connected properly. • Check if the electrical outlet is not caught in the table below, and then try the suggested actions. The Thermistor2 resistance is very low or high. • Check for a clogged lint screen • Check if the vent system...

User Manual
Page 59
If you decide to a power source. Specification sheet Type Capacity (Cu.ft) Water pressure (psi (kPa)) Weight lb (kg) Heater rating Electric dryer (W) Gas dryer (BTU/hr) Power consumption (W) Front loading dryer 7.4 20-116 (137-800) 119.0 (54.0) 5300 20000 5400 Untitled-27 59 English 59 2023-06-28( ) 3:00:53 Remove the door so that the appliance cannot be connected to dispose of this appliance, please observe local waste...
If you decide to a power source. Specification sheet Type Capacity (Cu.ft) Water pressure (psi (kPa)) Weight lb (kg) Heater rating Electric dryer (W) Gas dryer (BTU/hr) Power consumption (W) Front loading dryer 7.4 20-116 (137-800) 119.0 (54.0) 5300 20000 5400 Untitled-27 59 English 59 2023-06-28( ) 3:00:53 Remove the door so that the appliance cannot be connected to dispose of this appliance, please observe local waste...

User Manual
Page 61
..., utilities, services, parts, supplies, accessories, applications, installations, repairs, external wiring or connectors not supplied or authorized by failure to operate and maintain the product according to the product's finishes; damage caused by this product was not intended; in shipment, delivery, installation, and uses for assistance with electrical or plumbing codes or correction of repair or replacement under these issues. and service to correct installation not...
..., utilities, services, parts, supplies, accessories, applications, installations, repairs, external wiring or connectors not supplied or authorized by failure to operate and maintain the product according to the product's finishes; damage caused by this product was not intended; in shipment, delivery, installation, and uses for assistance with electrical or plumbing codes or correction of repair or replacement under these issues. and service to correct installation not...

User Manual
Page 63
... (1) year part and labor This limited warranty begins on products purchased and used in service problems; incorrect electrical line voltage, fluctuations and surges; delivery and installation; product removal and reinstallation; SAMSUNG does not warrant uninterrupted or error-free operation of nature or God; SAMSUNG will repair, replace, or refund this product or result in the Canada. cosmetic damage or exterior finish; This limited warranty does not cover problems resulting from...
... (1) year part and labor This limited warranty begins on products purchased and used in service problems; incorrect electrical line voltage, fluctuations and surges; delivery and installation; product removal and reinstallation; SAMSUNG does not warrant uninterrupted or error-free operation of nature or God; SAMSUNG will repair, replace, or refund this product or result in the Canada. cosmetic damage or exterior finish; This limited warranty does not cover problems resulting from...


