
Open Source Guide (ENGLISH)
Page 1
... of any change the software or use in any patents or other free programs whose permissions for software interchange; However, nothing else grants you distribute them as part of a whole which are distributed under the OpenSSL Project. this License. 3. This section is addressed as a special exception, the source code distributed need to make exceptions for making the program proprietary. The Free Software Foundation...
... of any change the software or use in any patents or other free programs whose permissions for software interchange; However, nothing else grants you distribute them as part of a whole which are distributed under the OpenSSL Project. this License. 3. This section is addressed as a special exception, the source code distributed need to make exceptions for making the program proprietary. The Free Software Foundation...
Open Source Guide (ENGLISH)
Page 2
...USE OR INABILITY TO USE THE LIBRARY (INCLUDING BUT NOT LIMITED TO LOSS OF DATA OR DATA BEING RENDERED INACCURATE OR LOSSES SUSTAINED BY YOU OR THIRD PARTIES OR A FAILURE OF THE LIBRARY TO OPERATE WITH ANY OTHER SOFTWARE...), EVEN IF SUCH HOLDER OR OTHER PARTY HAS BEEN ADVISED OF THE POSSIBILITY OF SUCH DAMAGES. It is found. and each file should have at least the "copyright" line...public, we recommend making it free software that everyone can do so by permitting redistribution under the terms of warranty; You can redistribute and change. 16. How to Apply...
...USE OR INABILITY TO USE THE LIBRARY (INCLUDING BUT NOT LIMITED TO LOSS OF DATA OR DATA BEING RENDERED INACCURATE OR LOSSES SUSTAINED BY YOU OR THIRD PARTIES OR A FAILURE OF THE LIBRARY TO OPERATE WITH ANY OTHER SOFTWARE...), EVEN IF SUCH HOLDER OR OTHER PARTY HAS BEEN ADVISED OF THE POSSIBILITY OF SUCH DAMAGES. It is found. and each file should have at least the "copyright" line...public, we recommend making it free software that everyone can do so by permitting redistribution under the terms of warranty; You can redistribute and change. 16. How to Apply...

Flash Guide (flash Manual) (English)
Page 3
... Box 16 Connecting to Y, PB, PR 16 Connecting to DVI (Digital Visual Interface 17 Connecting to HDMI (High Definition Multimedia Interface) ........ 17 Connecting a Camcorder 18 Installing Batteries in the Remote Control 19 Chapter 3: Operation 20 Turning the TV On and Off 20 Plug & Play Feature 20 Viewing the Menus and On-Screen Displays 22 Viewing the Menus 22 Viewing the Display 22 Selecting a Menu Language 23 Selecting the Antenna Input 23 Adjusting the Screen Automatically (Self Focus...
... Box 16 Connecting to Y, PB, PR 16 Connecting to DVI (Digital Visual Interface 17 Connecting to HDMI (High Definition Multimedia Interface) ........ 17 Connecting a Camcorder 18 Installing Batteries in the Remote Control 19 Chapter 3: Operation 20 Turning the TV On and Off 20 Plug & Play Feature 20 Viewing the Menus and On-Screen Displays 22 Viewing the Menus 22 Viewing the Display 22 Selecting a Menu Language 23 Selecting the Antenna Input 23 Adjusting the Screen Automatically (Self Focus...

Flash Guide (flash Manual) (English)
Page 4
... Picture 49 Choosing a Multi-Channel Sound (MTS) track 50 Auto Volume 51 Setting the SRS TSXT 52 Setting the On/Off Timer 53 Setting the Sleep Timer 54 Setting the Blue Screen Mode 55 Viewing Closed Caption Information 56 Setting the On/Off Melody 57 Selecting the HDMI Standard 58 Using the V-Chip (USA 59 How to Change Your Password 59 How to Enable/Disable the Rating Controls 60 How to Set up Restrictions Using the "TV...
... Picture 49 Choosing a Multi-Channel Sound (MTS) track 50 Auto Volume 51 Setting the SRS TSXT 52 Setting the On/Off Timer 53 Setting the Sleep Timer 54 Setting the Blue Screen Mode 55 Viewing Closed Caption Information 56 Setting the On/Off Melody 57 Selecting the HDMI Standard 58 Using the V-Chip (USA 59 How to Change Your Password 59 How to Enable/Disable the Rating Controls 60 How to Set up Restrictions Using the "TV...

Flash Guide (flash Manual) (English)
Page 5
... sharpest picture possible • A built-in multi-channel sound decoder for stereo and bilingual listening • Built-in the TV's memory • Automatic channel tuning for up to 181 channels • A special filter to obtain a sharper image from external sources • Self Focus • Digital Inputs DVI - Digital Visual Interface HDMI - Remote Control (BP59-00058A)/ AAA Batteries (4301-000103) Audio/Video Cable (AA39-00006A) Owner's Instructions (1)/ Safety Guide Manual (1)/ Quick Guide Manual (1) Warranty Cards (2)/ Registration Card (1) 5 BP68...
... sharpest picture possible • A built-in multi-channel sound decoder for stereo and bilingual listening • Built-in the TV's memory • Automatic channel tuning for up to 181 channels • A special filter to obtain a sharper image from external sources • Self Focus • Digital Inputs DVI - Digital Visual Interface HDMI - Remote Control (BP59-00058A)/ AAA Batteries (4301-000103) Audio/Video Cable (AA39-00006A) Owner's Instructions (1)/ Safety Guide Manual (1)/ Quick Guide Manual (1) Warranty Cards (2)/ Registration Card (1) 5 BP68...

Flash Guide (flash Manual) (English)
Page 8
... NEW TV Connection Jacks (Rear) Use the rear panel jacks to receive a signal from VHF/ UHF antennas or your cable system. Use "ANT 1 IN" and "ANT 2 IN" terminals to connect an A/V component that will be connected continuously, such as a Cable Set-Top Box). " HDMI/DVI Video Input jack (High Definition Multimedia Interface) Connect to the HDMI jack for device with HDMI or DVI output. ' DVI Audio Input jacks (Digital Visual Interface) Connect to another component (such as a VCR or a DVD player. Use the"ANT...
... NEW TV Connection Jacks (Rear) Use the rear panel jacks to receive a signal from VHF/ UHF antennas or your cable system. Use "ANT 1 IN" and "ANT 2 IN" terminals to connect an A/V component that will be connected continuously, such as a Cable Set-Top Box). " HDMI/DVI Video Input jack (High Definition Multimedia Interface) Connect to the HDMI jack for device with HDMI or DVI output. ' DVI Audio Input jacks (Digital Visual Interface) Connect to another component (such as a VCR or a DVD player. Use the"ANT...

Flash Guide (flash Manual) (English)
Page 9
... to view closed caption information. Æ VCR/DVD Controls Controls VCR/DVD functions: Rewind, Stop, Play/Pause, Fast Forward. ı SET Used during a particular scene. MTS (Multichannel Television Sound) Press to choose "Stereo", "Mono" or "SAP (Secondary Audio Program)". ÷ PIP ON Activates PIP (Picture-In-Picture). ® CH , CH Displays the available channels in sequence. (These buttons change channels in the PIP window only.) ∑ SELF FOCUS Press to adjust for details. Œ POWER Turns the TV...
... to view closed caption information. Æ VCR/DVD Controls Controls VCR/DVD functions: Rewind, Stop, Play/Pause, Fast Forward. ı SET Used during a particular scene. MTS (Multichannel Television Sound) Press to choose "Stereo", "Mono" or "SAP (Secondary Audio Program)". ÷ PIP ON Activates PIP (Picture-In-Picture). ® CH , CH Displays the available channels in sequence. (These buttons change channels in the PIP window only.) ∑ SELF FOCUS Press to adjust for details. Œ POWER Turns the TV...

Flash Guide (flash Manual) (English)
Page 14
... the side panel of the VCR.) 2 Connect a video cable between the "ANT IN" (1 or 2) terminal on the TV and the ANTENNA OUT terminal on pages 10-13). Follow the instructions in "Viewing a VCR or Camcorder Tape" to view your VCR tape. • Also, you can send out signals of its picture and sound to be either on the front or rear of TV. Connecting a Second...
... the side panel of the VCR.) 2 Connect a video cable between the "ANT IN" (1 or 2) terminal on the TV and the ANTENNA OUT terminal on pages 10-13). Follow the instructions in "Viewing a VCR or Camcorder Tape" to view your VCR tape. • Also, you can send out signals of its picture and sound to be either on the front or rear of TV. Connecting a Second...

Flash Guide (flash Manual) (English)
Page 15
... Regular Audio and Video jacks 1 Connect a set of video cables between the "AV IN 1 (VIDEO)" (or "AV IN 2 (VIDEO)") jack on the TV and the VIDEO OUT jack on the DVD player. • Also, you can connect to your DVD player's owner's instruction. For an explanation of Component video, see your TV. BP68-00289A-00Eng 3/30/04 9:28 AM Page 15 INSTALLATION Connecting a DVD Player The rear panel jacks on your TV make it easy to connect a DVD player...
... Regular Audio and Video jacks 1 Connect a set of video cables between the "AV IN 1 (VIDEO)" (or "AV IN 2 (VIDEO)") jack on the TV and the VIDEO OUT jack on the DVD player. • Also, you can connect to your DVD player's owner's instruction. For an explanation of Component video, see your TV. BP68-00289A-00Eng 3/30/04 9:28 AM Page 15 INSTALLATION Connecting a DVD Player The rear panel jacks on your TV make it easy to connect a DVD player...

Flash Guide (flash Manual) (English)
Page 17
... when high-bandwidth digital content protection DTV decoders, DVD players and D-VHS are put on the market.) 1 Connect a set of a PC. The DIGITAL INPUT jack is powered on the Set-Top Box. • The DIGITAL INPUT jack can be used with the picture signal of audio cables between the "DVI IN (AUDIO-L, R)" jacks on the TV and the AUDIO OUT jacks on the Set-Top Box. 2 Connect a video cable between the "HDMI/DVI IN" jacks on the TV and the HDMI...
... when high-bandwidth digital content protection DTV decoders, DVD players and D-VHS are put on the market.) 1 Connect a set of a PC. The DIGITAL INPUT jack is powered on the Set-Top Box. • The DIGITAL INPUT jack can be used with the picture signal of audio cables between the "DVI IN (AUDIO-L, R)" jacks on the TV and the AUDIO OUT jacks on the Set-Top Box. 2 Connect a video cable between the "HDMI/DVI IN" jacks on the TV and the HDMI...

Flash Guide (flash Manual) (English)
Page 25
... OPERATION Deactivating the Automatic Execution of the Self Focus The "Self Focus" feature starts on the power and the appearance of the self focus feature, select "Off" by pressing the ... T V Setup Time √ Plug & Play √ Language : English √ Self Focus √ Blue Screen : On √ Caption √ † More Move Enter Return 2 Press the ... or † button, then press the ENTER button...
... OPERATION Deactivating the Automatic Execution of the Self Focus The "Self Focus" feature starts on the power and the appearance of the self focus feature, select "Off" by pressing the ... T V Setup Time √ Plug & Play √ Language : English √ Self Focus √ Blue Screen : On √ Caption √ † More Move Enter Return 2 Press the ... or † button, then press the ENTER button...

Flash Guide (flash Manual) (English)
Page 26
After the available channels are connected to an antenna, press the ... Selecting the Video Signal Source Before your TV can memorize and store all of the available channels for viewing. 26 or † button to change channels by entering the channel digits. Press the ... This eliminates the need to select "Channel", then press the ENTER button. T V Channel Antenna : Ant.1 √ Air/CATV : Air √ Auto Program √ Favorite Channels √ Fine Tune...
After the available channels are connected to an antenna, press the ... Selecting the Video Signal Source Before your TV can memorize and store all of the available channels for viewing. 26 or † button to change channels by entering the channel digits. Press the ... This eliminates the need to select "Channel", then press the ENTER button. T V Channel Antenna : Ant.1 √ Air/CATV : Air √ Auto Program √ Favorite Channels √ Fine Tune...

Flash Guide (flash Manual) (English)
Page 59
... the pin number, press the remote control buttons in the following sequence, which resets the pin to 0-0-0-0: POWER (Off), MUTE, 8, 2, 4, POWER (On). 3 The "V-Chip" menu is defined by a password (i.e., a 4-digit secret code that is displayed. or † button to exit. Press the EXIT button to select "Change PIN", then press the ENTER button. Press the ... T V Setup Time √ Plug & Play √ Language : English √ Self Focus √ Blue Screen : On √ Caption √...
... the pin number, press the remote control buttons in the following sequence, which resets the pin to 0-0-0-0: POWER (Off), MUTE, 8, 2, 4, POWER (On). 3 The "V-Chip" menu is defined by a password (i.e., a 4-digit secret code that is displayed. or † button to exit. Press the EXIT button to select "Change PIN", then press the ENTER button. Press the ... T V Setup Time √ Plug & Play √ Language : English √ Self Focus √ Blue Screen : On √ Caption √...

Flash Guide (flash Manual) (English)
Page 67
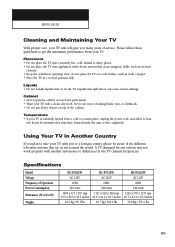
... care, your TV unit will give you many years of the different television systems that are in use water, cleaning fluids, wax, or chemicals. • Do not put heavy objects on top of Operation Power Consumption Dimension (W x D x H) Weight HC-P4252W AC 120V 60Hz 240 watts 1004 x 471 x 967 mm 39.5 x 18.5 x 38.1 inches 40.4 Kg / 89.1 lbs HC-P4752W AC 120V 60Hz...
... care, your TV unit will give you many years of the different television systems that are in use water, cleaning fluids, wax, or chemicals. • Do not put heavy objects on top of Operation Power Consumption Dimension (W x D x H) Weight HC-P4252W AC 120V 60Hz 240 watts 1004 x 471 x 967 mm 39.5 x 18.5 x 38.1 inches 40.4 Kg / 89.1 lbs HC-P4752W AC 120V 60Hz...

User Manual (user Manual) (ver.1.0) (English)
Page 3
... Box 16 Connecting to Y, PB, PR 16 Connecting to DVI (Digital Visual Interface 17 Connecting to HDMI (High Definition Multimedia Interface) ........ 17 Connecting a Camcorder 18 Installing Batteries in the Remote Control 19 Chapter 3: Operation 20 Turning the TV On and Off 20 Plug & Play Feature 20 Viewing the Menus and On-Screen Displays 22 Viewing the Menus 22 Viewing the Display 22 Selecting a Menu Language 23 Selecting the Antenna Input 23 Adjusting the Screen Automatically (Self Focus...
... Box 16 Connecting to Y, PB, PR 16 Connecting to DVI (Digital Visual Interface 17 Connecting to HDMI (High Definition Multimedia Interface) ........ 17 Connecting a Camcorder 18 Installing Batteries in the Remote Control 19 Chapter 3: Operation 20 Turning the TV On and Off 20 Plug & Play Feature 20 Viewing the Menus and On-Screen Displays 22 Viewing the Menus 22 Viewing the Display 22 Selecting a Menu Language 23 Selecting the Antenna Input 23 Adjusting the Screen Automatically (Self Focus...

User Manual (user Manual) (ver.1.0) (English)
Page 4
... picture 48 Selecting a Signal Source for the Sub picture 48 Changing the Channel of the Sub picture 49 Freezing the Picture 49 Choosing a Multi-Channel Sound (MTS) track 50 Auto Volume 51 Setting the SRS TSXT 52 Setting the On/Off Timer 53 Setting the Sleep Timer 54 Setting the Blue Screen Mode 55 Viewing Closed Caption Information 56 Setting the On/Off Melody 57 Selecting the HDMI Standard 58 Using the V-Chip 59 How to Change Your Password...
... picture 48 Selecting a Signal Source for the Sub picture 48 Changing the Channel of the Sub picture 49 Freezing the Picture 49 Choosing a Multi-Channel Sound (MTS) track 50 Auto Volume 51 Setting the SRS TSXT 52 Setting the On/Off Timer 53 Setting the Sleep Timer 54 Setting the Blue Screen Mode 55 Viewing Closed Caption Information 56 Setting the On/Off Melody 57 Selecting the HDMI Standard 58 Using the V-Chip 59 How to Change Your Password...

User Manual (user Manual) (ver.1.0) (English)
Page 9
... the volume. You can use your remote control to operate your Set-Top box, VCR, Cable box or DVD player. MTS (Multichannel Television Sound) Press to choose "Stereo", "Mono" or "SAP (Secondary Audio Program)". ÷ PIP ON Activates PIP (Picture-In-Picture). ® CH , CH Displays the available channels in sequence. (These buttons change channels. ¸ SOURCE Each time the button is not functioning properly, take out the batteries and press the RESET button for automatic shut off. ' MENU Displays the...
... the volume. You can use your remote control to operate your Set-Top box, VCR, Cable box or DVD player. MTS (Multichannel Television Sound) Press to choose "Stereo", "Mono" or "SAP (Secondary Audio Program)". ÷ PIP ON Activates PIP (Picture-In-Picture). ® CH , CH Displays the available channels in sequence. (These buttons change channels. ¸ SOURCE Each time the button is not functioning properly, take out the batteries and press the RESET button for automatic shut off. ' MENU Displays the...

User Manual (user Manual) (ver.1.0) (English)
Page 15
... of audio cables between the "AV IN 1 (L, R)" (or "AV IN 2 (L, R)") jacks on the TV and the AUDIO OUT jacks on the DVD player. 2 Connect a video cable between the "COMPONENT IN 1 (Y, PB, PR)" (or "COMPONENT IN 2 or 3 (Y, PB, PR)") jacks on the TV and the VIDEO OUT (Y, PB, PR) jacks on the DVD player. INSTALLATION Connecting a DVD Player The rear panel jacks on your TV make it easy to connect a DVD player to your DVD player's owner's instruction.
... of audio cables between the "AV IN 1 (L, R)" (or "AV IN 2 (L, R)") jacks on the TV and the AUDIO OUT jacks on the DVD player. 2 Connect a video cable between the "COMPONENT IN 1 (Y, PB, PR)" (or "COMPONENT IN 2 or 3 (Y, PB, PR)") jacks on the TV and the VIDEO OUT (Y, PB, PR) jacks on the DVD player. INSTALLATION Connecting a DVD Player The rear panel jacks on your TV make it easy to connect a DVD player to your DVD player's owner's instruction.

User Manual (user Manual) (ver.1.0) (English)
Page 59
... Focus √ Blue Screen : On √ Caption √ † More Move Enter Return 2 Press the ... How to select "V-Chip", then press the ENTER button. or † button to Change Your Password 1 Press the MENU button. The on-screen menu will instruct you to assign a password (and you forget the pin number, press the remote control buttons in the following sequence, which resets the pin to channels and programs is controlled by a password (i.e., a 4-digit secret code that...
... Focus √ Blue Screen : On √ Caption √ † More Move Enter Return 2 Press the ... How to select "V-Chip", then press the ENTER button. or † button to Change Your Password 1 Press the MENU button. The on-screen menu will instruct you to assign a password (and you forget the pin number, press the remote control buttons in the following sequence, which resets the pin to channels and programs is controlled by a password (i.e., a 4-digit secret code that...
User Manual (user Manual) (ver.1.0) (English)
Page 69
... HC-P4752W AC 120V 60Hz 240 watts 1127 x 620 x 984 mm 44.4 x 24.4 x 38.7 inches 49.7 Kg / 109.6 lbs HC-P5252W AC 120V 60Hz 240 watts 1226 x 570 x 1276 mm 48.3 x 22.5 x 50.2 inches 59.8 Kg / 131.9 lbs 69 Specifications Model Voltage Frequency of the cabinet. Never use around the world. A TV designed for moisture that may not work properly...
... HC-P4752W AC 120V 60Hz 240 watts 1127 x 620 x 984 mm 44.4 x 24.4 x 38.7 inches 49.7 Kg / 109.6 lbs HC-P5252W AC 120V 60Hz 240 watts 1226 x 570 x 1276 mm 48.3 x 22.5 x 50.2 inches 59.8 Kg / 131.9 lbs 69 Specifications Model Voltage Frequency of the cabinet. Never use around the world. A TV designed for moisture that may not work properly...


