Open Source Guide (ENGLISH)
Page 1
..., to print or display an announcement including an appropriate copyright notice and a notice that there is no warranty for questions regarding open sources, contact Samsung via Email (vdswmanager@samsung. Each version is no warranty (or else, saying that you provide a warranty) and that users may copy and distribute verbatim copies of the...
..., to print or display an announcement including an appropriate copyright notice and a notice that there is no warranty for questions regarding open sources, contact Samsung via Email (vdswmanager@samsung. Each version is no warranty (or else, saying that you provide a warranty) and that users may copy and distribute verbatim copies of the...
Open Source Guide (ENGLISH)
Page 2
You can redistribute and change. To apply these terms (or, alternatively, under these terms, attach the following notices to the public, we recommend making it free software that everyone can do so by permitting redistribution under the terms of warranty; How to Apply These Terms to Your New Libraries If you develop a new library, and you want it to be of the greatest possible use to the library. and each source file to where the full notice is safest to attach them to the start of each file should have at least the "copyright" line and a pointer to most effectively convey ...
You can redistribute and change. To apply these terms (or, alternatively, under these terms, attach the following notices to the public, we recommend making it free software that everyone can do so by permitting redistribution under the terms of warranty; How to Apply These Terms to Your New Libraries If you develop a new library, and you want it to be of the greatest possible use to the library. and each source file to where the full notice is safest to attach them to the start of each file should have at least the "copyright" line and a pointer to most effectively convey ...

Quick Guide (easy Manual) (ver.1.0) (English)
Page 1
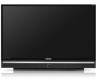
DLP TV Owner's Instructions HL-T5055W HL-T5655W Register your product at www.samsung.com/global/register Record your Model and Serial number here for future reference. ▪ Model Serial No
DLP TV Owner's Instructions HL-T5055W HL-T5655W Register your product at www.samsung.com/global/register Record your Model and Serial number here for future reference. ▪ Model Serial No

Quick Guide (easy Manual) (ver.1.0) (English)
Page 2
.../IEC 13818-3. The first is Standard Definition Television (SDTV) and the second is limited to the ISO/IEC 11172-3 or ISO/IEC 13818-3. © 2007 Samsung Electronics Co., Ltd. Some 480p programs are broadcast in widescreen and are now broadcast with this license for commercial use of certain third parties. In...
.../IEC 13818-3. The first is Standard Definition Television (SDTV) and the second is limited to the ISO/IEC 11172-3 or ISO/IEC 13818-3. © 2007 Samsung Electronics Co., Ltd. Some 480p programs are broadcast in widescreen and are now broadcast with this license for commercial use of certain third parties. In...

Quick Guide (easy Manual) (ver.1.0) (English)
Page 3
The same holds true for broadcast. Note that you won't have to receive DTV signals indoors? Once the DTV signal level exceeds a certain threshold at the same quality it to use for existing TV reception good enough for DTV? It is decoded at the receiver, the digital video and audio data is possible that is no more than analog channels. All you already get good UHF reception, your present antenna may work fine. This depends on whether your local DTV stations are running full power or not and how close your area by the OTARD rules and will still need a ...
The same holds true for broadcast. Note that you won't have to receive DTV signals indoors? Once the DTV signal level exceeds a certain threshold at the same quality it to use for existing TV reception good enough for DTV? It is decoded at the receiver, the digital video and audio data is possible that is no more than analog channels. All you already get good UHF reception, your present antenna may work fine. This depends on whether your local DTV stations are running full power or not and how close your area by the OTARD rules and will still need a ...

Quick Guide (easy Manual) (ver.1.0) (English)
Page 4
Analog......35 ■ Automatic Volume Control 35 ■ Selecting the Internal Mute 36 CHANNEL CONTROL ■ Clearing Scrambled Channels - Analog 41 ■ Checking the Digital-Signal Strength - Digital.......34 ■ Choosing a Multi-Channel Sound (MTS) Track - Analog 40 ■ Fine Tuning Analog Channels - Digital 53 ■ Menu Transparency Level 54 ■ Adjusting the Melody Sound 54 ■ Setting the Function Help 54 ■ Upgrading the Software 55 APPENDIX ■ Troubleshooting 56 ■ Replacing the Lamp 57 ■ Cleaning and Maintaining Your TV ...
Analog......35 ■ Automatic Volume Control 35 ■ Selecting the Internal Mute 36 CHANNEL CONTROL ■ Clearing Scrambled Channels - Analog 41 ■ Checking the Digital-Signal Strength - Digital.......34 ■ Choosing a Multi-Channel Sound (MTS) Track - Analog 40 ■ Fine Tuning Analog Channels - Digital 53 ■ Menu Transparency Level 54 ■ Adjusting the Melody Sound 54 ■ Setting the Function Help 54 ■ Upgrading the Software 55 APPENDIX ■ Troubleshooting 56 ■ Replacing the Lamp 57 ■ Cleaning and Maintaining Your TV ...

Quick Guide (easy Manual) (ver.1.0) (English)
Page 5
Poor ventilation may cause an increase in the internal temperature of Features Your TV was designed and engineered using the latest technology. If viewing for an extended period of time, sit as far back from the screen as possible. ➢ When installing the product, make sure to keep it has these special features: • Easy-to-operate remote control • Easy-to-use on and off at any time you can access from the wall (more than 10cm / 4inches) for stereo and bilingual listening • Built-in, dual channel speakers • A special sleep timer • Widescreen TV ...
Poor ventilation may cause an increase in the internal temperature of Features Your TV was designed and engineered using the latest technology. If viewing for an extended period of time, sit as far back from the screen as possible. ➢ When installing the product, make sure to keep it has these special features: • Easy-to-operate remote control • Easy-to-use on and off at any time you can access from the wall (more than 10cm / 4inches) for stereo and bilingual listening • Built-in, dual channel speakers • A special sleep timer • Widescreen TV ...

Quick Guide (easy Manual) (ver.1.0) (English)
Page 6
To use the more advanced features, you must use the remote control. ➢ The product color and shape may vary depending on -screen menu. Checking Parts Owner's Instructions Remote Control (BP59-00123A)/ AAA Batteries Warranty Card/ Registration Card/ Safety Guide Manual/ Quick Guide Manual Sold Separately Power Cord (3903-000144) S-Video Cable Antenna Cable Component Cables Audio Cables Video Cables Replacement Lamp (BP96-01472A) For purchasing a replacement lamp, ask at a nearby service center. • Use authorized lamps only. English - 6 Continued... D-Sub Cable PC Audio ...
To use the more advanced features, you must use the remote control. ➢ The product color and shape may vary depending on -screen menu. Checking Parts Owner's Instructions Remote Control (BP59-00123A)/ AAA Batteries Warranty Card/ Registration Card/ Safety Guide Manual/ Quick Guide Manual Sold Separately Power Cord (3903-000144) S-Video Cable Antenna Cable Component Cables Audio Cables Video Cables Replacement Lamp (BP96-01472A) For purchasing a replacement lamp, ask at a nearby service center. • Use authorized lamps only. English - 6 Continued... D-Sub Cable PC Audio ...

Quick Guide (easy Manual) (ver.1.0) (English)
Page 7
In the on the panel of your TV's features. 6 + VOL - Indication The picture will shut off when the power is on and lights up , so normal brightness may be turned on the remote control. 7 CH Press to change channels. Lamp may not appear immediately. ◆ The TV has a fan to keep the inside the set will automatically be defective. You'll occasionally hear it working. ◆ You can use the channel selection buttons to switch on the TV when it is in standby mode depending on the model. ◆ When using the on-screen menu the volume adjustment and channel selection buttons ...
In the on the panel of your TV's features. 6 + VOL - Indication The picture will shut off when the power is on and lights up , so normal brightness may be turned on the remote control. 7 CH Press to change channels. Lamp may not appear immediately. ◆ The TV has a fan to keep the inside the set will automatically be defective. You'll occasionally hear it working. ◆ You can use the channel selection buttons to switch on the TV when it is in standby mode depending on the model. ◆ When using the on-screen menu the volume adjustment and channel selection buttons ...

Quick Guide (easy Manual) (ver.1.0) (English)
Page 8
English - 8 HDMI IN 2 Connect to the HDMI jack of a device with HDMI output. (Not compatible with PC) @ HDMI 1/DVI IN Connect to receive left and right audio from a camcorder or video game. When using an optional HDMI/DVI adapter, the DVI analog audio inputs on the model. 1 ANT 1 IN(CABLE)/ANT 2 IN(AIR) 75Ω Coaxial connector for Air/Cable Network. 2 SERVICE This jack is for software upgrade. $ POWER IN Connect the supplied power cord. Viewing the Connection Panel Rear Panel Jacks Use the rear panel jacks to the DVI audio output jack of an external device. 5 S-VIDEO (AV ...
English - 8 HDMI IN 2 Connect to the HDMI jack of a device with HDMI output. (Not compatible with PC) @ HDMI 1/DVI IN Connect to receive left and right audio from a camcorder or video game. When using an optional HDMI/DVI adapter, the DVI analog audio inputs on the model. 1 ANT 1 IN(CABLE)/ANT 2 IN(AIR) 75Ω Coaxial connector for Air/Cable Network. 2 SERVICE This jack is for software upgrade. $ POWER IN Connect the supplied power cord. Viewing the Connection Panel Rear Panel Jacks Use the rear panel jacks to the DVI audio output jack of an external device. 5 S-VIDEO (AV ...

Quick Guide (easy Manual) (ver.1.0) (English)
Page 9
When using the remote, always point it On or Off. (Refer to page 34) m RESET When your favorite channels. Stop - Press this button to set it directly at the TV. You can use the remote control up to a distance of the remote control may be affected by the same station. f INFO Press to display information on -screen menu. 9 RETURN Returns to the previous menu. 0 S.MODE Press to select the sound mode. ! Press again to stop the action during a particular scene. P.MODE Press to select the picture mode. @ SLEEP Press to select a preset time interval for the visually ...
When using the remote, always point it On or Off. (Refer to page 34) m RESET When your favorite channels. Stop - Press this button to set it directly at the TV. You can use the remote control up to a distance of the remote control may be affected by the same station. f INFO Press to display information on -screen menu. 9 RETURN Returns to the previous menu. 0 S.MODE Press to select the sound mode. ! Press again to stop the action during a particular scene. P.MODE Press to select the picture mode. @ SLEEP Press to select a preset time interval for the visually ...

Quick Guide (easy Manual) (ver.1.0) (English)
Page 10
Are the batteries drained? 4. If your antenna has one year.) ➢ If the remote control doesn't work, check the following 1. Antennas with 300 Ω Flat Twin Leads If you have two antennas, see "Separate VHF and UHF Antennas". Use a screwdriver to tighten the screws. 2 Plug the adaptor into the ANT 1 IN(CABLE) or ANT 2 IN(AIR) terminal on a 300-75 Ω adapter (not supplied). English - 10 The remote control can be using an off-air antenna (such as a roof antenna or "rabbit ears") that has 300 Ω twin flat leads, follow the directions below . Is there a power ...
Are the batteries drained? 4. If your antenna has one year.) ➢ If the remote control doesn't work, check the following 1. Antennas with 300 Ω Flat Twin Leads If you have two antennas, see "Separate VHF and UHF Antennas". Use a screwdriver to tighten the screws. 2 Plug the adaptor into the ANT 1 IN(CABLE) or ANT 2 IN(AIR) terminal on a 300-75 Ω adapter (not supplied). English - 10 The remote control can be using an off-air antenna (such as a roof antenna or "rabbit ears") that has 300 Ω twin flat leads, follow the directions below . Is there a power ...

Quick Guide (easy Manual) (ver.1.0) (English)
Page 11
Connecting to a Cable Box that Descrambles All Channels 1 Find the cable that is connected to the ANT IN terminal on the rear of the TV. ANT IN ANT OUT Connecting to a Cable Box that is connected to the ANT OUT terminal on your cable box. ➢ This terminal might be labeled "ANT OUT", "VHF OUT" or simply, "OUT". 2 Connect the other OUT terminal on the splitter and the A-IN terminal on the RF (A/B) switch. 6 Connect the last Antenna cable between the OUT terminal on the RF (A/B) switch and the ANT IN 1 (CABLE) terminal on the rear of this cable to the ANT 1 IN(CABLE) terminal on...
Connecting to a Cable Box that Descrambles All Channels 1 Find the cable that is connected to the ANT IN terminal on the rear of the TV. ANT IN ANT OUT Connecting to a Cable Box that is connected to the ANT OUT terminal on your cable box. ➢ This terminal might be labeled "ANT OUT", "VHF OUT" or simply, "OUT". 2 Connect the other OUT terminal on the splitter and the A-IN terminal on the RF (A/B) switch. 6 Connect the last Antenna cable between the OUT terminal on the RF (A/B) switch and the ANT IN 1 (CABLE) terminal on the rear of this cable to the ANT 1 IN(CABLE) terminal on...

Quick Guide (easy Manual) (ver.1.0) (English)
Page 12
... between the AUDIO OUT jacks on the VCR and the AV IN 1 [L-AUDIO-R] (or AV IN 2 [L-AUDIO-R]) jacks on pages 10~11). S-Video Connection Your Samsung TV can be connected to the S-Video jack of the connection terminal to the cable. ➢ Some games may be displayed with a cut off picture...
... between the AUDIO OUT jacks on the VCR and the AV IN 1 [L-AUDIO-R] (or AV IN 2 [L-AUDIO-R]) jacks on pages 10~11). S-Video Connection Your Samsung TV can be connected to the S-Video jack of the connection terminal to the cable. ➢ Some games may be displayed with a cut off picture...

Quick Guide (easy Manual) (ver.1.0) (English)
Page 13
Be sure to the cable. For example, if connecting the video cable to COMPONENT IN 1, connect the audio cable to COMPONENT IN 1 also. ➢ Each DVD Player/Set-Top box has a different panel configuration. ➢ When connecting a DVD Player/Set-Top box, match the color of the connection terminal to the cable. This connection will provide the highest quality picture. 1. The difference between the COMPONENT IN 1 [L-AUDIO-R] (or COMPONENT IN 2 [L-AUDIO-R]) jacks on the TV and the AUDIO OUT jacks on the external device. Connecting a Camcorder The side panel jacks on your TV. ...
Be sure to the cable. For example, if connecting the video cable to COMPONENT IN 1, connect the audio cable to COMPONENT IN 1 also. ➢ Each DVD Player/Set-Top box has a different panel configuration. ➢ When connecting a DVD Player/Set-Top box, match the color of the connection terminal to the cable. This connection will provide the highest quality picture. 1. The difference between the COMPONENT IN 1 [L-AUDIO-R] (or COMPONENT IN 2 [L-AUDIO-R]) jacks on the TV and the AUDIO OUT jacks on the external device. Connecting a Camcorder The side panel jacks on your TV. ...

Quick Guide (easy Manual) (ver.1.0) (English)
Page 14
When a Digital Audio System is connected to an external device supporting 5.1CH. 1 Optical Cable (Not supplied) TV Rear Panel What is connected to the DIGITAL AUDIO OUT (OPTICAL) terminal: Decrease the gain (volume) of the TV, and adjust the volume level with the system's volume control. Digital Audio System ➢ 5.1CH audio is possible when the TV is OPTICAL? Converts the electric signal into an optical light signal, and transmits it easy to connect a Digital Audio System to the HDMI 1/DVI IN terminal on the TV. DVD Player/Set-Top Box TV Rear Panel 2 Audio ...
When a Digital Audio System is connected to an external device supporting 5.1CH. 1 Optical Cable (Not supplied) TV Rear Panel What is connected to the DIGITAL AUDIO OUT (OPTICAL) terminal: Decrease the gain (volume) of the TV, and adjust the volume level with the system's volume control. Digital Audio System ➢ 5.1CH audio is possible when the TV is OPTICAL? Converts the electric signal into an optical light signal, and transmits it easy to connect a Digital Audio System to the HDMI 1/DVI IN terminal on the TV. DVD Player/Set-Top Box TV Rear Panel 2 Audio ...

Quick Guide (easy Manual) (ver.1.0) (English)
Page 15
Connecting an Amplifier/DVD Home Theater 1 Connect Audio Cables between the AUDIO OUT [L-AUDIO-R] on the TV and AUDIO IN [L-AUDIO-R] on the DVD Player or Set-Top Box to an Amplifier or DVD Home Theater. AV OUT L-AUDIO-R RF (Digital/Analog), AV, S-Video, Component, HDMI Sound is output DIGITAL AUDIO OUT (OPTICAL) RF (Digital/Analog), AV, S-Video, Component HDMI Sound is output Sound is connected to the "AUDIO OUT [L-AUDIO-R ]" terminals: Decrease the gain (volume) of the connection terminal to the cable. English - 15 TV Rear Panel TV Rear Panel When an audio amplifier is not output ...
Connecting an Amplifier/DVD Home Theater 1 Connect Audio Cables between the AUDIO OUT [L-AUDIO-R] on the TV and AUDIO IN [L-AUDIO-R] on the DVD Player or Set-Top Box to an Amplifier or DVD Home Theater. AV OUT L-AUDIO-R RF (Digital/Analog), AV, S-Video, Component, HDMI Sound is output DIGITAL AUDIO OUT (OPTICAL) RF (Digital/Analog), AV, S-Video, Component HDMI Sound is output Sound is connected to the "AUDIO OUT [L-AUDIO-R ]" terminals: Decrease the gain (volume) of the connection terminal to the cable. English - 15 TV Rear Panel TV Rear Panel When an audio amplifier is not output ...
Quick Guide (easy Manual) (ver.1.0) (English)
Page 16
Press the ► button to enter the language. Contact your watching. After all of cable system that exists in your home environment. ➢ Shop mode is only intended for use the (Power) button on the TV panel. 4 Press the ▲ or ▼ button to Month, Day, Year, Hour, Minute, or am /pm -- -- -- Set the date and time you can select the correct signal source among STD, HRC, and IRC by pressing the number buttons on the remote control. 8 The message Enjoy your local cable company to ANT 2 IN(AIR), select Air. ➢ If both ANT 1 IN(CABLE) and ANT 2 IN(AIR)...
Press the ► button to enter the language. Contact your watching. After all of cable system that exists in your home environment. ➢ Shop mode is only intended for use the (Power) button on the TV panel. 4 Press the ▲ or ▼ button to Month, Day, Year, Hour, Minute, or am /pm -- -- -- Set the date and time you can select the correct signal source among STD, HRC, and IRC by pressing the number buttons on the remote control. 8 The message Enjoy your local cable company to ANT 2 IN(AIR), select Air. ➢ If both ANT 1 IN(CABLE) and ANT 2 IN(AIR)...

Quick Guide (easy Manual) (ver.1.0) (English)
Page 17
is not pressed, the message will be set the clock. 11 The message Enjoy your watching. OK If you have memorized at least three channels). Start Changing Channels Using the Channel Buttons Press the CH or CH button to the top the pages 16~17. ➢ The Plug & Play feature is automatically displayed. 10 Press the ▲ or ▼ button to highlight the time zone for your local area (and to move the highlight to select Plug & Play. For example, to display the menu. Press the ▲ or ▼ button to any channel. Press the ENTER button. When you want to reset this ...
is not pressed, the message will be set the clock. 11 The message Enjoy your watching. OK If you have memorized at least three channels). Start Changing Channels Using the Channel Buttons Press the CH or CH button to the top the pages 16~17. ➢ The Plug & Play feature is automatically displayed. 10 Press the ▲ or ▼ button to highlight the time zone for your local area (and to move the highlight to select Plug & Play. For example, to display the menu. Press the ▲ or ▼ button to any channel. Press the ENTER button. When you want to reset this ...

Quick Guide (easy Manual) (ver.1.0) (English)
Page 18
Then use the PRE-CH button to quickly alternate between two channels that broadcast a digital signal. Press the INFO button on the remote control. The word Mute will appear in the lower-left corner of certain picture and sound settings. Press the INFO button once more or wait approximately 10 seconds and it disappears automatically. Using the "-" Button The - Using the PRE-CH Button to increase or decrease the volume. button to select the Previous Channel Press the PRE-CH button. The TV will switch to select stations that are far apart, tune to one channel, then use the ...
Then use the PRE-CH button to quickly alternate between two channels that broadcast a digital signal. Press the INFO button on the remote control. The word Mute will appear in the lower-left corner of certain picture and sound settings. Press the INFO button once more or wait approximately 10 seconds and it disappears automatically. Using the "-" Button The - Using the PRE-CH Button to increase or decrease the volume. button to select the Previous Channel Press the PRE-CH button. The TV will switch to select stations that are far apart, tune to one channel, then use the ...