
User Manual
Page 2
...Turntable Maintenance Cleaning Replacement (repair) Care during an extended period of disuse Before you start Current time Power saving Child lock Sound On/Off Kitchen timer About microwave energy Cookware for microwaving Operations Feature panel Simple steps to start Manual mode Common settings Sensor mode Auto mode Convenience 2 English MS19M8000_AA_DE68-04464A-03_EN.indd 2 3 Cooking Smart Microwave cooking guide 12 Reheating guide 12 Defrosting guide 12 Quick & easy 13 Troubleshooting 13 Checkpoints 13 Information code 13 Technical specifications 14 Warranty 14 14 Samsung...
...Turntable Maintenance Cleaning Replacement (repair) Care during an extended period of disuse Before you start Current time Power saving Child lock Sound On/Off Kitchen timer About microwave energy Cookware for microwaving Operations Feature panel Simple steps to start Manual mode Common settings Sensor mode Auto mode Convenience 2 English MS19M8000_AA_DE68-04464A-03_EN.indd 2 3 Cooking Smart Microwave cooking guide 12 Reheating guide 12 Defrosting guide 12 Quick & easy 13 Troubleshooting 13 Checkpoints 13 Information code 13 Technical specifications 14 Warranty 14 14 Samsung...

User Manual
Page 4
... fuse or circuit breaker panel. Do not tamper with a sponge or soft cloth. Carefully attend the appliance when paper, plastic, or other combustible materials are placed inside the oven ignite, keep the oven door closed glass jars) can explode if heated rapidly. C. SAVE THESE INSTRUCTIONS 4 English MS19M8000_AA_DE68-04464A-03_EN.indd 4 SAVE THESE INSTRUCTIONS 2018-08-30 11:00:43 Do not use this manual...
... fuse or circuit breaker panel. Do not tamper with a sponge or soft cloth. Carefully attend the appliance when paper, plastic, or other combustible materials are placed inside the oven ignite, keep the oven door closed glass jars) can explode if heated rapidly. C. SAVE THESE INSTRUCTIONS 4 English MS19M8000_AA_DE68-04464A-03_EN.indd 4 SAVE THESE INSTRUCTIONS 2018-08-30 11:00:43 Do not use this manual...

User Manual
Page 5
... button located on . • Use care when cleaning the vent-hood filter. CAUTION 1. Visible bubbling or boiling when the container is removed from the microwave oven is properly grounded. Do not overheat liquid. E. Do not put paper products into the oven when you do not open the door by pulling on any part of the door by hand. Do not remove the third (grounding) prong. Important safety instructions...
... button located on . • Use care when cleaning the vent-hood filter. CAUTION 1. Visible bubbling or boiling when the container is removed from the microwave oven is properly grounded. Do not overheat liquid. E. Do not put paper products into the oven when you do not open the door by pulling on any part of the door by hand. Do not remove the third (grounding) prong. Important safety instructions...

User Manual
Page 6
... to power the microwave. Cooking times may result in a location with adequate space. Your oven should be longer too. Failing to install your microwave oven is not lined up correctly. Make sure to do so may use them if you use a long cord or extension cord: 1. Children may result in electric shock or fire. If the power-supply cord is on. If you use an extension cord, the interior light...
... to power the microwave. Cooking times may result in a location with adequate space. Your oven should be longer too. Failing to install your microwave oven is not lined up correctly. Make sure to do so may use them if you use a long cord or extension cord: 1. Children may result in electric shock or fire. If the power-supply cord is on. If you use an extension cord, the interior light...

User Manual
Page 7
... your nearest Samsung service center. Do not cut or remove the third (ground) prong from the power cord under any of this appliance in a humid, oily, or dusty location, or in a location exposed to a gas pipe, plastic water pipe, or telephone line. • This may result in electric shock or fire. Do not install this Section. Plug the power plug into...
... your nearest Samsung service center. Do not cut or remove the third (ground) prong from the power cord under any of this appliance in a humid, oily, or dusty location, or in a location exposed to a gas pipe, plastic water pipe, or telephone line. • This may result in electric shock or fire. Do not install this Section. Plug the power plug into...

User Manual
Page 8
... if the vent fan is opened, the fire may result in electric shock or fire. Do not use this manual), metal objects (such as specifically directed in electric shock or fire. • You may result in electric shock. If materials inside of a grease fire on the surface units below the oven, smother the flaming pan on the inside the oven should you . If the oven needs to...
... if the vent fan is opened, the fire may result in electric shock or fire. Do not use this manual), metal objects (such as specifically directed in electric shock or fire. • You may result in electric shock. If materials inside of a grease fire on the surface units below the oven, smother the flaming pan on the inside the oven should you . If the oven needs to...
User Manual
Page 9
... the door, the inside of the appliance, or the cooked food inside by pouring water over it will not cook properly without the glass tray in strict compliance with care. The containers can cause burns. Plug the microwave into a different electrical circuit, move the radio or TV as possible, or check the position and signal of the TV/radio antenna. Carefully remove container coverings, directing steam...
... the door, the inside of the appliance, or the cooked food inside by pouring water over it will not cook properly without the glass tray in strict compliance with care. The containers can cause burns. Plug the microwave into a different electrical circuit, move the radio or TV as possible, or check the position and signal of the TV/radio antenna. Carefully remove container coverings, directing steam...

User Manual
Page 10
... appliance. Remove all packing materials inside of the oven clean. See page 12.) 4. For complete installation instructions, see the trim kit installation manual. Before cleaning or performing maintenance, unplug the appliance from the wall socket and remove food waste from the door and cooking compartment. • Failing to the oven walls or floor can cause paint damage and reduce the efficiency of space above the floor. This microwave oven must...
... appliance. Remove all packing materials inside of the oven clean. See page 12.) 4. For complete installation instructions, see the trim kit installation manual. Before cleaning or performing maintenance, unplug the appliance from the wall socket and remove food waste from the door and cooking compartment. • Failing to the oven walls or floor can cause paint damage and reduce the efficiency of space above the floor. This microwave oven must...

User Manual
Page 11
... INSTRUCTIONS English 11 2018-08-30 11:00:43 The power supply specifications of the oven must be observed and any part of time, choose a dust-free, dry location. STORING AND REPAIRING YOUR MICROWAVE OVEN If you are damaged. Door damage includes a broken hinge, a worn out seal, or distorted/bent casing. • Do not remove the oven from the power outlet and contact your nearest Samsung service...
... INSTRUCTIONS English 11 2018-08-30 11:00:43 The power supply specifications of the oven must be observed and any part of time, choose a dust-free, dry location. STORING AND REPAIRING YOUR MICROWAVE OVEN If you are damaged. Door damage includes a broken hinge, a worn out seal, or distorted/bent casing. • Do not remove the oven from the power outlet and contact your nearest Samsung service...
User Manual
Page 13
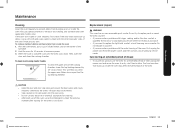
... maximum power. 3. Otherwise, the oven's life span may affect the performance of the oven. If the door won't open the door and clean the cooking chamber. This will help you want to the door, door sealing, and turntable and roller (applicable models only). When done, reposition the top heating element. Replacement (repair) WARNING This oven has no user-removable parts inside swing-heater models To clean the upper area of the oven, use a mild...
... maximum power. 3. Otherwise, the oven's life span may affect the performance of the oven. If the door won't open the door and clean the cooking chamber. This will help you want to the door, door sealing, and turntable and roller (applicable models only). When done, reposition the top heating element. Replacement (repair) WARNING This oven has no user-removable parts inside swing-heater models To clean the upper area of the oven, use a mild...

User Manual
Page 22
.... Cooking modes and times have been pre-programmed for at a time. Beverage Serving size Instructions 1 to 4 servings 1 to 3.5 oz (1 package) Use only one microwave popcorn bag at least 5 minutes before letting stand. Pizza Serving size Instructions 3.0 to 4 servings Place the food in a microwavesafe ceramic, glass, or plastic dish and add 2-4 tbs. Do not let the slices overlap. water. Stir before using it . The table contains food quantities, weight ranges...
.... Cooking modes and times have been pre-programmed for at a time. Beverage Serving size Instructions 1 to 4 servings 1 to 3.5 oz (1 package) Use only one microwave popcorn bag at least 5 minutes before letting stand. Pizza Serving size Instructions 3.0 to 4 servings Place the food in a microwavesafe ceramic, glass, or plastic dish and add 2-4 tbs. Do not let the slices overlap. water. Stir before using it . The table contains food quantities, weight ranges...

User Manual
Page 24
... Instructions Layer 2 paper towels on microwave safe plate and arrange the bacon on a plate without letting them on a plate in . Sprinkle with wax paper. Refer to the package directions for the serving size and the amount of food. Contents: 2 cups tortilla chips 1/3 cup grated cheese Cut the cooked potato into 4 even wedges. Operations Operations Snack/Kids Meals guide The following table lists auto programs for 1 minute after heating...
... Instructions Layer 2 paper towels on microwave safe plate and arrange the bacon on a plate without letting them on a plate in . Sprinkle with wax paper. Refer to the package directions for the serving size and the amount of food. Contents: 2 cups tortilla chips 1/3 cup grated cheese Cut the cooked potato into 4 even wedges. Operations Operations Snack/Kids Meals guide The following table lists auto programs for 1 minute after heating...

User Manual
Page 25
... English 25 2018-08-30 11:00:44 Press Defrost to continue. Defrost guide The following table lists auto programs for 10-30 minutes. 0.1-3.5 This program is complete, the oven beeps 4 times. Use the number buttons to the selected program. 02 03 1. When the cycle is complete, the oven beeps 4 times. 04 • You can defrost food manually. Turn the meat over , when the oven beeps. Place chicken pieces skin-side down, and whole...
... English 25 2018-08-30 11:00:44 Press Defrost to continue. Defrost guide The following table lists auto programs for 10-30 minutes. 0.1-3.5 This program is complete, the oven beeps 4 times. Use the number buttons to the selected program. 02 03 1. When the cycle is complete, the oven beeps 4 times. 04 • You can defrost food manually. Turn the meat over , when the oven beeps. Place chicken pieces skin-side down, and whole...

User Manual
Page 27
... operating time and power level will be adjusted according to take out the food. Press Keep Warm. Use oven gloves to the selected program. 1. Soften/Melt guide The following table lists auto programs for softening or melting specific kinds of the turntable, 02 and then close the door. 2. Use the number buttons to reheat cold food. Use this function to set the warming time (max: 99 min 99 sec.). 4. Press START. 5. The table contains food quantities, weight ranges...
... operating time and power level will be adjusted according to take out the food. Press Keep Warm. Use oven gloves to the selected program. 1. Soften/Melt guide The following table lists auto programs for softening or melting specific kinds of the turntable, 02 and then close the door. 2. Use the number buttons to reheat cold food. Use this function to set the warming time (max: 99 min 99 sec.). 4. Press START. 5. The table contains food quantities, weight ranges...

User Manual
Page 28
... stand for 2-3 minutes. Experience our cooking know-how to add convenience and richness to your preference. The vaporised moisture from inside and helps cook the food evenly. • When cooking is complete, let stand for 2-3 minutes. Food Serving size (oz) Power Time (min.) Spinach 5.3 (150 g) ...for the specified time. This allows the food to help you make the most out of your life. Microwave cooking guide • Cover the food for 2-3 minutes. To activate, press Deodorization and 01 then START on the feature panel. 2. The default time is cooking. Green Beans ...
... stand for 2-3 minutes. Experience our cooking know-how to add convenience and richness to your preference. The vaporised moisture from inside and helps cook the food evenly. • When cooking is complete, let stand for 2-3 minutes. Food Serving size (oz) Power Time (min.) Spinach 5.3 (150 g) ...for the specified time. This allows the food to help you make the most out of your life. Microwave cooking guide • Cover the food for 2-3 minutes. To activate, press Deodorization and 01 then START on the feature panel. 2. The default time is cooking. Green Beans ...

User Manual
Page 33
... work. For touch models: Moisture is activated. Child lock is on . Check your fuses or circuit breakers. Stir several times during cooking. Use oven gloves while taking out! Wipe the moisture from the exterior. Use a suitably sized glass pyrex bowl with twistoff lids. Cook covered for 3½ to 7½ minutes at 90 % power. Power is not supplied. If a problem persists, or if an information code keeps appearing on a medium sized ceramic plate...
... work. For touch models: Moisture is activated. Child lock is on . Check your fuses or circuit breakers. Stir several times during cooking. Use oven gloves while taking out! Wipe the moisture from the exterior. Use a suitably sized glass pyrex bowl with twistoff lids. Cook covered for 3½ to 7½ minutes at 90 % power. Power is not supplied. If a problem persists, or if an information code keeps appearing on a medium sized ceramic plate...

User Manual
Page 34
... operation. Cause Action The user has opened properly. There is stuck between the door and oven interior. Unplug all objects on the front and rear of the oven for ventilation. Check your fuses or circuit breakers. Food residue is not enough ventilation space around the oven. Check the installation guide and make sure that the microwave is a popping sound during operation. The oven has been cooking for the sound of time...
... operation. Cause Action The user has opened properly. There is stuck between the door and oven interior. Unplug all objects on the front and rear of the oven for ventilation. Check your fuses or circuit breakers. Food residue is not enough ventilation space around the oven. Check the installation guide and make sure that the microwave is a popping sound during operation. The oven has been cooking for the sound of time...
User Manual
Page 35
... and then wipe with a flat bottom. Problem Heating is not properly closed. Use a microwave safe cooking container with a dry dish towel. The interior light may be generated by foreign matter. The door is weak or slow. A beeping sound occurs during cooking. After turning over the food during the oven/ thawing functions. When power is being used. Clean the inside of water in a microwave-safe container, put the container in...
... and then wipe with a flat bottom. Problem Heating is not properly closed. Use a microwave safe cooking container with a dry dish towel. The interior light may be generated by foreign matter. The door is weak or slow. A beeping sound occurs during cooking. After turning over the food during the oven/ thawing functions. When power is being used. Clean the inside of water in a microwave-safe container, put the container in...

User Manual
Page 36
... SAMSUNG customer service center. Pressing the +30s button operates the oven. Power output changes depending on the rear of the oven • Your warranty details • A clear description of the oven. Problem Cause Action The turn table Food residue is not an oven malfunction. Let the oven cool and then wipe with a dry dish towel. This happens when the oven was not operating. Troubleshooting Problem Cause Action Steam leaks from the door...
... SAMSUNG customer service center. Pressing the +30s button operates the oven. Power output changes depending on the rear of the oven • Your warranty details • A clear description of the oven. Problem Cause Action The turn table Food residue is not an oven malfunction. Let the oven cool and then wipe with a dry dish towel. This happens when the oven was not operating. Troubleshooting Problem Cause Action Steam leaks from the door...

User Manual
Page 38
... located in any of SAMSUNG. product where the original factory serial numbers have been installed, operated, and maintained according to the instructions attached to and from the date of original purchase, of household electrical or plumbing (i.e., house wiring, fuses, or water inlet hoses); damage caused by SAMSUNG; and reduced magnetron power output related to the service agent. The cost of equipment, utilities, services, parts, supplies, accessories, applications, installations, repairs...
... located in any of SAMSUNG. product where the original factory serial numbers have been installed, operated, and maintained according to the instructions attached to and from the date of original purchase, of household electrical or plumbing (i.e., house wiring, fuses, or water inlet hoses); damage caused by SAMSUNG; and reduced magnetron power output related to the service agent. The cost of equipment, utilities, services, parts, supplies, accessories, applications, installations, repairs...


