
Owners Manual
Page 2
... microwave energy: • Read all safety instructions before using your own - Never try to repair the oven on sealing surfaces. (c) Do not operate the oven if it has been damaged. • This appliance should be serviced only by qualified service personnel. See "IMPORTANT GROUNDING INSTRUCTIONS" on page 4 of this manual. • Install or place this appliance only in accordance with the door open since open-door operation...
... microwave energy: • Read all safety instructions before using your own - Never try to repair the oven on sealing surfaces. (c) Do not operate the oven if it has been damaged. • This appliance should be serviced only by qualified service personnel. See "IMPORTANT GROUNDING INSTRUCTIONS" on page 4 of this manual. • Install or place this appliance only in accordance with the door open since open-door operation...
Owners Manual
Page 3
... cook properly without the glass tray in place on top of the appliance when it is provided to reduce the risk of table or counter. • When cleaning door and oven surfaces, use near a swimming pool, etc. • Keep the inside the oven ignite, keep the oven door closed , turn the oven off and disconnect the power cord, or shut off the power at the fuse or circuit breaker panel. Longer cord sets...
... cook properly without the glass tray in place on top of the appliance when it is provided to reduce the risk of table or counter. • When cleaning door and oven surfaces, use near a swimming pool, etc. • Keep the inside the oven ignite, keep the oven door closed , turn the oven off and disconnect the power cord, or shut off the power at the fuse or circuit breaker panel. Longer cord sets...

Owners Manual
Page 4
... operable. The marked electrical rating of the cord set or extension cord should be at least as great as the electrical rating of electric shock. The longer cord should be arranged so that circuit breaker is properly installed and grounded. Cooking times may be grounded. Consult a qualified electrician or servicer if you do not understand the grounding instructions or if you use an extension cord, the interior light...
... operable. The marked electrical rating of the cord set or extension cord should be at least as great as the electrical rating of electric shock. The longer cord should be arranged so that circuit breaker is properly installed and grounded. Cooking times may be grounded. Consult a qualified electrician or servicer if you do not understand the grounding instructions or if you use an extension cord, the interior light...

Owners Manual
Page 5
... Item 16 Defrosting Automatically 17 Setting Cooking Times & Power Levels 17 One-stage Cooking 17 Multi-stage Cooking 18 Using the More/Less Buttons 18 Switching the Beeper On/Off 18 Using the Kitchen Timer 19 Demonstration Mode 19 Setting the Child Protection Lock 19 Cooking Instructions 20 Cooking Utensils 20 Testing Utensils 20 Cooking Techniques 21 General Tips 21 Cooking Guide 22 Auto Defrosting Guide 24 Recipes 25 Appendix 27 Troubleshooting Guide 27 Care and Cleaning 27 Specifications 28 Warranty 31 Warranty Information 31...
... Item 16 Defrosting Automatically 17 Setting Cooking Times & Power Levels 17 One-stage Cooking 17 Multi-stage Cooking 18 Using the More/Less Buttons 18 Switching the Beeper On/Off 18 Using the Kitchen Timer 19 Demonstration Mode 19 Setting the Child Protection Lock 19 Cooking Instructions 20 Cooking Utensils 20 Testing Utensils 20 Cooking Techniques 21 General Tips 21 Cooking Guide 22 Auto Defrosting Guide 24 Recipes 25 Appendix 27 Troubleshooting Guide 27 Care and Cleaning 27 Specifications 28 Warranty 31 Warranty Information 31...
Owners Manual
Page 6
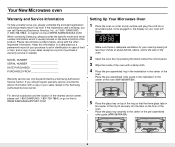
... the location of the pre-assembled roller guide.(MW1660WA/BA) 6 Make sure there is adequate ventilation for your oven will show: START ENTER COOK TIME TIME2 Kg g Oz. Place the glass tray secerely in the center of the oven. Setting Up Your Microwave Oven 1 Place the oven on the floor of the tray fit securely into the tabs on a flat, sturdy surface and plug the cord...
... the location of the pre-assembled roller guide.(MW1660WA/BA) 6 Make sure there is adequate ventilation for your oven will show: START ENTER COOK TIME TIME2 Kg g Oz. Place the glass tray secerely in the center of the oven. Setting Up Your Microwave Oven 1 Place the oven on the floor of the tray fit securely into the tabs on a flat, sturdy surface and plug the cord...

Owners Manual
Page 7
... of food to start cooking. 13. One Minute+ p.16 Press once for every minute of dish to be reheated. 7. Kitchen Timer p.19 Sets kitchen or convenience timer. 11. More/Less p.18 Increase or decrease cooking time. 9. Auto Reheat p.16 Selects type of cooking at High Power 2. Power Level p.17 Press this pad to set a power level other than high. 10. Number Buttons Sets cooking times or amounts and power levels other than high. 8. Your New Microwave oven Control Panel Buttons...
... of food to start cooking. 13. One Minute+ p.16 Press once for every minute of dish to be reheated. 7. Kitchen Timer p.19 Sets kitchen or convenience timer. 11. More/Less p.18 Increase or decrease cooking time. 9. Auto Reheat p.16 Selects type of cooking at High Power 2. Power Level p.17 Press this pad to set a power level other than high. 10. Number Buttons Sets cooking times or amounts and power levels other than high. 8. Your New Microwave oven Control Panel Buttons...

Owners Manual
Page 9
... Selects type of cooking at High Power 2. Start Press to set a power level other than high. 7. Number Buttons Sets cooking times or amounts and power levels other than high. 5. Pause/Cancel p.12 Press to cook popular foods. 4. One Minute+ p.16 Press once for every minute of dish to be reheated. 7 9 11 9 Kitchen Timer p.19 Sets kitchen or convenience timer. 8. Your New Microwave oven Control Panel Buttons MW1150WA/BA, MW1250WA/BA 2 3 12 4 6 8 10 Auto Defrost Popcorn One Minute + Potato...
... Selects type of cooking at High Power 2. Start Press to set a power level other than high. 7. Number Buttons Sets cooking times or amounts and power levels other than high. 5. Pause/Cancel p.12 Press to cook popular foods. 4. One Minute+ p.16 Press once for every minute of dish to be reheated. 7 9 11 9 Kitchen Timer p.19 Sets kitchen or convenience timer. 8. Your New Microwave oven Control Panel Buttons MW1150WA/BA, MW1250WA/BA 2 3 12 4 6 8 10 Auto Defrost Popcorn One Minute + Potato...
Owners Manual
Page 12
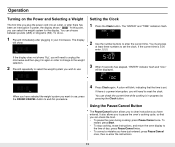
... need to reset the clock. A colon will be displayed. START ENTER COOK TIME TIME2 Kg g Oz Lbs. If the current time is in order to change to the weight selection. 2 Press 0 repeatedly to select the weight system you wish to use , press the PAUSE/CANCEL button to enter the current time. START ENTER COOK TIME TIME2 Kg g Oz Lbs. Setting the Clock 1 Press the Clock button. You can check the current time...
... need to reset the clock. A colon will be displayed. START ENTER COOK TIME TIME2 Kg g Oz Lbs. If the current time is in order to change to the weight selection. 2 Press 0 repeatedly to select the weight system you wish to use , press the PAUSE/CANCEL button to enter the current time. START ENTER COOK TIME TIME2 Kg g Oz Lbs. Setting the Clock 1 Press the Clock button. You can check the current time...

Owners Manual
Page 13
... follow package instructions for covering and standing. Put the pizza on turntable in spoke-like fashion. Do not cover. do not cover. Cover during cooking and stir before standing. QTY. 2 Press the button repeatedly to the food you are cooking (Popcorn, for covering and standing. Instant Cook Chart Item Popcorn Weight Remarks Regular (3.5 oz), Light Regular (3.0-3.5 oz) • Use one bag at a time. • Use caution when removing and opening hot bag...
... follow package instructions for covering and standing. Put the pizza on turntable in spoke-like fashion. Do not cover. do not cover. Cover during cooking and stir before standing. QTY. 2 Press the button repeatedly to the food you are cooking (Popcorn, for covering and standing. Instant Cook Chart Item Popcorn Weight Remarks Regular (3.5 oz), Light Regular (3.0-3.5 oz) • Use one bag at a time. • Use caution when removing and opening hot bag...

Owners Manual
Page 14
... or square in half vertically. Remove wrapping and cut butter in a microwave-safe dish. You can press "1" or "2" button for desired crispness. • Remove lid from baby food and place in dish, cover with the baby food key. 1 pint ½ gallon • Remove top of carton. Stir well at half time when the oven beeps, and re-start the oven. after finishing and let...
... or square in half vertically. Remove wrapping and cut butter in a microwave-safe dish. You can press "1" or "2" button for desired crispness. • Remove lid from baby food and place in dish, cover with the baby food key. 1 pint ½ gallon • Remove top of carton. Stir well at half time when the oven beeps, and re-start the oven. after finishing and let...

Owners Manual
Page 16
.... Plate of food. The display shows the number of food Weight 1 serving Casserole Pasta Reheat 1 to 4 servings (8 oz./serving) 1 to 4 servings (8 oz./serving) Remarks • Use only pre-cooked, refrigerated foods. • Cover plate with lid or vented plastic wrap. • Stir foods well before serving. 16 meat, poultry or fish ( up to 6 oz. Operation Using the One Minute + Button This button offers a convenient way to heat food in...
.... Plate of food. The display shows the number of food Weight 1 serving Casserole Pasta Reheat 1 to 4 servings (8 oz./serving) 1 to 4 servings (8 oz./serving) Remarks • Use only pre-cooked, refrigerated foods. • Cover plate with lid or vented plastic wrap. • Stir foods well before serving. 16 meat, poultry or fish ( up to 6 oz. Operation Using the One Minute + Button This button offers a convenient way to heat food in...

Owners Manual
Page 17
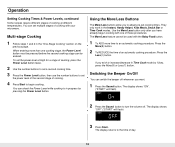
Operation Defrosting Automatically To thaw frozen food, set the weight of the food directly. START ENTER COOK TIME TIME2 Kg g Oz Lbs. You can set your food, press the Auto Defrost button repeatedly. One-stage Cooking For simple one-stage cooking, you control the heating intensity from one minute, enter the seconds too. You can also use the number buttons to High (0). Power Levels: 1 = PL:10 (Warm) 2 = PL:20 (Low) 3 = PL:30 (Defrost) 4 = PL:40 (Medium...
Operation Defrosting Automatically To thaw frozen food, set the weight of the food directly. START ENTER COOK TIME TIME2 Kg g Oz Lbs. You can set your food, press the Auto Defrost button repeatedly. One-stage Cooking For simple one-stage cooking, you control the heating intensity from one minute, enter the seconds too. You can also use the number buttons to High (0). Power Levels: 1 = PL:10 (Warm) 2 = PL:20 (Low) 3 = PL:30 (Defrost) 4 = PL:40 (Medium...
Owners Manual
Page 18
... time of an automatic cooking procedure: Press the Less(1) button. The display shows: "OFF".("START" will flash) START ENTER COOK TIMIE TIMIIE2 kg g oz lbs cup 2 kg g oz lbs cup Press the Sound button to turn the volume off whenever you to adjust pre-set multiple stages of day. 18 Using the More/Less Buttons The More/Less buttons allow you want. 1 Press the Sound button. Operation Setting Cooking Times & Power Levels...
... time of an automatic cooking procedure: Press the Less(1) button. The display shows: "OFF".("START" will flash) START ENTER COOK TIMIE TIMIIE2 kg g oz lbs cup 2 kg g oz lbs cup Press the Sound button to turn the volume off whenever you to adjust pre-set multiple stages of day. 18 Using the More/Less Buttons The More/Less buttons allow you want. 1 Press the Sound button. Operation Setting Cooking Times & Power Levels...

Owners Manual
Page 19
... display counts down and beeps when the time has elapsed. . "Note: The microwave does not turn demo mode off, repeat step 1 above . Setting the Child Protection Lock You can 't be used by unsupervised children. 1 Hold the "0" button and then press the 2 button.. At this point, the microwave oven cannot be used until it can lock your microwave oven operates without the oven heating. 1 Hold the 0 button and then press the 1 button. Operation Using the Kitchen Timer 1 Press the Kitchen Timer button. 2 Use...
... display counts down and beeps when the time has elapsed. . "Note: The microwave does not turn demo mode off, repeat step 1 above . Setting the Child Protection Lock You can 't be used by unsupervised children. 1 Hold the "0" button and then press the 2 button.. At this point, the microwave oven cannot be used until it can lock your microwave oven operates without the oven heating. 1 Hold the 0 button and then press the 1 button. Operation Using the Kitchen Timer 1 Press the Kitchen Timer button. 2 Use...

Owners Manual
Page 20
... be careful. • Ceramic, porcelain, and stoneware - Use narrow strips of foil to prevent overcooking of small items such as a cover to brown the exterior of exposed areas. Never use in a microwave, and can damage your oven. Other plastics can damage your oven, so be used once the food has been removed from the oven. Use only for short-term heating at High power...
... be careful. • Ceramic, porcelain, and stoneware - Use narrow strips of foil to prevent overcooking of small items such as a cover to brown the exterior of exposed areas. Never use in a microwave, and can damage your oven. Other plastics can damage your oven, so be used once the food has been removed from the oven. Use only for short-term heating at High power...

Owners Manual
Page 21
... the microwave oven is not recommended because all parts to do not heat the cookware, the heat is not recommended. Add a small amount of square baking dishes. Cooking Instructions Cooking Techniques Stirring Stir foods such as casseroles and vegetables while cooking to water molecules. To prevent overcooking, place thin or delicate parts toward the outside of the turntable where they receive more quickly, so...
... the microwave oven is not recommended because all parts to do not heat the cookware, the heat is not recommended. Add a small amount of square baking dishes. Cooking Instructions Cooking Techniques Stirring Stir foods such as casseroles and vegetables while cooking to water molecules. To prevent overcooking, place thin or delicate parts toward the outside of the turntable where they receive more quickly, so...
Owners Manual
Page 23
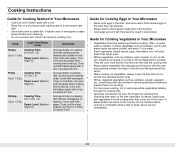
.... • When cooking cut vegetables, always cover the dish with a lid or vented microwavable plastic wrap. • Whole, unpeeled vegetables such as potatoes, acorn squash or corn on the cob, should have their skin pricked in several spots before cooking. Let stand 2-3 min. Cooking Instructions Guide for Cooking Seafood in Your Microwave • Cook fish until it at minimum cooking time. Power Level: Medium- Fillets Cooking Time: 3-7 min...
.... • When cooking cut vegetables, always cover the dish with a lid or vented microwavable plastic wrap. • Whole, unpeeled vegetables such as potatoes, acorn squash or corn on the cob, should have their skin pricked in several spots before cooking. Let stand 2-3 min. Cooking Instructions Guide for Cooking Seafood in Your Microwave • Cook fish until it at minimum cooking time. Power Level: Medium- Fillets Cooking Time: 3-7 min...

Owners Manual
Page 27
... oven's display works, but the power won't come on its own circuit. If there was a power outage, the time indicator will display " " Reset the clock and any cooking instructions. • Reset the circuit breaker or replace any blown fuse. • Plug another appliance on food particles or liquids, heat two cups of water (add the juice of water in the oven when it in the dishwasher. • Clean the outside the oven door...
... oven's display works, but the power won't come on its own circuit. If there was a power outage, the time indicator will display " " Reset the clock and any cooking instructions. • Reset the circuit breaker or replace any blown fuse. • Plug another appliance on food particles or liquids, heat two cups of water (add the juice of water in the oven when it in the dishwasher. • Clean the outside the oven door...

Owners Manual
Page 31
..., services, parts, supplies, accessories, applications, installations, repairs, external wiring or connectors not supplied or authorized by SAMSUNG which damage this product and shall not apply to the following, including, but not limited to: damage which occurs in shipment; altered product or serial numbers; cosmetic damage or exterior finish; reduced magnetron power output related to follow operating instructions, cleaning, maintenance and environmental instructions that are covered...
..., services, parts, supplies, accessories, applications, installations, repairs, external wiring or connectors not supplied or authorized by SAMSUNG which damage this product and shall not apply to the following, including, but not limited to: damage which occurs in shipment; altered product or serial numbers; cosmetic damage or exterior finish; reduced magnetron power output related to follow operating instructions, cleaning, maintenance and environmental instructions that are covered...

Owners Manual
Page 36
... cycle 1. SERVICE DIVISION 400 Valley Road, Suite 201 Mt. Enter weight of cooking. 2. Set Cooking Time and Power Levels Auto Reheat Handy Helper, kids Meals, Snack Bar 1. Press AUTO REHEAT repeatedly to select type of dish to set cooking time. 2. Quick Reference(English) Feature Operation Set Clock One Stage Cooking One Minute+ Cooking Instant Cook Buttons 1. Use number buttons to reheat. 2. Set power level or leave at other than HIGH, press POWER LEVEL and use the number buttons to set cooking time. 2. When the oven beeps, press...
... cycle 1. SERVICE DIVISION 400 Valley Road, Suite 201 Mt. Enter weight of cooking. 2. Set Cooking Time and Power Levels Auto Reheat Handy Helper, kids Meals, Snack Bar 1. Press AUTO REHEAT repeatedly to select type of dish to set cooking time. 2. Quick Reference(English) Feature Operation Set Clock One Stage Cooking One Minute+ Cooking Instant Cook Buttons 1. Use number buttons to reheat. 2. Set power level or leave at other than HIGH, press POWER LEVEL and use the number buttons to set cooking time. 2. When the oven beeps, press...


