

User Manual Ver.1.0 (Multi Language)
Page 2
... oven. • Use this oven with the door open since open-door operation can result in harmful exposure to accumulate on this appliance if it has a damaged cord or plug, if it is not working properly, or if it is necessary when used by anyone except properly qualified service personnel. IMPORTANT SAFETY INSTRUCTIONS When using any electrical appliance, basic safety precautions should be repaired, call 1-800-SAMSUNG...
... oven. • Use this oven with the door open since open-door operation can result in harmful exposure to accumulate on this appliance if it has a damaged cord or plug, if it is not working properly, or if it is necessary when used by anyone except properly qualified service personnel. IMPORTANT SAFETY INSTRUCTIONS When using any electrical appliance, basic safety precautions should be repaired, call 1-800-SAMSUNG...

User Manual Ver.1.0 (Multi Language)
Page 3
... oven walls or floor can become hot. Handle with caution. • Do not operate any other combustible materials are available and may spread. • Pre-caution for safe use to avoid possible exposure to excessive micro oven energy : Do not attempt to pull any portion of a heating or cooking appliance. • Do not mount over edge of table or counter. • When cleaning door and oven...
... oven walls or floor can become hot. Handle with caution. • Do not operate any other combustible materials are available and may spread. • Pre-caution for safe use to avoid possible exposure to excessive micro oven energy : Do not attempt to pull any portion of a heating or cooking appliance. • Do not mount over edge of table or counter. • When cleaning door and oven...
User Manual Ver.1.0 (Multi Language)
Page 4
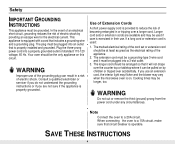
... cord is operable. The extension cord must be grounded. WARNING Do not cut or remove the third (ground) prong from the power cord under any circumstances. SAVE THESE INSTRUCTIONS 4 This appliance is equipped with a cord that is exercised in their use of the grounding plug can be pulled on by providing an escape wire for the electrical current. Cooking times may vary when the microwave oven...
... cord is operable. The extension cord must be grounded. WARNING Do not cut or remove the third (ground) prong from the power cord under any circumstances. SAVE THESE INSTRUCTIONS 4 This appliance is equipped with a cord that is exercised in their use of the grounding plug can be pulled on by providing an escape wire for the electrical current. Cooking times may vary when the microwave oven...

User Manual Ver.1.0 (Multi Language)
Page 5
... Item 16 Defrosting Automatically 17 Setting Cooking Times & Power Levels 17 One-stage Cooking 17 Multi-stage Cooking 18 Using the More/Less Buttons 18 Switching the Beeper On/Off 18 Using the Kitchen Timer 19 Demonstration Mode 19 Setting the Child Protection Lock 19 Cooking Instructions 20 Cooking Utensils 20 Testing Utensils 20 Cooking Techniques 21 General Tips 21 Cooking Guide 22 Auto Defrosting Guide 24 Recipes 25 Appendix 27 Troubleshooting Guide 27 Care and Cleaning 27 Specifications 28 Warranty 31 Warranty Information 31...
... Item 16 Defrosting Automatically 17 Setting Cooking Times & Power Levels 17 One-stage Cooking 17 Multi-stage Cooking 18 Using the More/Less Buttons 18 Switching the Beeper On/Off 18 Using the Kitchen Timer 19 Demonstration Mode 19 Setting the Child Protection Lock 19 Cooking Instructions 20 Cooking Utensils 20 Testing Utensils 20 Cooking Techniques 21 General Tips 21 Cooking Guide 22 Auto Defrosting Guide 24 Recipes 25 Appendix 27 Troubleshooting Guide 27 Care and Cleaning 27 Specifications 28 Warranty 31 Warranty Information 31...

User Manual Ver.1.0 (Multi Language)
Page 6
... the oven. Setting Up Your Microwave Oven 1 Place the oven on a flat, sturdy surface and plug the cord into the tabs on -line at 1-800- Place the glass tray secerely in the center of space behind, above, and to the Samsung Authorized Service Center. Please record these numbers below the control panel. 3 Wipe the inside of the pre-assembled roller guide.(MW1660WA/BA) 6 Your New Microwave oven Warranty and Service...
... the oven. Setting Up Your Microwave Oven 1 Place the oven on a flat, sturdy surface and plug the cord into the tabs on -line at 1-800- Place the glass tray secerely in the center of space behind, above, and to the Samsung Authorized Service Center. Please record these numbers below the control panel. 3 Wipe the inside of the pre-assembled roller guide.(MW1660WA/BA) 6 Your New Microwave oven Warranty and Service...

User Manual Ver.1.0 (Multi Language)
Page 7
Sound Button p.18 Sets sound on or off. 4. Auto Defrost p.17 Sets weight of dish to be reheated. 7. Start Press to cook popular foods. 5. Instant Cook Buttons p.13 Instant settings to start cooking. 13. Auto Reheat p.16 Selects type of food to be defrosted. 6. Kitchen Timer p.19 Sets kitchen or convenience timer. 11. Pause/Cancel p.12 Press to set a power level other than high. 10. Number Buttons Sets cooking times or amounts and power levels other than high. 8. Handy Helper, Kids Meals, Snack Bar p.14...
Sound Button p.18 Sets sound on or off. 4. Auto Defrost p.17 Sets weight of dish to be reheated. 7. Start Press to cook popular foods. 5. Instant Cook Buttons p.13 Instant settings to start cooking. 13. Auto Reheat p.16 Selects type of food to be defrosted. 6. Kitchen Timer p.19 Sets kitchen or convenience timer. 11. Pause/Cancel p.12 Press to set a power level other than high. 10. Number Buttons Sets cooking times or amounts and power levels other than high. 8. Handy Helper, Kids Meals, Snack Bar p.14...

User Manual Ver.1.0 (Multi Language)
Page 9
... Sandwich Snack Bar 1.Nachos 2.Chicken Wings 3.Potato Skins 4.Cheese Sticks 1Less 2 3 4 56 7 8 9More Power Level 0 Kitchen Timer Clock Sound Pause Cancel Start 1. Sound Button p.18 Sets sound on or off. 10. One Minute+ p.16 Press once for every minute of food to be defrosted. 3. Instant Cook Buttons p.13 Instant settings to set a power level other than high. 7. Power Level p.17 Press this pad to cook popular foods. 4. Auto Defrost p.17 Sets weight of cooking at High Power 2. Clock p.12 Sets current time. 9.
... Sandwich Snack Bar 1.Nachos 2.Chicken Wings 3.Potato Skins 4.Cheese Sticks 1Less 2 3 4 56 7 8 9More Power Level 0 Kitchen Timer Clock Sound Pause Cancel Start 1. Sound Button p.18 Sets sound on or off. 10. One Minute+ p.16 Press once for every minute of food to be defrosted. 3. Instant Cook Buttons p.13 Instant settings to set a power level other than high. 7. Power Level p.17 Press this pad to cook popular foods. 4. Auto Defrost p.17 Sets weight of cooking at High Power 2. Clock p.12 Sets current time. 9.

User Manual Ver.1.0 (Multi Language)
Page 12
... button to use : kg g oz Lbs. To restart, press Start. • To stop cooking, erase instructions, and return the oven display to set . The "ENTER" and "TIME" indicators flash. If the current time is set the clock. To do so, 1 Press 0 immediately after there has been an interruption in power, the display shows " " At this procedure. Operation Turning on the Power and Selecting a Weight The first time you plug the power cord...
... button to use : kg g oz Lbs. To restart, press Start. • To stop cooking, erase instructions, and return the oven display to set . The "ENTER" and "TIME" indicators flash. If the current time is set the clock. To do so, 1 Press 0 immediately after there has been an interruption in power, the display shows " " At this procedure. Operation Turning on the Power and Selecting a Weight The first time you plug the power cord...

User Manual Ver.1.0 (Multi Language)
Page 13
... size you are cooking (Popcorn, for covering and standing. Instant Cook Chart Item Popcorn Weight Remarks Regular (3.5 oz), Light Regular (3.0-3.5 oz) • Use one bag at a time. • Use caution when removing and opening hot bag from oven. Example: For 1 cup liquid use a 2 cup or larger dish. Cover during cooking and stir before standing. Once you select the correct serving size, the microwave will then beep every minute. Place on a microwave-safe plate...
... size you are cooking (Popcorn, for covering and standing. Instant Cook Chart Item Popcorn Weight Remarks Regular (3.5 oz), Light Regular (3.0-3.5 oz) • Use one bag at a time. • Use caution when removing and opening hot bag from oven. Example: For 1 cup liquid use a 2 cup or larger dish. Cover during cooking and stir before standing. Once you select the correct serving size, the microwave will then beep every minute. Place on a microwave-safe plate...

User Manual Ver.1.0 (Multi Language)
Page 14
... Chocolate Soften Cream Cheese Melt Butter Code Weight A-1 1 cup chips • • • A-2 1 package • (8 oz.) • A-3 1 stick • (1/4 lb.) 2 sticks • (1/2 lb.) • Remarks Place chocolate chips or square in half vertically. Only "1" button(serving) is over. Press Start button to the food you are cooking. Remove wrapping and cut butter in a microwave-safe dish. You can press "1" or...
... Chocolate Soften Cream Cheese Melt Butter Code Weight A-1 1 cup chips • • • A-2 1 package • (8 oz.) • A-3 1 stick • (1/4 lb.) 2 sticks • (1/2 lb.) • Remarks Place chocolate chips or square in half vertically. Only "1" button(serving) is over. Press Start button to the food you are cooking. Remove wrapping and cut butter in a microwave-safe dish. You can press "1" or...

User Manual Ver.1.0 (Multi Language)
Page 16
...; Use only refrigerated foods. • Cover with vented plastic wrap or wax paper. • Contents - 3-4 oz. Operation Using the One Minute + Button This button offers a convenient way to heat food in progress by pressing the One Minute + button for each minute you want to reheat, and the microwave automatically sets the reheating time. 1 Press the Auto Reheat button repeatedly to select the type of Food START ENTER COOK TIME TIME2...
...; Use only refrigerated foods. • Cover with vented plastic wrap or wax paper. • Contents - 3-4 oz. Operation Using the One Minute + Button This button offers a convenient way to heat food in progress by pressing the One Minute + button for each minute you want to reheat, and the microwave automatically sets the reheating time. 1 Press the Auto Reheat button repeatedly to select the type of Food START ENTER COOK TIME TIME2...

User Manual Ver.1.0 (Multi Language)
Page 17
... the food and the microwave automatically sets the defrosting time, power level and standing time. 1 Press the Auto Defrost button. QTY. 2 To set a time over . 4 Press the Start button to 99 minutes, 99 seconds. The oven calculates the defrosting time and starts automatically. The display shows "0.5 lbs." (0.2Kg if you control the heating intensity from Warm (1) to set a time from one minute, enter the seconds too. will beep to let you must set up to change the power level...
... the food and the microwave automatically sets the defrosting time, power level and standing time. 1 Press the Auto Defrost button. QTY. 2 To set a time over . 4 Press the Start button to 99 minutes, 99 seconds. The oven calculates the defrosting time and starts automatically. The display shows "0.5 lbs." (0.2Kg if you control the heating intensity from Warm (1) to set a time from one minute, enter the seconds too. will beep to let you must set up to change the power level...

User Manual Ver.1.0 (Multi Language)
Page 18
..., Snack Bar or Time Cook modes. Use the More/Less button only after you want. 1 Press the Sound button. The display shows "ON". ("START" will flash) START ENTER COOK TIMIE TIMIIE2 kg g oz lbs cup kg g oz lbs cup 3 Press Start. The display shows: "OFF".("START" will flash) START ENTER COOK TIMIE TIMIIE2 kg g oz lbs cup 2 kg g oz lbs cup Press the Sound button to set cooking times. Operation Setting Cooking Times & Power Levels, continued Some...
..., Snack Bar or Time Cook modes. Use the More/Less button only after you want. 1 Press the Sound button. The display shows "ON". ("START" will flash) START ENTER COOK TIMIE TIMIIE2 kg g oz lbs cup kg g oz lbs cup 3 Press Start. The display shows: "OFF".("START" will flash) START ENTER COOK TIMIE TIMIIE2 kg g oz lbs cup 2 kg g oz lbs cup Press the Sound button to set cooking times. Operation Setting Cooking Times & Power Levels, continued Some...

User Manual Ver.1.0 (Multi Language)
Page 19
... 't be used ." "Note: The microwave does not turn demo mode off, repeat step 1 above . Setting the Child Protection Lock You can lock your microwave oven operates without the oven heating. 1 Hold the 0 button and then press the 1 button. To turn on when the Kitchen timer is used until it is unlocked. Operation Using the Kitchen Timer 1 Press the Kitchen Timer button. 2 Use the Number buttons to set the length of time you want the timer to run. 3 Press Start to see how your microwave oven so...
... 't be used ." "Note: The microwave does not turn demo mode off, repeat step 1 above . Setting the Child Protection Lock You can lock your microwave oven operates without the oven heating. 1 Hold the 0 button and then press the 1 button. To turn on when the Kitchen timer is used until it is unlocked. Operation Using the Kitchen Timer 1 Press the Kitchen Timer button. 2 Use the Number buttons to set the length of time you want the timer to run. 3 Press Start to see how your microwave oven so...

User Manual Ver.1.0 (Multi Language)
Page 20
... heating and covering; If the dish is warm, then it directly on food. • Plastic storage and food containers - Do not use . • Styrofoam plates and cups - Using too much foil can damage your oven, so be warm and the dish you are designed for heating or cooking. • Microwavable browning dish - Use to retain steam. Limited Use • Aluminum foil - Cooking Instructions Cooking Utensils Recommended Use • Glass...
... heating and covering; If the dish is warm, then it directly on food. • Plastic storage and food containers - Do not use . • Styrofoam plates and cups - Using too much foil can damage your oven, so be warm and the dish you are designed for heating or cooking. • Microwavable browning dish - Use to retain steam. Limited Use • Aluminum foil - Cooking Instructions Cooking Utensils Recommended Use • Glass...

User Manual Ver.1.0 (Multi Language)
Page 21
... a small amount of the turntable where they receive more quickly, so stir from the microwave and instruct children to prevent overcooking. For example, the jelly inside a jelly doughnut will turn off when you are using a new recipe, use pot holders when removing food from the outside of water to dry food to cook for a few minutes after the oven stops. Roasts need shielding include poultry wing...
... a small amount of the turntable where they receive more quickly, so stir from the microwave and instruct children to prevent overcooking. For example, the jelly inside a jelly doughnut will turn off when you are using a new recipe, use pot holders when removing food from the outside of water to dry food to cook for a few minutes after the oven stops. Roasts need shielding include poultry wing...

User Manual Ver.1.0 (Multi Language)
Page 23
...; Cook eggs just until set; High(70). High(70). Shrimp Cooking Time: 3-5 ½ min. / lb. Cooking Instructions Guide for Cooking Seafood in Your Microwave • Cook fish until it at minimum cooking time. Let stand 5 min. Often, no extra water is completed, while a dish of the dish and the tips toward the center. • When cooking cut vegetables, always cover the dish with a lid or vented microwavable...
...; Cook eggs just until set; High(70). High(70). Shrimp Cooking Time: 3-5 ½ min. / lb. Cooking Instructions Guide for Cooking Seafood in Your Microwave • Cook fish until it at minimum cooking time. Let stand 5 min. Often, no extra water is completed, while a dish of the dish and the tips toward the center. • When cooking cut vegetables, always cover the dish with a lid or vented microwavable...

User Manual Ver.1.0 (Multi Language)
Page 27
... see sparks or arcing. • Remove any blown fuse. Appendix Troubleshooting Guide Before you call our service line: 1-800-SAMSUNG (1-800-726-7864) 27 Move your microwave further away from breaking, handle it carefully and do not put it ; If there was a power outage, the time indicator will display " " Reset the clock and any cooking instructions. • Reset the circuit breaker or replace any metallic utensils, cookware, or metal...
... see sparks or arcing. • Remove any blown fuse. Appendix Troubleshooting Guide Before you call our service line: 1-800-SAMSUNG (1-800-726-7864) 27 Move your microwave further away from breaking, handle it carefully and do not put it ; If there was a power outage, the time indicator will display " " Reset the clock and any cooking instructions. • Reset the circuit breaker or replace any metallic utensils, cookware, or metal...

User Manual Ver.1.0 (Multi Language)
Page 31
..., Eight (8) Years Parts Warranty for Magnetron This limited warranty begins on the original date of purchase to follow operating instructions, cleaning, maintenance and environmental instructions that are covered and prescribed in the instruction book; delivery and installation; customer adjustments and failure to SAMSUNG or SAMSUNG's authorized service center. SAMSUNG does not warrant uninterrupted or error-free operation of products, equipment, systems, utilities, services, parts, supplies, accessories, applications, installations, repairs, external wiring or connectors not...
..., Eight (8) Years Parts Warranty for Magnetron This limited warranty begins on the original date of purchase to follow operating instructions, cleaning, maintenance and environmental instructions that are covered and prescribed in the instruction book; delivery and installation; customer adjustments and failure to SAMSUNG or SAMSUNG's authorized service center. SAMSUNG does not warrant uninterrupted or error-free operation of products, equipment, systems, utilities, services, parts, supplies, accessories, applications, installations, repairs, external wiring or connectors not...

User Manual Ver.1.0 (Multi Language)
Page 36
... resume defrosting cycle. Press START to select serving size. 1. To increase serving size, press the corresponding number button. 3. Quick Reference(English) Feature Operation Set Clock One Stage Cooking One Minute+ Cooking Instant Cook Buttons Auto Defrost 1. To increase serving size, press the corresponding number button. 3. The time will display and the oven will start. 1. When the oven beeps, press PAUSE/ CANCEL button and turn food over. Set Cooking Time and Power Levels Auto Reheat Handy Helper, kids Meals, Snack Bar 1. Use number buttons to reheat. 2. Press AUTO REHEAT...
... resume defrosting cycle. Press START to select serving size. 1. To increase serving size, press the corresponding number button. 3. Quick Reference(English) Feature Operation Set Clock One Stage Cooking One Minute+ Cooking Instant Cook Buttons Auto Defrost 1. To increase serving size, press the corresponding number button. 3. The time will display and the oven will start. 1. When the oven beeps, press PAUSE/ CANCEL button and turn food over. Set Cooking Time and Power Levels Auto Reheat Handy Helper, kids Meals, Snack Bar 1. Use number buttons to reheat. 2. Press AUTO REHEAT...


