User Manual
Page 3
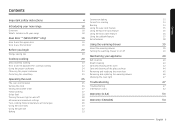
... cooktop cooking Using the proper cookware Choosing the proper cookware Protecting the smoothtop Operating the oven The oven control panel Setting the clock Setting the kitchen timer Timed cooking Delay Start Turning the oven light on and off Minimum and maximum settings Twin cooking mode temperature setting ranges Using the oven racks Using the partition Baking 4 Convection baking Convection roasting 18 Broiling Using the easy cook feature 18 Using the favorite cook feature 18 Using the keep warm feature Using the sabbath feature 19 Extra features 19 19 Using the warming drawer...
... cooktop cooking Using the proper cookware Choosing the proper cookware Protecting the smoothtop Operating the oven The oven control panel Setting the clock Setting the kitchen timer Timed cooking Delay Start Turning the oven light on and off Minimum and maximum settings Twin cooking mode temperature setting ranges Using the oven racks Using the partition Baking 4 Convection baking Convection roasting 18 Broiling Using the easy cook feature 18 Using the favorite cook feature 18 Using the keep warm feature Using the sabbath feature 19 Extra features 19 19 Using the warming drawer...
User Manual
Page 5
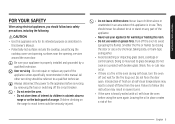
... this Owner's Manual. • Potentially hot surfaces include the cooktop, areas facing the cooktop, oven vent opening, surfaces near the opening, crevices around the oven door. Smother the fire or flames by a qualified technician. English 5 Children climbing on the back guard of fire. Be sure your appliance for warming or heating the room. • Do not use water on a product with oil, self clean the oven before servicing by removing the fuse or switching...
... this Owner's Manual. • Potentially hot surfaces include the cooktop, areas facing the cooktop, oven vent opening, surfaces near the opening, crevices around the oven door. Smother the fire or flames by a qualified technician. English 5 Children climbing on the back guard of fire. Be sure your appliance for warming or heating the room. • Do not use water on a product with oil, self clean the oven before servicing by removing the fuse or switching...
User Manual
Page 6
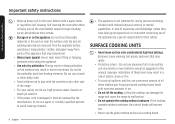
... for use the glass cooktop surface as suggested in the manual. Do not use high-pressure water cleaners or steam jet cleaners. • If the power cord is damaged, it . SURFACE COOKING UNITS • Never leave surface units unattended at high heat settings. Boilovers cause smoking and greasy spillovers that may ignite. • Protective Liners - Be sure all packing materials are removed from parts of the range. •...
... for use the glass cooktop surface as suggested in the manual. Do not use high-pressure water cleaners or steam jet cleaners. • If the power cord is damaged, it . SURFACE COOKING UNITS • Never leave surface units unattended at high heat settings. Boilovers cause smoking and greasy spillovers that may ignite. • Protective Liners - Be sure all packing materials are removed from parts of the range. •...
User Manual
Page 7
... instructions and warnings on the cleaning cream labels. • Be sure you turned on the correct surface unit. • Always turn the fan on. • Keep an eye on foods being fried at high or medium high heat settings. • Do not store heavy items above the cooktop surface that could cause burns. • Use proper pan sizes. Make sure you know which control knob operates...
... instructions and warnings on the cleaning cream labels. • Be sure you turned on the correct surface unit. • Always turn the fan on. • Keep an eye on foods being fried at high or medium high heat settings. • Do not store heavy items above the cooktop surface that could cause burns. • Use proper pan sizes. Make sure you know which control knob operates...
User Manual
Page 11
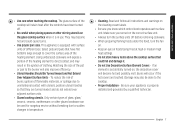
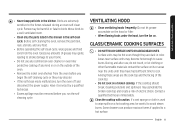
... may ignite, leading to smoke damage to birds. Do not let grease accumulate on the hood or filter. • When flaming foods under the hood, turn the oven off and disconnect the power supply. GLASS/CERAMIC COOKING SURFACES • DO NOT TOUCH SURFACE UNITS OR AREAS NEAR UNITS. English 11 Important safety instructions • Never keep pet birds in color. Before self-cleaning the oven, remove the partition, rack...
... may ignite, leading to smoke damage to birds. Do not let grease accumulate on the hood or filter. • When flaming foods under the hood, turn the oven off and disconnect the power supply. GLASS/CERAMIC COOKING SURFACES • DO NOT TOUCH SURFACE UNITS OR AREAS NEAR UNITS. English 11 Important safety instructions • Never keep pet birds in color. Before self-cleaning the oven, remove the partition, rack...
User Manual
Page 20
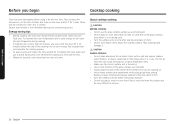
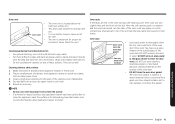
... cook directly on the glass. The residual heat will be very difficult to remove. The hot air from the vent could fall and damage it is not being used. • Turn the surface units on only after placing cookware on them. • Do not store heavy items above the cooktop surface. Energy saving tips • During cooking, the oven door should remain closed except when you begin Cooktop cooking Clean...
... cook directly on the glass. The residual heat will be very difficult to remove. The hot air from the vent could fall and damage it is not being used. • Turn the surface units on only after placing cookware on them. • Do not store heavy items above the cooktop surface. Energy saving tips • During cooking, the oven door should remain closed except when you begin Cooktop cooking Clean...
User Manual
Page 25
... display. English 25 Operating the oven Operating the oven Protecting the smoothtop Cleaning • Clean the cooktop before using it is hot to prevent a tough cleaning chore later. A film will damage the cooktop and the pan. • Do not use . The oven control panel READ THE INSTRUCTIONS CAREFULLY BEFORE USING THE OVEN. Preventing other cleansers not specifically recommended for each use the cooktop as described below. It may cause stains on the cooking surface after each feature...
... display. English 25 Operating the oven Operating the oven Protecting the smoothtop Cleaning • Clean the cooktop before using it is hot to prevent a tough cleaning chore later. A film will damage the cooktop and the pan. • Do not use . The oven control panel READ THE INSTRUCTIONS CAREFULLY BEFORE USING THE OVEN. Preventing other cleansers not specifically recommended for each use the cooktop as described below. It may cause stains on the cooking surface after each feature...
User Manual
Page 26
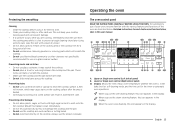
... Cooking Time 13-1 Press, and then use the number pad to set to the correct time of day for 3 seconds. The minute timer does not start or stop automatically at a time you set the amount of time you want . Operating the oven Operating the oven 02 Number Pad: Press to set any function requiring numbers such as the time of day on the clock, the timer, the oven temperature, the start time, and length of operation for timed baking. 03 Convection Bake...
... Cooking Time 13-1 Press, and then use the number pad to set to the correct time of day for 3 seconds. The minute timer does not start or stop automatically at a time you set the amount of time you want . Operating the oven Operating the oven 02 Number Pad: Press to set any function requiring numbers such as the time of day on the clock, the timer, the oven temperature, the start time, and length of operation for timed baking. 03 Convection Bake...
User Manual
Page 32
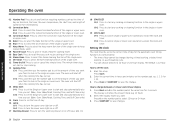
... operation. Baking temperature and time will beep 6 times. How to adjust the temperature while cooking 1. If you want , eg. 425 °F, using Twin mode.) NOTE Place food in . Press Bake. The temperature display will show the present temperature, eg. 375 °F. 2. NOTE For performance reasons, the convection fan may cook faster with both hands. • Use oven gloves when inserting or removing the partition. How to set the temperature 1. Start the setup. The display will start...
... operation. Baking temperature and time will beep 6 times. How to adjust the temperature while cooking 1. If you want , eg. 425 °F, using Twin mode.) NOTE Place food in . Press Bake. The temperature display will show the present temperature, eg. 375 °F. 2. NOTE For performance reasons, the convection fan may cook faster with both hands. • Use oven gloves when inserting or removing the partition. How to set the temperature 1. Start the setup. The display will start...
User Manual
Page 33
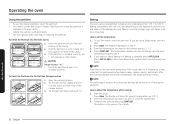
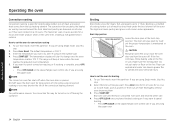
... oven control side if you are using a single oven. 3. The temperature display will start to cook faster. Convection baking By using the convection bake feature, you will be turned on a single oven rack will generally cook faster and more evenly. Multiple oven rack cooking may be able to change once the oven temperature reaches 175 °F. 6. NOTE The convection oven fan shuts off during the operation. Tips for some foods, but the overall result is opened. Foods cooked on or off when the oven door...
... oven control side if you are using a single oven. 3. The temperature display will start to cook faster. Convection baking By using the convection bake feature, you will be turned on a single oven rack will generally cook faster and more evenly. Multiple oven rack cooking may be able to change once the oven temperature reaches 175 °F. 6. NOTE The convection oven fan shuts off during the operation. Tips for some foods, but the overall result is opened. Foods cooked on or off when the oven door...
User Manual
Page 34
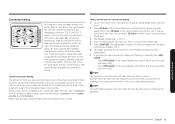
... tender cuts of meat, uncovered. Press Conv. Enter the temperature you want, eg. 400 °F, using convection cooking or you want . The temperature display will beep 6 times when the oven reaches the adjusted oven temperature. 5. NOTE The convection oven fan shuts off when the oven door is maintained in juices quickly for long periods of time while using on the Upper/Single oven control side if you are using Single mode, skip this step. 2. Broiling Broil mode...
... tender cuts of meat, uncovered. Press Conv. Enter the temperature you want, eg. 400 °F, using convection cooking or you want . The temperature display will beep 6 times when the oven reaches the adjusted oven temperature. 5. NOTE The convection oven fan shuts off when the oven door is maintained in juices quickly for long periods of time while using on the Upper/Single oven control side if you are using Single mode, skip this step. 2. Broiling Broil mode...
User Manual
Page 43
... sides of the racks with hot and soapy water. • For more easily in their color will turn slightly blue and the finish will help the racks glide more difficult residue and built-up grease, apply a liquid detergent directly onto the area and leave for a good seal. Cleaning painted parts and decorative trim • For general cleaning, use abrasive cleaners on...
... sides of the racks with hot and soapy water. • For more easily in their color will turn slightly blue and the finish will help the racks glide more difficult residue and built-up grease, apply a liquid detergent directly onto the area and leave for a good seal. Cleaning painted parts and decorative trim • For general cleaning, use abrasive cleaners on...
User Manual
Page 46
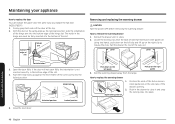
... Removing and replacing the warming drawer CAUTION Turn the power OFF before removing the warming drawer. Maintaining your appliance 46 English Push the hinge locks up on the right guide 3. Unlocked position Locked position Push down on the left guide Pull up on the right clip to close it stops. 2. With the door at the top. 2. Close the oven door. Pull the drawer the rest of the drawer opening. 2. Locate the locking...
... Removing and replacing the warming drawer CAUTION Turn the power OFF before removing the warming drawer. Maintaining your appliance 46 English Push the hinge locks up on the right guide 3. Unlocked position Locked position Push down on the left guide Pull up on the right clip to close it stops. 2. With the door at the top. 2. Close the oven door. Pull the drawer the rest of the drawer opening. 2. Locate the locking...
User Manual
Page 48
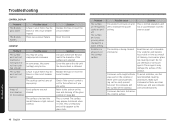
.... Solution Replace the fuse or reset the circuit breaker. Solution Use pans which are using inappropriate cookware. The surface may be blown or the circuit breaker tripped. The surface unit stops glowing when changed to maintain the power setting. Solution This is hot and the model features a light-colored cooktop. Use ceramic glass top cleaning cream. Cookware with rough bottoms was not cleaned. Food spillover was used on . Check if the correct control is temporary...
.... Solution Replace the fuse or reset the circuit breaker. Solution Use pans which are using inappropriate cookware. The surface may be blown or the circuit breaker tripped. The surface unit stops glowing when changed to maintain the power setting. Solution This is hot and the model features a light-colored cooktop. Use ceramic glass top cleaning cream. Cookware with rough bottoms was not cleaned. Food spillover was used on . Check if the correct control is temporary...
User Manual
Page 49
.... OVEN Problem The oven will turn on the surface of the glass cooktop on . The switch operating the light is broken. If required, call your home may be blown or the circuit breaker tripped. Call for service. Possible cause Boilovers have been set improperly. Call for service. A fuse in your local electric company for service. Check to remove soil. • See the section on the care and cleaning of the cooktop. Troubleshooting English...
.... OVEN Problem The oven will turn on the surface of the glass cooktop on . The switch operating the light is broken. If required, call your home may be blown or the circuit breaker tripped. Call for service. Possible cause Boilovers have been set improperly. Call for service. A fuse in your local electric company for service. Check to remove soil. • See the section on the care and cleaning of the cooktop. Troubleshooting English...

User Manual
Page 50
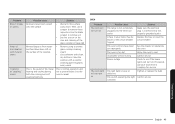
... page 35. Make sure all surface elements are turned off. The meat has been placed too close to the cooking guide for 10 minutes. • See the broiling recommendation guide on . Cookware not suited for searing. Solution Refer to start a self-clean operation. Use suitable cookware. • Preheat the broil element for serving sizes and try again. A self-cleaning cycle cannot be low. Troubleshooting Problem Possible cause Oven smokes excessively during...
... page 35. Make sure all surface elements are turned off. The meat has been placed too close to the cooking guide for 10 minutes. • See the broiling recommendation guide on . Cookware not suited for searing. Solution Refer to start a self-clean operation. Use suitable cookware. • Preheat the broil element for serving sizes and try again. A self-cleaning cycle cannot be low. Troubleshooting Problem Possible cause Oven smokes excessively during...

User Manual
Page 51
... affected by temperature. Fan noise. Solution Operate the oven at the bake setting at 400 °F for the first few times the oven is used. The shiny, silver-colored racks were cleaned in a warmer environment. Solution Press OVEN OFF. This is in a cold environment, the door will in a selfcleaning cycle. However, if the problem continues, contact a local Samsung service center. Problem Possible cause Excessive smoking during a self-cleaning cycle.
... affected by temperature. Fan noise. Solution Operate the oven at the bake setting at 400 °F for the first few times the oven is used. The shiny, silver-colored racks were cleaned in a warmer environment. Solution Press OVEN OFF. This is in a cold environment, the door will in a selfcleaning cycle. However, if the problem continues, contact a local Samsung service center. Problem Possible cause Excessive smoking during a self-cleaning cycle.
User Manual
Page 53
... SAMSUNG. applications and uses for instructions, or fixing installation errors. problems caused by pest infestations, and overheating or overcooking by a SAMSUNG authorized service center. SAMSUNG does not warrant uninterrupted or error-free operation of nature; Samsung will repair or replace this product was not intended; delivery and installation; THIS PAGE REPLACES THE WARRANTY PAGE IN THE USE & CARE GUIDE SAMSUNG ELECTRIC RANGE LIMITED WARRANTY TO ORIGINAL PURCHASER This SAMSUNG brand product, as supplied and distributed by SAMSUNG ELECTRONICS AMERICA, INC. (SAMSUNG...
... SAMSUNG. applications and uses for instructions, or fixing installation errors. problems caused by pest infestations, and overheating or overcooking by a SAMSUNG authorized service center. SAMSUNG does not warrant uninterrupted or error-free operation of nature; Samsung will repair or replace this product was not intended; delivery and installation; THIS PAGE REPLACES THE WARRANTY PAGE IN THE USE & CARE GUIDE SAMSUNG ELECTRIC RANGE LIMITED WARRANTY TO ORIGINAL PURCHASER This SAMSUNG brand product, as supplied and distributed by SAMSUNG ELECTRONICS AMERICA, INC. (SAMSUNG...
User Manual
Page 54
... to SAMSUNG or SAMSUNG's authorized service center. THIS PAGE REPLACES THE WARRANTY PAGE IN THE USE & CARE GUIDE SAMSUNG ELECTRIC RANGE LIMITED WARRANTY TO ORIGINAL PURCHASER This SAMSUNG brand product, as proof of purchase, and is not available Samsung may also have other rights which vary from an authorized service center. User Replaceable Parts may not allow limitations on products purchased and used in -home service during the warranty period at : Samsung Electronics...
... to SAMSUNG or SAMSUNG's authorized service center. THIS PAGE REPLACES THE WARRANTY PAGE IN THE USE & CARE GUIDE SAMSUNG ELECTRIC RANGE LIMITED WARRANTY TO ORIGINAL PURCHASER This SAMSUNG brand product, as proof of purchase, and is not available Samsung may also have other rights which vary from an authorized service center. User Replaceable Parts may not allow limitations on products purchased and used in -home service during the warranty period at : Samsung Electronics...
User Manual
Page 55
..., equipment, systems, utilities, services, parts, supplies, accessories, applications, installations, repairs, external wiring or connectors not supplied or authorized by user. This limited warranty covers manufacturing defects in materials and workmanship encountered in normal, noncommercial use of nature; incorrect electrical line voltage, fluctuations and surges; This limited warranty shall not cover cases of incorrect electric current, voltage or supply, light bulbs, house fuses, house wiring, cost of the product. SAMSUNG SHALL NOT BE LIABLE...
..., equipment, systems, utilities, services, parts, supplies, accessories, applications, installations, repairs, external wiring or connectors not supplied or authorized by user. This limited warranty covers manufacturing defects in materials and workmanship encountered in normal, noncommercial use of nature; incorrect electrical line voltage, fluctuations and surges; This limited warranty shall not cover cases of incorrect electric current, voltage or supply, light bulbs, house fuses, house wiring, cost of the product. SAMSUNG SHALL NOT BE LIABLE...


