

User Manual (user Manual) (ver.1.0) (English)
Page 4
... placed on the TV. • Ground outdoor antennas. This television receiver provides display of overhead power lines or other controls may not cause harmful interference, and (2) This device must accept any service or repairs to this TV, ask the service technician to perform safety checks to normal. • When replacement parts are covered by following conditions: - Power supply cords should not be placed in the vicinity of television closed captioning in damage...
... placed on the TV. • Ground outdoor antennas. This television receiver provides display of overhead power lines or other controls may not cause harmful interference, and (2) This device must accept any service or repairs to this TV, ask the service technician to perform safety checks to normal. • When replacement parts are covered by following conditions: - Power supply cords should not be placed in the vicinity of television closed captioning in damage...

User Manual (user Manual) (ver.1.0) (English)
Page 6
... Camcorder 2.7 Installing Batteries in the Remote Control 2.8 Chapter 3: Operation 3.1 Turning the TV On and Off 3.1 Adjusting basic convergence 3.1 Adjust Red Convergence 3.2 Adjust Blue Convergence 3.2 Viewing the Menus and On-Screen Displays 3.3 Viewing the Menus 3.3 Viewing the Display 3.3 Selecting a Menu Language 3.4 Memorizing the Channels 3.5 Selecting the Video Signal-source 3.5 Storing Channels in Memory (Automatic Method 3.6 Adding and Erasing Channels (Manual Method 3.7 Changing Channels 3.7 Using the Channel Buttons 3.7 Directly Accessing Channels 3.7 Setting the...
... Camcorder 2.7 Installing Batteries in the Remote Control 2.8 Chapter 3: Operation 3.1 Turning the TV On and Off 3.1 Adjusting basic convergence 3.1 Adjust Red Convergence 3.2 Adjust Blue Convergence 3.2 Viewing the Menus and On-Screen Displays 3.3 Viewing the Menus 3.3 Viewing the Display 3.3 Selecting a Menu Language 3.4 Memorizing the Channels 3.5 Selecting the Video Signal-source 3.5 Storing Channels in Memory (Automatic Method 3.6 Adding and Erasing Channels (Manual Method 3.7 Changing Channels 3.7 Using the Channel Buttons 3.7 Directly Accessing Channels 3.7 Setting the...

User Manual (user Manual) (ver.1.0) (English)
Page 7
... DVD 4.1 Setting Up Your Remote Control to Operate Your Cable Box 4.2 Setting the On/Off Timer 4.4 Setting the Sleep Timer 4.5 Viewing Closed Captions 4.6 Fine Tuning Channels 4.7 LNA(Low Noise Amplifier 4.8 Special Audio Options: Dolby Surround, MTS, and Headphones . . . 4.9 Dolby Prologic 4.9 Dolby 3D Phonic 4.10 Choosing a Multi-Channel Sound (MTS) Soundtrack. . . . . 4.11 Using Wireless Headphones 4.12 Setting up Wireless Headphones with Picture-in-Picture. . . . 4.12 Viewing Picture-in-Picture 4.13 Activating Picture-in-Picture 4.13 Selecting a Signal Source (Antenna or Cable...
... DVD 4.1 Setting Up Your Remote Control to Operate Your Cable Box 4.2 Setting the On/Off Timer 4.4 Setting the Sleep Timer 4.5 Viewing Closed Captions 4.6 Fine Tuning Channels 4.7 LNA(Low Noise Amplifier 4.8 Special Audio Options: Dolby Surround, MTS, and Headphones . . . 4.9 Dolby Prologic 4.9 Dolby 3D Phonic 4.10 Choosing a Multi-Channel Sound (MTS) Soundtrack. . . . . 4.11 Using Wireless Headphones 4.12 Setting up Wireless Headphones with Picture-in-Picture. . . . 4.12 Viewing Picture-in-Picture 4.13 Activating Picture-in-Picture 4.13 Selecting a Signal Source (Antenna or Cable...

User Manual (user Manual) (ver.1.0) (English)
Page 11
... input signals for a recording VCR.) Note: The monitor out does not operate in DVD or DTV mode. 1.4 CHAPTER ONE: YOUR NEW TV " DVD & DTV AUDIO INPUT Connect to the audio output jacks of a DVD player & SET-TOP BOX. ' DTV INPUT (For models PCJ532RF/PCJ534RF/ PCJ611RF/PCJ614RF/PCK5315R/PCK6115R) Connects video from a DVD player. Here are two ways to the (optional) rear-surround amp: Surround Left, Surround Right and Center. TV - TV - speaker 2. YOUR NEW TV Rear Panel Jacks Use the rear panel jacks to a cable TV...
... input signals for a recording VCR.) Note: The monitor out does not operate in DVD or DTV mode. 1.4 CHAPTER ONE: YOUR NEW TV " DVD & DTV AUDIO INPUT Connect to the audio output jacks of a DVD player & SET-TOP BOX. ' DTV INPUT (For models PCJ532RF/PCJ534RF/ PCJ611RF/PCJ614RF/PCK5315R/PCK6115R) Connects video from a DVD player. Here are two ways to the (optional) rear-surround amp: Surround Left, Surround Right and Center. TV - TV - speaker 2. YOUR NEW TV Rear Panel Jacks Use the rear panel jacks to a cable TV...
User Manual (user Manual) (ver.1.0) (English)
Page 12
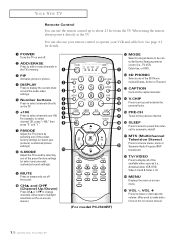
... Separate Audio Program (SAP broadcast). ¯ TV/VIDEO Press to display all of the available video sources (i.e., Antenna/cable, VCR, DVD, Video1~3 and S-Video 1~2). ˘ MENU Displays the main on -screen menus.) 1.5 CHAPTER ONE: YOUR NEW TV " S.MODE Adjust the TV sound by selecting one of the preset factory settings (or select your personal, customized picture settings). When using the remote, always point it directly at the TV. YOUR NEW TV Remote Control You can also use the remote control up...
... Separate Audio Program (SAP broadcast). ¯ TV/VIDEO Press to display all of the available video sources (i.e., Antenna/cable, VCR, DVD, Video1~3 and S-Video 1~2). ˘ MENU Displays the main on -screen menus.) 1.5 CHAPTER ONE: YOUR NEW TV " S.MODE Adjust the TV sound by selecting one of the preset factory settings (or select your personal, customized picture settings). When using the remote, always point it directly at the TV. YOUR NEW TV Remote Control You can also use the remote control up...

User Manual (user Manual) (ver.1.0) (English)
Page 20
... its picture and sound to be either 480p or 1080i format is usually included with an S-VHS VCR. (If not, check your VCR's instructions for a typical set-top box are supported in their original formats. 2.6 CHAPTER TWO: INSTALLATION Refer to the DTV mode, either on the front or on back of audio cables between the AUDIO OUT jacks on the TV and the AUDIO...
... its picture and sound to be either 480p or 1080i format is usually included with an S-VHS VCR. (If not, check your VCR's instructions for a typical set-top box are supported in their original formats. 2.6 CHAPTER TWO: INSTALLATION Refer to the DTV mode, either on the front or on back of audio cables between the AUDIO OUT jacks on the TV and the AUDIO...

User Manual (user Manual) (ver.1.0) (English)
Page 23
... also use the remote control for the convergence adjustments. (The Convergence Adjustment cannot be highlighted. Be sure to use the POWER button on the front panel. Adjusting Basic Convergence If the color appears spread out or "smeared" on the front panel.) First steps: 1 Press MENU. Press CH ▼ three times to highlight "Convergence" (the letters change to highlight the Setup icon (starts blinking). 2 Press VOL +. continued... 3.1 CHAPTER THREE: OPERATION Chapter Three OPERATION Turning the TV...
... also use the remote control for the convergence adjustments. (The Convergence Adjustment cannot be highlighted. Be sure to use the POWER button on the front panel. Adjusting Basic Convergence If the color appears spread out or "smeared" on the front panel.) First steps: 1 Press MENU. Press CH ▼ three times to highlight "Convergence" (the letters change to highlight the Setup icon (starts blinking). 2 Press VOL +. continued... 3.1 CHAPTER THREE: OPERATION Chapter Three OPERATION Turning the TV...

User Manual (user Manual) (ver.1.0) (English)
Page 33
... factory settings. • Choose Mild ("Mild Contrast") when viewing the TV in low light, or when playing video games. • Choose Custom if you can activate either Standard or Mild by pressing P.Mode (or by making a selection from the menu). Video icon will be highlighted (blinking). You can select "Custom" which automatically recalls your personalized picture settings. 1 Press MENU to display the VIDEO menu. 2 Press VOL - OPERATION Using Automatic Picture Settings...
... factory settings. • Choose Mild ("Mild Contrast") when viewing the TV in low light, or when playing video games. • Choose Custom if you can activate either Standard or Mild by pressing P.Mode (or by making a selection from the menu). Video icon will be highlighted (blinking). You can select "Custom" which automatically recalls your personalized picture settings. 1 Press MENU to display the VIDEO menu. 2 Press VOL - OPERATION Using Automatic Picture Settings...

User Manual (user Manual) (ver.1.0) (English)
Page 37
... code listed on the remote control. Press the "MODE" button to switch the remote control to operate your VCR. ▼ When your remote control is now set up, press the MODE button any time you enter 3 digits of your Samsung remote control, press SET. Your VCR should turn on . Chapter Four SPECIAL FEATURES Customizing Your Remote Control Your Samsung TV comes equipped with a "universal" remote control. If no other than one code listed, try the first one of the other codes listed for your TV's volume...
... code listed on the remote control. Press the "MODE" button to switch the remote control to operate your VCR. ▼ When your remote control is now set up, press the MODE button any time you enter 3 digits of your Samsung remote control, press SET. Your VCR should turn on . Chapter Four SPECIAL FEATURES Customizing Your Remote Control Your Samsung TV comes equipped with a "universal" remote control. If no other than one code listed, try the first one of the other codes listed for your TV's volume...

User Manual (user Manual) (ver.1.0) (English)
Page 42
... model PCJ533RF. 1 Press MENU to display the menu. ▼ Quick way to access captions menu: Simply press the Caption button on the tape's packaging: CC . In text mode, information unrelated to the program, such as well. All VCRs record the closed caption signal from television programs, so home-recorded video tapes also provide closed captions. SPECIAL FEATURES Viewing Closed Captions Your TV decodes and displays the closed captions that supplements the information in Field 1. (For example, Channel...
... model PCJ533RF. 1 Press MENU to display the menu. ▼ Quick way to access captions menu: Simply press the Caption button on the tape's packaging: CC . In text mode, information unrelated to the program, such as well. All VCRs record the closed caption signal from television programs, so home-recorded video tapes also provide closed captions. SPECIAL FEATURES Viewing Closed Captions Your TV decodes and displays the closed captions that supplements the information in Field 1. (For example, Channel...

User Manual (user Manual) (ver.1.0) (English)
Page 57
...:9 aspect ratio format for 30 seconds, then try this list of these troubleshooting tips apply, then call your nearest service center. Check all wire connections. No color, wrong colors or tints. Make sure the program is working. Possible Solution Try another channel. Adjust the antenna. Check the antenna connections. Adjust the picture settings. Press the "MODE" button to have a problem, first try operating it again. The TV won't turn on the screen. 5.1 CHAPTER FIVE: TROUBLESHOOTING Adjust the antenna. Make...
...:9 aspect ratio format for 30 seconds, then try this list of these troubleshooting tips apply, then call your nearest service center. Check all wire connections. No color, wrong colors or tints. Make sure the program is working. Possible Solution Try another channel. Adjust the antenna. Check the antenna connections. Adjust the picture settings. Press the "MODE" button to have a problem, first try operating it again. The TV won't turn on the screen. 5.1 CHAPTER FIVE: TROUBLESHOOTING Adjust the antenna. Make...
Service Guide
Page 3
... section marked "Instructions". Instructions to section 3. 3. If Service Bulletin states that repair is essential that are not available as per the micro kit section (3). Order part number for common fixes. Place order through Samsung Parts Department. Refer to enter, press "Mute 183" Geometric; to Service Bulletin Follow detailed Alignment/Adjustment instructions in this document are three adjustment modes: Convergence - The models covered in the service manual or the macro...
... section marked "Instructions". Instructions to section 3. 3. If Service Bulletin states that repair is essential that are not available as per the micro kit section (3). Order part number for common fixes. Place order through Samsung Parts Department. Refer to enter, press "Mute 183" Geometric; to Service Bulletin Follow detailed Alignment/Adjustment instructions in this document are three adjustment modes: Convergence - The models covered in the service manual or the macro...
Service Guide
Page 4
... audio operation, menu selections, or mechanical operations of these screens under warranty, contact Product/Technical Support for any mode where the screen is always dark or a screen image is replaced. However; This is selected. 4. The DTV input will result in delay in certain cases, a "special remote" is normally not covered by setting the option bytes. This means if an older version unit previously had a Macro kit installed, parts...
... audio operation, menu selections, or mechanical operations of these screens under warranty, contact Product/Technical Support for any mode where the screen is always dark or a screen image is replaced. However; This is selected. 4. The DTV input will result in delay in certain cases, a "special remote" is normally not covered by setting the option bytes. This means if an older version unit previously had a Macro kit installed, parts...
Service Guide
Page 5
If R802 is located in Main Board SOLUTION: 1. Change component. Before (code no) After (code no) R802 4.7ohm/3.85A(1404-001075) 001045) 4.7ohm/4.64A(1404- Service Bulletins SUBJECTS: Up-Grade (R802) SERVICE BULLETIN PRODUCT: PJT NO: PJT01 MODEL: HCJ552W / PCJ532RF / PCJ534RF PCJ612R / PCJ614R / PCJ522R BACKGROUND: When you received defect Projection TV, please check R802. Check R802 2. SAMSUNG PROJECTION TV SERVICE GUIDE Section 2 - If R802 is green color, change R802 as per parts list. * R802 is 4.75 ohm/3.85A(green color thermistor) 3. Last update: 3/14/01 3
If R802 is located in Main Board SOLUTION: 1. Change component. Before (code no) After (code no) R802 4.7ohm/3.85A(1404-001075) 001045) 4.7ohm/4.64A(1404- Service Bulletins SUBJECTS: Up-Grade (R802) SERVICE BULLETIN PRODUCT: PJT NO: PJT01 MODEL: HCJ552W / PCJ532RF / PCJ534RF PCJ612R / PCJ614R / PCJ522R BACKGROUND: When you received defect Projection TV, please check R802. Check R802 2. SAMSUNG PROJECTION TV SERVICE GUIDE Section 2 - If R802 is green color, change R802 as per parts list. * R802 is 4.75 ohm/3.85A(green color thermistor) 3. Last update: 3/14/01 3
Service Guide
Page 7
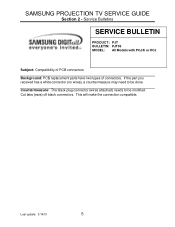
Countermeasure: The black plug connector (wires attached) needs to be modified. If the part you received has a white connector (no wires), a countermeasure may need to be done. Cut tabs (ears) off black connectors. Last update: 3/14/01 5 SAMSUNG PROJECTION TV SERVICE GUIDE Section 2 - Service Bulletins SERVICE BULLETIN PRODUCT: PJT BULLETIN: PJT03 MODEL: All Models with PCJ/K or HCJ Subject: Compatibility of PCB connectors Background: PCB replacement parts have two types of connectors. This will make the connection compatible.
Countermeasure: The black plug connector (wires attached) needs to be modified. If the part you received has a white connector (no wires), a countermeasure may need to be done. Cut tabs (ears) off black connectors. Last update: 3/14/01 5 SAMSUNG PROJECTION TV SERVICE GUIDE Section 2 - Service Bulletins SERVICE BULLETIN PRODUCT: PJT BULLETIN: PJT03 MODEL: All Models with PCJ/K or HCJ Subject: Compatibility of PCB connectors Background: PCB replacement parts have two types of connectors. This will make the connection compatible.
Service Guide
Page 8
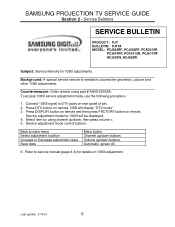
... 1080I signal to main menu Select adjustment location Increase or Decrease adjustment value Save data Menu button Channel up/down buttons Volume up /down buttons Automatic, power off. 6. Service adjustment mode for 1080I will display "DTV mode". 3. Select item by using part # AA59-00055A. Last update: 3/14/01 6 Press DISPLAY button on remote and then press FACTORY button on rear panel of set. 2. To access 1080I service adjustment mode, use the following procedure. 1. Service adjustment mode control buttons: Back to DTV jacks on remote. Subject: Service Remote for...
... 1080I signal to main menu Select adjustment location Increase or Decrease adjustment value Save data Menu button Channel up/down buttons Volume up /down buttons Automatic, power off. 6. Service adjustment mode for 1080I will display "DTV mode". 3. Select item by using part # AA59-00055A. Last update: 3/14/01 6 Press DISPLAY button on remote and then press FACTORY button on rear panel of set. 2. To access 1080I service adjustment mode, use the following procedure. 1. Service adjustment mode control buttons: Back to DTV jacks on remote. Subject: Service Remote for...
Service Guide
Page 15
... be changed as a unit and adjusted as described below ). Rancho Dominguez, CA 90220 1-800-634-8276 Last update: 3/14/01 13 Shield Convergence Board VR472 J120 5. Remove and reinstall chassis by following instructions in service bulletin 6. If the female part of this chassis; Note: • Set Top Box Adjustment, If set top box is used (1080i mode) perform procedure described in service manual. 2. SAMSUNG PROJECTION TV SERVICE GUIDE Section 4 - Micro Kit Instructions Important! Remove back panel...
... be changed as a unit and adjusted as described below ). Rancho Dominguez, CA 90220 1-800-634-8276 Last update: 3/14/01 13 Shield Convergence Board VR472 J120 5. Remove and reinstall chassis by following instructions in service bulletin 6. If the female part of this chassis; Note: • Set Top Box Adjustment, If set top box is used (1080i mode) perform procedure described in service manual. 2. SAMSUNG PROJECTION TV SERVICE GUIDE Section 4 - Micro Kit Instructions Important! Remove back panel...
Service Guide
Page 22
... contains other support data; service bulletins, BIOS files and our policy guide. SAMSUNG PROJECTION TV SERVICE GUIDE Section 7 - If the parts do not fix the problem and you need technical assistance: 973-601-6124 between 9:00 - 5:30 EST 2. To use these files you need Adobe Acrobat Viewer which can be resolved through normal means. Parts Issues If wrong or defective parts are available for download. Last update: 3/14...
... contains other support data; service bulletins, BIOS files and our policy guide. SAMSUNG PROJECTION TV SERVICE GUIDE Section 7 - If the parts do not fix the problem and you need technical assistance: 973-601-6124 between 9:00 - 5:30 EST 2. To use these files you need Adobe Acrobat Viewer which can be resolved through normal means. Parts Issues If wrong or defective parts are available for download. Last update: 3/14...
Service Guide
Page 42
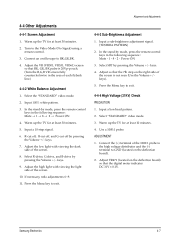
... high voltage distributor and the (-) terminal to GND (located on the right side of the screen is 20Vp-p each. (Turn the R,G,B VR screen fully counterclockwise in the area of each flyback line.) 4-4-2 White Balance Adjustment 1. Select SBT by pressing the Volume +/- Connect an oscilloscope to the Video Mode (No Signal) using a remote-control. 3. Input 100% white pattern. 3. Adjust the low light with viewing the light side of the screen. 8. If necessary, redo adjustments 6~9. 11. Use...
... high voltage distributor and the (-) terminal to GND (located on the right side of the screen is 20Vp-p each. (Turn the R,G,B VR screen fully counterclockwise in the area of each flyback line.) 4-4-2 White Balance Adjustment 1. Select SBT by pressing the Volume +/- Connect an oscilloscope to the Video Mode (No Signal) using a remote-control. 3. Input 100% white pattern. 3. Adjust the low light with viewing the light side of the screen. 8. If necessary, redo adjustments 6~9. 11. Use...
Service Guide
Page 43
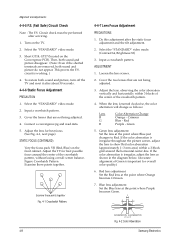
... R G B Color Aberration Change Orange - P L1 L2 RED ABERRATION BLUE ABERRATION L1, L2_< P Fig. 4-2 Color Aberration 4-8 Samsung Electronics Turn on the front cabinet. Connect a convergence jig and read data. 5. Adjust the TV for overall color quality.) 6. Examine these points together. Green 5. Select the ÒSTANDARDÓ video mode. 3. Cover the lenses that are removed, both sound and picture, turn off the TV and reset it after about 30 seconds. 4-4-6 Static Focus Adjustment PRECAUTION 1. Crimson Blue - If...
... R G B Color Aberration Change Orange - P L1 L2 RED ABERRATION BLUE ABERRATION L1, L2_< P Fig. 4-2 Color Aberration 4-8 Samsung Electronics Turn on the front cabinet. Connect a convergence jig and read data. 5. Adjust the TV for overall color quality.) 6. Examine these points together. Green 5. Select the ÒSTANDARDÓ video mode. 3. Cover the lenses that are removed, both sound and picture, turn off the TV and reset it after about 30 seconds. 4-4-6 Static Focus Adjustment PRECAUTION 1. Crimson Blue - If...


