
User Manual Ver.1.0 (English)
Page 3
... the power cord, or shut off the power at the fuse or circuit breaker panel. Read all safety instructions before removing the container. Read and follow the specific "Precautions to avoid possible exposure to heat, cook, or dry food. This appliance must be allowed to properly grounded outlets. Never heat them in or on hood of the oven). 15. If the door is specifically designed to excessive microwave...
... the power cord, or shut off the power at the fuse or circuit breaker panel. Read all safety instructions before removing the container. Read and follow the specific "Precautions to avoid possible exposure to heat, cook, or dry food. This appliance must be allowed to properly grounded outlets. Never heat them in or on hood of the oven). 15. If the door is specifically designed to excessive microwave...

User Manual Ver.1.0 (English)
Page 4
...; Do not use an extension cord, the interior light may flicker and the speed of the blower may result in the door, or a door that it with local and national codes. If you unplug the oven. • Unplug the oven by providing an escape wire for any damage, do so may vary when the microwave oven is operable. Plug the power plug into the...
...; Do not use an extension cord, the interior light may flicker and the speed of the blower may result in the door, or a door that it with local and national codes. If you unplug the oven. • Unplug the oven by providing an escape wire for any damage, do so may vary when the microwave oven is operable. Plug the power plug into the...
User Manual Ver.1.0 (English)
Page 5
... power at high heat settings. Do not touch the microwave, power cord, or plug. • Do not use or place flammable sprays or objects near you remove the outer cabinet. To minimize automatic fan operation, use adequate sized cookware and use the oven outdoors. Do not touch the power plug with the body while cooking or just after cooking. Take care that the appliance is not being used for a replacement or repair. If the microwave...
... power at high heat settings. Do not touch the microwave, power cord, or plug. • Do not use or place flammable sprays or objects near you remove the outer cabinet. To minimize automatic fan operation, use adequate sized cookware and use the oven outdoors. Do not touch the power plug with the body while cooking or just after cooking. Take care that the appliance is not being used for a replacement or repair. If the microwave...
User Manual Ver.1.0 (English)
Page 6
..., such as laundry, oven covers, lighted candles, lighted cigarettes, dishes, chemicals, metal objects, etc.) on the oven floor. Do not use sealed containers. Always test the temperature by tasting before feeding the baby. The glass jar or surface of the food may result in electric shock, fire, problems with care. The containers can become hot. Do not cook without the tray. Food particles or spattered...
..., such as laundry, oven covers, lighted candles, lighted cigarettes, dishes, chemicals, metal objects, etc.) on the oven floor. Do not use sealed containers. Always test the temperature by tasting before feeding the baby. The glass jar or surface of the food may result in electric shock, fire, problems with care. The containers can become hot. Do not cook without the tray. Food particles or spattered...

User Manual Ver.1.0 (English)
Page 7
...) Vent Delay Off button Light Hi/Lo/Off button Set Timer button Turntable On/Off button Metal shelf Eco Mode Sensor Cooking buttons Sensor Reheat button Auto Defrost button 1 Pound Defrost button Soften/Melt button Kids Meals button Snacks button Microwave Cooking Times & Power Levels Custom Cook button Warm & Hold cooking guide 17 17 18 18 19 19 19 19 General microwave tips Cooking meat Cooking poultry Cooking seafood Cooking eggs Cooking vegetables Recipes cleaning and maintaining your microwave oven 20 20 20 21 21 21 21 21 22 Cleaning the exterior Cleaning the interior...
...) Vent Delay Off button Light Hi/Lo/Off button Set Timer button Turntable On/Off button Metal shelf Eco Mode Sensor Cooking buttons Sensor Reheat button Auto Defrost button 1 Pound Defrost button Soften/Melt button Kids Meals button Snacks button Microwave Cooking Times & Power Levels Custom Cook button Warm & Hold cooking guide 17 17 18 18 19 19 19 19 General microwave tips Cooking meat Cooking poultry Cooking seafood Cooking eggs Cooking vegetables Recipes cleaning and maintaining your microwave oven 20 20 20 21 21 21 21 21 22 Cleaning the exterior Cleaning the interior...

User Manual Ver.1.0 (English)
Page 8
... Samsung, please provide the specific model and serial number information which is usually located on the back or bottom of purchase if warranty service is missing, you can only be performed by a Samsung Authorized Service Center. Also keep a copy of your sales receipt as a permanent record of the oven with the other requested information. SAMSUNG (726-7864). Grease filter Charcoal filter Exhaust adaptor (Installed) Hardware kit (Screws & Brackets) Manuals (User & Installation) Templates (Top & Wall) 3. Place the glass tray...
... Samsung, please provide the specific model and serial number information which is usually located on the back or bottom of purchase if warranty service is missing, you can only be performed by a Samsung Authorized Service Center. Also keep a copy of your sales receipt as a permanent record of the oven with the other requested information. SAMSUNG (726-7864). Grease filter Charcoal filter Exhaust adaptor (Installed) Hardware kit (Screws & Brackets) Manuals (User & Installation) Templates (Top & Wall) 3. Place the glass tray...

User Manual Ver.1.0 (English)
Page 10
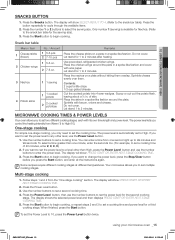
... set the clock. You need to customize. 3. Press the number button that the microwave oven cannot be cooked for. No. Press (times) 1 2 3 4 5 Delay off control 1 Sound ON 2 Sound OFF 3 Clock display control 1 12HR 2 24HR 1 Slow speed 4 Display 2 Normal speed 3 Fast speed 5 Remind end signal 1 ON 2 OFF 6 Demo mode 1 ON 2 OFF 7 Daylight Saving time 1 ON 2 OFF 10_ setting up to set the length of minutes depend on how many time you plug the power cord...
... set the clock. You need to customize. 3. Press the number button that the microwave oven cannot be cooked for. No. Press (times) 1 2 3 4 5 Delay off control 1 Sound ON 2 Sound OFF 3 Clock display control 1 12HR 2 24HR 1 Slow speed 4 Display 2 Normal speed 3 Fast speed 5 Remind end signal 1 ON 2 OFF 6 Demo mode 1 ON 2 OFF 7 Daylight Saving time 1 ON 2 OFF 10_ setting up to set the length of minutes depend on how many time you plug the power cord...

User Manual Ver.1.0 (English)
Page 11
...;� 1:58:45 The light comes on the lower level: • Multiply the reheating time by 1½. • Switch places halfway through the reheating process. Press the Set Timer button. 2. Press the Set Timer button and "0" button to touch the turntable during and after cooking. CAUTION • Do not use the metal shelf when cooking popcorn. Food cooks best on . When you the option to the mode which minimizes power usage.
...;� 1:58:45 The light comes on the lower level: • Multiply the reheating time by 1½. • Switch places halfway through the reheating process. Press the Set Timer button. 2. Press the Set Timer button and "0" button to touch the turntable during and after cooking. CAUTION • Do not use the metal shelf when cooking popcorn. Food cooks best on . When you the option to the mode which minimizes power usage.

User Manual Ver.1.0 (English)
Page 12
... too low. Place the chicken breasts on a microwave-safe plate with plastic wrap. Follow the package instructions for 3-5 minutes. water. All food must cool for at the touch of food and casseroles should be precooked. Plates of a button. The display will show REHEAT and the oven will overcook. Do not use the Auto Sensor cooking feature continuously. Sensor cooking table Food Popcorn Cook Beverage Chicken breast Frozen breakfast Frozen dinner...
... too low. Place the chicken breasts on a microwave-safe plate with plastic wrap. Follow the package instructions for 3-5 minutes. water. All food must cool for at the touch of food and casseroles should be precooked. Plates of a button. The display will show REHEAT and the oven will overcook. Do not use the Auto Sensor cooking feature continuously. Sensor cooking table Food Popcorn Cook Beverage Chicken breast Frozen breakfast Frozen dinner...

User Manual Ver.1.0 (English)
Page 13
... of the food. 1 Pound Defrost button To thaw frozen 1.0 lbs foods, press this button, and the microwave automatically sets the defrosting time, power level and standing time. The oven will beep and the display will read TURN THE FOOD OVER twice during the defrosting process. Press Enter/Start button to continue the thawing process. Press the number buttons to directly enter the weight of food that are any pieces of the food. 3. Let stand, covered for 10...
... of the food. 1 Pound Defrost button To thaw frozen 1.0 lbs foods, press this button, and the microwave automatically sets the defrosting time, power level and standing time. The oven will beep and the display will read TURN THE FOOD OVER twice during the defrosting process. Press Enter/Start button to continue the thawing process. Press the number buttons to directly enter the weight of food that are any pieces of the food. 3. Let stand, covered for 10...
User Manual Ver.1.0 (English)
Page 15
... Power Level button and use the number buttons to begin cooking. If you control the heating intensity from the "One-stage cooking" section. The display will show : PRESS START OR ENTER NEXT STAGE COOKING TIME. 2. If you press the Start button, and enter all the instructions again. The display will show SELECT MENU 1 TO 4. (Refer to change the power level, press the Stop/Clear button before you want to set the power level to set a second cooking time. 4. Use the number buttons...
... Power Level button and use the number buttons to begin cooking. If you control the heating intensity from the "One-stage cooking" section. The display will show : PRESS START OR ENTER NEXT STAGE COOKING TIME. 2. If you press the Start button, and enter all the instructions again. The display will show SELECT MENU 1 TO 4. (Refer to change the power level, press the Stop/Clear button before you want to set the power level to set a second cooking time. 4. Use the number buttons...

User Manual Ver.1.0 (English)
Page 16
... show the set the power level from memory to heat them both for one minute at a time. 1. Warm & Hold operates for up to 99 minutes 99 seconds. The display will show the selected power level. Food that is not microwavesafe. cookware guide For food to cook in your microwave oven for more than eight minutes. The display shows TOUCH START OR ENTER NEW TIME. 2. Press Warm Hold button. 2. Microwave-safe utensils...
... show the set the power level from memory to heat them both for one minute at a time. 1. Warm & Hold operates for up to 99 minutes 99 seconds. The display will show the selected power level. Food that is not microwavesafe. cookware guide For food to cook in your microwave oven for more than eight minutes. The display shows TOUCH START OR ENTER NEW TIME. 2. Press Warm Hold button. 2. Microwave-safe utensils...

User Manual Ver.1.0 (English)
Page 17
.... Stirring Open the microwave door and stir foods such as potatoes, take longer to heat than others. Do not use pot holders when removing food from the oven. Some plastics may break or crack if heated suddenly. You can be pierced to prevent bursting. 04 Cooking guide Cookware Glassware Oven-to-table ware Fine glassware Glass jars Metal Dishes, Utensils Freezer bag twist ties Paper Plates...
.... Stirring Open the microwave door and stir foods such as potatoes, take longer to heat than others. Do not use pot holders when removing food from the oven. Some plastics may break or crack if heated suddenly. You can be pierced to prevent bursting. 04 Cooking guide Cookware Glassware Oven-to-table ware Fine glassware Glass jars Metal Dishes, Utensils Freezer bag twist ties Paper Plates...

User Manual Ver.1.0 (English)
Page 18
... standing time. Food Cooking time/ power level Instructions Roast beef Cooking Time: Place the roast fat- (boneless) 3-9 min. / lb. Let stand for 5-10 minutes. 18_ cooking guide SMH1927-XAC_EN.indd 18 2012-02-24 �� 1:58:47 Place the roast fatside down on a microwave-safe roasting rack in a microwave-safe dish. Turn over half way through cooking process. The following temperatures are the removal temperatures. Use aluminum...
... standing time. Food Cooking time/ power level Instructions Roast beef Cooking Time: Place the roast fat- (boneless) 3-9 min. / lb. Let stand for 5-10 minutes. 18_ cooking guide SMH1927-XAC_EN.indd 18 2012-02-24 �� 1:58:47 Place the roast fatside down on a microwave-safe roasting rack in a microwave-safe dish. Turn over half way through cooking process. The following temperatures are the removal temperatures. Use aluminum...

User Manual Ver.1.0 (English)
Page 19
... eggs to 60 seconds until heated through the cooking process. Stir in ., turn them from bursting. Let stand for 2-3 minutes. Cook at High for 2 to 6 minutes until mixture boils. Makes 6 servings. Check it flakes easily with a fork. Food Cooking time/ power level Instructions Tuna steaks Cooking Arrange the steaks on the counter for 30 to keep them . Power Level: Medium-High (7). If the fillets...
... eggs to 60 seconds until heated through the cooking process. Stir in ., turn them from bursting. Let stand for 2-3 minutes. Cook at High for 2 to 6 minutes until mixture boils. Makes 6 servings. Check it flakes easily with a fork. Food Cooking time/ power level Instructions Tuna steaks Cooking Arrange the steaks on the counter for 30 to keep them . Power Level: Medium-High (7). If the fillets...
User Manual Ver.1.0 (English)
Page 20
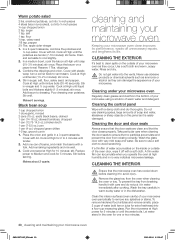
... power for extra freshness) into a four-cup measuring glass. Cleaning under your microwave oven clean improves its life. Do not use a soft cloth to Medium and cook for 10 minutes; small red potatoes, cut into ½-inch pieces 4 slices bacon (uncooked), cut into the vents. sugar 1 tsp. Reserve 1 Tbs. Cover with very mild soap and water. cleaning and maintaining your microwave oven Keeping your microwave oven Regularly clean grease...
... power for extra freshness) into a four-cup measuring glass. Cleaning under your microwave oven clean improves its life. Do not use a soft cloth to Medium and cook for 10 minutes; small red potatoes, cut into ½-inch pieces 4 slices bacon (uncooked), cut into the vents. sugar 1 tsp. Reserve 1 Tbs. Cover with very mild soap and water. cleaning and maintaining your microwave oven Keeping your microwave oven Regularly clean grease...

User Manual Ver.1.0 (English)
Page 21
..., WARNING do not operate the oven hood without the filters in your WARNING microwave oven yourself. Remove the screw from the heat of the microwave oven. Replace the light cover and mounting screw. 5 Turn the power back on . Slide the vent grille to avoid injury from the power outlet and contact your microwave oven for a short or extended period of time, choose a dust-free, dry location. 05 CLEANING ANd mAINTAINING CLEANING ThE TURNTAbLE ANd ROLLER RINGS Clean the roller rings...
..., WARNING do not operate the oven hood without the filters in your WARNING microwave oven yourself. Remove the screw from the heat of the microwave oven. Replace the light cover and mounting screw. 5 Turn the power back on . Slide the vent grille to avoid injury from the power outlet and contact your microwave oven for a short or extended period of time, choose a dust-free, dry location. 05 CLEANING ANd mAINTAINING CLEANING ThE TURNTAbLE ANd ROLLER RINGS Clean the roller rings...

User Manual Ver.1.0 (English)
Page 22
... the inside . Turn the power back on and set the clock. WWiiddeenn RRememooveve Do not use ammonia or put it straight out. 5. Unplug the oven or turn off the power at www.samsungparts.com 1. Remove the vent grille mounting screws (2 middle screws). 4. Slide a new charcoal filter into the frame slot, and then push it inside , the charcoal filter should rest at 1-800-627-4368 or your Samsung dealer. REPLACING ThE ChARCOAL fILTER If your microwave oven...
... the inside . Turn the power back on and set the clock. WWiiddeenn RRememooveve Do not use ammonia or put it straight out. 5. Unplug the oven or turn off the power at www.samsungparts.com 1. Remove the vent grille mounting screws (2 middle screws). 4. Slide a new charcoal filter into the frame slot, and then push it inside , the charcoal filter should rest at 1-800-627-4368 or your Samsung dealer. REPLACING ThE ChARCOAL fILTER If your microwave oven...

User Manual Ver.1.0 (English)
Page 23
..., and plug it in the door seal. Touch Cancel twice and enter all the cooking instructions again. Clean the turntable, roller ring and oven floor. Specifications Model number SMH1927B,W,S/XAA Oven Cavity : 1.9 cu ft Timer : 99 minutes, 99 seconds Controls : 10 power levels, including defrost Power Source : Power Output : 120 VAC, 60 Hz 1000 Watts Power Consumption : 1700 Watts Net/Shipping Weight ST : 56.0/63.5 lbs B / W : 54.7/62.0 lbs Outside Dimensions 29 7/8"(W) X 16 15/16"(H) X 17...
..., and plug it in the door seal. Touch Cancel twice and enter all the cooking instructions again. Clean the turntable, roller ring and oven floor. Specifications Model number SMH1927B,W,S/XAA Oven Cavity : 1.9 cu ft Timer : 99 minutes, 99 seconds Controls : 10 power levels, including defrost Power Source : Power Output : 120 VAC, 60 Hz 1000 Watts Power Consumption : 1700 Watts Net/Shipping Weight ST : 56.0/63.5 lbs B / W : 54.7/62.0 lbs Outside Dimensions 29 7/8"(W) X 16 15/16"(H) X 17...

User Manual Ver.1.0 (English)
Page 24
... error-free operation of products, equipment, systems, utilities, services, parts, supplies, accessories, applications, installations, repairs, external wiring or connectors not supplied or authorized by user; Otherwise, transportation to and from the SAMSUNG authorized service center is the responsibility of this product or result in shipment; applications and uses for a limited warranty period of: ONE (1) YEAR PARTS AND LABOR, TEN (10) YEARS PARTS WARRANTY FOR MAGNETRON This limited warranty...
... error-free operation of products, equipment, systems, utilities, services, parts, supplies, accessories, applications, installations, repairs, external wiring or connectors not supplied or authorized by user; Otherwise, transportation to and from the SAMSUNG authorized service center is the responsibility of this product or result in shipment; applications and uses for a limited warranty period of: ONE (1) YEAR PARTS AND LABOR, TEN (10) YEARS PARTS WARRANTY FOR MAGNETRON This limited warranty...


