Owners Manual
Page 2
... projection lens. THIS SYMBOL INDICATES THAT THERE ARE IMPORTANT OPERATING AND MAINTENANCE INSTRUCTIONS IN THE OWNER'S MANUAL WITH THIS UNIT. 2 SAFETY PRECAUTIONS WARNING : TO REDUCE THE RISK OF FIRE OR ELECTRIC SHOCK, DO NOT EXPOSE THIS APPLIANCE TO RAIN OR MOISTURE. If not, it in the way indicated. If your projector, and can reduce the service life of the projector cabinet for a considerable time. G Remote Control...
... projection lens. THIS SYMBOL INDICATES THAT THERE ARE IMPORTANT OPERATING AND MAINTENANCE INSTRUCTIONS IN THE OWNER'S MANUAL WITH THIS UNIT. 2 SAFETY PRECAUTIONS WARNING : TO REDUCE THE RISK OF FIRE OR ELECTRIC SHOCK, DO NOT EXPOSE THIS APPLIANCE TO RAIN OR MOISTURE. If not, it in the way indicated. If your projector, and can reduce the service life of the projector cabinet for a considerable time. G Remote Control...

Owners Manual
Page 3
... cabinet are covered by following conditions: a. e. Refer all warnings and instructions marked on the projector. Use a damp cloth for later use. Follow all servicing to rest on the marking label. The projector may cause hazards. d. Slots and openings in fire or electric shock. b. SAFETY INSTRUCTIONS All the safety and operating instructions should be operated only from the type of power source indicated on the power cord. Do not...
... cabinet are covered by following conditions: a. e. Refer all warnings and instructions marked on the projector. Use a damp cloth for later use. Follow all servicing to rest on the marking label. The projector may cause hazards. d. Slots and openings in fire or electric shock. b. SAFETY INSTRUCTIONS All the safety and operating instructions should be operated only from the type of power source indicated on the power cord. Do not...
Owners Manual
Page 4
... with this projector meets the requirement for use the plug with the cover omitted. The end of which is encouraged to try to which is required to radio communications. WARNING : THIS APPARATUS MUST BE EARTHED. Consult the dealer or an experienced radio/TV technician for your User Instructions. Model Numbers Trade Name Responsible party Address Telephone No. : PLC-XT11, PLC-XT16 : Sanyo : SANYO FISHER...
... with this projector meets the requirement for use the plug with the cover omitted. The end of which is encouraged to try to which is required to radio communications. WARNING : THIS APPARATUS MUST BE EARTHED. Consult the dealer or an experienced radio/TV technician for your User Instructions. Model Numbers Trade Name Responsible party Address Telephone No. : PLC-XT11, PLC-XT16 : Sanyo : SANYO FISHER...

Owners Manual
Page 5
... 14 REMOTE CONTROL BATTERIES INSTALLATION 15 TOP CONTROLS AND INDICATORS 16 SETTING MENU 36 OPERATING ON-SCREEN MENU 17 HOW TO OPERATE ON-SCREEN MENU 17 FLOW OF ON-SCREEN MENU OPERATION 17 APPENDIX 38 MENU BAR 18 BASIC OPERATION TURNING ON / OFF PROJECTOR ADJUSTING SCREEN ZOOM ADJUSTMENT FOCUS ADJUSTMENT LENS SHIFT ADJUSTMENT KEYSTONE ADJUSTMENT PICTURE FREEZE FUNCTION NO SHOW FUNCTION P-TIMER FUNCTION SOUND ADJUSTMENT LAMP REPLACEMENT 38 LAMP REPLACE 38 19 LAMP REPLACE COUNTER 39 OPERATING WIRELESS MOUSE 40 19 MAINTENANCE 41 20 WARNING TEMP. G Windows and...
... 14 REMOTE CONTROL BATTERIES INSTALLATION 15 TOP CONTROLS AND INDICATORS 16 SETTING MENU 36 OPERATING ON-SCREEN MENU 17 HOW TO OPERATE ON-SCREEN MENU 17 FLOW OF ON-SCREEN MENU OPERATION 17 APPENDIX 38 MENU BAR 18 BASIC OPERATION TURNING ON / OFF PROJECTOR ADJUSTING SCREEN ZOOM ADJUSTMENT FOCUS ADJUSTMENT LENS SHIFT ADJUSTMENT KEYSTONE ADJUSTMENT PICTURE FREEZE FUNCTION NO SHOW FUNCTION P-TIMER FUNCTION SOUND ADJUSTMENT LAMP REPLACEMENT 38 LAMP REPLACE 38 19 LAMP REPLACE COUNTER 39 OPERATING WIRELESS MOUSE 40 19 MAINTENANCE 41 20 WARNING TEMP. G Windows and...
Owners Manual
Page 6
... liquid crystal display (LCD) technology. When resolution of use . N One-Touch Auto PC Adjustment Incoming computer video signals are recognized and the best adjustment is optionally supplied. This function makes it easy to make a smart presentation on your computer is pressed. Zoom and focus can be operated through Wireless LAN by attaching Wireless imager that is automatically set up to the connected projector using the web browser on a projected screen. Projection Lamp is automatically turned on...
... liquid crystal display (LCD) technology. When resolution of use . N One-Touch Auto PC Adjustment Incoming computer video signals are recognized and the best adjustment is optionally supplied. This function makes it easy to make a smart presentation on your computer is pressed. Zoom and focus can be operated through Wireless LAN by attaching Wireless imager that is automatically set up to the connected projector using the web browser on a projected screen. Projection Lamp is automatically turned on...

Owners Manual
Page 12
... Projector NOTE : When connecting the cable, the power cords of your computer. CONNECTING PROJECTOR CONNECTING TO COMPUTER Cables used for connection (✽ = Cable or adapter is switched on. AUDIO IN - Pr / Cr USB USB Use one of these Control Cables corresponding with this projector.) • VGA Cable (HDB 15 pin) • USB Cable • Control Cable for SERIAL Port • MAC Adapter (When connecting to Macintosh computer) ✽ • DVI-Digital Cable (for Single Link T.M.D.S.) ✽ • DVI/VGA Adapter • Control Cable for ADB Port...
... Projector NOTE : When connecting the cable, the power cords of your computer. CONNECTING PROJECTOR CONNECTING TO COMPUTER Cables used for connection (✽ = Cable or adapter is switched on. AUDIO IN - Pr / Cr USB USB Use one of these Control Cables corresponding with this projector.) • VGA Cable (HDB 15 pin) • USB Cable • Control Cable for SERIAL Port • MAC Adapter (When connecting to Macintosh computer) ✽ • DVI-Digital Cable (for Single Link T.M.D.S.) ✽ • DVI/VGA Adapter • Control Cable for ADB Port...

Owners Manual
Page 14
... drag a selected screen object. (P40) LASER BUTTON Used to P37.) DIP SWITCH SETTING SW4 ........ When using Remote Control Unit, turn projector on or off . Set switches 1-3 as a PC mouse in table below are put on remote control. Laser beam is a class II laser; SELECT VOLUME+ MENU KEYSTONE LASER P-TIMERCOMPUTER 1 ZOOM COMPUTER 2 VIDEO FOCUS LENS POWER ON-OFF BUTTON Used to "ON." Lights green when drag ON position. (P40) ALL OFF MUTE BUTTON Used to mute sound. (P21) ON...
... drag a selected screen object. (P40) LASER BUTTON Used to P37.) DIP SWITCH SETTING SW4 ........ When using Remote Control Unit, turn projector on or off . Set switches 1-3 as a PC mouse in table below are put on remote control. Laser beam is a class II laser; SELECT VOLUME+ MENU KEYSTONE LASER P-TIMERCOMPUTER 1 ZOOM COMPUTER 2 VIDEO FOCUS LENS POWER ON-OFF BUTTON Used to "ON." Lights green when drag ON position. (P40) ALL OFF MUTE BUTTON Used to mute sound. (P21) ON...

Owners Manual
Page 15
... DIGITAL ZOOM +/- BEFORE OPERATION D.ZOOM BUTTON Used to batteries manufacturers instructions and local rules. 15 mode. (P30) MENU BUTTON Used to select input 60° source (VIDEO). (P31) Remote Control Batteries Installation 1 Remove battery compartment lid. Press lid downward and slide it. 2 Slide batteries into black image. (P21) FREEZE BUTTON Used to freeze picture. (P21) POINT (VOLUME +/-) BUTTONS Used to select an item or adjust value in front and rear of used as VOLUME +/- Two AA size...
... DIGITAL ZOOM +/- BEFORE OPERATION D.ZOOM BUTTON Used to batteries manufacturers instructions and local rules. 15 mode. (P30) MENU BUTTON Used to select input 60° source (VIDEO). (P31) Remote Control Batteries Installation 1 Remove battery compartment lid. Press lid downward and slide it. 2 Slide batteries into black image. (P21) FREEZE BUTTON Used to freeze picture. (P21) POINT (VOLUME +/-) BUTTONS Used to select an item or adjust value in front and rear of used as VOLUME +/- Two AA size...

Owners Manual
Page 16
... INDICATORS LAMP REPLACE INDICATOR Turns yellow when the life of the projection lamp draws to select an item or adjust value in Power Management mode. (P37) LAMP INDICATOR Becomes dim when the projector is ready to open or close MENU operation. (P17, 18) AUTO PC ADJ. They are also used to pan the image in DIGITAL ZOOM +/- INDICATOR Flashes red when internal projector temperature is too high. (P41) READY INDICATOR Lights green when the projector is turned on its top. BEFORE OPERATION TOP CONTROLS AND INDICATORS This projector...
... INDICATORS LAMP REPLACE INDICATOR Turns yellow when the life of the projection lamp draws to select an item or adjust value in Power Management mode. (P37) LAMP INDICATOR Becomes dim when the projector is ready to open or close MENU operation. (P17, 18) AUTO PC ADJ. They are also used to pan the image in DIGITAL ZOOM +/- INDICATOR Flashes red when internal projector temperature is too high. (P41) READY INDICATOR Lights green when the projector is turned on its top. BEFORE OPERATION TOP CONTROLS AND INDICATORS This projector...

Owners Manual
Page 18
...) IMAGE ADJUST MENU Used to adjust computer image. [Contrast/Brightness /Color Temp. /White Balance (R/G/B) /Gamma] (Refer to P29) SOUND MENU Used to adjust volume or mute sound. (Refer to P21) FOR VIDEO SOURCE Press MENU BUTTON while connecting to VIDEO input source. PC SYSTEM MENU Used to select computer system. (Refer to P22, 23) IMAGE SELECT MENU Used to select image level among Standard, Cinema and Image 1 ~ 4. (Refer to P33) SCREEN MENU Used to set size of projector or reset Lamp Replace Counter. (Refer to P36, 37) INPUT MENU Used to select input source...
...) IMAGE ADJUST MENU Used to adjust computer image. [Contrast/Brightness /Color Temp. /White Balance (R/G/B) /Gamma] (Refer to P29) SOUND MENU Used to adjust volume or mute sound. (Refer to P21) FOR VIDEO SOURCE Press MENU BUTTON while connecting to VIDEO input source. PC SYSTEM MENU Used to select computer system. (Refer to P22, 23) IMAGE SELECT MENU Used to select image level among Standard, Cinema and Image 1 ~ 4. (Refer to P33) SCREEN MENU Used to set size of projector or reset Lamp Replace Counter. (Refer to P36, 37) INPUT MENU Used to select input source...
Owners Manual
Page 19
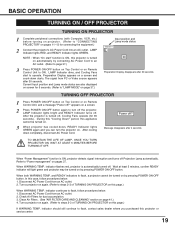
....) When WARNING TEMP. LAMP Indicator dims, and Cooling Fans start " function is ON, projector detects signal interruption and turns off , Cooling Fans operate (for 5 seconds. (Refer to "LAMP MODE" on page 37.) Input position and Lamp mode status Computer 1 30 Preparation Display disappears after 4 seconds. TURNING OFF PROJECTOR 1 Press POWER ON-OFF button on Top Control or on Remote Control Unit, and a message "Power off ? Power off ?" Wait at least 5 minutes, confirm READY indicator will light green and projector may be turned on...
....) When WARNING TEMP. LAMP Indicator dims, and Cooling Fans start " function is ON, projector detects signal interruption and turns off , Cooling Fans operate (for 5 seconds. (Refer to "LAMP MODE" on page 37.) Input position and Lamp mode status Computer 1 30 Preparation Display disappears after 4 seconds. TURNING OFF PROJECTOR 1 Press POWER ON-OFF button on Top Control or on Remote Control Unit, and a message "Power off ? Power off ?" Wait at least 5 minutes, confirm READY indicator will light green and projector may be turned on...
Owners Manual
Page 30
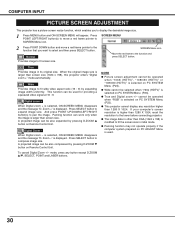
... XGA (1024 x 768) is selected on PC SYSTEM Menu (P23). To cancel Digital Zoom +/- mode, press any resolution higher than 1280 X 1024, reset the resolution to the lower before connecting projector. G Panning function may not operate properly if the computer system prepared on Remote Control Unit. Normal Provides image to pan the image. Zoom +" is used for providing a squeezed video signal at 16 : 9. Press SELECT button to SCREEN Menu icon. A projected image can be operated...
... XGA (1024 x 768) is selected on PC SYSTEM Menu (P23). To cancel Digital Zoom +/- mode, press any resolution higher than 1280 X 1024, reset the resolution to the lower before connecting projector. G Panning function may not operate properly if the computer system prepared on Remote Control Unit. Normal Provides image to pan the image. Zoom +" is used for providing a squeezed video signal at 16 : 9. Press SELECT button to SCREEN Menu icon. A projected image can be operated...
Owners Manual
Page 37
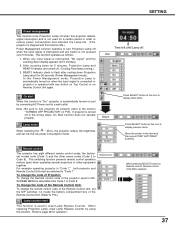
... set the DIP switches 1-3 inside the battery compartment box of Projector; the factoryset normal code (Code 1) and the other items. Press SELECT button at Remote control, Remote control code Menu appears. 37 For example operating projector in ONSCREEN MENU is operated with this Power Management mode, Projection Lamp is automatically turned on just by using this icon to display other seven codes (Code 2 to flash after cooling down display appears (for operation. To change the code of the projector used to reset Lamp Replace Counter. To change...
... set the DIP switches 1-3 inside the battery compartment box of Projector; the factoryset normal code (Code 1) and the other items. Press SELECT button at Remote control, Remote control code Menu appears. 37 For example operating projector in ONSCREEN MENU is operated with this Power Management mode, Projection Lamp is automatically turned on just by using this icon to display other seven codes (Code 2 to flash after cooling down display appears (for operation. To change the code of the projector used to reset Lamp Replace Counter. To change...
Owners Manual
Page 38
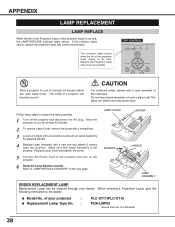
...projector. 6 Reset the Lamp Replace Counter. APPENDIX LAMP REPLACEMENT LAMP REPLACE When the life of the Projection Lamp of this indicator lights yellow, replace the projection lamp with a new one promptly. CAUTION For continued safety, replace with a new one and tighten 2 screws back into position. Do not drop a lamp assembly or touch a glass bulb! G Model No. of your dealer. LAMP COVER SCREWS SCREW HANDLE LAMP ASSEMBLY ORDER REPLACEMENT LAMP Replacement Lamp can be ordered through your projector : G Replacement Lamp Type No. : PLC-XT11/PLC-XT16 POA-LMP59 (Service Parts...
...projector. 6 Reset the Lamp Replace Counter. APPENDIX LAMP REPLACEMENT LAMP REPLACE When the life of the Projection Lamp of this indicator lights yellow, replace the projection lamp with a new one promptly. CAUTION For continued safety, replace with a new one and tighten 2 screws back into position. Do not drop a lamp assembly or touch a glass bulb! G Model No. of your dealer. LAMP COVER SCREWS SCREW HANDLE LAMP ASSEMBLY ORDER REPLACEMENT LAMP Replacement Lamp can be ordered through your projector : G Replacement Lamp Type No. : PLC-XT11/PLC-XT16 POA-LMP59 (Service Parts...

Owners Manual
Page 39
... use as a result of hours of lamp explosion. IF A LAMP EXPLODES, THE FOLLOWING SAFETY PRECAUTIONS SHOULD BE TAKEN. APPENDIX LAMP REPLACE COUNTER Be sure to reset the Lamp Replace Counter after the Lamp Assembly is reset, the LAMP REPLACE Indicator stops lighting. 1 Turn projector on, press MENU button and ON-SCREEN MENU will appear. When the Lamp Replace Counter is replaced. Contact an authorized service station for each lamp. G Lamp lifetime may result in which must be cleaned up , replace the lamp with a new...
... use as a result of hours of lamp explosion. IF A LAMP EXPLODES, THE FOLLOWING SAFETY PRECAUTIONS SHOULD BE TAKEN. APPENDIX LAMP REPLACE COUNTER Be sure to reset the Lamp Replace Counter after the Lamp Assembly is reset, the LAMP REPLACE Indicator stops lighting. 1 Turn projector on, press MENU button and ON-SCREEN MENU will appear. When the Lamp Replace Counter is replaced. Contact an authorized service station for each lamp. G Lamp lifetime may result in which must be cleaned up , replace the lamp with a new...

Owners Manual
Page 40
... the mouse driver (not supplied) is required. MENU KEYSTONE DRAG ON/OFF button Use this button and the POINT button to drag a selected screen object. Use the POINT button in Drag mode. INSTALLATION To use Wireless Remote Control Unit as a wireless mouse for most Personal Computers. When the computer is displayed on your computer to drag a selected screen object. DRAG ON D.ZOOM FREEZE NO SHOW INDICATOR LEFT CLICK button MUTE IMAGE LOCK This button has the...
... the mouse driver (not supplied) is required. MENU KEYSTONE DRAG ON/OFF button Use this button and the POINT button to drag a selected screen object. Use the POINT button in Drag mode. INSTALLATION To use Wireless Remote Control Unit as a wireless mouse for most Personal Computers. When the computer is displayed on your computer to drag a selected screen object. DRAG ON D.ZOOM FREEZE NO SHOW INDICATOR LEFT CLICK button MUTE IMAGE LOCK This button has the...

Owners Manual
Page 41
... AIR FILTER CARE AND CLEANING below : 1 Turn off when an internal temperature of the projector. CAUTION Do not operate the projector with a brush or wash out dust and particles. 4 Replace four Air Filters properly. INDICATOR WARNING TEMP. Contact service personnel from the AIR FILTER AC outlet. AIR FILTER CARE AND CLEANING Removable Air Filters prevents dust from accumulating on a lens, liquid crystal panels, or optical elements inside the projector. Usage in use, replace Lens Cover. 41 When the above checks, Cooling Fans...
... AIR FILTER CARE AND CLEANING below : 1 Turn off when an internal temperature of the projector. CAUTION Do not operate the projector with a brush or wash out dust and particles. 4 Replace four Air Filters properly. INDICATOR WARNING TEMP. Contact service personnel from the AIR FILTER AC outlet. AIR FILTER CARE AND CLEANING Removable Air Filters prevents dust from accumulating on a lens, liquid crystal panels, or optical elements inside the projector. Usage in use, replace Lens Cover. 41 When the above checks, Cooling Fans...

Owners Manual
Page 42
... section "CONNECTING PROJECTOR" on page 19.) G Check Projection Lamp. (Refer to display an image. NOTE : After pressing Power ON-OFF button to your computer or video equipment. LAMP indicator lights bright and READY indicator turns off before you select is at least 4.1' (1.2m) from audio input source. No image. and READY indicator. If both WARNING TEMP. G Check Projection Lens to a warm temperature location may result in order of focus. NOTE : Moving a projector from your computer and check your graphics controller rather...
... section "CONNECTING PROJECTOR" on page 19.) G Check Projection Lamp. (Refer to display an image. NOTE : After pressing Power ON-OFF button to your computer or video equipment. LAMP indicator lights bright and READY indicator turns off before you select is at least 4.1' (1.2m) from audio input source. No image. and READY indicator. If both WARNING TEMP. G Check Projection Lens to a warm temperature location may result in order of focus. NOTE : Moving a projector from your computer and check your graphics controller rather...
Owners Manual
Page 46
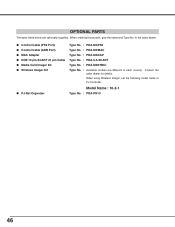
to PJ Controller. When using Wireless Imager, set the following model name to the sales dealer. When ordering those parts, give the name and Type No. Contact the sales dealer for details. G Control Cable (PS2 Port) G Control Cable (ADB Port) G MAC Adapter G HDB 15 pin-SCART 21 pin Cable G Media Card Imager Kit G Wireless Imager Kit Type No. : POA-MCPS2 Type No. : POA-MCMAC Type No. : POA-MACAP Type No...
to PJ Controller. When using Wireless Imager, set the following model name to the sales dealer. When ordering those parts, give the name and Type No. Contact the sales dealer for details. G Control Cable (PS2 Port) G Control Cable (ADB Port) G MAC Adapter G HDB 15 pin-SCART 21 pin Cable G Media Card Imager Kit G Wireless Imager Kit Type No. : POA-MCPS2 Type No. : POA-MCMAC Type No. : POA-MACAP Type No...

Owners Manual
Page 47
indicator keeps flashing.) Check and clean the Air Filter. If the projector is turned off ✽ When the life of the lamp. 47 Reset the Lamp Replace Counter after replacement of the projection lamp draws to an end, the LAMP REPLACE indicator lights yellow. APPENDIX INDICATORS AND PROJECTOR CONDITION Check the Indicators for service and checkup. The temperature inside the projector is being cooled down. It cannot be turned on . When this indicator lights yellow, replace the projection lamp with the POWER ON- ✽ OFF button. ✽ The projector is cooled...
indicator keeps flashing.) Check and clean the Air Filter. If the projector is turned off ✽ When the life of the lamp. 47 Reset the Lamp Replace Counter after replacement of the projection lamp draws to an end, the LAMP REPLACE indicator lights yellow. APPENDIX INDICATORS AND PROJECTOR CONDITION Check the Indicators for service and checkup. The temperature inside the projector is being cooled down. It cannot be turned on . When this indicator lights yellow, replace the projection lamp with the POWER ON- ✽ OFF button. ✽ The projector is cooled...


