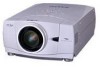

Instruction Manual, PLC-XP50
Page 2
... time. G Remote Control Unit, supplied to operate improperly, read this projector, emits the laser beam as possible. Do not look into a compartment or similarly enclosed, the minimum distances must be set in the "Trouble-shooting" section of the end of your projector seems to this manual thoroughly and operate the projector properly. THIS SYMBOL INDICATES THAT THERE ARE IMPORTANT OPERATING AND MAINTENANCE INSTRUCTIONS IN THE OWNER'S MANUAL WITH...
... time. G Remote Control Unit, supplied to operate improperly, read this projector, emits the laser beam as possible. Do not look into a compartment or similarly enclosed, the minimum distances must be set in the "Trouble-shooting" section of the end of your projector seems to this manual thoroughly and operate the projector properly. THIS SYMBOL INDICATES THAT THERE ARE IMPORTANT OPERATING AND MAINTENANCE INSTRUCTIONS IN THE OWNER'S MANUAL WITH...
Instruction Manual, PLC-XP50
Page 4
... receiving antenna. - Model Number Trade Name Responsible party Address Telephone No. : PLC-XP50/PLC-XP50L : Sanyo : SANYO FISHER COMPANY : 21605 Plummer Street, Chatsworth, California 91311 : (818)998-7322 AC POWER CORD REQUIREMENT The AC Power Cord supplied with this mains lead are designed to the equipment unless otherwise specified in the United States and Canada is connected. - red or orange). The Wires in this projector meets the...
... receiving antenna. - Model Number Trade Name Responsible party Address Telephone No. : PLC-XP50/PLC-XP50L : Sanyo : SANYO FISHER COMPANY : 21605 Plummer Street, Chatsworth, California 91311 : (818)998-7322 AC POWER CORD REQUIREMENT The AC Power Cord supplied with this mains lead are designed to the equipment unless otherwise specified in the United States and Canada is connected. - red or orange). The Wires in this projector meets the...
Instruction Manual, PLC-XP50
Page 5
... IMAGE ADJUSTMENTS 34 OPERATION OF REMOTE CONTROL 15 LASER POINTER FUNCTION 15 REMOTE CONTROL BATTERIES INSTALLATION 16 SETTING 37 TOP CONTROLS AND INDICATORS 17 OPERATING ON-SCREEN MENU 18 SETTING MENU 37 HOW TO OPERATE ON-SCREEN MENU 18 FLOW OF ON-SCREEN MENU OPERATION 18 MENU BAR 19 APPENDIX 41 BASIC OPERATION TURNING ON / OFF PROJECTOR ADJUSTING SCREEN ZOOM ADJUSTMENT FOCUS ADJUSTMENT LENS SHIFT ADJUSTMENT KEYSTONE ADJUSTMENT PICTURE FREEZE FUNCTION NO SHOW FUNCTION P-TIMER FUNCTION SOUND ADJUSTMENT 20 OPERATING WIRELESS MOUSE 41 MAINTENANCE 42 WARNING TEMP...
... IMAGE ADJUSTMENTS 34 OPERATION OF REMOTE CONTROL 15 LASER POINTER FUNCTION 15 REMOTE CONTROL BATTERIES INSTALLATION 16 SETTING 37 TOP CONTROLS AND INDICATORS 17 OPERATING ON-SCREEN MENU 18 SETTING MENU 37 HOW TO OPERATE ON-SCREEN MENU 18 FLOW OF ON-SCREEN MENU OPERATION 18 MENU BAR 19 APPENDIX 41 BASIC OPERATION TURNING ON / OFF PROJECTOR ADJUSTING SCREEN ZOOM ADJUSTMENT FOCUS ADJUSTMENT LENS SHIFT ADJUSTMENT KEYSTONE ADJUSTMENT PICTURE FREEZE FUNCTION NO SHOW FUNCTION P-TIMER FUNCTION SOUND ADJUSTMENT 20 OPERATING WIRELESS MOUSE 41 MAINTENANCE 42 WARNING TEMP...
Instruction Manual, PLC-XP50
Page 6
... resolution. Zoom and focus can be also adjusted with motordriven lens shift function. N Digital Zoom (for lower resolution. N Laser Pointer Function Remote Control Unit supplied with Remote Control Unit only. N Multilanguage Menu Display Operation menu is compressed into 1024 x 768 dots. N Compatibility This projector widely accepts various video and computer input signals including; G S-Video S-Video signal, such as a DVD player output high definition TV signals including 480i, 480p, 575i, 575p, 720p, 1035i or 1080i, can be connected. This...
... resolution. Zoom and focus can be also adjusted with motordriven lens shift function. N Digital Zoom (for lower resolution. N Laser Pointer Function Remote Control Unit supplied with Remote Control Unit only. N Multilanguage Menu Display Operation menu is compressed into 1024 x 768 dots. N Compatibility This projector widely accepts various video and computer input signals including; G S-Video S-Video signal, such as a DVD player output high definition TV signals including 480i, 480p, 575i, 575p, 720p, 1035i or 1080i, can be connected. This...

Instruction Manual, PLC-XP50
Page 13
...) Control Cable for Serial Port Terminal Control Cable Control Cable for PS/2 Port ✽ for Serial Port • Audio Cables (Mini Plug (stereo) x 2) ✽ IBM-compatible computer or Macintosh computer (VGA / SVGA / XGA / SXGA) Desktop type Laptop type Monitor Output Monitor Output or Monitor Input Monitor Output USB port Audio Output Serial port PS/2 port ADB port BNC Cable ✽ MAC Adapter ✽ Set slide switches according to ON DIP use before computer is switched on RESOLU- ON TION MODE that you turn...
...) Control Cable for Serial Port Terminal Control Cable Control Cable for PS/2 Port ✽ for Serial Port • Audio Cables (Mini Plug (stereo) x 2) ✽ IBM-compatible computer or Macintosh computer (VGA / SVGA / XGA / SXGA) Desktop type Laptop type Monitor Output Monitor Output or Monitor Input Monitor Output USB port Audio Output Serial port PS/2 port ADB port BNC Cable ✽ MAC Adapter ✽ Set slide switches according to ON DIP use before computer is switched on RESOLU- ON TION MODE that you turn...

Instruction Manual, PLC-XP50
Page 15
... look into the battery compartment box. Lights green when drag ON position. (P41) ALL OFF MUTE BUTTON Used to "ALL OFF" when it again. that you want to select remote control code. (Refer to operate Laser Pointer Function. SELECT VOLUME+ MENU KEYSTONE LASER P-TIMER INPUT 1 ZOOM COLOR.M INPUT 2 INPUT 3 FOCUS LENS NETWORK POWER ON-OFF BUTTON Used to turn it to mute sound. (P22) ON 1234 ALL-OFF SWITCH When using as a PC mouse in table...
... look into the battery compartment box. Lights green when drag ON position. (P41) ALL OFF MUTE BUTTON Used to "ALL OFF" when it again. that you want to select remote control code. (Refer to operate Laser Pointer Function. SELECT VOLUME+ MENU KEYSTONE LASER P-TIMER INPUT 1 ZOOM COLOR.M INPUT 2 INPUT 3 FOCUS LENS NETWORK POWER ON-OFF BUTTON Used to turn it to mute sound. (P22) ON 1234 ALL-OFF SWITCH When using as a PC mouse in table...

Instruction Manual, PLC-XP50
Page 16
... to expand or compress image in front and rear of used to batteries manufacturers instructions and local rules. mode. (P29) MENU BUTTON Used to select DIGITAL ZOOM +/- SELECT VOLUME+ MENU KEYSTONE P-TIMER BUTTON Used to operate PTIMER function. (P22) ZOOM BUTTON Used to adjust zoom. (P21) COLOR MANAGEMENT BUTTON Used to operate COLOR MANAGEMENT. (P34) LASER P-TIMER INPUT 1 ZOOM COLOR.M INPUT 2 INPUT 3 FOCUS LENS NETWORK NO SHOW BUTTON Used to select network input. (Option) Remote Control Batteries Installation 1 Remove battery compartment lid. G Replace two batteries at same...
... to expand or compress image in front and rear of used to batteries manufacturers instructions and local rules. mode. (P29) MENU BUTTON Used to select DIGITAL ZOOM +/- SELECT VOLUME+ MENU KEYSTONE P-TIMER BUTTON Used to operate PTIMER function. (P22) ZOOM BUTTON Used to adjust zoom. (P21) COLOR MANAGEMENT BUTTON Used to operate COLOR MANAGEMENT. (P34) LASER P-TIMER INPUT 1 ZOOM COLOR.M INPUT 2 INPUT 3 FOCUS LENS NETWORK NO SHOW BUTTON Used to select network input. (Option) Remote Control Batteries Installation 1 Remove battery compartment lid. G Replace two batteries at same...

Instruction Manual, PLC-XP50
Page 17
... input source. (P23, 24, 30) FOCUS BUTTON Used to adjust focus. (P21) LENS SHIFT BUTTON Used to select LENS SHIFT function. (P21) POINT (VOLUME + / - ) BUTTONS Used to pan image in DIGITAL ZOOM mode. (P29) 17 buttons. And bright when a projector is also used as VOLUME +/- AUTO PC ADJ. BEFORE OPERATION TOP CONTROLS AND INDICATORS This projector has CONTROL BUTTONS (TOP CONTROLS) and INDICATORS on . MENU BUTTON Used to open or close MENU operation. (P18, 19) ZOOM BUTTON Used to adjust zoom. (P21) POWER ON-OFF BUTTON Used to turn a projector on . It is in ON-SCREEN MENU...
... input source. (P23, 24, 30) FOCUS BUTTON Used to adjust focus. (P21) LENS SHIFT BUTTON Used to select LENS SHIFT function. (P21) POINT (VOLUME + / - ) BUTTONS Used to pan image in DIGITAL ZOOM mode. (P29) 17 buttons. And bright when a projector is also used as VOLUME +/- AUTO PC ADJ. BEFORE OPERATION TOP CONTROLS AND INDICATORS This projector has CONTROL BUTTONS (TOP CONTROLS) and INDICATORS on . MENU BUTTON Used to open or close MENU operation. (P18, 19) ZOOM BUTTON Used to adjust zoom. (P21) POWER ON-OFF BUTTON Used to turn a projector on . It is in ON-SCREEN MENU...

Instruction Manual, PLC-XP50
Page 18
... set function. 18 FOCUS LENS FLOW OF ON-SCREEN MENU OPERATION Display ON-SCREEN MENU MENU BAR MENU ICON 1 Press MENU button to select the item. Refer to following pages to adjust value or set selected function by pressing POINT RIGHT / LEFT buttons. SELECT BUTTON ITEM DATA Press POINT LEFT/RIGHT buttons to operate each adjustment on ON-SCREEN MENU. SELECT VOLUME+ MENU KEYSTONE POINT BUTTONS Used to show ITEM DATA. 4 Adjust ITEM DATA by pressing SELECT button. P-TIMERCOMPUTER 1 ZOOM COMPUTER 2 VIDEO SELECT BUTTON Used...
... set function. 18 FOCUS LENS FLOW OF ON-SCREEN MENU OPERATION Display ON-SCREEN MENU MENU BAR MENU ICON 1 Press MENU button to select the item. Refer to following pages to adjust value or set selected function by pressing POINT RIGHT / LEFT buttons. SELECT BUTTON ITEM DATA Press POINT LEFT/RIGHT buttons to operate each adjustment on ON-SCREEN MENU. SELECT VOLUME+ MENU KEYSTONE POINT BUTTONS Used to show ITEM DATA. 4 Adjust ITEM DATA by pressing SELECT button. P-TIMERCOMPUTER 1 ZOOM COMPUTER 2 VIDEO SELECT BUTTON Used...

Instruction Manual, PLC-XP50
Page 19
... /Auto picture control/Color temp. /White balance (R/G/B) /Sharpness/Gamma /Noise reduction/Progressive] (Refer to P33) Same function as Menu for PC source. BEFORE OPERATION MENU BAR FOR PC SOURCE Press MENU BUTTON while connecting to VIDEO input source. SOUND MENU Used to adjust volume or mute sound. (Refer to P22) INPUT MENU Used to select input source (Input 1, Input 2 or Input 3). (Refer to P30) IMAGE SELECT MENU Used to select image level among Standard, Real and Image 1 ~ 4. (Refer to P28) SCREEN MENU Used to adjust size of image. [Normal / True / Wide / Digital zoom...
... /Auto picture control/Color temp. /White balance (R/G/B) /Sharpness/Gamma /Noise reduction/Progressive] (Refer to P33) Same function as Menu for PC source. BEFORE OPERATION MENU BAR FOR PC SOURCE Press MENU BUTTON while connecting to VIDEO input source. SOUND MENU Used to adjust volume or mute sound. (Refer to P22) INPUT MENU Used to select input source (Input 1, Input 2 or Input 3). (Refer to P30) IMAGE SELECT MENU Used to select image level among Standard, Real and Image 1 ~ 4. (Refer to P28) SCREEN MENU Used to adjust size of image. [Normal / True / Wide / Digital zoom...

Instruction Manual, PLC-XP50
Page 20
... WARNING TEMP. LAMP Indicator lights RED, and READY Indicator lights GREEN. Signal from PC or Video source appears after 30 seconds. During this projector is turned on automatically by connecting AC Power Cord to an AC outlet. (Refer to ON. If using the projector continuously for one hour at least once during a 24 hour period. After projector is flashing, projector cannot be turned on Remote Control Unit, and a message "Power off the Projection Lamp automatically. TO MAINTAIN LIFE OF LAMP, ONCE YOU TURN PROJECTOR ON...
... WARNING TEMP. LAMP Indicator lights RED, and READY Indicator lights GREEN. Signal from PC or Video source appears after 30 seconds. During this projector is turned on automatically by connecting AC Power Cord to an AC outlet. (Refer to ON. If using the projector continuously for one hour at least once during a 24 hour period. After projector is flashing, projector cannot be turned on Remote Control Unit, and a message "Power off the Projection Lamp automatically. TO MAINTAIN LIFE OF LAMP, ONCE YOU TURN PROJECTOR ON...

Instruction Manual, PLC-XP50
Page 39
... change the code of the projector used in "Code 7," both projector and Remote Control Unit must be projected if a signal starts being set time is automatically turned on P20). If "Shut down starts for power management are "Ready" and "5 Min". When a SELECT button is pressed, the adjustment screen is canceled. Note ; If "Off" is selected The power management function is displayed. SETTING Power management This projector is selected 2) When the set . The factory default settings for the time being input or...
... change the code of the projector used in "Code 7," both projector and Remote Control Unit must be projected if a signal starts being set time is automatically turned on P20). If "Shut down starts for power management are "Ready" and "5 Min". When a SELECT button is pressed, the adjustment screen is canceled. Note ; If "Off" is selected The power management function is displayed. SETTING Power management This projector is selected 2) When the set . The factory default settings for the time being input or...

Instruction Manual, PLC-XP50
Page 41
... button, DRAG ON INDICATOR lights green and the remote control is switched on Wireless Remote Control Unit. DRAG ON D.ZOOM FREEZE NO SHOW INDICATOR LEFT CLICK button MUTE IMAGE LOCK This button has the same function as a wireless mouse for Serial Port (supplied). VOLUME- Use the POINT button in your computer to drag a selected screen object. SELECT VOLUME+ RIGHT CLICK button This button has the same function as Wireless Mouse for a Personal Computer, installation of this projector with Control Cable...
... button, DRAG ON INDICATOR lights green and the remote control is switched on Wireless Remote Control Unit. DRAG ON D.ZOOM FREEZE NO SHOW INDICATOR LEFT CLICK button MUTE IMAGE LOCK This button has the same function as a wireless mouse for Serial Port (supplied). VOLUME- Use the POINT button in your computer to drag a selected screen object. SELECT VOLUME+ RIGHT CLICK button This button has the same function as Wireless Mouse for a Personal Computer, installation of this projector with Control Cable...
Instruction Manual, PLC-XP50
Page 44
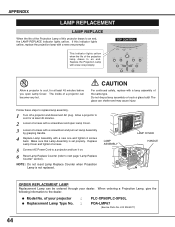
... 2 screws. 5 Connect AC Power Cord to a projector and turn it on. 6 Reset Lamp Replace Counter (refer to replace lamp assembly. 1 Turn off a projector and disconnect AC plug. G Model No. Do not drop a lamp assembly or touch a glass bulb! Follow these steps to next page "Lamp Replace Counter" section). Make sure that Lamp Assembly is not replaced. of the same type. LAMP ASSEMBLY LAMP COVER HANDLE ORDER REPLACEMENT LAMP Replacement Lamp can be ordered through your projector : G Replacement Lamp Type No. : PLC-XP50/PLC-XP50L POA...
... 2 screws. 5 Connect AC Power Cord to a projector and turn it on. 6 Reset Lamp Replace Counter (refer to replace lamp assembly. 1 Turn off a projector and disconnect AC plug. G Model No. Do not drop a lamp assembly or touch a glass bulb! Follow these steps to next page "Lamp Replace Counter" section). Make sure that Lamp Assembly is not replaced. of the same type. LAMP ASSEMBLY LAMP COVER HANDLE ORDER REPLACEMENT LAMP Replacement Lamp can be ordered through your projector : G Replacement Lamp Type No. : PLC-XP50/PLC-XP50L POA...

Instruction Manual, PLC-XP50
Page 45
... projector service. No one IMMEDIATELY after the Lamp Assembly is reset, the LAMP REPLACE Indicator stops lighting. 1 Turn projector on, press MENU button and ON-SCREEN MENU will appear. Move the pointer to the environment of use of lamp explosion. When the Lamp Replace Counter is replaced. Press POINT LEFT/RIGHT button(s) to move a red frame pointer to SETTING Menu icon (refer to page 40). 2 Press POINT UP/DOWN button to move a red frame pointer to reset Lamp Replace Counter...
... projector service. No one IMMEDIATELY after the Lamp Assembly is reset, the LAMP REPLACE Indicator stops lighting. 1 Turn projector on, press MENU button and ON-SCREEN MENU will appear. Move the pointer to the environment of use of lamp explosion. When the Lamp Replace Counter is replaced. Press POINT LEFT/RIGHT button(s) to move a red frame pointer to SETTING Menu icon (refer to page 40). 2 Press POINT UP/DOWN button to move a red frame pointer to reset Lamp Replace Counter...

Instruction Manual, PLC-XP50
Page 46
...button to display an image. No sound. G Check WARNING TEMP. NOTE : Moving a projector from a projector. G Make sure temperature is switched on , it needs cleaning. G Press MUTE button. 46 Check cable connection. Verify that all computer, video and power cord are not seen during Operation. G Make sure READY Indicator lights. Image is corresponding with a projector. (When you reconnect a projector, be turned on page 38.) G Check connection between your computer monitor's display. Some displays are properly connected. 3. If both WARNING TEMP. and READY indicator flashes...
...button to display an image. No sound. G Check WARNING TEMP. NOTE : Moving a projector from a projector. G Make sure temperature is switched on , it needs cleaning. G Press MUTE button. 46 Check cable connection. Verify that all computer, video and power cord are not seen during Operation. G Make sure READY Indicator lights. Image is corresponding with a projector. (When you reconnect a projector, be turned on page 38.) G Check connection between your computer monitor's display. Some displays are properly connected. 3. If both WARNING TEMP. and READY indicator flashes...

Instruction Manual, PLC-XP50
Page 48
... and the Ready indicator will go out. Reset the Lamp Replace Counter after replacement of the projector exceeds the normal level. It cannot be turned on until the READY indicator lights green. mal, the READY indicator lights green and the projector can be turned on . (The WARNING TEMP. It may cause electric shock or a fire hazard. ✽ The projector is operating normally. The Warning Temp. indicator keeps flashing.) Check and clean the Air Filter. If the projector is being cooled...
... and the Ready indicator will go out. Reset the Lamp Replace Counter after replacement of the projector exceeds the normal level. It cannot be turned on until the READY indicator lights green. mal, the READY indicator lights green and the projector can be turned on . (The WARNING TEMP. It may cause electric shock or a fire hazard. ✽ The projector is operating normally. The Warning Temp. indicator keeps flashing.) Check and clean the Air Filter. If the projector is being cooled...

Instruction Manual, PLC-XP50
Page 51
.../Off Image adjust Scale Position Scale Position On/Off On/Off On/Off Off/Ready/Shut down On/Off Code 1 Code 2 Code 3 Code 4 Code 5 Code 6 Code 7 Code 8 Quit Mouse Projector Off Control panel Remote control Yes/No Yes/No Contrast 0 - 63 Brightness 0 - 63 Color 0 - 63 Tint 0 - 63 Color management 0 - 63 Auto picture control Off/L1/L2 Color temp. System Setting Sound Language Lamp mode Keystone Aspect V Aspect H Anamorphic Blue back Display Menu position Logo Ceiling Rear Power management On start Remote control code USB Key lock Lamp counter reset Factory default Volume Built...
.../Off Image adjust Scale Position Scale Position On/Off On/Off On/Off Off/Ready/Shut down On/Off Code 1 Code 2 Code 3 Code 4 Code 5 Code 6 Code 7 Code 8 Quit Mouse Projector Off Control panel Remote control Yes/No Yes/No Contrast 0 - 63 Brightness 0 - 63 Color 0 - 63 Tint 0 - 63 Color management 0 - 63 Auto picture control Off/L1/L2 Color temp. System Setting Sound Language Lamp mode Keystone Aspect V Aspect H Anamorphic Blue back Display Menu position Logo Ceiling Rear Power management On start Remote control code USB Key lock Lamp counter reset Factory default Volume Built...
Instruction Manual, PLC-XP50
Page 52
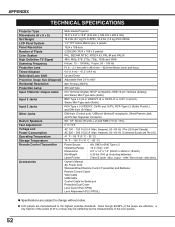
...Manual AC Power Cord Wireless/Wired Remote Control Transmitter and Batteries Remote Control Cable VGA Cable USB Cable Control Cable for Serial port Protective Dust Cover Lens Cover (PLC-XP50) Lens Attachment (PLC-XP50L) G Specifications are subject to the highest possible standards. G LCD panels are effective, a tiny fraction of the pixels (0.01% or less) may be ineffective by the characteristics of Pixels Color System High Definition TV Signal Scanning Frequency Projection Lens Throw distance Motorized Lens Shift Projection Image Size (Diagonal) Horizontal Resolution Projection Lamp Input...
...Manual AC Power Cord Wireless/Wired Remote Control Transmitter and Batteries Remote Control Cable VGA Cable USB Cable Control Cable for Serial port Protective Dust Cover Lens Cover (PLC-XP50) Lens Attachment (PLC-XP50L) G Specifications are subject to the highest possible standards. G LCD panels are effective, a tiny fraction of the pixels (0.01% or less) may be ineffective by the characteristics of Pixels Color System High Definition TV Signal Scanning Frequency Projection Lens Throw distance Motorized Lens Shift Projection Image Size (Diagonal) Horizontal Resolution Projection Lamp Input...

Instruction Manual, PLC-XP50
Page 54
... Type No. This feature enables you to use the projector for wide variety of the lens, always contact the sales dealer. It may cause injury. APPENDIX OPTIONAL PARTS The parts listed below are sold separately. G Control Cable (PS2 Port) G Control Cable (ADB Port) G MAC Adapter G DVI Cable G HDB 15 pin-SCART 21 pin Cable G Long Zoom Lens G Ultra Long Zoom Lens G Short Zoom Lens G Short Fixed Lens G PJ-Net Organizer Type No. : POA...
... Type No. This feature enables you to use the projector for wide variety of the lens, always contact the sales dealer. It may cause injury. APPENDIX OPTIONAL PARTS The parts listed below are sold separately. G Control Cable (PS2 Port) G Control Cable (ADB Port) G MAC Adapter G DVI Cable G HDB 15 pin-SCART 21 pin Cable G Long Zoom Lens G Ultra Long Zoom Lens G Short Zoom Lens G Short Fixed Lens G PJ-Net Organizer Type No. : POA...


