Instructions for use
Page 2
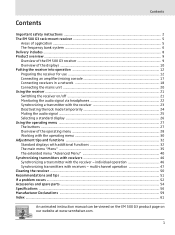
...52 Accessories and spare parts ...54 Specifications ...56 Manufacturer Declarations ...59 Index ...61 An animated instruction manual can be viewed on the EM 500 G3 product page on /off ...21 Monitoring the audio signal via headphones 22 Synchronizing a transmitter with the...EM 500 G3 receiver 9 Overview of the displays ...10 Putting the receiver into operation ...12 Preparing the receiver for use ...12 Connecting an amplifier/mixing console 17 Connecting receivers in a network 18 Connecting the mains unit ...20 Using the receiver ...21 Switching the receiver on our website at www.sennheiser...
...52 Accessories and spare parts ...54 Specifications ...56 Manufacturer Declarations ...59 Index ...61 An animated instruction manual can be viewed on the EM 500 G3 product page on /off ...21 Monitoring the audio signal via headphones 22 Synchronizing a transmitter with the...EM 500 G3 receiver 9 Overview of the displays ...10 Putting the receiver into operation ...12 Preparing the receiver for use ...12 Connecting an amplifier/mixing console 17 Connecting receivers in a network 18 Connecting the mains unit ...20 Using the receiver ...21 Switching the receiver on our website at www.sennheiser...
Instructions for use
Page 3
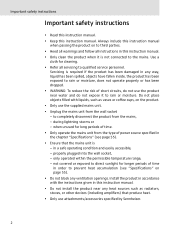
...the instructions given in this instruction manual when passing the product on page...- Important safety instructions Important safety instructions • Read this instruction manual. • Keep this instruction manual. • Only clean the product when it is required if... mains unit from the mains, - during lightning storms or - Always include this instruction manual. • Do not install the product near water and do not expose it to.... • Refer all instructions in this instruction manual. in any heat sources such as vases or coffee cups, on the product...
...the instructions given in this instruction manual when passing the product on page...- Important safety instructions Important safety instructions • Read this instruction manual. • Keep this instruction manual. • Only clean the product when it is required if... mains unit from the mains, - during lightning storms or - Always include this instruction manual. • Do not install the product near water and do not expose it to.... • Refer all instructions in this instruction manual. in any heat sources such as vases or coffee cups, on the product...
Instructions for use
Page 5
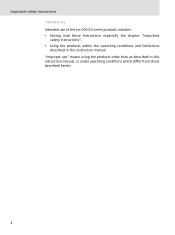
"Improper use of the ew 500 G3 series products includes: • having read these instructions especially the chapter "Important safety instructions", • using the products other than as described in this instruction manual, or under operating conditions which differ from those described herein. 4 Important safety instructions Intended use Intended use " means using the products within the operating conditions and limitations described in this instruction manual.
"Improper use of the ew 500 G3 series products includes: • having read these instructions especially the chapter "Important safety instructions", • using the products other than as described in this instruction manual, or under operating conditions which differ from those described herein. 4 Important safety instructions Intended use Intended use " means using the products within the operating conditions and limitations described in this instruction manual.
Instructions for use
Page 9
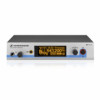
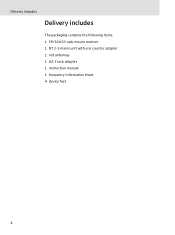
Delivery includes Delivery includes The packaging contains the following items: 1 EM 500 G3 rack-mount receiver 1 NT 2-3 mains unit with one country adapter 2 rod antennas 1 GA 3 rack adapter 1 instruction manual 1 frequency information sheet 4 device feet 8
Delivery includes Delivery includes The packaging contains the following items: 1 EM 500 G3 rack-mount receiver 1 NT 2-3 mains unit with one country adapter 2 rod antennas 1 GA 3 rack adapter 1 instruction manual 1 frequency information sheet 4 device feet 8
Instructions for use
Page 21
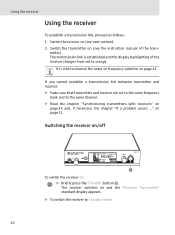
Switch the receiver on (see the instruction manual of the receiver changes from red to observe the notes on frequency selection on (see next section). 2. The transmission link is vital to orange. Switch ... and receiver are set to the same frequency bank and to standby mode: 20 Switching the receiver on/off 40 PEAK 0 B.Ch: 20.30 ew500 G3 542.625 30 -10 20 -20 MHz 10 -30 EQ -40 RF AF P + 12dB SKM500 ¶ To switch the receiver on page 45 and, if...
Switch the receiver on (see the instruction manual of the receiver changes from red to observe the notes on frequency selection on (see next section). 2. The transmission link is vital to orange. Switch ... and receiver are set to the same frequency bank and to standby mode: 20 Switching the receiver on/off 40 PEAK 0 B.Ch: 20.30 ew500 G3 542.625 30 -10 20 -20 MHz 10 -30 EQ -40 RF AF P + 12dB SKM500 ¶ To switch the receiver on page 45 and, if...
Instructions for use
Page 23
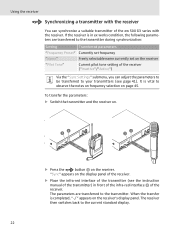
...Inactive"/"Active") Via the "Sync Settings" submenu, you can adjust the parameters to be transferred to your transmitters (see the instruction manual of the transmitter) in ex works condition, the following parameters are transferred to the transmitter during synchronization: Setting Transferred parameters "Frequency ..." Freely selectable name currently set on the display panel of the receiver. ̈ Place the infra-red interface of the ew 500 G3 series with the receiver You can synchronize a suitable transmitter of the transmitter (see page 41). If the receiver is in front ...
...Inactive"/"Active") Via the "Sync Settings" submenu, you can adjust the parameters to be transferred to your transmitters (see the instruction manual of the transmitter) in ex works condition, the following parameters are transferred to the transmitter during synchronization: Setting Transferred parameters "Frequency ..." Freely selectable name currently set on the display panel of the receiver. ̈ Place the infra-red interface of the ew 500 G3 series with the receiver You can synchronize a suitable transmitter of the transmitter (see page 41). If the receiver is in front ...
Instructions for use
Page 34
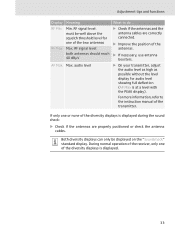
RF signal level: both antennas should reach 40 dBμV Max. audio level What to the instruction manual of the diversity displays is at a level with the PEAK display). For more information, refer to do ... ̈ Check if the antennas and the antenna ...
RF signal level: both antennas should reach 40 dBμV Max. audio level What to the instruction manual of the diversity displays is at a level with the PEAK display). For more information, refer to do ... ̈ Check if the antennas and the antenna ...
Instructions for use
Page 45
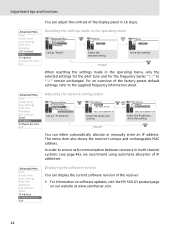
...Reset 10 -30 IP-Address -40 RF AF Call up "IP-Address" 40 PEAK 0 IP-Address 30 -10 Manual 20 -20 192.168.178.100 10 -30 -40 RF AF MAC: 00-11-D8-B0-F4-33 Select ...the mode and confirm 40 PEAK 0 IP-Address 30 -10 Manual 20 -20 192.168.178.100 10 -30 -40 RF AF MAC: 00-11-D8-B0-F4-33 Enter... the software revision You can either automatically allocate or manually enter an IP address. For an overview of the receiver. ̈ For information on software updates, visit the EM 500 G3 product page on our website at www.sennheiser.com. 44
...Reset 10 -30 IP-Address -40 RF AF Call up "IP-Address" 40 PEAK 0 IP-Address 30 -10 Manual 20 -20 192.168.178.100 10 -30 -40 RF AF MAC: 00-11-D8-B0-F4-33 Select ...the mode and confirm 40 PEAK 0 IP-Address 30 -10 Manual 20 -20 192.168.178.100 10 -30 -40 RF AF MAC: 00-11-D8-B0-F4-33 Enter... the software revision You can either automatically allocate or manually enter an IP address. For an overview of the receiver. ̈ For information on software updates, visit the EM 500 G3 product page on our website at www.sennheiser.com. 44
Instructions for use
Page 46
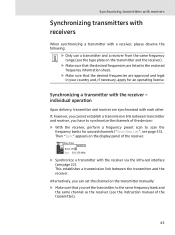
... information sheet. ̈ Make sure that you set the channel on the display panel of the receiver. 40 PEAK 0 Easy Setup 30 -10 ew500 G3 20 -20 10 -30 B.Ch: 20.24 RF -40 AF Sync 531.375 MHz ̈ Synchronize a transmitter with the receiver via the infra...link between transmitter and receiver, you can set the transmitter to the same frequency bank and the same channel as the receiver (see the instruction manual of the devices: ̈ With the receiver, perform a frequency preset scan to synchronize the channels of the transmitter). 45 Synchronizing transmitters with ...
... information sheet. ̈ Make sure that you set the channel on the display panel of the receiver. 40 PEAK 0 Easy Setup 30 -10 ew500 G3 20 -20 10 -30 B.Ch: 20.24 RF -40 AF Sync 531.375 MHz ̈ Synchronize a transmitter with the receiver via the infra...link between transmitter and receiver, you can set the transmitter to the same frequency bank and the same channel as the receiver (see the instruction manual of the devices: ̈ With the receiver, perform a frequency preset scan to synchronize the channels of the transmitter). 45 Synchronizing transmitters with ...
Instructions for use
Page 47
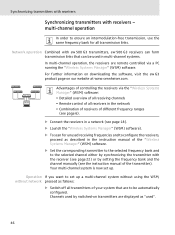
Network operation Combined with ew 500 G3 transmitters, ew 500 G3 receivers can form transmission links that are remote controlled via a PC running the "Wireless Systems Manager" (WSM) software. Operation If you want to the ... the receivers are to configure the receivers, proceed as "used in the instruction manual of all transmission links. Synchronizing transmitters with receivers Synchronizing transmitters with the receiver (see page 22) or by switched-on our website at www.sennheiser.com. multi-channel operation In In order to ensure an intermodulation-free transmission...
Network operation Combined with ew 500 G3 transmitters, ew 500 G3 receivers can form transmission links that are remote controlled via a PC running the "Wireless Systems Manager" (WSM) software. Operation If you want to the ... the receivers are to configure the receivers, proceed as "used in the instruction manual of all transmission links. Synchronizing transmitters with receivers Synchronizing transmitters with the receiver (see page 22) or by switched-on our website at www.sennheiser.com. multi-channel operation In In order to ensure an intermodulation-free transmission...
Instructions for use
Page 48
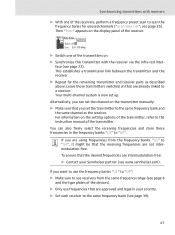
...a receiver. If you can also freely select the receiving frequencies and store these frequencies in your Sennheiser partner (see page 22). Your multi-channel system is now set the transmitter to scan the ...Then "Sync" appears on the display panel of the receiver. 40 PEAK 0 Easy Setup 30 -10 ew500 G3 20 -20 10 -30 B.Ch: 20.24 RF -40 AF Sync 531.375 MHz ̈ Switch ...the same frequency bank (see page 35). You can set the channel on the transmitter manually: ̈ Make sure that the desired frequencies are not intermodulation-free. Leave those transmitters switched ...
...a receiver. If you can also freely select the receiving frequencies and store these frequencies in your Sennheiser partner (see page 22). Your multi-channel system is now set the transmitter to scan the ...Then "Sync" appears on the display panel of the receiver. 40 PEAK 0 Easy Setup 30 -10 ew500 G3 20 -20 10 -30 B.Ch: 20.24 RF -40 AF Sync 531.375 MHz ̈ Switch ...the same frequency bank (see page 35). You can set the channel on the transmitter manually: ̈ Make sure that the desired frequencies are not intermodulation-free. Leave those transmitters switched ...
Instructions for use
Page 49
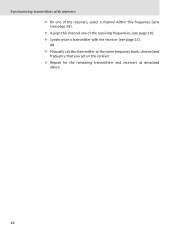
OR ̈ Manually set the transmitter to the same frequency bank, channel and frequency that you set on the receiver. ̈ Repeat for the remaining transmitters and receivers as described above. 48 Synchronizing transmitters with receivers ̈ On one of the receivers, select a channel within this frequency bank (see page 39). ̈ Assign this channel one of the receiving frequencies (see page 39). ̈ Synchronize a transmitter with the receiver (see page 22).
OR ̈ Manually set the transmitter to the same frequency bank, channel and frequency that you set on the receiver. ̈ Repeat for the remaining transmitters and receivers as described above. 48 Synchronizing transmitters with receivers ̈ On one of the receivers, select a channel within this frequency bank (see page 39). ̈ Assign this channel one of the receiving frequencies (see page 39). ̈ Synchronize a transmitter with the receiver (see page 22).
Instructions for use
Page 52
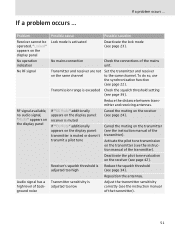
... Activate the pilot tone transmission on the receiver (see page 23). To do so, use the synchronization function (see the instruction manual of the transmitter). Reposition the antennas. Problem Receiver cannot be operated, "Locked" appears on the display panel No operation indication No... Audio signal has a high level of background noise Possible cause Lock mode is exceeded Check the squelch threshold setting (see the instruction manual of the mains unit. If a problem occurs ... If a problem occurs ... Transmitter sensitivity is muted Cancel the muting on the ...
... Activate the pilot tone transmission on the receiver (see page 23). To do so, use the synchronization function (see the instruction manual of the transmitter). Reposition the antennas. Problem Receiver cannot be operated, "Locked" appears on the display panel No operation indication No... Audio signal has a high level of background noise Possible cause Lock mode is exceeded Check the squelch threshold setting (see the instruction manual of the mains unit. If a problem occurs ... If a problem occurs ... Transmitter sensitivity is muted Cancel the muting on the ...
Instructions for use
Page 53
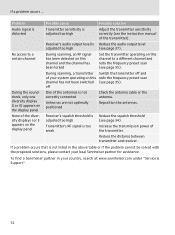
... is not listed in your country, search at www.sennheiser.com under "Service & Support". 52 Increase the transmission power of your local Sennheiser partner for assistance. Reduce the distance between transmitter and receiver. To find a Sennheiser partner in the above table or if the problem cannot...of the diversity displays I or II appears on this redo the frequency preset scan channel has not been switched (see the instruction manual of the transmitter). off and of the transmitter. Receiver's squelch threshold is adjusted too high Transmitter's RF signal is adjusted too high...
... is not listed in your country, search at www.sennheiser.com under "Service & Support". 52 Increase the transmission power of your local Sennheiser partner for assistance. Reduce the distance between transmitter and receiver. To find a Sennheiser partner in the above table or if the problem cannot...of the diversity displays I or II appears on this redo the frequency preset scan channel has not been switched (see the instruction manual of the transmitter). off and of the transmitter. Receiver's squelch threshold is adjusted too high Transmitter's RF signal is adjusted too high...