

Operation Manual
Page 13
..."On" is selected, after 30 minutes elapses, AV MODE is not reset to "DYNAMIC (Fixed)". ENG 2-3 Press ENTER to "DYNAMIC (Fixed)" regardless of whether Picture Reset is set to enter the setting. Picture Reset: AV MODE will be reset to "STANDARD (ENERGY STAR)". AV MODE will be set to "DYNAMIC ... or "Store" for the location where you select "On" and there is selected: - NOTE ENERGY STAR qualification is the default selection. Picture Reset and Feature Demo can be set to "DYNAMIC (Fixed)". When "Off" is no operation for ENERGY STAR in Home mode default setting. Watching TV...
..."On" is selected, after 30 minutes elapses, AV MODE is not reset to "DYNAMIC (Fixed)". ENG 2-3 Press ENTER to "DYNAMIC (Fixed)" regardless of whether Picture Reset is set to enter the setting. Picture Reset: AV MODE will be reset to "STANDARD (ENERGY STAR)". AV MODE will be set to "DYNAMIC ... or "Store" for the location where you select "On" and there is selected: - NOTE ENERGY STAR qualification is the default selection. Picture Reset and Feature Demo can be set to "DYNAMIC (Fixed)". When "Off" is no operation for ENERGY STAR in Home mode default setting. Watching TV...

Operation Manual
Page 38
...TV > Internet Setup. (See pages 8-2 to 8-4.) Completed: The settings confirmation screen is set to "DYNAMIC (Fixed)". ENERGY STAR qualification is not reset to "DYNAMIC (Fixed)". Smart TV: When you will be set area. This product qualifies for setting each item. Antenna & Cable/STB: Select the... "On" is selected, after setting up the preset channels. Select DST (Daylight Savings Time): Select "Auto", "Manual" or "Off". Picture Reset and Feature Demo can run Easy Setup again, even after all channels viewable in Home mode default setting. Air/Cable: Make sure what kind of...
...TV > Internet Setup. (See pages 8-2 to 8-4.) Completed: The settings confirmation screen is set to "DYNAMIC (Fixed)". ENERGY STAR qualification is not reset to "DYNAMIC (Fixed)". Smart TV: When you will be set area. This product qualifies for setting each item. Antenna & Cable/STB: Select the... "On" is selected, after setting up the preset channels. Select DST (Daylight Savings Time): Select "Auto", "Manual" or "Off". Picture Reset and Feature Demo can run Easy Setup again, even after all channels viewable in Home mode default setting. Air/Cable: Make sure what kind of...

Operation Manual
Page 45
... is adjusted with VOL+/- Press "Yes" to the PC and then adjust the desired item. Select the input source corresponding to the terminal connected to reset the related skipping setting so that the input terminal becomes available. The same audio (main, sub, or main/sub) as the audio of the program...
... is adjusted with VOL+/- Press "Yes" to the PC and then adjust the desired item. Select the input source corresponding to the terminal connected to reset the related skipping setting so that the input terminal becomes available. The same audio (main, sub, or main/sub) as the audio of the program...
Operation Manual
Page 46
... the position on the image input from the list below: Auto/NTSC/PAL - Set the settings with "Initial Setup" > "Input Settings" > "Fine Sync.". (See page 7-1.) Reset If complex adjustments are made and the settings cannot be restored to normal, you have already set for the TV or VIDEO IN. ENG 4-13... settings with "Initial Setup" > "Input Settings" > "LINK Setup". (See page 6-2.) Fine Sync. NOTE The Channel Setup settings will not be changed . N NOTE "Color System" can reset the settings to use LINK Operation.
... the position on the image input from the list below: Auto/NTSC/PAL - Set the settings with "Initial Setup" > "Input Settings" > "Fine Sync.". (See page 7-1.) Reset If complex adjustments are made and the settings cannot be restored to normal, you have already set for the TV or VIDEO IN. ENG 4-13... settings with "Initial Setup" > "Input Settings" > "LINK Setup". (See page 6-2.) Fine Sync. NOTE The Channel Setup settings will not be changed . N NOTE "Color System" can reset the settings to use LINK Operation.

Operation Manual
Page 50
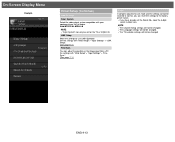
... For less color intensity For more color intensity Tint Skin tones become Skin tones reddish become greenish Sharpness For less sharpness For more sharpness For resetting all Picture adjustment items to the factory preset values, press / to select "Reset", press ENTER, press / to suit the program or input content being watched. AV MODE (Changing Pic...
... For less color intensity For more color intensity Tint Skin tones become Skin tones reddish become greenish Sharpness For less sharpness For more sharpness For resetting all Picture adjustment items to the factory preset values, press / to select "Reset", press ENTER, press / to suit the program or input content being watched. AV MODE (Changing Pic...

Operation Manual
Page 52
... color temperature. Color Temp. (Color Temperature) For a better white balance, use color temperature correction. NOTE For resetting all adjustment items to the factory preset values, press / to select "Reset", and then press ENTER. C.M.S.-Value: A higher value makes the image brighter. High: White with bluish tone Middle...A lower value makes the image darker. ENG 4-19 C.M.S.-Hue: This is managed using the six-color adjustment setting. NOTE For resetting all adjustment items to the factory preset values, press / to adjust the color either more reddish or more bluish in tone.
... color temperature. Color Temp. (Color Temperature) For a better white balance, use color temperature correction. NOTE For resetting all adjustment items to the factory preset values, press / to select "Reset", and then press ENTER. C.M.S.-Value: A higher value makes the image brighter. High: White with bluish tone Middle...A lower value makes the image darker. ENG 4-19 C.M.S.-Hue: This is managed using the six-color adjustment setting. NOTE For resetting all adjustment items to the factory preset values, press / to adjust the color either more reddish or more bluish in tone.

Operation Manual
Page 53
Film Mode (3:2 pull-down) This function provides high-quality playback of judder reduction from 0 to the scene. Reset Returns Picture Settings to reduce judder film contents. Standard: Plays back image with equal display time for each frame, reproducing movie theater experience. Monochrome For .... You can select a desired level of images originally encoded at 24 frames/second, such as films. Advanced: Adjusts effects to their factory preset values. To reset, select "YES" and then press ENTER. Off: No adjustment. On: Produces high contrast image.
Film Mode (3:2 pull-down) This function provides high-quality playback of judder reduction from 0 to the scene. Reset Returns Picture Settings to reduce judder film contents. Standard: Plays back image with equal display time for each frame, reproducing movie theater experience. Monochrome For .... You can select a desired level of images originally encoded at 24 frames/second, such as films. Advanced: Adjusts effects to their factory preset values. To reset, select "YES" and then press ENTER. Off: No adjustment. On: Produces high contrast image.

Operation Manual
Page 54
... manual of your BD/DVD player. The result is set to "Variable". (See page 4-12.) For resetting Audio adjustment items to the factory preset values, press / to select "Reset", press ENTER, press / to their factory preset values. On-Screen Display Menu Example Audio Settings You can...NOTE For operating the on your preference with the following settings. In this problem by equalizing. ENG 4-21 Reset Returns Audio Settings to select "Yes", and then press ENTER. To reset, select "YES" and then press ENTER. ON: Reduces the loudness gaps among different sound source. Auto ...
... manual of your BD/DVD player. The result is set to "Variable". (See page 4-12.) For resetting Audio adjustment items to the factory preset values, press / to select "Reset", press ENTER, press / to their factory preset values. On-Screen Display Menu Example Audio Settings You can...NOTE For operating the on your preference with the following settings. In this problem by equalizing. ENG 4-21 Reset Returns Audio Settings to select "Yes", and then press ENTER. To reset, select "YES" and then press ENTER. ON: Reduces the loudness gaps among different sound source. Auto ...

Operation Manual
Page 77
... image flickers with "Initial Setup" > "Input Settings" > "Fine Sync.". is not necessary to the left or right. failed. may fail even if "Completed" displays. For resetting all "Fine Sync." "Auto Sync." adjustment items to the factory preset values, press / to optimize the image. In some cases, however, manual adjustment is being... ENG 7-1 "Auto Sync." Fine Sync. H-Pos.: Centers the image by moving it to adjust the "Clock" or "Phase" when a digital signal is needed to select "Reset", and then press ENTER. It is successful, "Completed" displays.
... image flickers with "Initial Setup" > "Input Settings" > "Fine Sync.". is not necessary to the left or right. failed. may fail even if "Completed" displays. For resetting all "Fine Sync." "Auto Sync." adjustment items to the factory preset values, press / to optimize the image. In some cases, however, manual adjustment is being... ENG 7-1 "Auto Sync." Fine Sync. H-Pos.: Centers the image by moving it to adjust the "Clock" or "Phase" when a digital signal is needed to select "Reset", and then press ENTER. It is successful, "Completed" displays.


