Operation Manual
Page 9
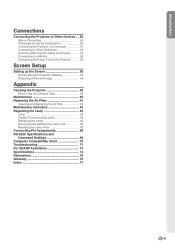
...Projector 59 How to Use the Carrying Case 59 Maintenance 60 Replacing the Air Filter 61 Cleaning and Replacing the Air Filter 61 Maintenance Indicators 63 Regarding the Lamp 65 Lamp 65 Caution Concerning the Lamp 65 Replacing the Lamp 65 Removing and Installing the Lamp Unit 66 Resetting the Lamp... Timer 67 Connecting Pin Assignments 68 RS-232C Specifications and Command Settings 69 Computer Compatibility Chart 70 Troubleshooting 71 For SHARP ...
...Projector 59 How to Use the Carrying Case 59 Maintenance 60 Replacing the Air Filter 61 Cleaning and Replacing the Air Filter 61 Maintenance Indicators 63 Regarding the Lamp 65 Lamp 65 Caution Concerning the Lamp 65 Replacing the Lamp 65 Removing and Installing the Lamp Unit 66 Resetting the Lamp... Timer 67 Connecting Pin Assignments 68 RS-232C Specifications and Command Settings 69 Computer Compatibility Chart 70 Troubleshooting 71 For SHARP ...

Operation Manual
Page 22
... on page 24. Blinking in green: The lamp is ready. Enter the keycode. Power indicator ON button Lamp indicator Note • The lamp indicator illuminates, indicating the status of the lamp. Red: The lamp should be replaced. • If the projector is put into focus or adjusting the projection ...on-screen display to another language, reset the language according to the procedure on page 48. 1 Plug the power cord into the wall outlet. • The power indicator illuminates red, and the projector enters standby mode. 2 Press on the projector or on Connect the required external ...
... on page 24. Blinking in green: The lamp is ready. Enter the keycode. Power indicator ON button Lamp indicator Note • The lamp indicator illuminates, indicating the status of the lamp. Red: The lamp should be replaced. • If the projector is put into focus or adjusting the projection ...on-screen display to another language, reset the language according to the procedure on page 48. 1 Plug the power cord into the wall outlet. • The power indicator illuminates red, and the projector enters standby mode. 2 Press on the projector or on Connect the required external ...

Operation Manual
Page 71
... it while pressing the tab (2) to the projector. Info • Make sure to secure the lamp unit cover. Then tighten the user service screw (3) to reset the lamp timer only when replacing the lamp. Hold the lamp unit by the handle and pull it in the direction of the projector. 2 Reset the lamp timer. • While simultaneously holding down...
... it while pressing the tab (2) to the projector. Info • Make sure to secure the lamp unit cover. Then tighten the user service screw (3) to reset the lamp timer only when replacing the lamp. Hold the lamp unit by the handle and pull it in the direction of the projector. 2 Reset the lamp timer. • While simultaneously holding down...


