
XV-Z2000U Operation Manual
Page 2
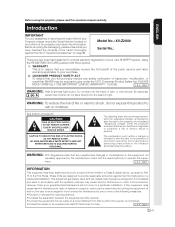
... full benefit of the parts, service and labor warranty applicable to Part 15 of projector. If this equip- Model No.: XV-Z2000 Serial No.: There are designed to radio communications. ONLY WARNING: High brightness light source. CONSUMER PRODUCT SAFETY ACT To ensure that SHARP may cause harmful interference to provide reasonable protection against the list of the projector and retain this operation manual carefully. ment. These...
... full benefit of the parts, service and labor warranty applicable to Part 15 of projector. If this equip- Model No.: XV-Z2000 Serial No.: There are designed to radio communications. ONLY WARNING: High brightness light source. CONSUMER PRODUCT SAFETY ACT To ensure that SHARP may cause harmful interference to provide reasonable protection against the list of the projector and retain this operation manual carefully. ment. These...
XV-Z2000U Operation Manual
Page 3
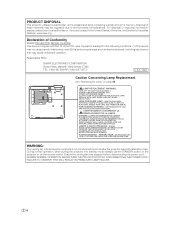
Declaration of Conformity SHARP PROJECTOR, MODEL XV-Z2000 This device complies with Part 15 of mercury. LAMP REPLACEMENT WARNING : TURN OFF THE LAMP AND DISCONNECT POWER CORD BEFORE OPENING THIS COVER. ALLOW 1 HOUR TO COOL BEFORE REPLACING THE LAMP. REPLACE WITH SAME SHARP LAMP UNIT MODEL AN-K2LP ONLY. POTENTIAL HAZARD OF GLASS PARTICLES IF LAMP HAS RUPTURED. L'INTERIEUR DU BOITIER ETANT EXTREMEMENT CHAUD, ATTENDRE 1 HEURE AVANT DE PROCEDER AU REMPLACEMENT DE LA LAMPE. NE...
Declaration of Conformity SHARP PROJECTOR, MODEL XV-Z2000 This device complies with Part 15 of mercury. LAMP REPLACEMENT WARNING : TURN OFF THE LAMP AND DISCONNECT POWER CORD BEFORE OPENING THIS COVER. ALLOW 1 HOUR TO COOL BEFORE REPLACING THE LAMP. REPLACE WITH SAME SHARP LAMP UNIT MODEL AN-K2LP ONLY. POTENTIAL HAZARD OF GLASS PARTICLES IF LAMP HAS RUPTURED. L'INTERIEUR DU BOITIER ETANT EXTREMEMENT CHAUD, ATTENDRE 1 HEURE AVANT DE PROCEDER AU REMPLACEMENT DE LA LAMPE. NE...
XV-Z2000U Operation Manual
Page 5
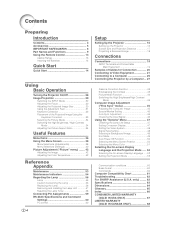
... 40 Picture Adjustment ("Picture" menu) ........ 42 Adjusting the Image 42 Adjusting the Color Temperature 42 Reference Appendix Maintenance 53 Maintenance Indicators 54 Regarding the Lamp 56 Lamp 56 Caution Concerning the Lamp 56 Replacing the Lamp 56 Removing and Installing the Lamp Unit 57 Resetting the Lamp Timer 58 Connecting Pin Assignments 59 RS-232C Specifications and Command Settings 60 PC control 60 -4 Setup Setting Up the Projector 16 Setting Up the Projector 16 Screen Size and Projection Distance 17 Projecting a Reversed Image 18 Connections Connections 19 INPUT...
... 40 Picture Adjustment ("Picture" menu) ........ 42 Adjusting the Image 42 Adjusting the Color Temperature 42 Reference Appendix Maintenance 53 Maintenance Indicators 54 Regarding the Lamp 56 Lamp 56 Caution Concerning the Lamp 56 Replacing the Lamp 56 Removing and Installing the Lamp Unit 57 Resetting the Lamp Timer 58 Connecting Pin Assignments 59 RS-232C Specifications and Command Settings 60 PC control 60 -4 Setup Setting Up the Projector 16 Setting Up the Projector 16 Screen Size and Projection Distance 17 Projecting a Reversed Image 18 Connections Connections 19 INPUT...
XV-Z2000U Operation Manual
Page 7
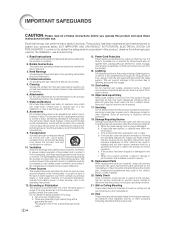
... service personnel under the following types of these instructions before you are provided for cleaning. 6. Heat This product should be situated away from the product. 14. Power-Cord Protection Power-supply cords should be routed so that could result in a risk of other sources, refer to rain or water. Wall or Ceiling Mounting This product should be blocked or covered. BUT IMPROPER USE...
... service personnel under the following types of these instructions before you are provided for cleaning. 6. Heat This product should be situated away from the product. 14. Power-Cord Protection Power-supply cords should be routed so that could result in a risk of other sources, refer to rain or water. Wall or Ceiling Mounting This product should be blocked or covered. BUT IMPROPER USE...

XV-Z2000U Operation Manual
Page 8
... reduce the overall operation life of glass particles if lamp ruptures. See "Replacing the Lamp" on the screen washes out the colors, making viewing difficult. Caution concerning the setup of the lens. When the projector is from the wall outlet and wait at least 7 7/8 inches (20 cm) of the projector is subjected to maintain high image quality, SHARP recommends that this projector be cleaned more often. Do...
... reduce the overall operation life of glass particles if lamp ruptures. See "Replacing the Lamp" on the screen washes out the colors, making viewing difficult. Caution concerning the setup of the lens. When the projector is from the wall outlet and wait at least 7 7/8 inches (20 cm) of the projector is subjected to maintain high image quality, SHARP recommends that this projector be cleaned more often. Do...
XV-Z2000U Operation Manual
Page 9
... power supply voltage and the shape of the plug may change color or become deformed. Temperature monitor function ■ If the projector starts to overheat due to be connected for the country you are in. off period the projector will turn off the equipment to be connected. ■ Please read the operation manuals of the projector and the equipment to setup problems or blockage of the air...
... power supply voltage and the shape of the plug may change color or become deformed. Temperature monitor function ■ If the projector starts to overheat due to be connected for the country you are in. off period the projector will turn off the equipment to be connected. ■ Please read the operation manuals of the projector and the equipment to setup problems or blockage of the air...
XV-Z2000U Operation Manual
Page 10
... into standby mode. RESIZE button 34 Switch the picture display (STRETCH, SIDE BAR, etc.). Front View Remote control sensor 13 Front adjustment foot 31 (on the bottom of the projector) HEIGHT ADJUST button 31 • Attaching the lens cap Push the lens cap on the menu. MENU button 38 Display adjustment and setting screens. 10 Power indicator 10 54 Lamp indicator 10 54 Temperature warning indicator 30 ZOOM/FOCUS button Adjust the projected image size or adjust the focus. 29 INPUT button Switch input mode 1, 2, 3, 4, 5 or DIGITAL. 38 Adjustment buttons ('/"/\/|) Select menu items...
... into standby mode. RESIZE button 34 Switch the picture display (STRETCH, SIDE BAR, etc.). Front View Remote control sensor 13 Front adjustment foot 31 (on the bottom of the projector) HEIGHT ADJUST button 31 • Attaching the lens cap Push the lens cap on the menu. MENU button 38 Display adjustment and setting screens. 10 Power indicator 10 54 Lamp indicator 10 54 Temperature warning indicator 30 ZOOM/FOCUS button Adjust the projected image size or adjust the focus. 29 INPUT button Switch input mode 1, 2, 3, 4, 5 or DIGITAL. 38 Adjustment buttons ('/"/\/|) Select menu items...
XV-Z2000U Operation Manual
Page 13
...Mode" on the "Picture" menu. Remote Control STANDBY button 28 Put the projector into standby mode. INPUT 1 button 29 INPUT 2 button 29 INPUT 4 button 29 AUTO SYNC button 46 Automatically adjust images when connected to the previous display. Note • All the buttons on the menu. UNDO button 34 Undo an operation or returning to a computer. IRIS button 34 Switch "HIGH BRIGHTNESS MODE" or "HIGH CONTRAST MODE". 28 ON button Turn the power on. 38 MENU button Display adjustment and setting screens. 30 Adjustment buttons 38 ('/"/\/|) 30 ZOOM/FOCUS button Adjust the projected image size...
...Mode" on the "Picture" menu. Remote Control STANDBY button 28 Put the projector into standby mode. INPUT 1 button 29 INPUT 2 button 29 INPUT 4 button 29 AUTO SYNC button 46 Automatically adjust images when connected to the previous display. Note • All the buttons on the menu. UNDO button 34 Undo an operation or returning to a computer. IRIS button 34 Switch "HIGH BRIGHTNESS MODE" or "HIGH CONTRAST MODE". 28 ON button Turn the power on. 38 MENU button Display adjustment and setting screens. 30 Adjustment buttons 38 ('/"/\/|) 30 ZOOM/FOCUS button Adjust the projected image size...
XV-Z2000U Operation Manual
Page 16
... message is displayed, to switch the INPUT mode. Turn the video equipment on the projector, input mode switches in order of : INPUT 1 INPUT 2 INPUT 3 INPUT 4 INPUT 5 DIGITAL • When using the HEIGHT ADJUST button. 2 Adjust the focus by pressing \ or |. 2 Adjust the focus by pressing \ or |. 2 Adjust the projected image size by pressing ' or ". 7. Adjust the projector angle, focus and zoom 1 Adjust the focus On the projector 1 Press . On the remote control 1 Press . 3 Adjust the projector angle using the remote control, press ///// to put the projector into standby mode...
... message is displayed, to switch the INPUT mode. Turn the video equipment on the projector, input mode switches in order of : INPUT 1 INPUT 2 INPUT 3 INPUT 4 INPUT 5 DIGITAL • When using the HEIGHT ADJUST button. 2 Adjust the focus by pressing \ or |. 2 Adjust the focus by pressing \ or |. 2 Adjust the projected image size by pressing ' or ". 7. Adjust the projector angle, focus and zoom 1 Adjust the focus On the projector 1 Press . On the remote control 1 Press . 3 Adjust the projector angle using the remote control, press ///// to put the projector into standby mode...
XV-Z2000U Operation Manual
Page 17
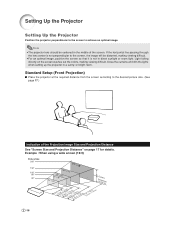
... required distance from the screen according to achieve an optimal image. Note • The projector lens should be distorted, making viewing difficult. • For an optimal image, position the screen so that it is not perpendicular to the screen, the image will be centered in the middle of the Projection Image Size and Projection Distance See "Screen Size and Projection Distance" on the screen washes out the colors, making viewing difficult. Light falling...
... required distance from the screen according to achieve an optimal image. Note • The projector lens should be distorted, making viewing difficult. • For an optimal image, position the screen so that it is not perpendicular to the screen, the image will be centered in the middle of the Projection Image Size and Projection Distance See "Screen Size and Projection Distance" on the screen washes out the colors, making viewing difficult. Light falling...
XV-Z2000U Operation Manual
Page 29
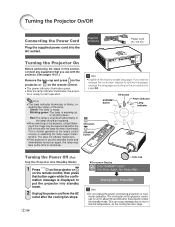
... projector is warming up or shutting down abnormally or the lamp should be replaced. • When switching on the remote control. • The power indicator illuminates green. • After the lamp indicator illuminates, the projec- This is stabilising the lamp output characteristics. Turning the Projector On/Off Connecting the Power Cord Plug the supplied power cord into standby mode and immediately turned on page 52. The cooling fan in internal temperature, as the lamp's control circuitry is normal operation...
... projector is warming up or shutting down abnormally or the lamp should be replaced. • When switching on the remote control. • The power indicator illuminates green. • After the lamp indicator illuminates, the projec- This is stabilising the lamp output characteristics. Turning the Projector On/Off Connecting the Power Cord Plug the supplied power cord into standby mode and immediately turned on page 52. The cooling fan in internal temperature, as the lamp's control circuitry is normal operation...
XV-Z2000U Operation Manual
Page 48
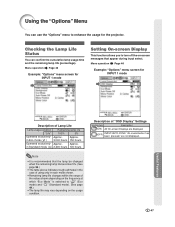
are displayed. (OFF) INPUT/AUTO SYNC/ "An invalid button has been pressed." Using the "Options" Menu You can confirm the cumulative lamp usage time and the remaining lamp life (percentage). in each mode shown. • Remaining lamp life changes within the range of the values shown depending on -screen messages that appear during input select. Menu operation Page 40 Example: "Options" menu screen for the projector. Approx. in Standard mode ( ) 2,000 hours 100 hours Note • It...
are displayed. (OFF) INPUT/AUTO SYNC/ "An invalid button has been pressed." Using the "Options" Menu You can confirm the cumulative lamp usage time and the remaining lamp life (percentage). in each mode shown. • Remaining lamp life changes within the range of the values shown depending on -screen messages that appear during input select. Menu operation Page 40 Example: "Options" menu screen for the projector. Approx. in Standard mode ( ) 2,000 hours 100 hours Note • It...
XV-Z2000U Operation Manual
Page 49
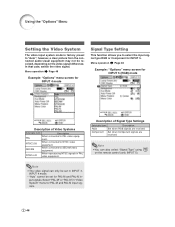
however, a clear picture from the connected audio-visual equipment may not be set in INPUT 3, INPUT 4 mode. • "Auto" cannot be received, depending on the remote control (only INPUT 5). Select "PAL-M" or "PAL-N" in PAL video equipment. PAL ment. NTSC4.43 When reproducing NTSC signals in "Video System" menu for PAL-M and PAL-N input signals. -48 Description of Video Systems Selectable items Description When connected to NTSC video equipment. Note •...
however, a clear picture from the connected audio-visual equipment may not be set in INPUT 3, INPUT 4 mode. • "Auto" cannot be received, depending on the remote control (only INPUT 5). Select "PAL-M" or "PAL-N" in PAL video equipment. PAL ment. NTSC4.43 When reproducing NTSC signals in "Video System" menu for PAL-M and PAL-N input signals. -48 Description of Video Systems Selectable items Description When connected to NTSC video equipment. Note •...
XV-Z2000U Operation Manual
Page 57
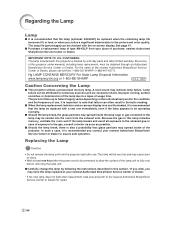
CUSTOMERS: The lamp included with a new one hour after the power cord is also a possibility that glass particles may spread inside the lamp cage or gas contained in this projector under warranty, including lamp replacement, must be obtained through an Authorized SharpVision Service Center or Dealer. A loud sound may spread inside of time up to failure largely varies depending on -screen display icon are illuminated, it...
CUSTOMERS: The lamp included with a new one hour after the power cord is also a possibility that glass particles may spread inside the lamp cage or gas contained in this projector under warranty, including lamp replacement, must be obtained through an Authorized SharpVision Service Center or Dealer. A loud sound may spread inside of time up to failure largely varies depending on -screen display icon are illuminated, it...

XV-Z2000U Operation Manual
Page 59
Info • If the lamp unit and lamp unit cover are not correctly installed, the power will not turn on the lower left of the screen, indicating that the lamp timer is connected to become damaged or explode. 1 Connect the power cord. • Plug the power cord into the lamp unit compartment. Fasten the securing screws. 6 Replace the lamp unit cover. • Align the lamp unit cover and slide it . 5 Insert the new lamp unit. •...
Info • If the lamp unit and lamp unit cover are not correctly installed, the power will not turn on the lower left of the screen, indicating that the lamp timer is connected to become damaged or explode. 1 Connect the power cord. • Plug the power cord into the lamp unit compartment. Fasten the securing screws. 6 Replace the lamp unit cover. • Align the lamp unit cover and slide it . 5 Insert the new lamp unit. •...
XV-Z2000U Operation Manual
Page 61
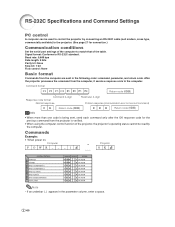
... Specifications and Command Settings PC control A computer can be read by the computer. Baud rate: 9,600 bps Data length: 8 bits Parity bit: None Stop bit: 1 bit Flow control: None Basic format Commands from the projector is being sent, send each command only after the OK response code for connection.) Communication conditions Set the serial port settings of the computer to match that of the projector, the projector's operating status...
... Specifications and Command Settings PC control A computer can be read by the computer. Baud rate: 9,600 bps Data length: 8 bits Parity bit: None Stop bit: 1 bit Flow control: None Basic format Commands from the projector is being sent, send each command only after the OK response code for connection.) Communication conditions Set the serial port settings of the computer to match that of the projector, the projector's operating status...
XV-Z2000U Operation Manual
Page 63
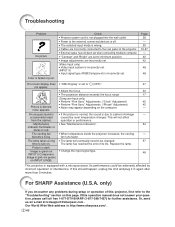
... shrinkage - The cooling fan • When temperature inside the projector increases, the cooling - The lamp has reached the end of this page. Its performance could be changed. 57 time to the "Troubleshooting" section on this projector, first refer to turn on • Change the input signal type. 48 INPUT 5 Component. Troubleshooting Problem No picture Color is http://www.sharpusa.com/ . -62 If this operation manual does not answer your...
... shrinkage - The cooling fan • When temperature inside the projector increases, the cooling - The lamp has reached the end of this page. Its performance could be changed. 57 time to the "Troubleshooting" section on this projector, first refer to turn on • Change the input signal type. 48 INPUT 5 Component. Troubleshooting Problem No picture Color is http://www.sharpusa.com/ . -62 If this operation manual does not answer your...
XV-Z2000U Operation Manual
Page 64
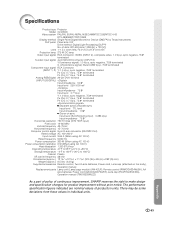
...), Operation manual Replacement parts Lamp unit (Lamp/cage module) (AN-K2LP), Remote control (RRMCGA334WJSA), AA size batteries, Power cord (QACCDA007WJPZ), Lens cap (PCAPHA021WJSA), Operation manual (TINS-B529WJZZ) As a part of policy of production units. There may be some deviations from these values in individual units. -63 Appendix of dots: 921,600 dots (1,280 [H] × 720 [V]) Lens 1-1.5 × zoom lens, F2.0-2.5 f=21.3-31.6 mm Projection lamp 275 W DC lamp Video input signal RCA Connector: VIDEO (INPUT 4), composite video, 1.0 Vp-p, sync negative...
...), Operation manual Replacement parts Lamp unit (Lamp/cage module) (AN-K2LP), Remote control (RRMCGA334WJSA), AA size batteries, Power cord (QACCDA007WJPZ), Lens cap (PCAPHA021WJSA), Operation manual (TINS-B529WJZZ) As a part of policy of production units. There may be some deviations from these values in individual units. -63 Appendix of dots: 921,600 dots (1,280 [H] × 720 [V]) Lens 1-1.5 × zoom lens, F2.0-2.5 f=21.3-31.6 mm Projection lamp 275 W DC lamp Video input signal RCA Connector: VIDEO (INPUT 4), composite video, 1.0 Vp-p, sync negative...
XV-Z2000U Operation Manual
Page 67
... Lens cap 9 M MENU button 38 Menu Color 51 Menu Position 50 O ON button 28 On-screen display language 52 OSD Display 47 P Phase 45 Picture 42 Picture Mode 44 PICTURE MODE button 34 Power cord 28 Power indicator 10 PRJ mode 52 R Rear 52 Rear adjustment feet 31 Red 42 Remote control 12 Remote control sensor 13 Replacing the lamp 56 RESIZE button 34 RS-232C terminal 27 S Sharp 42 Signal Info 46 Signal Type 48 Special Modes 45 STANDBY button 28 STRETCH 35 S-video input terminal 24 T Temperature warning indicator...
... Lens cap 9 M MENU button 38 Menu Color 51 Menu Position 50 O ON button 28 On-screen display language 52 OSD Display 47 P Phase 45 Picture 42 Picture Mode 44 PICTURE MODE button 34 Power cord 28 Power indicator 10 PRJ mode 52 R Rear 52 Rear adjustment feet 31 Red 42 Remote control 12 Remote control sensor 13 Replacing the lamp 56 RESIZE button 34 RS-232C terminal 27 S Sharp 42 Signal Info 46 Signal Type 48 Special Modes 45 STANDBY button 28 STRETCH 35 S-video input terminal 24 T Temperature warning indicator...
XV-Z2000U Operation Manual
Page 68
... of projectors installed in height. To find the location of the nearest Sharp Authorized Servicer, call Sharp toll free at the Servicer's facility, the Servicer will reinstall it will, at its option, either repair the defect or replace the defective Product or part thereof with a new or remanufactured equivalent at no event shall Sharp be liable, or in any way responsible, for any filter. Contact...
... of projectors installed in height. To find the location of the nearest Sharp Authorized Servicer, call Sharp toll free at the Servicer's facility, the Servicer will reinstall it will, at its option, either repair the defect or replace the defective Product or part thereof with a new or remanufactured equivalent at no event shall Sharp be liable, or in any way responsible, for any filter. Contact...


