Instruction Manual
Page 2
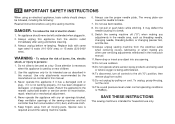
...not pull or push fabric while stitching. SAVE THESE INSTRUCTIONS This sewing machine is required around the sewing machine needle. 6. Never operate this sewing machine. Special care is intended for household use only. Switch the sewing machine off ("O") position, then remove plug from the electrical outlet when... use outdoors. 13.Do not operate where aerosol spray products are being administered. 14.To disconnect, turn all moving parts. Close attention is necessary when this appliance only for examination, repair, electrical or mechanical adjustment. 4. To unplug, ...
...not pull or push fabric while stitching. SAVE THESE INSTRUCTIONS This sewing machine is required around the sewing machine needle. 6. Never operate this sewing machine. Special care is intended for household use only. Switch the sewing machine off ("O") position, then remove plug from the electrical outlet when... use outdoors. 13.Do not operate where aerosol spray products are being administered. 14.To disconnect, turn all moving parts. Close attention is necessary when this appliance only for examination, repair, electrical or mechanical adjustment. 4. To unplug, ...
Instruction Manual
Page 6
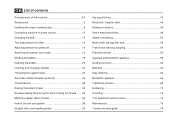
GB List of contents Principal parts of the machine 2/4 Accessories 6 Installing the snap-in sewing table 8 Connecting machine to power source 10 Changing the bulb 12 Two-step presser foot lifter 14 Adjusting presser foot pressure 14 Attaching the presser foot holder...20 Inserting and changing needles 22 Threading the upper thread 24 Automatic needle threader (optional 26 Thread tension 28 Raising the bobbin thread 30 Reverse sewing/ Removing the work/ Cutting the thread.........32 Matching needle/ fabric/ thread 34 How to choose your pattern 38 Straight stitch and needle position ...
GB List of contents Principal parts of the machine 2/4 Accessories 6 Installing the snap-in sewing table 8 Connecting machine to power source 10 Changing the bulb 12 Two-step presser foot lifter 14 Adjusting presser foot pressure 14 Attaching the presser foot holder...20 Inserting and changing needles 22 Threading the upper thread 24 Automatic needle threader (optional 26 Thread tension 28 Raising the bobbin thread 30 Reverse sewing/ Removing the work/ Cutting the thread.........32 Matching needle/ fabric/ thread 34 How to choose your pattern 38 Straight stitch and needle position ...
Instruction Manual
Page 9
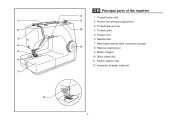
Thread tension dial 9 2. Presser foot 6. Automatic threader (optional) 2 Removable sewing table/ accessory storage 11 8. Stitch length dial 11. Thread take-up lever 10 4. Pattern selector dial 12. 1 2 3 4 5 6 7 12 GB Principal parts of the machine 8 1. Reverse sewing lever 9. Thread cutter 5. Presser foot pressure adjustment 3. Needle plate 7. Bobbin stopper 10.
Thread tension dial 9 2. Presser foot 6. Automatic threader (optional) 2 Removable sewing table/ accessory storage 11 8. Stitch length dial 11. Thread take-up lever 10 4. Pattern selector dial 12. 1 2 3 4 5 6 7 12 GB Principal parts of the machine 8 1. Reverse sewing lever 9. Thread cutter 5. Presser foot pressure adjustment 3. Needle plate 7. Bobbin stopper 10.


