User Guide
Page 2
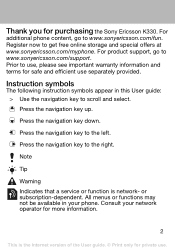
...use separately provided. Instruction symbols The following instruction symbols appear in your network operator for safe and efficient use . For additional phone content, go to scroll and select. Press the navigation key to www.sonyericsson.com/fun. Press the navigation key to get... or function is the Internet version of the User guide. © Print only for purchasing the Sony Ericsson K330. Register now to the right. or subscription-dependent. For product support, go to the left. Consult your phone. Press the navigation key up. Press the navigation key down.
...use separately provided. Instruction symbols The following instruction symbols appear in your network operator for safe and efficient use . For additional phone content, go to scroll and select. Press the navigation key to www.sonyericsson.com/fun. Press the navigation key to get... or function is the Internet version of the User guide. © Print only for purchasing the Sony Ericsson K330. Register now to the right. or subscription-dependent. For product support, go to the left. Consult your phone. Press the navigation key up. Press the navigation key down.
User Guide
Page 3
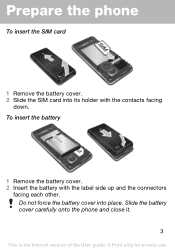
Prepare the phone To insert the SIM card 1 Remove the battery cover. 2 Slide the SIM card into place. Do not force the battery cover into its holder with the label side up and the connectors facing each other. Slide the battery cover carefully onto the phone and close it. 3 This is the Internet version of the User guide. © Print only for private use. To insert the battery 1 Remove the battery cover. 2 Insert the battery with the contacts facing down.
Prepare the phone To insert the SIM card 1 Remove the battery cover. 2 Slide the SIM card into place. Do not force the battery cover into its holder with the label side up and the connectors facing each other. Slide the battery cover carefully onto the phone and close it. 3 This is the Internet version of the User guide. © Print only for private use. To insert the battery 1 Remove the battery cover. 2 Insert the battery with the contacts facing down.
User Guide
Page 4
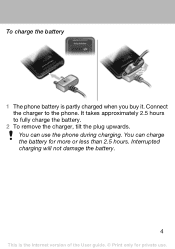
You can use . Interrupted charging will not damage the battery. 4 This is partly charged when you buy it. To charge the battery 1 The phone battery is the Internet version of the User guide. © Print only for more or less than 2.5 hours. It takes approximately 2.5 hours to the phone. You can charge the battery for private use the phone during charging. Connect the charger to fully charge the battery. 2 To remove the charger, tilt the plug upwards.
You can use . Interrupted charging will not damage the battery. 4 This is partly charged when you buy it. To charge the battery 1 The phone battery is the Internet version of the User guide. © Print only for more or less than 2.5 hours. It takes approximately 2.5 hours to the phone. You can charge the battery for private use the phone during charging. Connect the charger to fully charge the battery. 2 To remove the charger, tilt the plug upwards.
User Guide
Page 5
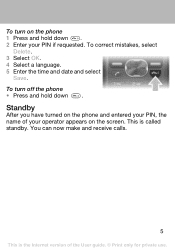
To turn on the phone 1 Press and hold down . 2 Enter your operator appears on the screen. This is the Internet version of your PIN if requested. To turn off the phone • Press and hold down . To correct mistakes, select Delete. 3 Select OK. 4 Select a language. 5 Enter the time and date and select Save. You can now make and receive calls. 5 This is called standby. Standby After you have turned on the phone and entered your PIN, the name of the User guide. © Print only for private use.
To turn on the phone 1 Press and hold down . 2 Enter your operator appears on the screen. This is the Internet version of your PIN if requested. To turn off the phone • Press and hold down . To correct mistakes, select Delete. 3 Select OK. 4 Select a language. 5 Enter the time and date and select Save. You can now make and receive calls. 5 This is called standby. Standby After you have turned on the phone and entered your PIN, the name of the User guide. © Print only for private use.
User Guide
Page 6
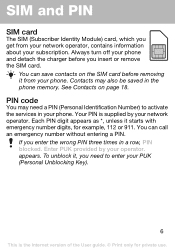
...only for example, 112 or 911. If you need a PIN (Personal Identification Number) to enter your PUK (Personal Unblocking Key). 6 This is supplied by your phone. appears. You can call an emergency number without entering a PIN. SIM and PIN SIM card The SIM (Subscriber Identity Module) card, which you insert or... remove the SIM card. Contacts may need to activate the services in the phone memory. You can save contacts on page 18. PIN code You may also be saved in your operator. Always turn off your...
...only for example, 112 or 911. If you need a PIN (Personal Identification Number) to enter your PUK (Personal Unblocking Key). 6 This is supplied by your phone. appears. You can call an emergency number without entering a PIN. SIM and PIN SIM card The SIM (Subscriber Identity Module) card, which you insert or... remove the SIM card. Contacts may need to activate the services in the phone memory. You can save contacts on page 18. PIN code You may also be saved in your operator. Always turn off your...
User Guide
Page 7
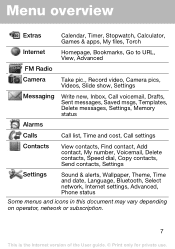
..., Voicemail, Delete contacts, Speed dial, Copy contacts, Send contacts, Settings Settings Sound & alerts, Wallpaper, Theme, Time and date, Language, Bluetooth, Select network, Internet settings, Advanced, Phone status Some menus and icons in this document may vary depending on operator, network or subscription. 7 This is the Internet version of the User guide...
..., Voicemail, Delete contacts, Speed dial, Copy contacts, Send contacts, Settings Settings Sound & alerts, Wallpaper, Theme, Time and date, Language, Bluetooth, Select network, Internet settings, Advanced, Phone status Some menus and icons in this document may vary depending on operator, network or subscription. 7 This is the Internet version of the User guide...
User Guide
Page 8
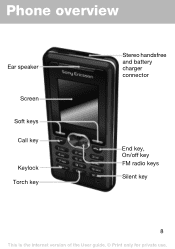
Phone overview Ear speaker Screen Soft keys Call key Keylock Torch key Stereo handsfree and battery charger connector End key, On/off key FM radio keys Silent key 8 This is the Internet version of the User guide. © Print only for private use.
Phone overview Ear speaker Screen Soft keys Call key Keylock Torch key Stereo handsfree and battery charger connector End key, On/off key FM radio keys Silent key 8 This is the Internet version of the User guide. © Print only for private use.
User Guide
Page 9
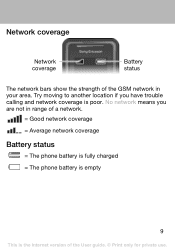
Network coverage Network coverage Battery status The network bars show the strength of the User guide. © Print only for private use. No network means you have trouble calling and network coverage is the Internet version of the GSM network in your area. Try moving to another location if you are not in range of a network. = Good network coverage = Average network coverage Battery status = The phone battery is fully charged = The phone battery is empty 9 This is poor.
Network coverage Network coverage Battery status The network bars show the strength of the User guide. © Print only for private use. No network means you have trouble calling and network coverage is the Internet version of the GSM network in your area. Try moving to another location if you are not in range of a network. = Good network coverage = Average network coverage Battery status = The phone battery is fully charged = The phone battery is empty 9 This is poor.
User Guide
Page 10
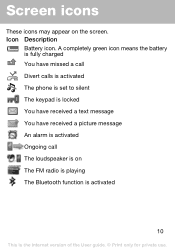
Screen icons These icons may appear on The FM radio is playing The Bluetooth function is activated 10 This is on the screen. A completely green icon means the battery is fully charged You have missed a call Divert calls is activated The phone is set to silent The keypad is locked You have received a text message You have received a picture message An alarm is activated Ongoing call The loudspeaker is the Internet version of the User guide. © Print only for private use. Icon Description Battery icon.
Screen icons These icons may appear on The FM radio is playing The Bluetooth function is activated 10 This is on the screen. A completely green icon means the battery is fully charged You have missed a call Divert calls is activated The phone is set to silent The keypad is locked You have received a text message You have received a picture message An alarm is activated Ongoing call The loudspeaker is the Internet version of the User guide. © Print only for private use. Icon Description Battery icon.

User Guide
Page 11
... Back. To unlock the keypad • Press and select Unlock. To navigate the menus 1 From standby select Menu. 2 Press , , , and select a menu. To set the phone to activate torch. Shortcuts From standby you can use . To call your contacts. • Press , then the left soft key to silent • Press and...
... Back. To unlock the keypad • Press and select Unlock. To navigate the menus 1 From standby select Menu. 2 Press , , , and select a menu. To set the phone to activate torch. Shortcuts From standby you can use . To call your contacts. • Press , then the left soft key to silent • Press and...
User Guide
Page 12
To reject a call 1 From standby enter the area code and phone number. 2 Press . To turn off the ringtone without answering the call • Press or . 12 This is the Internet version of a network. To make a call &#...; Press . This could damage your ear when using the loudspeaker. Calling You must turn on speaker. Do not hold the phone to turn on the loudspeaker • Select Turn on the phone and be within range of the User guide. © Print only for private use. To turn off the ringtone when...
To reject a call 1 From standby enter the area code and phone number. 2 Press . To turn off the ringtone without answering the call • Press or . 12 This is the Internet version of a network. To make a call &#...; Press . This could damage your ear when using the loudspeaker. Calling You must turn on speaker. Do not hold the phone to turn on the loudspeaker • Select Turn on the phone and be within range of the User guide. © Print only for private use. To turn off the ringtone when...
User Guide
Page 13
... international calls 1 From standby press and hold down until a + sign appears on the screen. 2 Enter the country code, area code (without the first zero) and phone number. 3 Press .
... international calls 1 From standby press and hold down until a + sign appears on the screen. 2 Enter the country code, area code (without the first zero) and phone number. 3 Press .
User Guide
Page 14
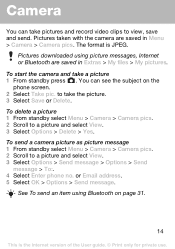
... picture 1 From standby select Menu > Camera > Camera pics. 2 Scroll to a picture and select View. 3 Select Options > Send message > Options > Send message > To:. 4 Select Enter phone no. or Email address. 5 Select OK > Options > Send message. to view, save and send. See To send an item using picture messages, Internet or Bluetooth...only for private use. You can take pictures and record video clips to take a picture 1 From standby press . Pictures downloaded using Bluetooth on the phone screen. 2 Select Take pic. Camera You can see the subject on page 31. 14 This is JPEG.
... picture 1 From standby select Menu > Camera > Camera pics. 2 Scroll to a picture and select View. 3 Select Options > Send message > Options > Send message > To:. 4 Select Enter phone no. or Email address. 5 Select OK > Options > Send message. to view, save and send. See To send an item using picture messages, Internet or Bluetooth...only for private use. You can take pictures and record video clips to take a picture 1 From standby press . Pictures downloaded using Bluetooth on the phone screen. 2 Select Take pic. Camera You can see the subject on page 31. 14 This is JPEG.
User Guide
Page 15
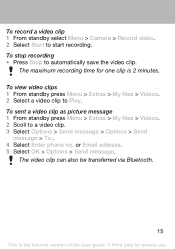
... clips 1 From standby press Menu > Extras > My files > Videos. 2 Select a video clip to a video clip. 3 Select Options > Send message > Options > Send message > To:. 4 Select Enter phone no. To sent a video clip as picture message 1 From standby press Menu > Extras > My files > Videos. 2 Scoll to Play. The video clip can also be...
... clips 1 From standby press Menu > Extras > My files > Videos. 2 Select a video clip to a video clip. 3 Select Options > Send message > Options > Send message > To:. 4 Select Enter phone no. To sent a video clip as picture message 1 From standby press Menu > Extras > My files > Videos. 2 Scoll to Play. The video clip can also be...
User Guide
Page 17
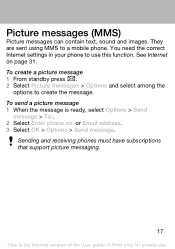
... 2 Select Picture messages > Options and select among the options to a mobile phone. Sending and receiving phones must have subscriptions that support picture messaging. 17 This is ready, select Options > Send message > To:. 2 Select Enter phone no. They are sent using MMS to create the message. You need the ...correct Internet settings in your phone to use . or Email address. 3 Select OK > Options > Send message. See Internet on...
... 2 Select Picture messages > Options and select among the options to a mobile phone. Sending and receiving phones must have subscriptions that support picture messaging. 17 This is ready, select Options > Send message > To:. 2 Select Enter phone no. They are sent using MMS to create the message. You need the ...correct Internet settings in your phone to use . or Email address. 3 Select OK > Options > Send message. See Internet on...
User Guide
Page 18
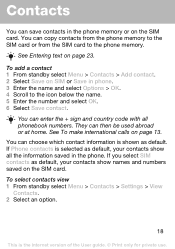
... a contact 1 From standby select Menu > Contacts > Add contact. 2 Select Save on page 23. Contacts You can choose which contact information is shown as default. If Phone contacts is the Internet version of the User guide. © Print only for private use. You can then be used abroad or at home. See... Entering text on SIM or Save in the phone memory or on the SIM card. They can copy contacts from the phone memory to the SIM card or from the SIM card to the icon below the name. 5 Enter the number...
... a contact 1 From standby select Menu > Contacts > Add contact. 2 Select Save on page 23. Contacts You can choose which contact information is shown as default. If Phone contacts is the Internet version of the User guide. © Print only for private use. You can then be used abroad or at home. See... Entering text on SIM or Save in the phone memory or on the SIM card. They can copy contacts from the phone memory to the SIM card or from the SIM card to the icon below the name. 5 Enter the number...
User Guide
Page 19
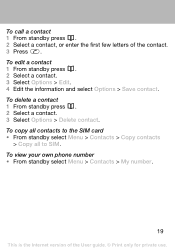
... select Menu > Contacts > Copy contacts > Copy all to SIM. To delete a contact 1 From standby press . 2 Select a contact. 3 Select Options > Delete contact. To view your own phone number • From standby select Menu > Contacts > My number. 19 This is the Internet version of the contact. 3 Press . To call a contact 1 From standby press...
... select Menu > Contacts > Copy contacts > Copy all to SIM. To delete a contact 1 From standby press . 2 Select a contact. 3 Select Options > Delete contact. To view your own phone number • From standby select Menu > Contacts > My number. 19 This is the Internet version of the contact. 3 Press . To call a contact 1 From standby press...
User Guide
Page 20
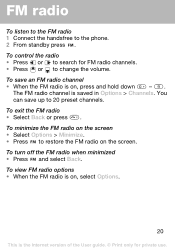
... handsfree to restore the FM radio on the screen. The FM radio channel is on the screen • Select Options > Minimize. • Press to the phone. 2 From standby press . To turn off the FM radio when minimized • Press and select Back. To minimize the FM radio on , press and hold...
... handsfree to restore the FM radio on the screen. The FM radio channel is on the screen • Select Options > Minimize. • Press to the phone. 2 From standby press . To turn off the FM radio when minimized • Press and select Back. To minimize the FM radio on , press and hold...
User Guide
Page 22
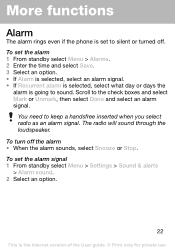
... to silent or turned off the alarm • When the alarm sounds, select Snooze or Stop. More functions Alarm The alarm rings even if the phone is set to keep a handsfree inserted when you select radio as an alarm signal.
... to silent or turned off the alarm • When the alarm sounds, select Snooze or Stop. More functions Alarm The alarm rings even if the phone is set to keep a handsfree inserted when you select radio as an alarm signal.
User Guide
Page 24
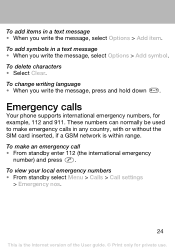
To view your local emergency numbers • From standby select Menu > Calls > Call settings > Emergency nos. 24 This is within range. Emergency calls Your phone supports international emergency numbers, for private use. These numbers can normally be used to make an emergency call • From standby enter 112 (the international ...
To view your local emergency numbers • From standby select Menu > Calls > Call settings > Emergency nos. 24 This is within range. Emergency calls Your phone supports international emergency numbers, for private use. These numbers can normally be used to make an emergency call • From standby enter 112 (the international ...


