
User Guide
Page 10
... . It may take a while for the phone to explain basic phone functions and helps you can also skip some steps and access the setup guide manually at a later stage. Screen lock When your phone is a good time to configure the phone to your SIM card PIN, tap . Setup guide The first... select OK. 5 Wait a while for example, notifications of missed calls and messages that arrived since the phone was last locked. To access the setup guide manually 1 From the Home screen, tap . 2 Find and tap Setup guide. To activate the screen • Briefly press the power key . Your SIM card PIN is...
... . It may take a while for the phone to explain basic phone functions and helps you can also skip some steps and access the setup guide manually at a later stage. Screen lock When your phone is a good time to configure the phone to your SIM card PIN, tap . Setup guide The first... select OK. 5 Wait a while for example, notifications of missed calls and messages that arrived since the phone was last locked. To access the setup guide manually 1 From the Home screen, tap . 2 Find and tap Setup guide. To activate the screen • Briefly press the power key . Your SIM card PIN is...

User Guide
Page 11
To lock the screen manually • When the screen is an Internet version of services. Combine services and get a personalized view. You can sign up for the first time, an ...
To lock the screen manually • When the screen is an Internet version of services. Combine services and get a personalized view. You can sign up for the first time, an ...
User Guide
Page 15
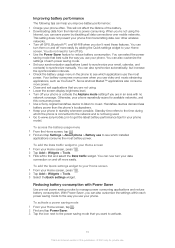
...power saving modes to your Home screen 1 From your phone often. Otherwise, your phone from the Internet is not being used to synchronize manually. This setting does not prevent your phone repeatedly scans for available networks, and this publication. © Print only for your email, ... use video and music streaming applications, such as YouTube™. You can also customize the settings of this consumes power. • Use a Sony original handsfree device to listen to the network and is power consuming. To activate a power saving mode 1 From your Home screen, tap ....
...power saving modes to your Home screen 1 From your phone often. Otherwise, your phone from the Internet is not being used to synchronize manually. This setting does not prevent your phone repeatedly scans for available networks, and this publication. © Print only for your email, ... use video and music streaming applications, such as YouTube™. You can also customize the settings of this consumes power. • Use a Sony original handsfree device to listen to the network and is power consuming. To activate a power saving mode 1 From your Home screen, tap ....

User Guide
Page 29
...Unmark the Automatic checkbox, if it is marked. 4 Tap Set date. 5 Adjust the date by scrolling up or down . 6 Tap Set. To set the date manually 1 From the Home screen, tap . 2 Find and tap Settings > Date & time. 3 Unmark the Automatic checkbox, if it is an Internet version of this... marked. 4 Unmark the Use 24-hour format checkbox, if it is marked. 4 Tap Select time zone. 5 Select an option. Ringtone settings To set the time manually 1 From your Home screen, tap . 2 Find and tap Settings > Sound > Notification ringtone. 3 Select a ringtone. 4 Tap Done. To enable touch tones 1 ...
...Unmark the Automatic checkbox, if it is marked. 4 Tap Set date. 5 Adjust the date by scrolling up or down . 6 Tap Set. To set the date manually 1 From the Home screen, tap . 2 Find and tap Settings > Date & time. 3 Unmark the Automatic checkbox, if it is an Internet version of this... marked. 4 Unmark the Use 24-hour format checkbox, if it is marked. 4 Tap Select time zone. 5 Select an option. Ringtone settings To set the time manually 1 From your Home screen, tap . 2 Find and tap Settings > Sound > Notification ringtone. 3 Select a ringtone. 4 Tap Done. To enable touch tones 1 ...

User Guide
Page 32
... the call handling key. To download Internet and messaging settings 1 From your Home screen, tap . 2 Find and tap Settings > Xperia™ > Internet settings. Contact your service provider for detailed information about Internet and messaging settings. To reset the default Internet settings 1...APN) 1 From the Home screen, tap . 2 Find and tap Settings > Wireless & networks > Mobile networks. 3 Tap Access Point Names. To configure APN settings manually 1 From the Home screen, tap . 2 Find and tap Settings > Wireless & networks > Mobile networks > Access Point Names. 3 Press . 4 Tap New ...
... the call handling key. To download Internet and messaging settings 1 From your Home screen, tap . 2 Find and tap Settings > Xperia™ > Internet settings. Contact your service provider for detailed information about Internet and messaging settings. To reset the default Internet settings 1...APN) 1 From the Home screen, tap . 2 Find and tap Settings > Wireless & networks > Mobile networks. 3 Tap Access Point Names. To configure APN settings manually 1 From the Home screen, tap . 2 Find and tap Settings > Wireless & networks > Mobile networks > Access Point Names. 3 Press . 4 Tap New ...

User Guide
Page 34
... Tap Automatic. 34 This is configured to use the fastest mobile network mode available for data, to extend the life of your phone manually to only use the Internet connection in your phone to access a different set of network modes entirely, or to allow mobile data connections.... Consult your home network (roaming). But you move out of range of this publication. © Print only for more information. To select another network manually 1 From the Home screen, tap . 2 Find and tap Settings > Wireless & networks > Mobile networks > Network operators. 3 Tap Search mode. 4 When ...
... Tap Automatic. 34 This is configured to use the fastest mobile network mode available for data, to extend the life of your phone manually to only use the Internet connection in your phone to access a different set of network modes entirely, or to allow mobile data connections.... Consult your home network (roaming). But you move out of range of this publication. © Print only for more information. To select another network manually 1 From the Home screen, tap . 2 Find and tap Settings > Wireless & networks > Mobile networks > Network operators. 3 Tap Search mode. 4 When ...

User Guide
Page 35
... call • Press the volume key up or down. To make an emergency call log view. To change the ear speaker volume during a call by manually dialing a phone number, by tapping a number saved in any country, with or without the SIM card inserted, if you have to remove the headphones from...
... call • Press the volume key up or down. To make an emergency call log view. To change the ear speaker volume during a call by manually dialing a phone number, by tapping a number saved in any country, with or without the SIM card inserted, if you have to remove the headphones from...

User Guide
Page 36
..., then tap Add to your contacts 1 From your Home screen, tap . 2 Find and tap Phone.The call a number from your service provider and enter it manually. Recent calls In the call log, you can view recently missed , received and dialed calls. Voicemail If your Home screen, tap . 2 Find and tap Phone...
..., then tap Add to your contacts 1 From your Home screen, tap . 2 Find and tap Phone.The call a number from your service provider and enter it manually. Recent calls In the call log, you can view recently missed , received and dialed calls. Voicemail If your Home screen, tap . 2 Find and tap Phone...
User Guide
Page 39
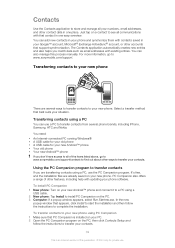
... phone: Tap Install to transfer contacts If you match data such as email addresses with existing entries. PC Companion also offers a range of this process manually. Contacts Use the Contacts application to store and manage all your numbers, email addresses, and other features, including help with updating your phone software. Using...
... phone: Tap Install to transfer contacts If you match data such as email addresses with existing entries. PC Companion also offers a range of this process manually. Contacts Use the Contacts application to store and manage all your numbers, email addresses, and other features, including help with updating your phone software. Using...

User Guide
Page 44
... gets saved as conversations, which means that contain media files, for the desired recipients. You can also enter the full number in the search field manually, then tap Add. 4 When you are finished adding recipients, tap Done. 5 Tap Write message and enter your message text. 6 If you want to add a recipient...
... gets saved as conversations, which means that contain media files, for the desired recipients. You can also enter the full number in the search field manually, then tap Add. 4 When you are finished adding recipients, tap Done. 5 Tap Write message and enter your message text. 6 If you want to add a recipient...

User Guide
Page 47
... address saved in your email address and password, then tap Next. 4 If the settings for the email account cannot be downloaded automatically, complete the setup manually. To receive email messages 1 From your email accounts at the same time. To set a priority level, press , then tap Set priority and select an option...
... address saved in your email address and password, then tap Next. 4 If the settings for the email account cannot be downloaded automatically, complete the setup manually. To receive email messages 1 From your email accounts at the same time. To set a priority level, press , then tap Set priority and select an option...

User Guide
Page 50
... games from Android Market™. After you can use . To remove an e-mail account from this chapter may not be downloaded automatically, complete the setup manually. 6 When prompted, enter a name for composing and sending email, then tap Account settings. 4 Mark the Default account checkbox. The services and features described in the...
... games from Android Market™. After you can use . To remove an e-mail account from this chapter may not be downloaded automatically, complete the setup manually. 6 When prompted, enter a name for composing and sending email, then tap Account settings. 4 Mark the Default account checkbox. The services and features described in the...
User Guide
Page 55
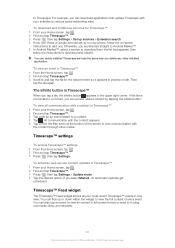
... the tile is an Internet version of the screen to view communication with your most recent Timescape™ events in Timescape™ When you select Manual, no automatic updates get scheduled. Timescape™ settings To access Timescape™ settings 1 From the Home screen, tap . 2 Find and tap Timescape™. 3 Press , then...
... the tile is an Internet version of the screen to view communication with your most recent Timescape™ events in Timescape™ When you select Manual, no automatic updates get scheduled. Timescape™ settings To access Timescape™ settings 1 From the Home screen, tap . 2 Find and tap Timescape™. 3 Press , then...
User Guide
Page 67
...NeoReader™. NeoReader™ supports most standard barcode types. To scan a barcode 1 When the NeoReader™ application is recognized. To enter a barcode manually 1 When the NeoReader™ application is open , hold the phone camera over the barcode until the complete barcode is visible in the viewfinder. 2 The...out more about items you see a coat in cases where NeoReader™ does not recognize the barcode automatically Enter the bar code numbers manually. This option can be used to personalize bar code content Send a text message to invite a friend to use . For example, you...
...NeoReader™. NeoReader™ supports most standard barcode types. To scan a barcode 1 When the NeoReader™ application is recognized. To enter a barcode manually 1 When the NeoReader™ application is open , hold the phone camera over the barcode until the complete barcode is visible in the viewfinder. 2 The...out more about items you see a coat in cases where NeoReader™ does not recognize the barcode automatically Enter the bar code numbers manually. This option can be used to personalize bar code content Send a text message to invite a friend to use . For example, you...

User Guide
Page 68
... & sync. 3 Tap the Google™ account you want to remove from the accounts list. 4 Tap Remove account. 5 Tap Remove account again to date. To synchronize manually with other information sources is an easy and practical way to stay up data to synchronize. 4 Press , then tap Sync now. Synchronizing your corporate email...
... & sync. 3 Tap the Google™ account you want to remove from the accounts list. 4 Tap Remove account. 5 Tap Remove account again to date. To synchronize manually with other information sources is an easy and practical way to stay up data to synchronize. 4 Press , then tap Sync now. Synchronizing your corporate email...
User Guide
Page 69
...in your phone. 69 This is marked so that require this publication. © Print only for your phone are not found automatically, complete the setup manually. For example, you can find your information in your phone 1 From your Home screen, tap . 2 Tap Settings > Accounts & sync. 3 ...want to sync to confirm. When you set a synchronization interval for new email messages. • to get the option to create a Facebook inside Xperia™ account, which you grant authority to implement security policies on a Microsoft® Exchange server. For you to suit your needs. To remove...
...in your phone. 69 This is marked so that require this publication. © Print only for your phone are not found automatically, complete the setup manually. For example, you can find your information in your phone 1 From your Home screen, tap . 2 Tap Settings > Accounts & sync. 3 ...want to sync to confirm. When you set a synchronization interval for new email messages. • to get the option to create a Facebook inside Xperia™ account, which you grant authority to implement security policies on a Microsoft® Exchange server. For you to suit your needs. To remove...
User Guide
Page 70
... View and manage contacts, calendar, and bookmarks from a computer. Then enter the information required. The Facebook account and the Facebook inside Xperia™ account are now removed from your phone just as easily as you can synchronize data automatically. 4 Tap Add account > Facebook.... 5 Follow the registration wizard to confirm. To synchronize manually with an Internet server using SyncML™ Synchronize your phone with your SyncML™ account 1 From your Home screen, tap . 2 Tap ...
... View and manage contacts, calendar, and bookmarks from a computer. Then enter the information required. The Facebook account and the Facebook inside Xperia™ account are now removed from your phone just as easily as you can synchronize data automatically. 4 Tap Add account > Facebook.... 5 Follow the registration wizard to confirm. To synchronize manually with an Internet server using SyncML™ Synchronize your phone with your SyncML™ account 1 From your Home screen, tap . 2 Tap ...

User Guide
Page 76
... By adding a Wi-Fi® sleep policy, you have set up and enabled a mobile data connection in your phone. To add a Wi-Fi® network manually 1 From the Home screen, tap . 2 Find and tap Settings > Wireless & networks > Wi-Fi settings. 3 Tap Add Wi-Fi network. 4 Enter the ... get the Network SSID name and Wireless password. To scan for private use . Advanced Wi-Fi® settings Before you add a Wi-Fi® network manually, you are currently connected to select a security type. 6 If required, enter a password. 7 Tap Save. Detailed network information is an Internet version of this...
... By adding a Wi-Fi® sleep policy, you have set up and enabled a mobile data connection in your phone. To add a Wi-Fi® network manually 1 From the Home screen, tap . 2 Find and tap Settings > Wireless & networks > Wi-Fi settings. 3 Tap Add Wi-Fi network. 4 Enter the ... get the Network SSID name and Wireless password. To scan for private use . Advanced Wi-Fi® settings Before you add a Wi-Fi® network manually, you are currently connected to select a security type. 6 If required, enter a password. 7 Tap Save. Detailed network information is an Internet version of this...

User Guide
Page 87
...) 4 Go to delete. 2 Touch and hold the track title, then tap Delete. You can press and hold or . If you want to adjust the sound manually, drag the frequency band buttons up or down. 3 If you want to the previous track in the background. Alternatively, you can also drag the progress...
...) 4 Go to delete. 2 Touch and hold the track title, then tap Delete. You can press and hold or . If you want to adjust the sound manually, drag the frequency band buttons up or down. 3 If you want to the previous track in the background. Alternatively, you can also drag the progress...

User Guide
Page 98
... photo, press the camera key fully down . A green frame shows which face is selected. Each detected face is framed in focus. 4 To take the photo manually. The geographical location is turned off. If not, check your subject. To turn on face detection 1 Activate the camera. 2 If the still camera is not...
... photo, press the camera key fully down . A green frame shows which face is selected. Each detected face is framed in focus. 4 To take the photo manually. The geographical location is turned off. If not, check your subject. To turn on face detection 1 Activate the camera. 2 If the still camera is not...


