
User Guide for Android 1.6
Page 6
...in your phone. If you want to manually add or change any network settings, see Internet and messaging settings on the phone with the Google™ services in your phone, or by going to www.sonyericsson.com/user from your old phone to the Sony Ericsson account, and then transfer it is ...sonyericsson.com/support from your computer to download the settings to your phone. Your new Google™ account has now been created and set up a Sony Ericsson account from the SIM card to the Google™ Terms of this publication. © Print only for messaging and the Internet will need a 2G...
...in your phone. If you want to manually add or change any network settings, see Internet and messaging settings on the phone with the Google™ services in your phone, or by going to www.sonyericsson.com/user from your old phone to the Sony Ericsson account, and then transfer it is ...sonyericsson.com/support from your computer to download the settings to your phone. Your new Google™ account has now been created and set up a Sony Ericsson account from the SIM card to the Google™ Terms of this publication. © Print only for messaging and the Internet will need a 2G...
User Guide for Android 1.6
Page 7
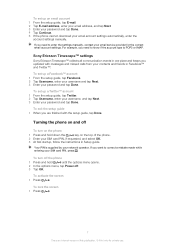
...Enter your password and tap Done. 4 Tap Continue. 5 If the phone cannot download your email account settings automatically, enter the account settings manually. Your PIN is POP3 or IMAP. To exit the setup guide • When you updated with the setup guide, tap Done. To ... your password and tap Done. If you need to correct a mistake made while entering your SIM card PIN, press . Sony Ericsson Timescape™ settings Sony Ericsson Timescape™ collects all communication events in one place and keeps you are finished with messages and missed calls from your network...
...Enter your password and tap Done. 4 Tap Continue. 5 If the phone cannot download your email account settings automatically, enter the account settings manually. Your PIN is POP3 or IMAP. To exit the setup guide • When you updated with the setup guide, tap Done. To ... your password and tap Done. If you need to correct a mistake made while entering your SIM card PIN, press . Sony Ericsson Timescape™ settings Sony Ericsson Timescape™ collects all communication events in one place and keeps you are finished with messages and missed calls from your network...

User Guide for Android 1.6
Page 21
...Internet and messaging settings For most mobile phone networks and operators, settings for messaging and Internet will be preinstalled or downloaded to switch networks manually. If you can select a language to www.sonyericsson.com/support for help. If not, you have several available connections, the active ... turns off the screen quickly, briefly press the power key . Phone language You can go to use . To change the Internet settings manually. You will be able to the right. 4 Tap OK. You can also press and hold to your computer to download the settings ...
...Internet and messaging settings For most mobile phone networks and operators, settings for messaging and Internet will be preinstalled or downloaded to switch networks manually. If you can select a language to www.sonyericsson.com/support for help. If not, you have several available connections, the active ... turns off the screen quickly, briefly press the power key . Phone language You can go to use . To change the Internet settings manually. You will be able to the right. 4 Tap OK. You can also press and hold to your computer to download the settings ...

User Guide for Android 1.6
Page 22
... . 4 Tap Reset to enable automatic network selection. To select another network, even if you move out of range of the manually selected network. It is an Internet version of your home network (roaming). Contact your network operator for more information. Please note ...2 Find and tap Settings > Wireless controls > Mobile networks. 3 Mark the Data roaming checkbox. 22 This is recommended to default . To configure Internet settings manually 1 From the Home screen, drag upwards. 2 Find and tap Settings > Wireless controls > Mobile networks > Access Point Names. 3 Press . 4 Tap New...
... . 4 Tap Reset to enable automatic network selection. To select another network, even if you move out of range of the manually selected network. It is an Internet version of your home network (roaming). Contact your network operator for more information. Please note ...2 Find and tap Settings > Wireless controls > Mobile networks. 3 Mark the Data roaming checkbox. 22 This is recommended to default . To configure Internet settings manually 1 From the Home screen, drag upwards. 2 Find and tap Settings > Wireless controls > Mobile networks > Access Point Names. 3 Press . 4 Tap New...

User Guide for Android 1.6
Page 25
... call log. 3 Tap . 4 Tap an existing contact to add the number to get your subscription includes an answering service, callers can then enter the number manually. To enter your voicemail number 1 From the Home screen, drag upwards. 2 Find and tap Settings > Call settings > Voicemail. 3 Enter your voicemail service 1 From the Home...
... call log. 3 Tap . 4 Tap an existing contact to add the number to get your subscription includes an answering service, callers can then enter the number manually. To enter your voicemail number 1 From the Home screen, drag upwards. 2 Find and tap Settings > Call settings > Voicemail. 3 Enter your voicemail service 1 From the Home...

User Guide for Android 1.6
Page 32
... item and then tap View video or Play audio. If your phone using SMS and MMS You can also tap the text field, enter a number manually, and then tap Done. 6 If you want to add a photo or a video, tap and select an option. 7 If you want to open . You can send...
... item and then tap View video or Play audio. If your phone using SMS and MMS You can also tap the text field, enter a number manually, and then tap Done. 6 If you want to add a photo or a video, tap and select an option. 7 If you want to open . You can send...

User Guide for Android 1.6
Page 34
... For example, you need to create a new contact. 7 Edit the contact information and tap Save. To save a sender's email address to enter the settings manually, contact your contacts 1 From the Home screen, drag upwards. 2 Find and tap E-mail. 3 Tap Inbox, then tap the desired message. 4 Tap the... download your regular email account. To set up an email account in your phone 1 From the Home screen, drag upwards. 2 Find and tap Settings > Sony Ericsson > E-mail. 3 Tap Uninstall account > OK. To remove the email account from your phone. You can proceed by tapping . 5 Tap Subject, enter ...
... For example, you need to create a new contact. 7 Edit the contact information and tap Save. To save a sender's email address to enter the settings manually, contact your contacts 1 From the Home screen, drag upwards. 2 Find and tap E-mail. 3 Tap Inbox, then tap the desired message. 4 Tap the... download your regular email account. To set up an email account in your phone 1 From the Home screen, drag upwards. 2 Find and tap Settings > Sony Ericsson > E-mail. 3 Tap Uninstall account > OK. To remove the email account from your phone. You can proceed by tapping . 5 Tap Subject, enter ...

User Guide for Android 1.6
Page 39
...the Home screen, drag upwards. 2 Find and tap Settings > Sony Ericsson > Timescape™ settings > Clear content. 3 Tap the content you want to a web service, you want to the tile for private use. When you select Manual, no automatic updates will be made. Timescape™ settings To ...access Timescape™ settings 1 From the Home screen, drag upwards. 2 Find and tap Settings > Sony Ericsson > Timescape™ settings. You can update your login details...
...the Home screen, drag upwards. 2 Find and tap Settings > Sony Ericsson > Timescape™ settings > Clear content. 3 Tap the content you want to a web service, you want to the tile for private use. When you select Manual, no automatic updates will be made. Timescape™ settings To ...access Timescape™ settings 1 From the Home screen, drag upwards. 2 Find and tap Settings > Sony Ericsson > Timescape™ settings. You can update your login details...

User Guide for Android 1.6
Page 50
... © Print only for more information. You can use . To delete a synchronization item in Sony Ericsson Sync 1 From the Home screen, drag upwards. 2 Find and tap Sony Ericsson Sync. 3 Tap the name of the synchronization service you want to synchronize automatically. See To set... interval. 5 Tap Save. To stop a synchronization in Sony Ericsson Sync • When synchronizing, tap Cancel. To synchronize with your Gmail™, Google Calendar™, and contacts. Google™ sync You can synchronize manually, or set the phone to synchronize automatically by activating background...
... © Print only for more information. You can use . To delete a synchronization item in Sony Ericsson Sync 1 From the Home screen, drag upwards. 2 Find and tap Sony Ericsson Sync. 3 Tap the name of the synchronization service you want to synchronize automatically. See To set... interval. 5 Tap Save. To stop a synchronization in Sony Ericsson Sync • When synchronizing, tap Cancel. To synchronize with your Gmail™, Google Calendar™, and contacts. Google™ sync You can synchronize manually, or set the phone to synchronize automatically by activating background...

User Guide for Android 1.6
Page 52
...5 Tap the Security field to select a security type for the Wi-Fi network you are not connected to use . To add a Wi-Fi™ network manually 1 From the Home screen, drag upwards. 2 Find and tap Settings > Wireless controls > Wi-Fi settings. 3 Tap Add Wi-Fi network. 4 Enter ... . The detailed network information will maximize the phone battery performance. Advanced Wi-Fi™ settings Before you add a Wi-Fi™ network manually, you are currently connected to get the Network SSID name and Wireless password. This will be displayed. Using a static IP address You can choose...
...5 Tap the Security field to select a security type for the Wi-Fi network you are not connected to use . To add a Wi-Fi™ network manually 1 From the Home screen, drag upwards. 2 Find and tap Settings > Wireless controls > Wi-Fi settings. 3 Tap Add Wi-Fi network. 4 Enter ... . The detailed network information will maximize the phone battery performance. Advanced Wi-Fi™ settings Before you add a Wi-Fi™ network manually, you are currently connected to get the Network SSID name and Wireless password. This will be displayed. Using a static IP address You can choose...

User Guide for Android 2.1
Page 23
upwards. To set the time manually 1 From the Home screen, drag upwards. 2 Find and tap Settings > Date & time. 3 Unmark the Automatic checkbox, if it is marked. 4 Tap Set time. 5 Tap or ..., you have to unmark Use 24-hour format. To access the setup guide 1 From the Home screen, drag 2 Tap Setup guide. To set the date manually 1 From the Home screen, drag upwards. 2 Find and tap Settings > Date & time. 3 Unmark the Automatic checkbox, if it is marked. 4 Tap Set date. 5 Tap or...
upwards. To set the time manually 1 From the Home screen, drag upwards. 2 Find and tap Settings > Date & time. 3 Unmark the Automatic checkbox, if it is marked. 4 Tap Set time. 5 Tap or ..., you have to unmark Use 24-hour format. To access the setup guide 1 From the Home screen, drag 2 Tap Setup guide. To set the date manually 1 From the Home screen, drag upwards. 2 Find and tap Settings > Date & time. 3 Unmark the Automatic checkbox, if it is marked. 4 Tap Set date. 5 Tap or...

User Guide for Android 2.1
Page 25
... Print only for private use in your phone. To download Internet and messaging settings 1 From the Home screen, drag upwards. 2 Find and tap Settings > Sony Ericsson > Settings download. To view the current Access Point Name (APN) 1 From the Home screen, drag upwards. 2 Find and tap Settings > Wireless & networks...a 2G/ 3G mobile data connection and the correct settings. You can also press and hold to turn on your phone. Phone language You can manually add and change the phone language 1 From the Home screen, drag upwards. 2 Find and tap Settings > Language & keyboard > Select locale....
... Print only for private use in your phone. To download Internet and messaging settings 1 From the Home screen, drag upwards. 2 Find and tap Settings > Sony Ericsson > Settings download. To view the current Access Point Name (APN) 1 From the Home screen, drag upwards. 2 Find and tap Settings > Wireless & networks...a 2G/ 3G mobile data connection and the correct settings. You can also press and hold to turn on your phone. Phone language You can manually add and change the phone language 1 From the Home screen, drag upwards. 2 Find and tap Settings > Language & keyboard > Select locale....

User Guide for Android 2.1
Page 26
...To save battery, you can disable all data connections over 2G/3G networks with your phone to allow you to switch networks manually, for private use Wi-Fi® and Bluetooth™ connections. When data traffic is an Internet version of this publication....and tap Settings > Wireless & networks > Mobile networks > Access Point Names. 3 Press . 4 Tap Reset to default . Contact your network settings. To configure Internet settings manually 1 From the Home screen, drag upwards. 2 Find and tap Settings > Wireless & networks > Mobile networks > Access Point Names. 3 Press . 4 Tap New APN...
...To save battery, you can disable all data connections over 2G/3G networks with your phone to allow you to switch networks manually, for private use Wi-Fi® and Bluetooth™ connections. When data traffic is an Internet version of this publication....and tap Settings > Wireless & networks > Mobile networks > Access Point Names. 3 Press . 4 Tap Reset to default . Contact your network settings. To configure Internet settings manually 1 From the Home screen, drag upwards. 2 Find and tap Settings > Wireless & networks > Mobile networks > Access Point Names. 3 Press . 4 Tap New APN...

User Guide for Android 2.1
Page 27
If you select a network manually, your phone will not search for private use GSM networks only 1 From the Home screen, drag upwards. 2 Find and tap Settings > Wireless & networks > Mobile networks. 3 ... Home screen, drag upwards. 2 Find and tap Settings > Wireless & networks > Mobile networks > Network operators. 3 Tap Select automatically. 27 This is an Internet version of the manually selected network. To use . To select another network, even if you move out of range of this publication. © Print only for another network...
If you select a network manually, your phone will not search for private use GSM networks only 1 From the Home screen, drag upwards. 2 Find and tap Settings > Wireless & networks > Mobile networks. 3 ... Home screen, drag upwards. 2 Find and tap Settings > Wireless & networks > Mobile networks > Network operators. 3 Tap Select automatically. 27 This is an Internet version of the manually selected network. To use . To select another network, even if you move out of range of this publication. © Print only for another network...

User Guide for Android 2.1
Page 29
... you hear repeated beeps during a call, tap Busy. 29 This is activated, you will be notified by a beep if you can then enter the number manually. To view missed calls 1 When you have activated call waiting, you receive another call. To mute the microphone during a call 1 During a call, tap . When it...
... you hear repeated beeps during a call, tap Busy. 29 This is activated, you will be notified by a beep if you can then enter the number manually. To view missed calls 1 When you have activated call waiting, you receive another call. To mute the microphone during a call 1 During a call, tap . When it...

User Guide for Android 2.1
Page 37
... is an Internet version of the messages sent. If your message text and tap Next. 4 To add a recipient, select a contact, or enter the full number manually in the status bar. You are finished, tap Done. 7 To send the message, tap Send. Tap a recipient field to edit the recipient number, or tap...
... is an Internet version of the messages sent. If your message text and tap Next. 4 To add a recipient, select a contact, or enter the full number manually in the status bar. You are finished, tap Done. 7 To send the message, tap Send. Tap a recipient field to edit the recipient number, or tap...

User Guide for Android 2.1
Page 39
... private use the RoadSync Mail application in the left corner, then select an option. 39 This is POP3 or IMAP. You can complete the setup manually. If you want to enter the settings manually, contact your Microsoft® Exchange Server email account.
... private use the RoadSync Mail application in the left corner, then select an option. 39 This is POP3 or IMAP. You can complete the setup manually. If you want to enter the settings manually, contact your Microsoft® Exchange Server email account.

User Guide for Android 2.1
Page 40
... several. 5 Mark the checkboxes for private use 1 From the Home screen, drag upwards. 2 Find and tap Email. 3 Tap the account you can complete the setup manually. To remove an email account from your email address and password and tap Next. 5 If the settings for the email account cannot be downloaded automatically...
... several. 5 Mark the checkboxes for private use 1 From the Home screen, drag upwards. 2 Find and tap Email. 3 Tap the account you can complete the setup manually. To remove an email account from your email address and password and tap Next. 5 If the settings for the email account cannot be downloaded automatically...

User Guide for Android 2.1
Page 46
... screen, drag upwards. 2 Find and tap Timescape™. 3 Scroll to the tile for private use. To filter the events displayed in Contacts. If you select Manual, no automatic updates will be made. 46 This is saved in Timescape™ 1 From the Home screen, drag upwards. 2 Find and tap Timescape™. 3 Tap...
... screen, drag upwards. 2 Find and tap Timescape™. 3 Scroll to the tile for private use. To filter the events displayed in Contacts. If you select Manual, no automatic updates will be made. 46 This is saved in Timescape™ 1 From the Home screen, drag upwards. 2 Find and tap Timescape™. 3 Tap...

User Guide for Android 2.1
Page 56
... deactivate an alarm 1 From the Home screen, drag upwards. 2 Find and tap Alarm. 3 Drag the slider button to the left to enter long web addresses manually, or use . upwards. To delete an alarm 1 From the Home screen, drag 2 Find and tap Alarm. 3 Tap the desired alarm. 4 Tap Delete. By scanning bar...
... deactivate an alarm 1 From the Home screen, drag upwards. 2 Find and tap Alarm. 3 Drag the slider button to the left to enter long web addresses manually, or use . upwards. To delete an alarm 1 From the Home screen, drag 2 Find and tap Alarm. 3 Tap the desired alarm. 4 Tap Delete. By scanning bar...


