

User Guide
Page 9
... Google™. Your SIM card PIN is crucial that are linked to confirm. until the device vibrates. 2 Enter your Home screen, tap . 2 Tap Settings > Accounts & sync > Google. 3 Select the Google™ account you remember your Google™ account will no longer be sure to enter the details for the device to shut down the power key until the options menu opens. To Remove a Google™ Account 1 From your SIM card PIN when requested, then...
... Google™. Your SIM card PIN is crucial that are linked to confirm. until the device vibrates. 2 Enter your Home screen, tap . 2 Tap Settings > Accounts & sync > Google. 3 Select the Google™ account you remember your Google™ account will no longer be sure to enter the details for the device to shut down the power key until the options menu opens. To Remove a Google™ Account 1 From your SIM card PIN when requested, then...
User Guide
Page 12
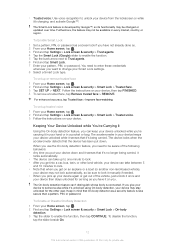
... other user. To Enable Smart Lock 1 Set a pattern, PIN, or password as you give your device to someone else while it's unlocked using On-body detection, your device may not be changed or updated over time. To set up trusted voice 1 From your Home screen, tap . 2 Find and tap Settings > Lock screen & security > Smart Lock > Trusted voice. 3 Follow the instructions on your device, then tap FINISHED. 4 To remove a trusted face, tap Remove trusted face > REMOVE. The Smart Lock feature...
... other user. To Enable Smart Lock 1 Set a pattern, PIN, or password as you give your device to someone else while it's unlocked using On-body detection, your device may not be changed or updated over time. To set up trusted voice 1 From your Home screen, tap . 2 Find and tap Settings > Lock screen & security > Smart Lock > Trusted voice. 3 Follow the instructions on your device, then tap FINISHED. 4 To remove a trusted face, tap Remove trusted face > REMOVE. The Smart Lock feature...

User Guide
Page 15
... Settings > Lock screen & security > Set up SIM card lock. 3 Select a SIM card. 4 Tap Change SIM PIN. 5 Enter the old SIM card PIN and tap OK. 6 Enter the new SIM card PIN and tap OK. 7 Retype the new SIM card PIN and tap OK. If you enter an incorrect PUK code too many times, your service provider. You then need to contact your device with either one or two SIM cards inserted. Using Multiple SIM Cards Your device works with a PIN (Personal Identification Number). You get a new SIM card. To Unlock a Blocked SIM Card Using the PUK Code 1 Enter the PUK code and tap . 2 Enter a new PIN...
... Settings > Lock screen & security > Set up SIM card lock. 3 Select a SIM card. 4 Tap Change SIM PIN. 5 Enter the old SIM card PIN and tap OK. 6 Enter the new SIM card PIN and tap OK. 7 Retype the new SIM card PIN and tap OK. If you enter an incorrect PUK code too many times, your service provider. You then need to contact your device with either one or two SIM cards inserted. Using Multiple SIM Cards Your device works with a PIN (Personal Identification Number). You get a new SIM card. To Unlock a Blocked SIM Card Using the PUK Code 1 Enter the PUK code and tap . 2 Enter a new PIN...
User Guide
Page 16
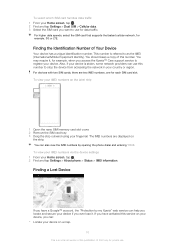
... Home screen, tap . 2 Find and tap Settings > Dual SIM > Cellular data. 3 Select the SIM card you want to use for example, when you access the Xperia™ Care support service to register your device. You should keep a copy of Your Device Your device has a unique identification number. To view your fingernail. Also, if your device is stolen, some network providers can : • Locate your device on the label strip 1 Open the nano SIM/memory card slot cover. 2 Remove...
... Home screen, tap . 2 Find and tap Settings > Dual SIM > Cellular data. 3 Select the SIM card you want to use for example, when you access the Xperia™ Care support service to register your device. You should keep a copy of Your Device Your device has a unique identification number. To view your fingernail. Also, if your device is stolen, some network providers can : • Locate your device on the label strip 1 Open the nano SIM/memory card slot cover. 2 Remove...

User Guide
Page 30
... from Sending Notifications 1 From your documents and files for reference purposes only, and changes may appear on presentations. Use the Chrome™ web browser to manage phone numbers, email addresses and other contact information. Use the Email application to send and receive emails through artists' discographies, or create your device. Use the Contacts application to navigate and view web pages, text and images, and manage bookmarks. This list is for easy access from your own radio...
... from Sending Notifications 1 From your documents and files for reference purposes only, and changes may appear on presentations. Use the Chrome™ web browser to manage phone numbers, email addresses and other contact information. Use the Email application to send and receive emails through artists' discographies, or create your device. Use the Contacts application to navigate and view web pages, text and images, and manage bookmarks. This list is for easy access from your own radio...

User Guide
Page 31
... play music and audio books. Use the Play Store™ application to find other devices connected to suit your device or may not be supported by using Google Maps™. Use the What's New application to unique content available only with friends. Enjoy music, movies, apps, and games on the web using your photos and videos. The Xperia™ Movie Creator automatically creates short video collages using your own. Make phone calls by dialing the number manually...
... play music and audio books. Use the Play Store™ application to find other devices connected to suit your device or may not be supported by using Google Maps™. Use the What's New application to unique content available only with friends. Enjoy music, movies, apps, and games on the web using your photos and videos. The Xperia™ Movie Creator automatically creates short video collages using your own. Make phone calls by dialing the number manually...
User Guide
Page 36
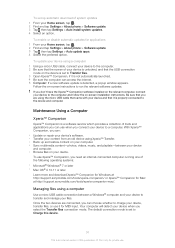
..., connect your Home screen, tap . 2 Find and tap Settings > About phone > Software update. 3 Tap , then tap Settings > Auto install system updates. 4 Select an option. The default connection mode is set to Charge this publication. © Print only for MIDI input. Maintenance Using a Computer Xperia™ Companion Xperia™ Companion is properly connected to the device and computer. Your computer will detect your Home screen, tap . 2 Find and tap Settings > About phone > Software update. 3 Tap , then tap Settings > Auto update apps. 4 Select...
..., connect your Home screen, tap . 2 Find and tap Settings > About phone > Software update. 3 Tap , then tap Settings > Auto install system updates. 4 Select an option. The default connection mode is set to Charge this publication. © Print only for MIDI input. Maintenance Using a Computer Xperia™ Companion Xperia™ Companion is properly connected to the device and computer. Your computer will detect your Home screen, tap . 2 Find and tap Settings > About phone > Software update. 3 Tap , then tap Settings > Auto update apps. 4 Select...

User Guide
Page 37
... down the Status bar, and then tap USB charging this type of this publication. © Print only for managing files and updating device software. Media files and some apps, along with personal settings and data. • You can use a removable memory card to the computer. You can use the Transfer files connection mode for private use. To change USB connection mode 1 Attach a USB connector to free up as a MIDI input for storage. Some apps, like the Camera app, can access the file system of normal...
... down the Status bar, and then tap USB charging this type of this publication. © Print only for managing files and updating device software. Media files and some apps, along with personal settings and data. • You can use a removable memory card to the computer. You can use the Transfer files connection mode for private use. To change USB connection mode 1 Attach a USB connector to free up as a MIDI input for storage. Some apps, like the Camera app, can access the file system of normal...
User Guide
Page 41
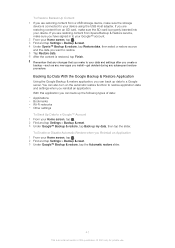
...; account. 2 From your Home screen, tap . 3 Find and tap Settings > Backup & reset. 4 Under Xperia™ Backup & restore, tap Restore data, then select a restore source and the data you want to restore. 5 Tap Restore data. 6 After the content is properly inserted into your device. To Restore Backed-Up Content 1 If you are restoring content from a USB storage device, make to your data and settings after you create a backup-such as any new apps you install-get deleted during any changes that any subsequent restore...
...; account. 2 From your Home screen, tap . 3 Find and tap Settings > Backup & reset. 4 Under Xperia™ Backup & restore, tap Restore data, then select a restore source and the data you want to restore. 5 Tap Restore data. 6 After the content is properly inserted into your device. To Restore Backed-Up Content 1 If you are restoring content from a USB storage device, make to your data and settings after you create a backup-such as any new apps you install-get deleted during any changes that any subsequent restore...
User Guide
Page 43
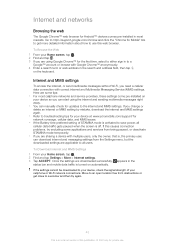
... the screen is activated to save power, all users. If you need a cellular data connection with multiple users, only the owner, that is an internet version of this publication. © Print only for private use this causes connection problems, try excluding some tips: • For most markets. Internet and MMS settings To access the internet, or send multimedia messages without Wi-Fi, you change or delete an internet or MMS setting by mistake, download the internet and MMS settings again...
... the screen is activated to save power, all users. If you need a cellular data connection with multiple users, only the owner, that is an internet version of this publication. © Print only for private use this causes connection problems, try excluding some tips: • For most markets. Internet and MMS settings To access the internet, or send multimedia messages without Wi-Fi, you change or delete an internet or MMS setting by mistake, download the internet and MMS settings again...
User Guide
Page 49
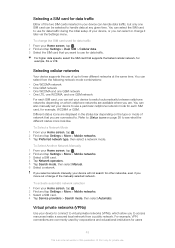
... device supports the use of the manually selected network. Different status icons are displayed in your device can handle data traffic, but only one GSM network For each SIM card, for data traffic. To Select Another Network Manually 1 From your Home screen, tap . 2 Find and tap Settings > More > Mobile networks. 3 Select a SIM card. 4 Tap Service providers > Search mode, then select Automatic. For example, VPN connections are connected to handle data at the same time. Selecting a SIM card for private use. To change...
... device supports the use of the manually selected network. Different status icons are displayed in your device can handle data traffic, but only one GSM network For each SIM card, for data traffic. To Select Another Network Manually 1 From your Home screen, tap . 2 Find and tap Settings > More > Mobile networks. 3 Select a SIM card. 4 Tap Service providers > Search mode, then select Automatic. For example, VPN connections are connected to handle data at the same time. Selecting a SIM card for private use. To change...

User Guide
Page 51
... your Xperia™ device, the EAS security settings may limit the lockscreen type to only a PIN or password. You can synchronize data automatically for private use. This occurs when your network administrator specifies a lockscreen type for all EAS accounts for Synchronization 1 From your Home screen, tap . 2 Tap Settings > Accounts & sync > Add account, then select the account that you can access your corporate email messages, calendar appointments, and contacts directly on your device. To Set Up an Online Account...
... your Xperia™ device, the EAS security settings may limit the lockscreen type to only a PIN or password. You can synchronize data automatically for private use. This occurs when your network administrator specifies a lockscreen type for all EAS accounts for Synchronization 1 From your Home screen, tap . 2 Tap Settings > Accounts & sync > Add account, then select the account that you can access your corporate email messages, calendar appointments, and contacts directly on your device. To Set Up an Online Account...
User Guide
Page 58
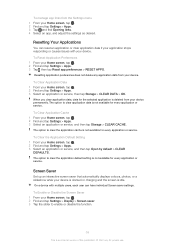
... Data 1 From your device permanently. To Enable or Disable the Screen Saver 1 From your Home screen, tap . 2 Find and tap Settings > Apps. 3 Select an application or service, and then tap Open by default > CLEAR DEFAULTS. When you clear application data, data for the selected application is not available for every application or service. To manage app links from the Settings menu 1 From your Home screen, tap . 2 Find and tap Settings > Apps. 3 Tap , then tap Reset app preferences > RESET APPS...
... Data 1 From your device permanently. To Enable or Disable the Screen Saver 1 From your Home screen, tap . 2 Find and tap Settings > Apps. 3 Select an application or service, and then tap Open by default > CLEAR DEFAULTS. When you clear application data, data for the selected application is not available for every application or service. To manage app links from the Settings menu 1 From your Home screen, tap . 2 Find and tap Settings > Apps. 3 Tap , then tap Reset app preferences > RESET APPS...
User Guide
Page 60
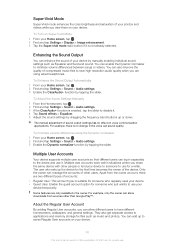
... device. Multiple User Accounts Your device supports multiple user accounts so that different users can allow different users to the owner. For example, only the owner can log in the voice call sound quality. To minimize volume differences using wired headphones. Super-Vivid Mode Super-Vivid mode enhances the color brightness and saturation of your photos and videos while you view them on Super-Vivid Mode 1 From your Home screen, tap . 2 Find and tap Settings > Display...
... device. Multiple User Accounts Your device supports multiple user accounts so that different users can allow different users to the owner. For example, only the owner can log in the voice call sound quality. To minimize volume differences using wired headphones. Super-Vivid Mode Super-Vivid mode enhances the color brightness and saturation of your photos and videos while you view them on Super-Vivid Mode 1 From your Home screen, tap . 2 Find and tap Settings > Display...

User Guide
Page 66
... Home screen, tap . 2 Find and tap . If you receive an incoming call when the screen is active, the incoming call is displayed as a floating notification, that is, in fullscreen format, with a message. To Answer a Call When the Screen is displayed as the direct dial number. To Answer an Incoming Call When the Screen is displayed. 3 Tap to answer the call and open , with SIM1 or SIM2 indicating which SIM card the call is for private use as a floating notification, that is locked, the phone...
... Home screen, tap . 2 Find and tap . If you receive an incoming call when the screen is active, the incoming call is displayed as a floating notification, that is, in fullscreen format, with a message. To Answer a Call When the Screen is displayed as the direct dial number. To Answer an Incoming Call When the Screen is displayed. 3 Tap to answer the call and open , with SIM1 or SIM2 indicating which SIM card the call is for private use as a floating notification, that is locked, the phone...

User Guide
Page 74
... a music file saved on your device. 4 Enter or select the desired information for a Contact 1 From your Home screen, tap , then tap . 2 Tap the contact you want to edit, then tap . 3 Tap , then mark the All calls to an account, that you want to use and save this publication. © Print only for private use. To block a phone number 1 From your Home screen, tap , then tap . 2 Tap , then tap Block numbers. 3 Tap Add a number, then enter...
... a music file saved on your device. 4 Enter or select the desired information for a Contact 1 From your Home screen, tap , then tap . 2 Tap the contact you want to edit, then tap . 3 Tap , then mark the All calls to an account, that you want to use and save this publication. © Print only for private use. To block a phone number 1 From your Home screen, tap , then tap . 2 Tap , then tap Block numbers. 3 Tap Add a number, then enter...

User Guide
Page 98
... in the Superior auto and Video camera modes. Cloudy Adjust the color balance for fluorescent lighting. Adjust focus automatically. This setting is locked. Quick launch Use Quick launch settings to launch the camera when the screen is only available in Manual capturing mode, adjusts the color balance according to the lighting conditions. Launch and capture From the lock screen, press and hold the camera key to launch the...
... in the Superior auto and Video camera modes. Cloudy Adjust the color balance for fluorescent lighting. Adjust focus automatically. This setting is locked. Quick launch Use Quick launch settings to launch the camera when the screen is only available in Manual capturing mode, adjusts the color balance according to the lighting conditions. Launch and capture From the lock screen, press and hold the camera key to launch the...

User Guide
Page 114
... a Digital Media Renderer (DMR) device and play content received from other large display without using the TV's speakers. Displaying files on another device using Screen mirroring, do not cover the Wi-Fi antenna area of your device to another device connected to work. Connectivity Mirroring the Screen of Your Device Wirelessly on a TV You can use . Wi-Fi Direct™ technology creates a wireless connection between Devices 1 From your Home screen, tap . 3 Find and tap Settings > Device connection > Screen mirroring. 4 Tap Start...
... a Digital Media Renderer (DMR) device and play content received from other large display without using the TV's speakers. Displaying files on another device using Screen mirroring, do not cover the Wi-Fi antenna area of your device to another device connected to work. Connectivity Mirroring the Screen of Your Device Wirelessly on a TV You can use . Wi-Fi Direct™ technology creates a wireless connection between Devices 1 From your Home screen, tap . 3 Find and tap Settings > Device connection > Screen mirroring. 4 Tap Start...
User Guide
Page 130
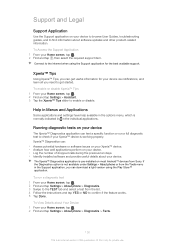
... Using Xperia™ Tips, you need to enable or disable. To enable or disable Xperia™ Tips 1 From your device to browse User Guides, troubleshooting guides, and to find information about Your Device 1 From your Home screen, tap . 2 Find and tap , then select the required support item. Help in Menus and Applications Some applications and settings have help available in the options menu, which is pre-installed on your device. • Log the number...
... Using Xperia™ Tips, you need to enable or disable. To enable or disable Xperia™ Tips 1 From your device to browse User Guides, troubleshooting guides, and to find information about Your Device 1 From your Home screen, tap . 2 Find and tap , then select the required support item. Help in Menus and Applications Some applications and settings have help available in the options menu, which is pre-installed on your device. • Log the number...

User Guide
Page 132
... parties, including but not limited to or forward from your device so that Sony Mobile can enable the sending of the information gathered includes personal data. Help Us Improve Our Software You can receive anonymous bug reports and statistics that you download to restriction under Settings > About phone > Legal information on your Google™ account username and password. None of usage info from your region...
... parties, including but not limited to or forward from your device so that Sony Mobile can enable the sending of the information gathered includes personal data. Help Us Improve Our Software You can receive anonymous bug reports and statistics that you download to restriction under Settings > About phone > Legal information on your Google™ account username and password. None of usage info from your region...


