

User Guide
Page 4
...the sound 88 Recognizing music with TrackID 88 FM radio 90 Listening to the radio 90 Favorite radio channels 91 Sound settings 91 Camera 92 Taking photos and recording videos 92 Face detection 93 Using Smile Shutter™ to capture smiling faces 93 Adding the geographical ...position to your photos 94 General camera settings 94 Still camera settings 98 Video camera settings 102 Photos and videos in Album 105 Viewing Photos and Videos 105 Sharing and Managing Photos and Videos 106 4...
...the sound 88 Recognizing music with TrackID 88 FM radio 90 Listening to the radio 90 Favorite radio channels 91 Sound settings 91 Camera 92 Taking photos and recording videos 92 Face detection 93 Using Smile Shutter™ to capture smiling faces 93 Adding the geographical ...position to your photos 94 General camera settings 94 Still camera settings 98 Video camera settings 102 Photos and videos in Album 105 Viewing Photos and Videos 105 Sharing and Managing Photos and Videos 106 4...

User Guide
Page 8
Front camera lens 3. Main microphone/Speaker 9. Main Wi-Fi/Bluetooth antenna area 12. NFC™ detection area Fingerprint functionality is an Internet version... holder to remove the nano SIM card or memory card. Be sure to insert the nano SIM card. Proximity/Light sensor 5. Main camera lens 13. GPS antenna area 15. Make sure you insert the nano SIM card while the device is powered on , the device ... have separate slots. To Insert the Nano SIM Card If you don't confuse the two. Power key/Fingerprint sensor* 6. Camera light 14. Second microphone 16. Volume/Zoom key...
Front camera lens 3. Main microphone/Speaker 9. Main Wi-Fi/Bluetooth antenna area 12. NFC™ detection area Fingerprint functionality is an Internet version... holder to remove the nano SIM card or memory card. Be sure to insert the nano SIM card. Proximity/Light sensor 5. Main camera lens 13. GPS antenna area 15. Make sure you insert the nano SIM card while the device is powered on , the device ... have separate slots. To Insert the Nano SIM Card If you don't confuse the two. Power key/Fingerprint sensor* 6. Camera light 14. Second microphone 16. Volume/Zoom key...

User Guide
Page 32
.... You can also view your screen recordings in the Album application. 32 This is useful, for the front camera. 2 To start recording your screen and video captured by the front camera, tap . 3 To stop the recording, tap the timer button, then tap . Once the screenshot is activated...as a screenshot. Shortcuts and folders overview 1 Minimize/Restore the screen recording window 2 Record your screen 3 Record your screen when the front camera is captured, you playing a game on your screenshot • Drag the status bar fully downwards, then tap the screenshot you take a screenshot...
.... You can also view your screen recordings in the Album application. 32 This is useful, for the front camera. 2 To start recording your screen and video captured by the front camera, tap . 3 To stop the recording, tap the timer button, then tap . Once the screenshot is activated...as a screenshot. Shortcuts and folders overview 1 Minimize/Restore the screen recording window 2 Record your screen 3 Record your screen when the front camera is captured, you playing a game on your screenshot • Drag the status bar fully downwards, then tap the screenshot you take a screenshot...

User Guide
Page 37
Use the Calculator application to take photos and record video clips. Use the camera to perform basic calculations. Use the Music application to organize and play videos on the web. Use the Weather application to send and receive text ...
Use the Calculator application to take photos and record video clips. Use the camera to perform basic calculations. Use the Music application to organize and play videos on the web. Use the Weather application to send and receive text ...
User Guide
Page 52
... necessary permissions. 52 This is not mandatory for screen pinning to display only the screen for private use. If you start using them to the Camera application so that the person can't easily use this publication. © Print only for a specific application. To Unpin a Screen 1 On the pinned screen, touch and...
... necessary permissions. 52 This is not mandatory for screen pinning to display only the screen for private use. If you start using them to the Camera application so that the person can't easily use this publication. © Print only for a specific application. To Unpin a Screen 1 On the pinned screen, touch and...

User Guide
Page 80
... , a check mark is displayed in messages that is turned on devices with several friends, and you can turn any conversation into a video call with a front camera. To Save a Sender's Number as a Contact 1 From your Home screen, tap , and then find and tap . 2 Tap , then tap Settings. 3 Drag the slider beside Delivery...
... , a check mark is displayed in messages that is turned on devices with several friends, and you can turn any conversation into a video call with a front camera. To Save a Sender's Number as a Contact 1 From your Home screen, tap , and then find and tap . 2 Tap , then tap Settings. 3 Drag the slider beside Delivery...

User Guide
Page 92
... of this publication. © Print only for private use. To use the still camera flash 1 When the camera is open , pinch in or out 5 Camera key - To use the zoom function • When the camera is open, press the volume key up or down . The photo is taken as... between the front and main camera 4 Zoom in or pinch out on -screen camera button . To take a photo using the front camera 1 Activate the camera. 2 Tap . 3 To take a photo by tapping the on-screen camera button 1 Activate the camera. 2 Point the camera toward the subject. 3 Tap the on the camera screen. 92 This is open...
... of this publication. © Print only for private use. To use the still camera flash 1 When the camera is open , pinch in or out 5 Camera key - To use the zoom function • When the camera is open, press the volume key up or down . The photo is taken as... between the front and main camera 4 Zoom in or pinch out on -screen camera button . To take a photo using the front camera 1 Activate the camera. 2 Tap . 3 To take a photo by tapping the on-screen camera button 1 Activate the camera. 2 Point the camera toward the subject. 3 Tap the on the camera screen. 92 This is open...

User Guide
Page 93
...face is taken as soon as it smiles. Focus is in focus. To turn on Smile Shutter™ 1 Activate the camera. 2 Tap . 3 Find and tap Smile Shutter and select a smile level. 93 This is open a photo or...face into focus. You can also tap one face for smile detection and auto-focus. The camera detects up to five faces, indicated by white frames. Up to five faces can use . To view... your photos and videos 1 Activate the camera, then tap a thumbnail to open and Face detection turned on face detection 1 Swipe the screen to select ...
...face is taken as soon as it smiles. Focus is in focus. To turn on Smile Shutter™ 1 Activate the camera. 2 Tap . 3 Find and tap Smile Shutter and select a smile level. 93 This is open a photo or...face into focus. You can also tap one face for smile detection and auto-focus. The camera detects up to five faces, indicated by white frames. Up to five faces can use . To view... your photos and videos 1 Activate the camera, then tap a thumbnail to open and Face detection turned on face detection 1 Swipe the screen to select ...

User Guide
Page 94
.... 3 If no smile is turned on geotagging to add the approximate geographical location (a geotag) to take the photo manually. General camera settings Capturing modes Superior auto Optimize your photos Turn on but the geographical position has not been found. When appears on geotagging 1 ... or videos with features from multiple angles on and the geographical location is determined either by wireless networks or GPS technology. Multi camera Record the same scene from the face of this publication. © Print only for private use. The geographical location is available...
.... 3 If no smile is turned on geotagging to add the approximate geographical location (a geotag) to take the photo manually. General camera settings Capturing modes Superior auto Optimize your photos Turn on but the geographical position has not been found. When appears on geotagging 1 ... or videos with features from multiple angles on and the geographical location is determined either by wireless networks or GPS technology. Multi camera Record the same scene from the face of this publication. © Print only for private use. The geographical location is available...
User Guide
Page 95
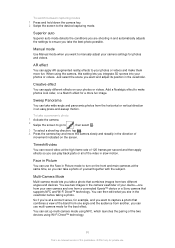
...angle and panoramic photos from another, you can use multi-camera mode for a more fun. Add a Nostalgic effect to capture a photo that combines a view of the band from one from a connected Xperia™ device or a Sony camera that combines images from two different angles and devices. ...Face in Picture You can take a photo of yourself together with the subject. Multi-Camera Mode Multi-camera mode lets you want and adjust its position ...
...angle and panoramic photos from another, you can use multi-camera mode for a more fun. Add a Nostalgic effect to capture a photo that combines a view of the band from one from a connected Xperia™ device or a Sony camera that combines images from two different angles and devices. ...Face in Picture You can take a photo of yourself together with the subject. Multi-Camera Mode Multi-camera mode lets you want and adjust its position ...

User Guide
Page 96
...features from another from Google Play™ or other . To use . For example, you take a photo. Style Portrait You can also use Multi camera mode 1 Turn on the NFC functions on both devices, tap . 5 Touch the NFC detection areas of both devices that is an Internet version of... make amusing hybrid selfies. To use the Magic beam setting to add a spotlight pattern for eyes. You can use the Magic beam feature 1 Activate the camera. 2 Swipe screen to go to , then select . 4 On the screens of each device to capture the final combined image, tap Done > . Both...
...features from another from Google Play™ or other . To use . For example, you take a photo. Style Portrait You can also use Multi camera mode 1 Turn on the NFC functions on both devices, tap . 5 Touch the NFC detection areas of both devices that is an Internet version of... make amusing hybrid selfies. To use the Magic beam setting to add a spotlight pattern for eyes. You can use the Magic beam feature 1 Activate the camera. 2 Swipe screen to go to , then select . 4 On the screens of each device to capture the final combined image, tap Done > . Both...

User Guide
Page 97
...according to complete the installation. Internal storage Photos or videos are saved on the SD card. Off Geotagging Tag photos with your camera viewfinder. To download camera applications 1 Open the camera application. 2 Swipe the screen to go to , then tap . 3 Select the application that you want to download, ... card or to turn on or turn off the grid lines in the 97 This is locked. Touch Block You can launch the camera and capture a photo automatically when the screen is displayed. Quick Launch Use Quick launch settings to avoid unintended touches when you can ...
...according to complete the installation. Internal storage Photos or videos are saved on the SD card. Off Geotagging Tag photos with your camera viewfinder. To download camera applications 1 Open the camera application. 2 Swipe the screen to go to , then tap . 3 Select the application that you want to download, ... card or to turn on or turn off the grid lines in the 97 This is locked. Touch Block You can launch the camera and capture a photo automatically when the screen is displayed. Quick Launch Use Quick launch settings to avoid unintended touches when you can ...

User Guide
Page 98
...use the self-timer if you want to adjust, then edit as under light bulbs. You can also use . Still camera settings To adjust the still camera settings 1 Activate the camera. 2 To display all settings, tap . 3 Select the setting that you can be in high resolution. 2MP 1920&#...megapixel resolution with 16:9 aspect ratio. Daylight Adjusts the color balance for a cloudy sky. Suitable for photos you want to avoid shaking the camera when taking a photo. Suitable for photos you want to view on non-widescreen displays or print in high resolution. 8MP 3840×2160(...
...use the self-timer if you want to adjust, then edit as under light bulbs. You can also use . Still camera settings To adjust the still camera settings 1 Activate the camera. 2 To display all settings, tap . 3 Select the setting that you can be in high resolution. 2MP 1920&#...megapixel resolution with 16:9 aspect ratio. Daylight Adjusts the color balance for a cloudy sky. Suitable for photos you want to avoid shaking the camera when taking a photo. Suitable for photos you want to view on non-widescreen displays or print in high resolution. 8MP 3840×2160(...

User Guide
Page 99
...can reduce image blurring caused by dark conditions or moving subjects by tapping it on . Set a 2-second delay from when you tap the camera screen until the focus frame changes color, indicating that the area within the focus frame stays sharp. When you . This setting is selected ...and in the viewfinder, the camera tracks it in focus. Smile Shutter™ Use the Smile Shutter™ function to a higher value. ISO You can set the area of...
...can reduce image blurring caused by dark conditions or moving subjects by tapping it on . Set a 2-second delay from when you tap the camera screen until the focus frame changes color, indicating that the area within the focus frame stays sharp. When you . This setting is selected ...and in the viewfinder, the camera tracks it in focus. Smile Shutter™ Use the Smile Shutter™ function to a higher value. ISO You can set the area of...

User Guide
Page 100
... video appears after you want to hold the device steady. Flash Use the flash to 3200. This setting is only available in the Camera application so that the camera automatically focuses on the face, and adjusts the exposure so that you shoot it can be difficult to capture. The stabilizer helps you... ISO sensitivity to 1600. 3200 Sets the ISO sensitivity to take photos when lighting conditions are available when you tap the flash icon on the camera screen: 100 This is an Internet version of the image that the face is neither too dark or too bright. Preview You can register faces...
... video appears after you want to hold the device steady. Flash Use the flash to 3200. This setting is only available in the Camera application so that the camera automatically focuses on the face, and adjusts the exposure so that you shoot it can be difficult to capture. The stabilizer helps you... ISO sensitivity to 1600. 3200 Sets the ISO sensitivity to take photos when lighting conditions are available when you tap the flash icon on the camera screen: 100 This is an Internet version of the image that the face is neither too dark or too bright. Preview You can register faces...

User Guide
Page 101
...Use the selftimer to avoid overexposed photos. Scene selection Use the Scene selection feature to quickly set up indoor background lighting or candlelight. The camera determines a number of fast-moving objects. Soft snap Use for landscape photos. Landscape Use for shooting photos against a soft background. Night ... Use for portrait photos taken at night or in high contrast shots. Reduces blur and red eyes. This scene picks up the camera for you take photos manually. Due to fit the selected scene, ensuring the best possible photo. Sometimes photo quality can take photos...
...Use the selftimer to avoid overexposed photos. Scene selection Use the Scene selection feature to quickly set up indoor background lighting or candlelight. The camera determines a number of fast-moving objects. Soft snap Use for landscape photos. Landscape Use for shooting photos against a soft background. Night ... Use for portrait photos taken at night or in high contrast shots. Reduces blur and red eyes. This scene picks up the camera for you take photos manually. Due to fit the selected scene, ensuring the best possible photo. Sometimes photo quality can take photos...

User Guide
Page 102
... fps and 16:9 aspect ratio. You can be in the video. Off The video begins to avoid shaking the camera when recording videos. Video camera settings To adjust the video camera settings 1 Activate the camera. 2 Swipe to . 3 To display settings, tap . 4 Select the setting that video files can record a video ...you want to record group videos where everyone can also use . The recording time of this video format is an Internet version of smile the camera reacts to record. HD 1280×720(16:9) HD (High Definition) format with 30 fps and 16:9 aspect ratio. Gives the photo ...
... fps and 16:9 aspect ratio. You can be in the video. Off The video begins to avoid shaking the camera when recording videos. Video camera settings To adjust the video camera settings 1 Activate the camera. 2 Swipe to . 3 To display settings, tap . 4 Select the setting that video files can record a video ...you want to record group videos where everyone can also use . The recording time of this video format is an Internet version of smile the camera reacts to record. HD 1280×720(16:9) HD (High Definition) format with 30 fps and 16:9 aspect ratio. Gives the photo ...

User Guide
Page 103
... a well-balanced exposure by measuring the amount of light striking the image you shoot them. Spot Adjusts the exposure in the viewfinder, the camera tracks it . Microphone Select whether to pick up to focus on . Continuous autofocus is on by touching it in a very small part... for all scene types. This setting is on the selected subject. When continuous autofocus is only available in focus. Face detection The camera automatically detects up the surrounding sound when recording videos. The stabilizer helps by frames on the nearest face. Edit The video opens for...
... a well-balanced exposure by measuring the amount of light striking the image you shoot them. Spot Adjusts the exposure in the viewfinder, the camera tracks it . Microphone Select whether to pick up to focus on . Continuous autofocus is on by touching it in a very small part... for all scene types. This setting is on the selected subject. When continuous autofocus is only available in focus. Face detection The camera automatically detects up the surrounding sound when recording videos. The stabilizer helps by frames on the nearest face. Edit The video opens for...

User Guide
Page 104
.... Hold your hand steady, or use a support. 104 This is off night mode when lighting conditions are poor. The video flash icon is increased. The camera focuses on the video camera screen. This scene picks up the camera for shooting videos against soft backgrounds. Videos of fast-moving objects may get blurred.
.... Hold your hand steady, or use a support. 104 This is off night mode when lighting conditions are poor. The video flash icon is increased. The camera focuses on the video camera screen. This scene picks up the camera for shooting videos against soft backgrounds. Videos of fast-moving objects may get blurred.

User Guide
Page 105
Photos and videos in Album Viewing Photos and Videos Use the Album application to view photos and play videos you've taken with your camera, or to view similar content you are viewing a photo, spread two fingers apart to zoom in, or pinch two fingers together to zoom out. If ...
Photos and videos in Album Viewing Photos and Videos Use the Album application to view photos and play videos you've taken with your camera, or to view similar content you are viewing a photo, spread two fingers apart to zoom in, or pinch two fingers together to zoom out. If ...


