
Operating Instructions
Page 2
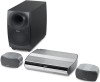
...receiver. - DAV-X1 Serial No WARNING This equipment has been tested and found to the presence of uninsulated "dangerous voltage" within the product's enclosure that provides guidelines for an extended period of time. This equipment generates, uses, and can be connected to the grounding system of the ...building, as it any changes or modifications not expressly approved in this manual could void your authority to call upon your Sony dealer regarding this product. It is intended...
...receiver. - DAV-X1 Serial No WARNING This equipment has been tested and found to the presence of uninsulated "dangerous voltage" within the product's enclosure that provides guidelines for an extended period of time. This equipment generates, uses, and can be connected to the grounding system of the ...building, as it any changes or modifications not expressly approved in this manual could void your authority to call upon your Sony dealer regarding this product. It is intended...
Operating Instructions
Page 4
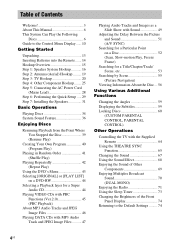
... 6 Guide to the Control Menu Display...... 10 Getting Started Unpacking 13 Inserting Batteries into the Remote....... 14 Hookup Overview 15 Step 1: Speaker System Hookup........... 16 Step 2: Antenna (Aerial) Hookup ......... 19 Step 3: TV Hookup 20 Step 4: Other Component Hookup........ 25 Step 5: Connecting the...Own Program 40 (Program Play) Playing in Random Order 41 (Shuffle Play) Playing Repeatedly 42 (Repeat Play) Using the DVD's Menu 43 Selecting [ORIGINAL] or [PLAY LIST] on a DVD-RW 44 Selecting a Playback layer for a Super Audio CD 44 Playing VIDEO CDs with PBC Functions (Ver...
... 6 Guide to the Control Menu Display...... 10 Getting Started Unpacking 13 Inserting Batteries into the Remote....... 14 Hookup Overview 15 Step 1: Speaker System Hookup........... 16 Step 2: Antenna (Aerial) Hookup ......... 19 Step 3: TV Hookup 20 Step 4: Other Component Hookup........ 25 Step 5: Connecting the...Own Program 40 (Program Play) Playing in Random Order 41 (Shuffle Play) Playing Repeatedly 42 (Repeat Play) Using the DVD's Menu 43 Selecting [ORIGINAL] or [PLAY LIST] on a DVD-RW 44 Selecting a Playback layer for a Super Audio CD 44 Playing VIDEO CDs with PBC Functions (Ver...

Operating Instructions
Page 5
Settings and Adjustments Using the Setup Display 75 Setting the Display or Sound Track Language 76 [LANGUAGE SETUP] Settings for the Display 77 [SCREEN SETUP] Custom Settings 79 [CUSTOM SETUP] Speaker Setting (Subwoofer 80 [SPEAKER SETUP] Additional Information Precautions 81 Notes about the Discs 82 Troubleshooting 82 Self-diagnosis Function 85 (When letters/numbers appear in the display) Specifications 86 Glossary 87 Language Code List 90 Index to Parts and Controls 91 DVD Setup Display List 96 AMP Menu List 97 Index 98 5US
Settings and Adjustments Using the Setup Display 75 Setting the Display or Sound Track Language 76 [LANGUAGE SETUP] Settings for the Display 77 [SCREEN SETUP] Custom Settings 79 [CUSTOM SETUP] Speaker Setting (Subwoofer 80 [SPEAKER SETUP] Additional Information Precautions 81 Notes about the Discs 82 Troubleshooting 82 Self-diagnosis Function 85 (When letters/numbers appear in the display) Specifications 86 Glossary 87 Language Code List 90 Index to Parts and Controls 91 DVD Setup Display List 96 AMP Menu List 97 Index 98 5US

Operating Instructions
Page 6
About This Manual • The instructions in this manual describe the controls on the area. • "DVD" may be displayed (disc title only). You can also use the controls on the system if they have the same or similar names as those on the remote. • The Control Menu items may be ... 9660 Level 1/ Level 2, or its extended format, Joliet 6US audio CD format - Note about CDs The system can be used in this manual. MP3 audio tracks and JPEG image files of discs DVD VIDEO Disc logo DVD-RW VIDEO CD Super Audio CD*1 Audio CD*2 CD-R/CD-RW (audio data) (MP3 files) (JPEG...
About This Manual • The instructions in this manual describe the controls on the area. • "DVD" may be displayed (disc title only). You can also use the controls on the system if they have the same or similar names as those on the remote. • The Control Menu items may be ... 9660 Level 1/ Level 2, or its extended format, Joliet 6US audio CD format - Note about CDs The system can be used in this manual. MP3 audio tracks and JPEG image files of discs DVD VIDEO Disc logo DVD-RW VIDEO CD Super Audio CD*1 Audio CD*2 CD-R/CD-RW (audio data) (MP3 files) (JPEG...

Operating Instructions
Page 7
...format • Data part of CD-Extras • DVD Audios • DVD-RAMs • A DVD VIDEO with digital audio material on the other side. Play interactive software using menu screens displayed on the TV screen (PBC Playback), in DVD-RWs with copyright protection technologies This product is a two...video playback functions of Ver. 1.1 discs. Moreover, you can enjoy two kinds of playback depending on PBC (Playback Control) (VIDEO CDs) This system conforms to Ver. 1.1 and Ver. 2.0 of VIDEO CD standards. However, since the audio material side does not conform to the Compact Disc...
...format • Data part of CD-Extras • DVD Audios • DVD-RAMs • A DVD VIDEO with digital audio material on the other side. Play interactive software using menu screens displayed on the TV screen (PBC Playback), in DVD-RWs with copyright protection technologies This product is a two...video playback functions of Ver. 1.1 discs. Moreover, you can enjoy two kinds of playback depending on PBC (Playback Control) (VIDEO CDs) This system conforms to Ver. 1.1 and Ver. 2.0 of VIDEO CD standards. However, since the audio material side does not conform to the Compact Disc...

Operating Instructions
Page 8
...Super Audio CD Super Audio CD is a new high-quality audio disc standard where music is contained in the first session. The DSD format, using a sampling frequency 64 times higher than that is prohibited by area restrictions. Types of Super Audio CDs There are two types of discs, ... • Super Audio CD layer: A high-density signal layer for a Super Audio CD" (page 44). Also, refer to the original sound. Since this system. DVD VIDEOs labeled ALL will also play on one side, it is contained in the first session. Depending on the TV screen. Any subsequent MP3 audio...
...Super Audio CD Super Audio CD is a new high-quality audio disc standard where music is contained in the first session. The DSD format, using a sampling frequency 64 times higher than that is prohibited by area restrictions. Types of Super Audio CDs There are two types of discs, ... • Super Audio CD layer: A high-density signal layer for a Super Audio CD" (page 44). Also, refer to the original sound. Since this system. DVD VIDEOs labeled ALL will also play on one side, it is contained in the first session. Depending on the TV screen. Any subsequent MP3 audio...

Operating Instructions
Page 9
... Laboratories. *2 Manufactured under license from Digital Theater Systems, Inc. Use of Digital Theater Systems, Inc. 9US Reverse engineering or disassembly is prohibited. "Dolby," "Pro Logic," and the double-D symbol are trademarks of this copyright protection technology must be authorized by Macrovision, and is intended for home and other limited viewing uses only unless otherwise authorized by U.S. Copyrights...
... Laboratories. *2 Manufactured under license from Digital Theater Systems, Inc. Use of Digital Theater Systems, Inc. 9US Reverse engineering or disassembly is prohibited. "Dolby," "Pro Logic," and the double-D symbol are trademarks of this copyright protection technology must be authorized by Macrovision, and is intended for home and other limited viewing uses only unless otherwise authorized by U.S. Copyrights...

Operating Instructions
Page 10
... Playback status (N Playback, X Pause, x Stop, etc.) Selected item 12 (27) 18 (34) T 1:32:55 OFF OFF DISC TITLE CHAPTER DVD VIDEO Type of disc being played*3 Playing time*4 Current setting Options Function name of selected Control Menu item Operation message REPEAT ENTER Quit: DISPLAY 10US... Press DISPLAY repeatedly to view related information. For details about each item, see the pages in parentheses. Guide to the Control Menu Display DISPLAY Use the Control Menu to select a function and to turn on or change the Control Menu display as follows: , Control Menu display 1 m ...
... Playback status (N Playback, X Pause, x Stop, etc.) Selected item 12 (27) 18 (34) T 1:32:55 OFF OFF DISC TITLE CHAPTER DVD VIDEO Type of disc being played*3 Playing time*4 Current setting Options Function name of selected Control Menu item Operation message REPEAT ENTER Quit: DISPLAY 10US... Press DISPLAY repeatedly to view related information. For details about each item, see the pages in parentheses. Guide to the Control Menu Display DISPLAY Use the Control Menu to select a function and to turn on or change the Control Menu display as follows: , Control Menu display 1 m ...

Operating Instructions
Page 11
... be played, the [ORIGINAL] one, or an edited [PLAY LIST]. [TIME/TEXT] (page 53) Checks the elapsed time and the remaining playback time. Displays the DVD/CD text or the MP3 track name. [PROGRAM] (page 40) Selects the track to play in the order you want. [SHUFFLE] (page 41) Plays the... tracks/all albums) repeatedly or one title/chapter/track/album repeatedly. [PARENTAL CONTROL] (page 60) Sets to prohibit playback on this system. [SETUP] (page 75) [QUICK] Setup (page 29) Use Quick Setup to choose the desired language of the on ), track number for VIDEO CDs/Super Audio CDs/CDs, album number for...
... be played, the [ORIGINAL] one, or an edited [PLAY LIST]. [TIME/TEXT] (page 53) Checks the elapsed time and the remaining playback time. Displays the DVD/CD text or the MP3 track name. [PROGRAM] (page 40) Selects the track to play in the order you want. [SHUFFLE] (page 41) Plays the... tracks/all albums) repeatedly or one title/chapter/track/album repeatedly. [PARENTAL CONTROL] (page 60) Sets to prohibit playback on this system. [SETUP] (page 75) [QUICK] Setup (page 29) Use Quick Setup to choose the desired language of the on ), track number for VIDEO CDs/Super Audio CDs/CDs, album number for...

Operating Instructions
Page 12
... was taken. [INTERVAL] (page 50) Specifies the duration for which the slides are displayed on the screen. [EFFECT] (page 50) Selects the effects to be used for changing slides during a slide show. [MODE (MP3, JPEG)] (page 49) Selects the data type; The [ORIGINAL/PLAY LIST] indicator lights up in green when...
... was taken. [INTERVAL] (page 50) Specifies the duration for which the slides are displayed on the screen. [EFFECT] (page 50) Selects the effects to be used for changing slides during a slide show. [MODE (MP3, JPEG)] (page 49) Selects the data type; The [ORIGINAL/PLAY LIST] indicator lights up in green when...

Operating Instructions
Page 14
... size AAA (R03) batteries by pinching the sides. Note • Do not leave the remote in an extremely hot or humid place. • Do not use the remote for an extended period of time, remove the batteries to avoid possible damage from the sun or lighting apparatus. When... battery with an old one. • Do not drop any foreign object into the Remote You can control the system using the remote, point it at the remote sensor on the system. 1Slide open the cover. 2 2Remove the cover by matching the 3 and # ends on the batteries to direct light from battery leakage...
... size AAA (R03) batteries by pinching the sides. Note • Do not leave the remote in an extremely hot or humid place. • Do not use the remote for an extended period of time, remove the batteries to avoid possible damage from the sun or lighting apparatus. When... battery with an old one. • Do not drop any foreign object into the Remote You can control the system using the remote, point it at the remote sensor on the system. 1Slide open the cover. 2 2Remove the cover by matching the 3 and # ends on the batteries to direct light from battery leakage...

Operating Instructions
Page 16
... Connect the supplied speaker system using the supplied speaker cord. Do not connect any speakers other than those supplied with this system. To the front speaker (gray, 5 m (16.4 ft)) To the system To the subwoofer (black, 3 m (9.8 ft)) To the front speaker (gray, 5 m (16.4 ft)) Attaching the speaker pads... to determine the ideal speaker positions (page 31). To obtain the best possible front surround sound, use the supplied Setup Disc to the bottom four corners of the front speakers. 16US Required cord Speaker cord You can connect the system and speakers with this one cord.
... Connect the supplied speaker system using the supplied speaker cord. Do not connect any speakers other than those supplied with this system. To the front speaker (gray, 5 m (16.4 ft)) To the system To the subwoofer (black, 3 m (9.8 ft)) To the front speaker (gray, 5 m (16.4 ft)) Attaching the speaker pads... to determine the ideal speaker positions (page 31). To obtain the best possible front surround sound, use the supplied Setup Disc to the bottom four corners of the front speakers. 16US Required cord Speaker cord You can connect the system and speakers with this one cord.

Operating Instructions
Page 17
... 75 COAXIAL Subwoofer Connect the speaker cord in the right front speaker position. A Connect the speaker cord to the right front speaker. Connect to the system. continued 17US k k RIGHT (gray) Label side face down. B Connect the speaker jack marked RIGHT to the above illustration. Secure the jack by ...tightening the two screws. The front speakers are identical, and either can be used for the left or right speaker. If you connect the RIGHT jack to the speaker, it in order of 1 to 4, according to the...
... 75 COAXIAL Subwoofer Connect the speaker cord in the right front speaker position. A Connect the speaker cord to the right front speaker. Connect to the system. continued 17US k k RIGHT (gray) Label side face down. B Connect the speaker jack marked RIGHT to the above illustration. Secure the jack by ...tightening the two screws. The front speakers are identical, and either can be used for the left or right speaker. If you connect the RIGHT jack to the speaker, it in order of 1 to 4, according to the...

Operating Instructions
Page 18
...such as alcohol or benzene. • Do not connect the WOOFER jack either can be used for glasses. • Do not use the Setup Disc to the subwoofer. For details on their bottom surfaces, with the SONY logo correctly oriented. 18US Note • Do not set the speakers in an inclined ...position. • Do not place the speakers in the left front speaker position. D Connect the speaker jack marked WOOFER to check all the components, speakers, and AC power cord (mains lead), use any type...
...such as alcohol or benzene. • Do not connect the WOOFER jack either can be used for glasses. • Do not use the Setup Disc to the subwoofer. For details on their bottom surfaces, with the SONY logo correctly oriented. 18US Note • Do not set the speakers in an inclined ...position. • Do not place the speakers in the left front speaker position. D Connect the speaker jack marked WOOFER to check all the components, speakers, and AC power cord (mains lead), use any type...

Operating Instructions
Page 19
... antennas (aerials) for listening to an outdoor FM antenna (aerial) as possible. Tip • When you have poor FM reception, use a 75-ohms coaxial cable (not supplied) to connect the system to the radio. AM loop antenna (aerial) ANTENNA COMPONENT VIDEO OUT AM FM 75 COAXIAL Y PB/CB PR/CR FM wire... antenna (aerial) Note • To prevent noise pickup, keep the AM loop antenna (aerial) away from the system and other components. • Be sure to either terminal. System ANTENNA AM FM 75 COAXIAL Outdoor FM antenna (aerial) 19US
... antennas (aerials) for listening to an outdoor FM antenna (aerial) as possible. Tip • When you have poor FM reception, use a 75-ohms coaxial cable (not supplied) to connect the system to the radio. AM loop antenna (aerial) ANTENNA COMPONENT VIDEO OUT AM FM 75 COAXIAL Y PB/CB PR/CR FM wire... antenna (aerial) Note • To prevent noise pickup, keep the AM loop antenna (aerial) away from the system and other components. • Be sure to either terminal. System ANTENNA AM FM 75 COAXIAL Outdoor FM antenna (aerial) 19US

Operating Instructions
Page 21
...The DVI jack will not be connected via COMPONENT VIDEO IN jacks (Y, PB/CB, PR/CR). Note • Only when DVD function is selected (by pressing FUNCTION repeatedly until "DVD" appears in the front panel display), the COMPONENT VIDEO OUT jacks output video signals, and the HDMI OUT jack outputs video...(page 22). To connect to a standard 4:3 screen TV Depending on a separate bus from the HDMI OUT jack. Furthermore, you should use the COMPONENT VIDEO OUT jacks (Y, PB/ CB, PR/CR) instead of the system to DVI jacks that Super Audio CD sound is OFF). When connecting to a TV with DVI input...
...The DVI jack will not be connected via COMPONENT VIDEO IN jacks (Y, PB/CB, PR/CR). Note • Only when DVD function is selected (by pressing FUNCTION repeatedly until "DVD" appears in the front panel display), the COMPONENT VIDEO OUT jacks output video signals, and the HDMI OUT jack outputs video...(page 22). To connect to a standard 4:3 screen TV Depending on a separate bus from the HDMI OUT jack. Furthermore, you should use the COMPONENT VIDEO OUT jacks (Y, PB/ CB, PR/CR) instead of the system to DVI jacks that Super Audio CD sound is OFF). When connecting to a TV with DVI input...

Operating Instructions
Page 22
Does your TV accepts progressive signals, and, - To display using this method, you need to connect to a TV that ... signals. you select these settings when 22US "P AUTO" or "P VIDEO" appears in the front panel display when the system outputs progressive signals. 1 Press FUNCTION repeatedly to the COMPONENT VIDEO OUT jacks, and, - Select this setting when: -... Progressive is the method for video-based software. the TV is connected to select "DVD." 2 Press PROGRESSIVE. Note that the picture will not be clear or no picture will appear if you select ...
Does your TV accepts progressive signals, and, - To display using this method, you need to connect to a TV that ... signals. you select these settings when 22US "P AUTO" or "P VIDEO" appears in the front panel display when the system outputs progressive signals. 1 Press FUNCTION repeatedly to the COMPONENT VIDEO OUT jacks, and, - Select this setting when: -... Progressive is the method for video-based software. the TV is connected to select "DVD." 2 Press PROGRESSIVE. Note that the picture will not be clear or no picture will appear if you select ...

Operating Instructions
Page 24
...IN) TV with COAXIAL DIGITAL OUT jack A To connect the AUDIO OUT jacks of a TV to the TV (AUDIO IN) jacks of this system. When you use both the TV AUDIO IN jacks (analogue connection) and the COAXIAL DIGITAL IN jack (digital connection) at the same time, the digital connection takes...; To listen to the appropriate jacks on the components. Connecting the audio cords Outputs TV sound through the speakers of this system Connect a TV to the TV (AUDIO IN) jacks using a coaxial digital cord (not supplied). White (L/audio) Red (R/audio) B To connect the COAXIAL DIGITAL OUT jack of a TV to...
...IN) TV with COAXIAL DIGITAL OUT jack A To connect the AUDIO OUT jacks of a TV to the TV (AUDIO IN) jacks of this system. When you use both the TV AUDIO IN jacks (analogue connection) and the COAXIAL DIGITAL IN jack (digital connection) at the same time, the digital connection takes...; To listen to the appropriate jacks on the components. Connecting the audio cords Outputs TV sound through the speakers of this system Connect a TV to the TV (AUDIO IN) jacks using a coaxial digital cord (not supplied). White (L/audio) Red (R/audio) B To connect the COAXIAL DIGITAL OUT jack of a TV to...

Operating Instructions
Page 25
...of the picture increases from A to B. When connecting a cord, be sure to match the color-coded sleeve to the system. To VIDEO 1/SAT 1 (OPTICAL DIGITAL IN) OPTICAL DIGITAL OUT COAXIAL DIGITAL OUT VIDEO OUT AUDIO OUT L R S VIDEO...VCR or digital satellite receiver, etc. To VIDEO 2/ SAT 2 (S-VIDEO IN) Connecting the video cords The quality of this system Connect a VCR or other component to avoid hum and noise. VCR or digital satellite receiver, etc. Getting Started Step 4: ...Be sure to make connections securely to the VIDEO IN jack using a video/audio cord (not supplied).
...of the picture increases from A to B. When connecting a cord, be sure to match the color-coded sleeve to the system. To VIDEO 1/SAT 1 (OPTICAL DIGITAL IN) OPTICAL DIGITAL OUT COAXIAL DIGITAL OUT VIDEO OUT AUDIO OUT L R S VIDEO...VCR or digital satellite receiver, etc. To VIDEO 2/ SAT 2 (S-VIDEO IN) Connecting the video cords The quality of this system Connect a VCR or other component to avoid hum and noise. VCR or digital satellite receiver, etc. Getting Started Step 4: ...Be sure to make connections securely to the VIDEO IN jack using a video/audio cord (not supplied).

Operating Instructions
Page 26
...audio cord (not supplied). To connect the AUDIO OUT jacks of other component to the AUDIO IN jacks of this system Connect a VCR or other component to the S VIDEO IN jack using a coaxial digital cord (not supplied). Note • Make sure that the connected jack combinations are correct; Connecting ... (L/Audio) Red (R/Audio) To connect the COAXIAL DIGITAL OUT jack of a component to the COAXIAL DIGITAL IN jack of this system Connect the component to the COAXIAL DIGITAL IN jack using an S video cord (not supplied). B To connect the S VIDEO OUT jack of other component to the S VIDEO IN ...
...audio cord (not supplied). To connect the AUDIO OUT jacks of other component to the AUDIO IN jacks of this system Connect a VCR or other component to the S VIDEO IN jack using a coaxial digital cord (not supplied). Note • Make sure that the connected jack combinations are correct; Connecting ... (L/Audio) Red (R/Audio) To connect the COAXIAL DIGITAL OUT jack of a component to the COAXIAL DIGITAL IN jack of this system Connect the component to the COAXIAL DIGITAL IN jack using an S video cord (not supplied). B To connect the S VIDEO OUT jack of other component to the S VIDEO IN ...


