
Operating Instructions
Page 1
...Model No. Digital Photo Frame DPF-A72N/E72N/D72N Operating Instructions Before operating this unit, please read this product. Refer to these numbers whenever you call upon your Sony dealer regarding this manual thoroughly and retain it for future reference. DPF-A72N/E72N/D72N Serial No... Product lineup differ by country and region. 4-155-760-11 (1) Before operation Basic operations Advanced operations Using a computer Error messages Troubleshooting Additional information © 2009 Sony Corporation Owner's Record The model...
...Model No. Digital Photo Frame DPF-A72N/E72N/D72N Operating Instructions Before operating this unit, please read this product. Refer to these numbers whenever you call upon your Sony dealer regarding this manual thoroughly and retain it for future reference. DPF-A72N/E72N/D72N Serial No... Product lineup differ by country and region. 4-155-760-11 (1) Before operation Basic operations Advanced operations Using a computer Error messages Troubleshooting Additional information © 2009 Sony Corporation Owner's Record The model...

Operating Instructions
Page 3
...treated as household waste. Disposal of waste batteries (applicable in the EMC Directive for EMC and product safety is Sony Corporation, 1-7-1 Konan Minato-ku Tokyo, 1080075 Japan. In case of the materials will be used in the ...help to remove the battery from the product safely. To ensure that for the recycling of this product is Sony Deutschland GmbH, Hedelfinger Strasse 61, 70327 Stuttgart, Germany. For more detailed information about recycling of electrical and ... of California, USA only Perchlorate Material - By ensuring this digital photo frame.
...treated as household waste. Disposal of waste batteries (applicable in the EMC Directive for EMC and product safety is Sony Corporation, 1-7-1 Konan Minato-ku Tokyo, 1080075 Japan. In case of the materials will be used in the ...help to remove the battery from the product safely. To ensure that for the recycling of this product is Sony Deutschland GmbH, Hedelfinger Strasse 61, 70327 Stuttgart, Germany. For more detailed information about recycling of electrical and ... of California, USA only Perchlorate Material - By ensuring this digital photo frame.

Operating Instructions
Page 4
...screen. Unless you save a backup copy of the copyright law. ROM", , "MagicGate", and are trademarks or registered trademarks of Sony Corporation. • Microsoft, Windows, and Windows Vista are registered trademarks of copyright holders for your data. Any unauthorized use or malfunction... malfunction. Backup recommendations To avoid potential risk of data loss caused by use or modification of FUJIFILM Corporation. • The photo frame contains fonts from Monotype Imaging Inc. • This software is limited to the copyright holders claim for any way. •...
...screen. Unless you save a backup copy of the copyright law. ROM", , "MagicGate", and are trademarks or registered trademarks of Sony Corporation. • Microsoft, Windows, and Windows Vista are registered trademarks of copyright holders for your data. Any unauthorized use or malfunction... malfunction. Backup recommendations To avoid potential risk of data loss caused by use or modification of FUJIFILM Corporation. • The photo frame contains fonts from Monotype Imaging Inc. • This software is limited to the copyright holders claim for any way. •...

Operating Instructions
Page 6
... Before operation Enjoying your photo frame in various ways 8 Features 9 Checking included items 10 Identifying the parts 11 Basic operations Preparing the remote control ........14 Setting the stand 15 To display the photo frame on the wall 16 To exchange a panel (DPF-E72N only 17 Connecting to the... AC power source 18 Turning the photo frame on ..........20 Setting the current time 21 Inserting a memory card 22 Changing...
... Before operation Enjoying your photo frame in various ways 8 Features 9 Checking included items 10 Identifying the parts 11 Basic operations Preparing the remote control ........14 Setting the stand 15 To display the photo frame on the wall 16 To exchange a panel (DPF-E72N only 17 Connecting to the... AC power source 18 Turning the photo frame on ..........20 Setting the current time 21 Inserting a memory card 22 Changing...

Operating Instructions
Page 7
Error messages If an error message appears .........49 Troubleshooting If trouble occurs 51 Additional information Precautions 55 On safety 55 On installation 55 On cleaning 55 On restrictions on duplication ........56 Disposing of the photo frame .........56 About memory cards 56 "Memory Stick 56 SD memory card 57 xD-Picture Card 57 CompactFlash card (DPF-D72N only 58 Notes on using a memory card .......58 Specifications 59 Index 61 7 GB
Error messages If an error message appears .........49 Troubleshooting If trouble occurs 51 Additional information Precautions 55 On safety 55 On installation 55 On cleaning 55 On restrictions on duplication ........56 Disposing of the photo frame .........56 About memory cards 56 "Memory Stick 56 SD memory card 57 xD-Picture Card 57 CompactFlash card (DPF-D72N only 58 Notes on using a memory card .......58 Specifications 59 Index 61 7 GB

Operating Instructions
Page 8
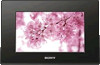
Before operation Enjoying your photo frame in various ways The Sony DPF-A72N/E72N/D72N is a digital photo frame for easily displaying images taken with a digital camera or other device, without using a computer. 8 GB
Before operation Enjoying your photo frame in various ways The Sony DPF-A72N/E72N/D72N is a digital photo frame for easily displaying images taken with a digital camera or other device, without using a computer. 8 GB

Operating Instructions
Page 10
... portrait or landscape position. (.page 15) Checking included items Make sure that the following items are included. • Digital photo frame (1) • Stand (1) • Remote control (1) • AC adaptor (1) • Exchangeable panel (2) (DPF-E72N only) • Operating Instructions (this manual) (1) • Read This First (1) • Warranty (1) (In some regions, the warranty is...
... portrait or landscape position. (.page 15) Checking included items Make sure that the following items are included. • Digital photo frame (1) • Stand (1) • Remote control (1) • AC adaptor (1) • Exchangeable panel (2) (DPF-E72N only) • Operating Instructions (this manual) (1) • Read This First (1) • Warranty (1) (In some regions, the warranty is...

Operating Instructions
Page 11
..., see the pages indicated in the parentheses. B Stand (.page 15) C DC IN 5 V jack (.page 18) Insert the DC plug of the DPF-D72N, except that the DPF-A72N/ E72N are not equipped with a computer. A USB B connector (.page 47) Connect a USB cable when you want to this sensor. Continued 11 GB... it at this jack, and connect the AC adaptor and the wall outlet. The locations and names of buttons and connectors of the DPF-A72N/E72N are of the DPF-D72N. The illustrations are identical to those of the supplied AC adaptor to use the photo frame with CompactFlash card/Microdrive slot.
..., see the pages indicated in the parentheses. B Stand (.page 15) C DC IN 5 V jack (.page 18) Insert the DC plug of the DPF-D72N, except that the DPF-A72N/ E72N are not equipped with a computer. A USB B connector (.page 47) Connect a USB cable when you want to this sensor. Continued 11 GB... it at this jack, and connect the AC adaptor and the wall outlet. The locations and names of buttons and connectors of the DPF-A72N/E72N are of the DPF-D72N. The illustrations are identical to those of the supplied AC adaptor to use the photo frame with CompactFlash card/Microdrive slot.

Operating Instructions
Page 12
J Reset switch If the photo frame does not operate at all with the power on the remote control, such as a pin to album] and [Date/time settings]. From the menu, you ... 22) M VIEW MODE button (.page 23) N Holes for storing stand 12 GB I BACK button Returns to enter the selection. D CompactFlash card/Microdrive slot (.page 22) (DPF-D72N only) E 1 (on the wall (.page 16) O Space for hanging unit on /standby) button F Standby indicator G MENU button Displays the menu.
J Reset switch If the photo frame does not operate at all with the power on the remote control, such as a pin to album] and [Date/time settings]. From the menu, you ... 22) M VIEW MODE button (.page 23) N Holes for storing stand 12 GB I BACK button Returns to enter the selection. D CompactFlash card/Microdrive slot (.page 22) (DPF-D72N only) E 1 (on the wall (.page 16) O Space for hanging unit on /standby) button F Standby indicator G MENU button Displays the menu.

Operating Instructions
Page 14
...control may shorten, or the Remote control may explode if mistreated. Pull out the protective sheet before use the buttons on the photo frame when it is facing upwards. Basic operations Preparing the remote control The supplied lithium battery (CR2025) has already been inserted into the ...remote control Point the top end of the remote control If the remote control stops working, replace the battery (CR2025 lithium battery) with a Sony CR2025 lithium battery. In this case, replace the battery with a new one. 1 Pull out the battery holder. Protective sheet Replacing the ...
...control may shorten, or the Remote control may explode if mistreated. Pull out the protective sheet before use the buttons on the photo frame when it is facing upwards. Basic operations Preparing the remote control The supplied lithium battery (CR2025) has already been inserted into the ...remote control Point the top end of the remote control If the remote control stops working, replace the battery (CR2025 lithium battery) with a Sony CR2025 lithium battery. In this case, replace the battery with a new one. 1 Pull out the battery holder. Protective sheet Replacing the ...

Operating Instructions
Page 15
...hole on remote control operation. When an operation is performed differently, for example, with the remote control and the buttons on the photo frame, it will not be explained in a tip. Incorrectly inserting, shorting, dismantling, or heating the battery, or throwing it without moving... the stand. Setting the stand 1 Hold the photo frame tightly and insert the stand straight into a fire may cause the battery to prevent leaking and corrosion. - Basic operations • Using a ...
...hole on remote control operation. When an operation is performed differently, for example, with the remote control and the buttons on the photo frame, it will not be explained in a tip. Incorrectly inserting, shorting, dismantling, or heating the battery, or throwing it without moving... the stand. Setting the stand 1 Hold the photo frame tightly and insert the stand straight into a fire may cause the battery to prevent leaking and corrosion. - Basic operations • Using a ...

Operating Instructions
Page 16
... inch) from the photo frame. Notes • Check whether the stand is contained in the wall. If you remove the stand from the surface of the television screen may fall over. • DPF-A72N/D72N only: When the photo frame is placed in the portrait orientation, the Sony logo doesn't light up.... • The photo frame does not detect and rotate the orientation of images when [Auto display orientation] of...
... inch) from the photo frame. Notes • Check whether the stand is contained in the wall. If you remove the stand from the surface of the television screen may fall over. • DPF-A72N/D72N only: When the photo frame is placed in the portrait orientation, the Sony logo doesn't light up.... • The photo frame does not detect and rotate the orientation of images when [Auto display orientation] of...

Operating Instructions
Page 17
...the wall outlet. • We take no responsibility for storing stand on the rear of the photo frame and lift up the front panel. Since a magnet is placed on a stable surface. • ...Remove the stand and store it in the storage portion, you hang the photo frame on the wall. Continued 17 GB To exchange a panel (DPF-E72N only) You can keep the stand attached to the portion. • ...Connect the DC cable of the AC adaptor to the photo frame and hang the photo frame on the wall. Basic ...
...the wall outlet. • We take no responsibility for storing stand on the rear of the photo frame and lift up the front panel. Since a magnet is placed on a stable surface. • ...Remove the stand and store it in the storage portion, you hang the photo frame on the wall. Continued 17 GB To exchange a panel (DPF-E72N only) You can keep the stand attached to the portion. • ...Connect the DC cable of the AC adaptor to the photo frame and hang the photo frame on the wall. Basic ...

Operating Instructions
Page 18
... AC plug Notes • The socket outlet should be as close as possible to the unit, and easily accessible. • Do not place the photo frame on an unsteady or tilted surface. • Connect the AC adaptor to an easily accessible wall outlet close by disconnecting the plug from the wall... outlet. The photo frame is automatically turned on. 4 Press the four corners of the exchangeable panel to snap it into the DC IN 5 V jack on an exchangeable panel to...
... AC plug Notes • The socket outlet should be as close as possible to the unit, and easily accessible. • Do not place the photo frame on an unsteady or tilted surface. • Connect the AC adaptor to an easily accessible wall outlet close by disconnecting the plug from the wall... outlet. The photo frame is automatically turned on. 4 Press the four corners of the exchangeable panel to snap it into the DC IN 5 V jack on an exchangeable panel to...

Operating Instructions
Page 19
... a narrow space, such as illustrated above and remove it from the outlet. • Even if your Sony service facilities for repair. 19 GB About the AC plug Attaching the AC plug Attach the AC plug to...; Do not turn off when it is moved. • After use the AC adaptor with your photo frame is turned off or disconnect the AC adaptor from the AC adaptor main unit by pushing the "PUSH" ...the AC adaptor with dry hands as illustrated above . • The AC plug shape may turn the photo frame off , AC power (house current) is still supplied to it while connected to remove the AC plug. ...
... a narrow space, such as illustrated above and remove it from the outlet. • Even if your Sony service facilities for repair. 19 GB About the AC plug Attaching the AC plug Attach the AC plug to...; Do not turn off when it is moved. • After use the AC adaptor with your photo frame is turned off or disconnect the AC adaptor from the AC adaptor main unit by pushing the "PUSH" ...the AC adaptor with dry hands as illustrated above . • The AC plug shape may turn the photo frame off , AC power (house current) is still supplied to it while connected to remove the AC plug. ...

Operating Instructions
Page 20
...turned on without a memory card connected, the initial display below appears on the photo frame or remote control until the power turns off or disconnect the AC adaptor from red. ...power Press 1 (on/standby) on the photo frame or remote control to the next section. The Sony logo on the front panel lights up (DPFA72N/D72N only). Turning the ...photo frame on When you have already turned on your photo frame in an initial state When the photo frame is displayed. The standby indicator turns to green from the photo frame...
...turned on without a memory card connected, the initial display below appears on the photo frame or remote control until the power turns off or disconnect the AC adaptor from red. ...power Press 1 (on/standby) on the photo frame or remote control to the next section. The Sony logo on the front panel lights up (DPFA72N/D72N only). Turning the ...photo frame on When you have already turned on your photo frame in an initial state When the photo frame is displayed. The standby indicator turns to green from the photo frame...

Operating Instructions
Page 21
... The Date/time settings screen is displayed. The settings screen is displayed. 6 Select the format of the photo frame needs to be adjusted in order to display an accurate time in the photo frame, or anything other than the clock and calendar settings item (page 25) are selected. 3 Press v/V to select [Date...
... The Date/time settings screen is displayed. The settings screen is displayed. 6 Select the format of the photo frame needs to be adjusted in order to display an accurate time in the photo frame, or anything other than the clock and calendar settings item (page 25) are selected. 3 Press v/V to select [Date...

Operating Instructions
Page 22
... standard and Duo size compatible slot, so you do not try to 58. Reinsert the memory card after checking the label side of the photo frame). Insert xD-Picture Card, SD memory card, or "Memory Stick" from which it in the internal memory are displayed automatically. Notes • ...the corresponding slot with this could damage the memory card and/or photo frame. • The "Memory Stick PRO" (Standard/Duo)/SD memory card/MMC/xD-Picture Card multi-purpose slot automatically detects the card type. CompactFlash card (DPF-D72N only) Access lamp Insert "Memory Stick Duo" into the slot A....
... standard and Duo size compatible slot, so you do not try to 58. Reinsert the memory card after checking the label side of the photo frame). Insert xD-Picture Card, SD memory card, or "Memory Stick" from which it in the internal memory are displayed automatically. Notes • ...the corresponding slot with this could damage the memory card and/or photo frame. • The "Memory Stick PRO" (Standard/Duo)/SD memory card/MMC/xD-Picture Card multi-purpose slot automatically detects the card type. CompactFlash card (DPF-D72N only) Access lamp Insert "Memory Stick Duo" into the slot A....

Operating Instructions
Page 23
... 1 Press VIEW MODE. Displays a clock or calendar style. Displays a thumbnail list style. The view mode screen is on the photo frame. 23 GB Note If you have not operated the photo frame for an extended period of time, the style the cursor is displayed. 3 Press B/b/v/V or VIEW MODE to the group area...
... 1 Press VIEW MODE. Displays a clock or calendar style. Displays a thumbnail list style. The view mode screen is on the photo frame. 23 GB Note If you have not operated the photo frame for an extended period of time, the style the cursor is displayed. 3 Press B/b/v/V or VIEW MODE to the group area...

Operating Instructions
Page 24
... cannot be displayed. Refer to "Slideshow Settings" (page 31). • You can use the VIEW MODE button on the photo frame when the image you select the slideshow display. Displays images with the shooting date and time. Displays images while randomly switching between a... slideshow styles and effects. Slideshow display Group Image A Slideshow B C D Style Single view Multi image view Clock view Calendar view E Time Machine (DPF-D72N only) F Random view A B Explanation Displays one after another , while showing a calendar. The present date and time is inserted, the images...
... cannot be displayed. Refer to "Slideshow Settings" (page 31). • You can use the VIEW MODE button on the photo frame when the image you select the slideshow display. Displays images with the shooting date and time. Displays images while randomly switching between a... slideshow styles and effects. Slideshow display Group Image A Slideshow B C D Style Single view Multi image view Clock view Calendar view E Time Machine (DPF-D72N only) F Random view A B Explanation Displays one after another , while showing a calendar. The present date and time is inserted, the images...


