
Instruction Manual
Page 1
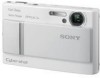
Record the serial number in the space provided below. Owner's Record The model and serial numbers are located on the advanced operations, please refer to these numbers whenever you call upon your Sony dealer regarding this manual thoroughly, and retain it for future reference. Refer to "Cyber-shot Handbook." Model No. DSC-T10 Serial No © 2006 Sony Corporation 2-691-401-11(1) Digital Still Camera Instruction Manual GB DSC-T10 CD-ROM (supplied) For details on the bottom. Operating Instructions Before operating the unit, please read this product.
Record the serial number in the space provided below. Owner's Record The model and serial numbers are located on the advanced operations, please refer to these numbers whenever you call upon your Sony dealer regarding this manual thoroughly, and retain it for future reference. Refer to "Cyber-shot Handbook." Model No. DSC-T10 Serial No © 2006 Sony Corporation 2-691-401-11(1) Digital Still Camera Instruction Manual GB DSC-T10 CD-ROM (supplied) For details on the bottom. Operating Instructions Before operating the unit, please read this product.

Instruction Manual
Page 5
... of this product, please contact your local Civic Office, your nearest Sony service station. 5 For Customers in Europe This product has been tested and found to comply with the limits for a Class B digital device, pursuant to Part 15 of the FCC Rules. Notice for ... cables shorter than 3 meters (9.8 feet). [ Attention The electromagnetic fields at the specific frequencies may influence the picture and sound of this camera. [ Notice If static electricity or electromagnetism causes data transfer to discontinue midway (fail), restart the application or disconnect and connect the communication ...
... of this product, please contact your local Civic Office, your nearest Sony service station. 5 For Customers in Europe This product has been tested and found to comply with the limits for a Class B digital device, pursuant to Part 15 of the FCC Rules. Notice for ... cables shorter than 3 meters (9.8 feet). [ Attention The electromagnetic fields at the specific frequencies may influence the picture and sound of this camera. [ Notice If static electricity or electromagnetism causes data transfer to discontinue midway (fail), restart the application or disconnect and connect the communication ...

Instruction Manual
Page 6
... or dusty locations may cause malfunctions. • If moisture condensation occurs, remove it before using the camera (page 30). • Do not shake or strike the camera. These points are normal in the manufacturing process and do not affect the recording in color) that ...Japan Electronics and Information Technology Industries Association). • Playback of images recorded with DCF (Design rule for effective use the camera near a location that the camera is neither dust-proof, nor splashproof, nor water-proof. Water entering the inside of the pixels are not guaranteed. [ ...
... or dusty locations may cause malfunctions. • If moisture condensation occurs, remove it before using the camera (page 30). • Do not shake or strike the camera. These points are normal in the manufacturing process and do not affect the recording in color) that ...Japan Electronics and Information Technology Industries Association). • Playback of images recorded with DCF (Design rule for effective use the camera near a location that the camera is neither dust-proof, nor splashproof, nor water-proof. Water entering the inside of the pixels are not guaranteed. [ ...

Instruction Manual
Page 7
.../a "Memory Stick Duo" (not supplied) ........ 10 3 Turning the camera on/setting the clock 12 Shooting images easily (Auto adjustment mode 13 Viewing/deleting images 16 Indicators on using your computer 24 Supported Operating Systems for USB connection and application software (supplied 24 Viewing "Cyber-shot Handbook 24 Battery life and memory capacity 25...
.../a "Memory Stick Duo" (not supplied) ........ 10 3 Turning the camera on/setting the clock 12 Shooting images easily (Auto adjustment mode 13 Viewing/deleting images 16 Indicators on using your computer 24 Supported Operating Systems for USB connection and application software (supplied 24 Viewing "Cyber-shot Handbook 24 Battery life and memory capacity 25...

Instruction Manual
Page 8
Getting started Checking the accessories supplied • Battery charger BC-CS3 (1) • USB, A/V, DC IN cable for multi-use terminal (1) • Power cord (mains lead) (1) (not supplied in the USA and Canada) • Rechargeable battery pack NP-FT1 (1)/Battery case (1) • Wrist strap (1) • CD-ROM (Cyber-shot application software/ "Cyber-shot Handbook") (1) • Instruction Manual (this manual) (1) Attach the strap to prevent the camera from damage by being dropped, etc. Hook 8
Getting started Checking the accessories supplied • Battery charger BC-CS3 (1) • USB, A/V, DC IN cable for multi-use terminal (1) • Power cord (mains lead) (1) (not supplied in the USA and Canada) • Rechargeable battery pack NP-FT1 (1)/Battery case (1) • Wrist strap (1) • CD-ROM (Cyber-shot application software/ "Cyber-shot Handbook") (1) • Instruction Manual (this manual) (1) Attach the strap to prevent the camera from damage by being dropped, etc. Hook 8

Instruction Manual
Page 10
... one minute until it clicks. 3 Insert the battery pack. 4 Close the battery/"Memory Stick Duo" cover. [ When there is no "Memory Stick Duo" inserted The camera records/plays back images using the internal memory (approx. 56 MB). [ To check the remaining battery time Open the lens cover or press the POWER...
... one minute until it clicks. 3 Insert the battery pack. 4 Close the battery/"Memory Stick Duo" cover. [ When there is no "Memory Stick Duo" inserted The camera records/plays back images using the internal memory (approx. 56 MB). [ To check the remaining battery time Open the lens cover or press the POWER...

Instruction Manual
Page 12
3 Turning the camera on/setting the clock Mode switch POWER button ɟ Control button Lens Lens cover 1 2 3 1 Select with the mode switch, then press the POWER button or ... • Unless you set the clock, the Clock Set screen appears each time the camera is turned on. • If the camera is running on battery power and you do not operate the camera for about three minutes, the camera turns off automatically to prevent wearing down the battery pack (Auto power-off function...
3 Turning the camera on/setting the clock Mode switch POWER button ɟ Control button Lens Lens cover 1 2 3 1 Select with the mode switch, then press the POWER button or ... • Unless you set the clock, the Clock Set screen appears each time the camera is turned on. • If the camera is running on battery power and you do not operate the camera for about three minutes, the camera turns off automatically to prevent wearing down the battery pack (Auto power-off function...

Instruction Manual
Page 13
... ɠ Shutter button Mode switch (Screen display switch) button Tripod receptacle (bottom) (Image Size) button (STEADY SHOT) button Zoom (W/T) button Control button (EV) button 1Select a mode with the shutter button. Movie: Select . 2Hold the camera steady, keeping your arm at your side. Position the subject in the center of the focus frame...
... ɠ Shutter button Mode switch (Screen display switch) button Tripod receptacle (bottom) (Image Size) button (STEADY SHOT) button Zoom (W/T) button Control button (EV) button 1Select a mode with the shutter button. Movie: Select . 2Hold the camera steady, keeping your arm at your side. Position the subject in the center of the focus frame...

Instruction Manual
Page 14
[ Using the zoom Press the zoom button. • When the zoom scale exceeds 3×, the camera uses the Digital Zoom function. • The camera zooms slowly while shooting a movie. [ Quick Review (Checking the last still image you shot) Press b ( ) on the control button repeatedly until the shutter operates. [ Anti-blur function The anti-blur function...
[ Using the zoom Press the zoom button. • When the zoom scale exceeds 3×, the camera uses the Digital Zoom function. • The camera zooms slowly while shooting a movie. [ Quick Review (Checking the last still image you shot) Press b ( ) on the control button repeatedly until the shutter operates. [ Anti-blur function The anti-blur function...

Instruction Manual
Page 17
...) indicator on the selected image. 3 Press (Delete). 4 Select [OK] with the cable for multi-use terminal (supplied). 2 Set the switch on TV screen 1 Connect the camera to "TV." To the multi connector Cable for multi-use terminal To audio/video input jacks 17 To cancel, press again. [ To view images on...
...) indicator on the selected image. 3 Press (Delete). 4 Select [OK] with the cable for multi-use terminal (supplied). 2 Set the switch on TV screen 1 Connect the camera to "TV." To the multi connector Cable for multi-use terminal To audio/video input jacks 17 To cancel, press again. [ To view images on...

Instruction Manual
Page 18
Indicators on the screen [ When shooting still images [ When shooting movies [ When playing back A 60min z M BRK WB STBY REC Battery remaining AE/AF lock Recording mode White balance Standby/Recording a movie Camera mode (Scene Selection) SL 1.3 ON VIVID NATURAL SEPIA B&W - 1.3 Step 12/16 N Camera mode (Program) Flash mode Flash charging Zoom scaling Red-eye reduction Sharpness Contrast AF illuminator Metering mode Color mode Protect Print order (DPOF) mark Zoom scaling Frame by frame playback Playback Volume 18
Indicators on the screen [ When shooting still images [ When shooting movies [ When playing back A 60min z M BRK WB STBY REC Battery remaining AE/AF lock Recording mode White balance Standby/Recording a movie Camera mode (Scene Selection) SL 1.3 ON VIVID NATURAL SEPIA B&W - 1.3 Step 12/16 N Camera mode (Program) Flash mode Flash charging Zoom scaling Red-eye reduction Sharpness Contrast AF illuminator Metering mode Color mode Protect Print order (DPOF) mark Zoom scaling Frame by frame playback Playback Volume 18

Instruction Manual
Page 20
... step 3 and then press B. Different items are available depending on the position of the mode switch and the settings. 2 Press MENU to display the menu. (Camera) menu 3 Select the desired menu item with b/B on the control button. • If the desired item is invisible, keep pressing b/B until the item appears on...
... step 3 and then press B. Different items are available depending on the position of the mode switch and the settings. 2 Press MENU to display the menu. (Camera) menu 3 Select the desired menu item with b/B on the control button. • If the desired item is invisible, keep pressing b/B until the item appears on...

Instruction Manual
Page 21
Only the available items are displayed on the mode switch position and the (camera) menu settings. Selects a luminous sensitivity. Adjusts the sharpness of the image. 9 (Focus) Changes the focus method. (Metering Mode) Selects the metering mode. ...amount of the image. M (Interval) Selects the frame interval when the REC Mode is set to [Exp Brktg]. Menu for shooting (Camera) Selects the still image camera mode. Mode (REC Mode) Selects the continuous shooting method. Auto: Allows easy shooting with the exposure adjusted automatically (both the shutter speed ...
Only the available items are displayed on the mode switch position and the (camera) menu settings. Selects a luminous sensitivity. Adjusts the sharpness of the image. 9 (Focus) Changes the focus method. (Metering Mode) Selects the metering mode. ...amount of the image. M (Interval) Selects the frame interval when the REC Mode is set to [Exp Brktg]. Menu for shooting (Camera) Selects the still image camera mode. Mode (REC Mode) Selects the continuous shooting method. Auto: Allows easy shooting with the exposure adjusted automatically (both the shutter speed ...

Instruction Manual
Page 22
...printer. Internal Memory Tool Format Formats the internal memory. 22 Plays back a series of a recorded image. Cuts movies. Camera 2 STEADY SHOT Selects the anti-blur mode. Displays the recorded image on a subject in dark surroundings. Changes Setup items. Records an ...Protect) DPOF (Print) (Slide) (Resize) (Rotate) (Divide) (Setup) Trimming Selects the folder for playback zoom.) Setup items Camera 1 AF Mode Digital Zoom Function Guide Red Eye Reduction AF Illuminator Auto Review Selects the auto focus operation mode. Prevents accidental erasure. Rotates a still ...
...printer. Internal Memory Tool Format Formats the internal memory. 22 Plays back a series of a recorded image. Cuts movies. Camera 2 STEADY SHOT Selects the anti-blur mode. Displays the recorded image on a subject in dark surroundings. Changes Setup items. Records an ...Protect) DPOF (Print) (Slide) (Resize) (Rotate) (Divide) (Setup) Trimming Selects the folder for playback zoom.) Setup items Camera 1 AF Mode Digital Zoom Function Guide Red Eye Reduction AF Illuminator Auto Review Selects the auto focus operation mode. Prevents accidental erasure. Rotates a still ...

Instruction Manual
Page 23
...Duo". Changes the folder currently used to assign file numbers to images. Selects the language to a computer or a PictBridge compliant printer using the camera with battery pack. Selects the brightness of the connected video equipment. Erases all images in a "Memory Stick Duo" for multi-use terminal. ...backlight when using the cable for recording images. Selects the method used for the Slide show. Selects the sound produced when you operate the camera. Selects the USB mode to be used to a "Memory Stick Duo". Folder Change REC. Creates a folder in the internal memory ...
...Duo". Changes the folder currently used to assign file numbers to images. Selects the language to a computer or a PictBridge compliant printer using the camera with battery pack. Selects the brightness of the connected video equipment. Erases all images in a "Memory Stick Duo" for multi-use terminal. ...backlight when using the cable for recording images. Selects the method used for the Slide show. Selects the sound produced when you operate the camera. Selects the USB mode to be used to a "Memory Stick Duo". Folder Change REC. Creates a folder in the internal memory ...

Instruction Manual
Page 24
... X(v10.1 to v10.4) not compatible • Must be installed with the camera on your computer, and insert the CD- Follow the on your computer, and insert the CD- Supported Operating Systems for copying "Cyber-shot Handbook" appears. For details, refer to copy. 2 After the installation is... Macintosh users 1 Turn on -screen instructions to "Cyber-shot Handbook." When you can display images shot with above OS at delivery. • If your OS does not support USB connections, use still images and movies from the camera more than ever by taking advantage of "Picture Motion...
... X(v10.1 to v10.4) not compatible • Must be installed with the camera on your computer, and insert the CD- Follow the on your computer, and insert the CD- Supported Operating Systems for copying "Cyber-shot Handbook" appears. For details, refer to copy. 2 After the installation is... Macintosh users 1 Turn on -screen instructions to "Cyber-shot Handbook." When you can display images shot with above OS at delivery. • If your OS does not support USB connections, use still images and movies from the camera more than ever by taking advantage of "Picture Motion...

Instruction Manual
Page 25
The brightness of LCD Backlight is set to up. - [AF Mode] is set to [Monitor]. - [STEADY SHOT] is based on and off once every ten times. 25 of images Battery life (min.) Approx. 250 Approx. 125 • The measurement method is set ... can be recorded/viewed and the battery life when you use it more, as necessary. The flash is used frequently. - The camera has been turned on the CIPA standard. (CIPA: Camera & Imaging Products Association) • The number of images/battery life does not change, regardless of image size. [ When viewing still images...
The brightness of LCD Backlight is set to up. - [AF Mode] is set to [Monitor]. - [STEADY SHOT] is based on and off once every ten times. 25 of images Battery life (min.) Approx. 250 Approx. 125 • The measurement method is set ... can be recorded/viewed and the battery life when you use it more, as necessary. The flash is used frequently. - The camera has been turned on the CIPA standard. (CIPA: Camera & Imaging Products Association) • The number of images/battery life does not change, regardless of image size. [ When viewing still images...

Instruction Manual
Page 26
... image quality is [Fine] on the upper line and [Standard] on the lower line.) (Units: Images) Internal Capacity memory "Memory Stick Duo" formatted with this camera Size Approx. 56MB 64MB 128MB 256MB 512MB 1GB 2GB 7M 16 18 37 67 137 279 573 33 36 73 132 268 548 1125 3:2 16...
... image quality is [Fine] on the upper line and [Standard] on the lower line.) (Units: Images) Internal Capacity memory "Memory Stick Duo" formatted with this camera Size Approx. 56MB 64MB 128MB 256MB 512MB 1GB 2GB 7M 16 18 37 67 137 279 573 33 36 73 132 268 548 1125 3:2 16...

Instruction Manual
Page 27
[ The approximate recording time of movies (Units: hour : minute : second) Internal Capacity memory "Memory Stick Duo" formatted with this camera Size Approx. 56MB 64MB 128MB 256MB 512MB 1GB 2GB 640(Fine) - - - 0:02:50 0:06:00 0:12:20 0:25:10 640(Standard) 0:02:30 0:02:50 0:...:20 • Movies with the size set to [640(Fine)] can only be recorded on a "Memory Stick PRO Duo". • When images recorded using earlier Sony models are played back on this camera, the display may differ from the actual image size. 27
[ The approximate recording time of movies (Units: hour : minute : second) Internal Capacity memory "Memory Stick Duo" formatted with this camera Size Approx. 56MB 64MB 128MB 256MB 512MB 1GB 2GB 640(Fine) - - - 0:02:50 0:06:00 0:12:20 0:25:10 640(Standard) 0:02:30 0:02:50 0:...:20 • Movies with the size set to [640(Fine)] can only be recorded on a "Memory Stick PRO Duo". • When images recorded using earlier Sony models are played back on this camera, the display may differ from the actual image size. 27

Instruction Manual
Page 28
...turn on the power. 3 Initialize the settings (page 23). 4 Consult your Sony dealer or local authorized Sony service facility. Replace it with your camera, try the following solutions. 1 Check the items below, and refer to "Cyber-shot Handbook." Battery pack and power The battery pack cannot be checked when you ... pack is discharged. Replace it with a new one . 28 If a code such as "C/E:ss:ss" appears on the screen, refer to "Cyber-shot Handbook." 2 Remove the battery pack, and insert the battery pack again after about three minutes while the power is dead. The power turns off ...
...turn on the power. 3 Initialize the settings (page 23). 4 Consult your Sony dealer or local authorized Sony service facility. Replace it with your camera, try the following solutions. 1 Check the items below, and refer to "Cyber-shot Handbook." Battery pack and power The battery pack cannot be checked when you ... pack is discharged. Replace it with a new one . 28 If a code such as "C/E:ss:ss" appears on the screen, refer to "Cyber-shot Handbook." 2 Remove the battery pack, and insert the battery pack again after about three minutes while the power is dead. The power turns off ...


