
Cyber-shot® Handbook
Page 4
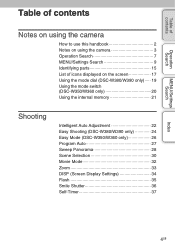
... using the camera 3 Operation Search 7 MENU/Settings Search 9 Identifying parts 15 List of icons displayed on the screen 17 Using the mode dial (DSC-W380/W390 only)····· 19 Using the mode switch (DSC-W350/W360 only 20 Using the internal memory 21 Shooting Intelligent Auto Adjustment 22 Easy Shooting (DSC-W380/W390 only 24 Easy Mode (DSC-W350/W360 only 26 Program Auto 27 Sweep Panorama 28 Scene Selection 30 Movie Mode 32 Zoom 33 DISP (Screen Display Settings 34 Flash 35 Smile Shutter 36 Self-Timer...
... using the camera 3 Operation Search 7 MENU/Settings Search 9 Identifying parts 15 List of icons displayed on the screen 17 Using the mode dial (DSC-W380/W390 only)····· 19 Using the mode switch (DSC-W350/W360 only 20 Using the internal memory 21 Shooting Intelligent Auto Adjustment 22 Easy Shooting (DSC-W380/W390 only 24 Easy Mode (DSC-W350/W360 only 26 Program Auto 27 Sweep Panorama 28 Scene Selection 30 Movie Mode 32 Zoom 33 DISP (Screen Display Settings 34 Flash 35 Smile Shutter 36 Self-Timer...
Cyber-shot® Handbook
Page 5
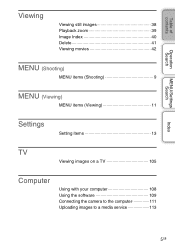
Table of contents Operation Search MENU/Settings Search Viewing Viewing still images 38 Playback zoom 39 Image Index 40 Delete 41 Viewing movies 42 MENU (Shooting) MENU items (Shooting 9 MENU (Viewing) MENU items (Viewing 11 Settings Setting items 13 TV Viewing images on a TV 105 Computer Using with your computer 108 Using the software 109 Connecting the camera to the computer 111 Uploading images to a media service 113 Index 5GB
Table of contents Operation Search MENU/Settings Search Viewing Viewing still images 38 Playback zoom 39 Image Index 40 Delete 41 Viewing movies 42 MENU (Shooting) MENU items (Shooting 9 MENU (Viewing) MENU items (Viewing 11 Settings Setting items 13 TV Viewing images on a TV 105 Computer Using with your computer 108 Using the software 109 Connecting the camera to the computer 111 Uploading images to a media service 113 Index 5GB

Cyber-shot® Handbook
Page 8
.../Settings Search Adjusting exposure EV 51 Changing focus position Focus 57 Face Detection 63 Changing image size Image Size 46 Deleting images Delete 41, 73 Format 97 Displaying enlarged images Playback zoom 39 Trimming 72 Editing images Retouch 72 Playing back a series of Slideshow 68 images in order Shooting/Viewing with Easy Shooting (DSC-W380/W390 only 24 easy-to-see indicators Easy Mode (DSC-W350/W360 only 26, 67 Printing images with the date Using the "PMB (Picture Motion Browser)" 109 Changing date and time settings Area Setting 103 Date & Time Setting...
.../Settings Search Adjusting exposure EV 51 Changing focus position Focus 57 Face Detection 63 Changing image size Image Size 46 Deleting images Delete 41, 73 Format 97 Displaying enlarged images Playback zoom 39 Trimming 72 Editing images Retouch 72 Playing back a series of Slideshow 68 images in order Shooting/Viewing with Easy Shooting (DSC-W380/W390 only 24 easy-to-see indicators Easy Mode (DSC-W350/W360 only 26, 67 Printing images with the date Using the "PMB (Picture Motion Browser)" 109 Changing date and time settings Area Setting 103 Date & Time Setting...

Cyber-shot® Handbook
Page 9
... control button. 4 Press the MENU button to shooting mode. Image Size Flash - - - - - ISO - - - - Scene Recognition - - - - - Focus - - - - Metering Mode - - - DRO - - - - - Shooting Direction - - - - - MENU/Settings Search Table of contents Operation Search MENU/Settings Search Index MENU items (Shooting) You can select the various shooting functions easily from the MENU button. 1 Press the ON/OFF (Power) button and set the camera to turn off the Menu screen. ON/OFF (Power) button 2 Press the MENU button to display the Menu screen...
... control button. 4 Press the MENU button to shooting mode. Image Size Flash - - - - - ISO - - - - Scene Recognition - - - - - Focus - - - - Metering Mode - - - DRO - - - - - Shooting Direction - - - - - MENU/Settings Search Table of contents Operation Search MENU/Settings Search Index MENU items (Shooting) You can select the various shooting functions easily from the MENU button. 1 Press the ON/OFF (Power) button and set the camera to turn off the Menu screen. ON/OFF (Power) button 2 Press the MENU button to display the Menu screen...

Cyber-shot® Handbook
Page 13
... Digital Zoom Auto Orientation Red Eye Reduction Blink Alert Beep Language Setting Function Guide Demo Mode Initialize COMPONENT Video Out USB Connect LUN Settings Download Music Format Music Power Save Format Create REC.Folder Change REC.Folder Delete REC.Folder Copy File Number Format File Number Area Setting Date & Time Setting Control button MENU button 13GB Continued r Index MENU/Settings Search Operation Search Table of the control button to display the setup screen. 3 Select the desired category with v/V, then press B to select each item, then z. 4 Select the desired setting...
... Digital Zoom Auto Orientation Red Eye Reduction Blink Alert Beep Language Setting Function Guide Demo Mode Initialize COMPONENT Video Out USB Connect LUN Settings Download Music Format Music Power Save Format Create REC.Folder Change REC.Folder Delete REC.Folder Copy File Number Format File Number Area Setting Date & Time Setting Control button MENU button 13GB Continued r Index MENU/Settings Search Operation Search Table of the control button to display the setup screen. 3 Select the desired category with v/V, then press B to select each item, then z. 4 Select the desired setting...

Cyber-shot® Handbook
Page 18
... Protect Print order (DPOF) Playback zoom View Mode B Display Indication z ISO400 AE/AF lock ISO number 125 F3.5 +2.0EV NR slow shutter Shutter speed Aperture value Exposure Value AF range finder frame indicator REC Standby Recording a movie/Standby a movie 0:12 Recording time (m:s) 101-0012 Folder-file number 2010 1 1 9:30 AM Recorded date/time of the playback image z STOP z PLAY Function guide for playing image bB BACK/NEXT Selecting images V VOLUME Adjusting volume C Display 96 12/12 100Min Indication Recording folder Playback folder Number of recordable images Image...
... Protect Print order (DPOF) Playback zoom View Mode B Display Indication z ISO400 AE/AF lock ISO number 125 F3.5 +2.0EV NR slow shutter Shutter speed Aperture value Exposure Value AF range finder frame indicator REC Standby Recording a movie/Standby a movie 0:12 Recording time (m:s) 101-0012 Folder-file number 2010 1 1 9:30 AM Recorded date/time of the playback image z STOP z PLAY Function guide for playing image bB BACK/NEXT Selecting images V VOLUME Adjusting volume C Display 96 12/12 100Min Indication Recording folder Playback folder Number of recordable images Image...

Cyber-shot® Handbook
Page 24
... battery charge is recognized. on the control button t desired mode Select between [Large] or [Small] size. on the control button zOn Scene Recognition Scene Recognition operates in Easy Shooting mode Image Size: Self-Timer: Flash: MENU t [Image Size] t z on the control button t desired mode t z Select between [Auto] or [Off] mode. Table of contents Operation Search MENU/Settings Search Easy Shooting (DSC-W380/W390 only) Allows you to shoot still images using a tripod), (Backlight), (Backlight Portrait), (Landscape), (Macro) or (Portrait), and displays an icon on the LCD screen...
... battery charge is recognized. on the control button t desired mode Select between [Large] or [Small] size. on the control button zOn Scene Recognition Scene Recognition operates in Easy Shooting mode Image Size: Self-Timer: Flash: MENU t [Image Size] t z on the control button t desired mode t z Select between [Auto] or [Off] mode. Table of contents Operation Search MENU/Settings Search Easy Shooting (DSC-W380/W390 only) Allows you to shoot still images using a tripod), (Backlight), (Backlight Portrait), (Landscape), (Macro) or (Portrait), and displays an icon on the LCD screen...

Cyber-shot® Handbook
Page 26
... using the minimum necessary functions. The text size increases and indicators become easier to see page 60. Notes • The battery charge is used up more quickly because the screen brightness increases automatically. • When the (Playback) button is recognized. on the control button t desired mode Select between [Auto] or [Off] mode. on the control button MENU t [Exit Easy Mode] t [OK] t z zOn Scene Recognition Scene Recognition operates in Easy Mode (Shooting) Image Size: Self-Timer: Flash: Smile Shutter: Exit Easy Mode: MENU t [Image Size] t z on the control button...
... using the minimum necessary functions. The text size increases and indicators become easier to see page 60. Notes • The battery charge is used up more quickly because the screen brightness increases automatically. • When the (Playback) button is recognized. on the control button t desired mode Select between [Auto] or [Off] mode. on the control button MENU t [Exit Easy Mode] t [OK] t z zOn Scene Recognition Scene Recognition operates in Easy Mode (Shooting) Image Size: Self-Timer: Flash: Smile Shutter: Exit Easy Mode: MENU t [Image Size] t z on the control button...

Cyber-shot® Handbook
Page 50
...; [Focus], [White Balance] and [EV] are adjusted for the first image, and these settings are also used for the image size. • When the battery level is low, or when the internal memory or the memory card is set to 100 images in succession when you press and hold down the shutter button. Shoots up to [Off]. • When recording with the self timer, a series of a maximum of contents Operation Search Burst Settings You...
...; [Focus], [White Balance] and [EV] are adjusted for the first image, and these settings are also used for the image size. • When the battery level is low, or when the internal memory or the memory card is set to 100 images in succession when you press and hold down the shutter button. Shoots up to [Off]. • When recording with the self timer, a series of a maximum of contents Operation Search Burst Settings You...

Cyber-shot® Handbook
Page 55
... Operation Search To capture the basic white color in [One Push Set] mode 1 Frame a white object such as a piece of paper filling the screen under the same lighting conditions as you can adjust color tones manually using [White Balance] and [Underwater White Balance] are adjusted automatically, but you will shoot the subject. 2 MENU t button (White Balance) t [One Push Set] t z on the control The screen momentarily turns black, and when the white balance has been adjusted and stored in the memory, the recording screen...
... Operation Search To capture the basic white color in [One Push Set] mode 1 Frame a white object such as a piece of paper filling the screen under the same lighting conditions as you can adjust color tones manually using [White Balance] and [Underwater White Balance] are adjusted automatically, but you will shoot the subject. 2 MENU t button (White Balance) t [One Push Set] t z on the control The screen momentarily turns black, and when the white balance has been adjusted and stored in the memory, the recording screen...

Cyber-shot® Handbook
Page 60
... a slow shutter results when a scene is selected - When the camera recognizes the scene, it switches to [Self-portrait One Person] and [Self-portrait Two People] • The available flash settings are [Auto] and [Off]. • (Twilight using a tripod). Example of contents Operation Search MENU/Settings Search Scene Recognition In Intelligent Auto Adjustment mode, the camera automatically detects shooting conditions, and then takes the shot. Keep the camera still during shooting. •...
... a slow shutter results when a scene is selected - When the camera recognizes the scene, it switches to [Self-portrait One Person] and [Self-portrait Two People] • The available flash settings are [Auto] and [Off]. • (Twilight using a tripod). Example of contents Operation Search MENU/Settings Search Scene Recognition In Intelligent Auto Adjustment mode, the camera automatically detects shooting conditions, and then takes the shot. Keep the camera still during shooting. •...
Cyber-shot® Handbook
Page 66
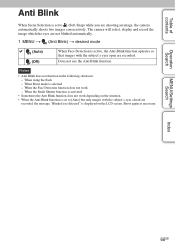
... the Anti Blink function does not work - When using the flash - When Burst mode is active, the Anti Blink function operates so that images with the subject's eyes closed are shooting an image, the camera automatically shoots two images consecutively. MENU/Settings Search Index 66GB Shoot again as necessary. Table of contents Operation Search Anti Blink When Scene Selection is set to (Soft Snap) while you are recorded, the message "Blinked eye detected" is displayed on the...
... the Anti Blink function does not work - When using the flash - When Burst mode is active, the Anti Blink function operates so that images with the subject's eyes closed are shooting an image, the camera automatically shoots two images consecutively. MENU/Settings Search Index 66GB Shoot again as necessary. Table of contents Operation Search Anti Blink When Scene Selection is set to (Soft Snap) while you are recorded, the message "Blinked eye detected" is displayed on the...

Cyber-shot® Handbook
Page 67
... the internal memory (if selected) with [All]. You can delete the currently displayed image. zOn Easy Viewing mode In Easy Mode, only the deletion function is used up more quickly because the screen brightness increases automatically. • The shooting mode also changes to [Date View] when using a memory card. Table of contents Operation Search Easy Mode (DSC-W350/W360 only) When you see still images, the text size increases and indicators become easier to see (Easy Viewing). 1 Press the 2 MENU t (Playback) button to set to [Easy Mode]. MENU/Settings Search...
... the internal memory (if selected) with [All]. You can delete the currently displayed image. zOn Easy Viewing mode In Easy Mode, only the deletion function is used up more quickly because the screen brightness increases automatically. • The shooting mode also changes to [Date View] when using a memory card. Table of contents Operation Search Easy Mode (DSC-W350/W360 only) When you see still images, the text size increases and indicators become easier to see (Easy Viewing). 1 Press the 2 MENU t (Playback) button to set to [Easy Mode]. MENU/Settings Search...

Cyber-shot® Handbook
Page 71
...Operation Search MENU/Settings Search View Mode Allows you want to view unregistered images, select [OK] to select the display format for later playback. Notes • When using a battery pack with a different camera This camera creates a database file in the memory card, the registration screen "Files found which were not recognized Import files" appears. Displaying the Calendar 1 MENU t (View Mode) t [Date View] t z on the control button 2 Press the (Index) button repeatedly until the Calendar is not available on the control button (Date View) (Folder view (Still)) (Folder view...
...Operation Search MENU/Settings Search View Mode Allows you want to view unregistered images, select [OK] to select the display format for later playback. Notes • When using a battery pack with a different camera This camera creates a database file in the memory card, the registration screen "Files found which were not recognized Import files" appears. Displaying the Calendar 1 MENU t (View Mode) t [Date View] t z on the control button 2 Press the (Index) button repeatedly until the Calendar is not available on the control button (Date View) (Folder view (Still)) (Folder view...
Cyber-shot® Handbook
Page 93
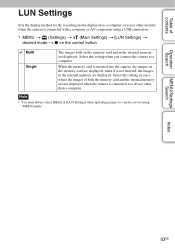
... [Multi] in [LUN Settings] when uploading images to a media service using a USB connection. 1 MENU t (Settings) t (Main Settings) t [LUN Settings] t desired mode t z on the control button Multi Single The images both the memory card and the internal memory are displayed. MENU/Settings Search Index 93GB Select this setting when you connect the camera to a device other monitor when the camera is connected with a computer or AV component using "PMB Portable". Select this setting in the internal memory are displayed; when it is not...
... [Multi] in [LUN Settings] when uploading images to a media service using a USB connection. 1 MENU t (Settings) t (Main Settings) t [LUN Settings] t desired mode t z on the control button Multi Single The images both the memory card and the internal memory are displayed. MENU/Settings Search Index 93GB Select this setting when you connect the camera to a device other monitor when the camera is connected with a computer or AV component using "PMB Portable". Select this setting in the internal memory are displayed; when it is not...

Cyber-shot® Handbook
Page 108
... 500 MB Display: Screen resolution: 1,024 × 768 dots or more *1 64-bit editions and Starter (Edition) are contained on the types of contents Operation Search MENU/Settings Search Using with Hi-Speed USB (USB 2.0 compliant). • When your computer resumes activity from suspend or sleep mode, communication between the camera and your Cyber-shot camera. OS (pre-installed) Others Microsoft Windows XP*1 SP3/Windows Vista*2 SP2...
... 500 MB Display: Screen resolution: 1,024 × 768 dots or more *1 64-bit editions and Starter (Edition) are contained on the types of contents Operation Search MENU/Settings Search Using with Hi-Speed USB (USB 2.0 compliant). • When your computer resumes activity from suspend or sleep mode, communication between the camera and your Cyber-shot camera. OS (pre-installed) Others Microsoft Windows XP*1 SP3/Windows Vista*2 SP2...

Cyber-shot® Handbook
Page 110
... Transfer" allows you to replace the Music files provided in a calendar display. • You can correct (Red Eye Reduction, etc.) still images, and change the shooting date and time. • You can create discs with the camera to media services. (An internet connection environment is required.) • For other details, see the help in the [Mac] folder. For other application software before you install "Music Transfer". • For installation, you to import images shot...
... Transfer" allows you to replace the Music files provided in a calendar display. • You can correct (Red Eye Reduction, etc.) still images, and change the shooting date and time. • You can create discs with the camera to media services. (An internet connection environment is required.) • For other details, see the help in the [Mac] folder. For other application software before you install "Music Transfer". • For installation, you to import images shot...

Cyber-shot® Handbook
Page 120
... were shot using the "PMB". The eyes of the screen are much brighter than the flash range using the flash. • Light the room and shoot the subject. • Retouch the image using "PMB". Cannot shoot images in viewing menu (page 72), or correct using [Retouch] t [Red Eye Correction] in succession. • The internal memory or memory card is called smearing. The date and time are not recorded. Delete the USB connection (page 112). • This is set to display...
... were shot using the "PMB". The eyes of the screen are much brighter than the flash range using the flash. • Light the room and shoot the subject. • Retouch the image using "PMB". Cannot shoot images in viewing menu (page 72), or correct using [Retouch] t [Red Eye Correction] in succession. • The internal memory or memory card is called smearing. The date and time are not recorded. Delete the USB connection (page 112). • This is set to display...
Cyber-shot® Handbook
Page 122
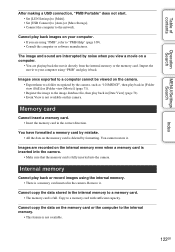
...; Event View is deleted by noise when you are recorded on the memory card is not available on your computer using the internal memory. • There is not available. 122GB Memory card Cannot insert a memory card. • Insert the memory card in the camera. Remove it . Cannot copy the data on a computer. • You are interrupted by formatting. You cannot restore it . Table of contents Operation Search MENU/Settings Search Index After making a USB connection...
...; Event View is deleted by noise when you are recorded on the memory card is not available on your computer using the internal memory. • There is not available. 122GB Memory card Cannot insert a memory card. • Insert the memory card in the camera. Remove it . Cannot copy the data on a computer. • You are interrupted by formatting. You cannot restore it . Table of contents Operation Search MENU/Settings Search Index After making a USB connection...

Cyber-shot® Handbook
Page 126
... set to record movies. Select another folder, or create a new folder (pages 98, 99). 126GB Internal memory error • Turn the power off automatically, or you may be played back in the camera (page 3). Memory card locked • You are using the memory card with a computer and then delete the folder. Folder error • A folder with the same first three digit number already exists on again. No still images • The selected folder or date does not contain a file...
... set to record movies. Select another folder, or create a new folder (pages 98, 99). 126GB Internal memory error • Turn the power off automatically, or you may be played back in the camera (page 3). Memory card locked • You are using the memory card with a computer and then delete the folder. Folder error • A folder with the same first three digit number already exists on again. No still images • The selected folder or date does not contain a file...


