
Operating Guide
Page 2
.... Owner's Record The model and serial numbers are located on the set through openings as they may touch dangerous voltage points or short out parts that may be operated only from battery power, or other ). If you call your protection, please read these numbers whenever you are unable to the presence of important operating and maintenance (servicing) instructions in . This is intended to alert the user...
.... Owner's Record The model and serial numbers are located on the set through openings as they may touch dangerous voltage points or short out parts that may be operated only from battery power, or other ). If you call your protection, please read these numbers whenever you are unable to the presence of important operating and maintenance (servicing) instructions in . This is intended to alert the user...
Operating Guide
Page 3
... replacement parts are provided for this indicates a need for long periods of the set, and to protect it from the wall outlet and refer servicing to be blocked or covered. - Adjust only those controls that the set is not likely to qualified service personnel under the following the operating instructions. When the set . Power-Cord Protection Route the power cord so that have fallen into the set. - Cleaning...
... replacement parts are provided for this indicates a need for long periods of the set, and to protect it from the wall outlet and refer servicing to be blocked or covered. - Adjust only those controls that the set is not likely to qualified service personnel under the following the operating instructions. When the set . Power-Cord Protection Route the power cord so that have fallen into the set. - Cleaning...
Operating Guide
Page 5
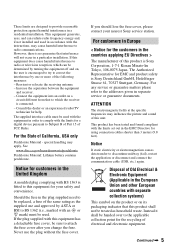
... for the customers in Europe < Notice for your nearest Sony service station. This equipment generates, uses, and can be determined by turning the equipment off and on, the user is no guarantee that interference will not occur in a residential installation. These limits are designed to discontinue midway (fail), restart the application or disconnect and connect the communication cable (USB...
... for the customers in Europe < Notice for your nearest Sony service station. This equipment generates, uses, and can be determined by turning the equipment off and on, the user is no guarantee that interference will not occur in a residential installation. These limits are designed to discontinue midway (fail), restart the application or disconnect and connect the communication cable (USB...
Operating Guide
Page 7
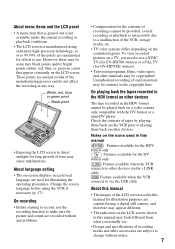
... to make sure the picture and sound are used in this manual for effective use a NTSC TV (for GV-HD700 owners) or a PAL TV (for GV-HD700E owners). • Television programs, films, video tapes, and other materials may be some tiny black points and/or bright points (white, red, blue, or green in color) that is grayed out is not available under the current recording or playback...
... to make sure the picture and sound are used in this manual for effective use a NTSC TV (for GV-HD700 owners) or a PAL TV (for GV-HD700E owners). • Television programs, films, video tapes, and other materials may be some tiny black points and/or bright points (white, red, blue, or green in color) that is grayed out is not available under the current recording or playback...
Operating Guide
Page 8
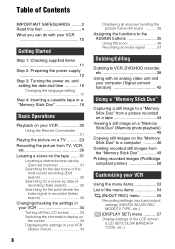
... supplied items 11 Step 2: Preparing the power supply 12 Step 3: Turning the power on, and setting the date and time 16 Changing the language setting 17 Step 4: Inserting a cassette tape or a "Memory Stick Duo 18 Basic Operations Playback on your VCR 20 Using the Remote Commander 21 Playing the picture on a TV .......... 23 Recording the picture from TV, VCR, etc 28 Locating a scene on the tape ....... 31 Locating a desired scene quickly...
... supplied items 11 Step 2: Preparing the power supply 12 Step 3: Turning the power on, and setting the date and time 16 Changing the language setting 17 Step 4: Inserting a cassette tape or a "Memory Stick Duo 18 Basic Operations Playback on your VCR 20 Using the Remote Commander 21 Playing the picture on a TV .......... 23 Recording the picture from TV, VCR, etc 28 Locating a scene on the tape ....... 31 Locating a desired scene quickly...

Operating Guide
Page 10
... DV standard cassette tapes. • The VCR adopts the HDV1080i specification, which utilizes 1,080 effective scanning lines, within the HDV standards, and records pictures at the image bit rate of about more than 2 times the horizontal resolution of this VCR 1 Compatible with HDV/DV formats The VCR is compatible with both the HDV and DV formats. The HDV format is a new video format for professional use . 6 Capturing...
... DV standard cassette tapes. • The VCR adopts the HDV1080i specification, which utilizes 1,080 effective scanning lines, within the HDV standards, and records pictures at the image bit rate of about more than 2 times the horizontal resolution of this VCR 1 Compatible with HDV/DV formats The VCR is compatible with both the HDV and DV formats. The HDV format is a new video format for professional use . 6 Capturing...

Operating Guide
Page 31
.... The recorded picture becomes rough when a picture is not displayed, press DISPLAY 3. 2 Press STOP 7 when you use the another GV-HD700/ HD700E for playback, set [HDV/DV SEL] to [AUTO] on the GV-HD700/HD700E for playback while recording to [HDV] on the VCR. Data codes (date/time/camera settings data) may fluctuate. If the tape counter is paused on the VCR when connecting with an A/V connecting cable with an i.LINK cable: - To record the part recorded in...
.... The recorded picture becomes rough when a picture is not displayed, press DISPLAY 3. 2 Press STOP 7 when you use the another GV-HD700/ HD700E for playback, set [HDV/DV SEL] to [AUTO] on the GV-HD700/HD700E for playback while recording to [HDV] on the VCR. Data codes (date/time/camera settings data) may fluctuate. If the tape counter is paused on the VCR when connecting with an A/V connecting cable with an i.LINK cable: - To record the part recorded in...
Operating Guide
Page 34
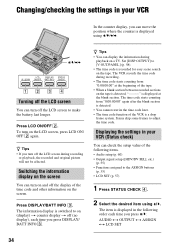
... the setup value of the time code and other information on the screen You can display the information during recording or playback, the recorded and original picture will not be affected. V/v/B/b Turning off the display of the following order each time you press DISPLAY/ BATT INFO 3. z Tips • If you press V/v: AUDIO y OUTPUT y ASSIGN y LCD SET 34 The information display is displayed in your VCR In the counter display, you...
... the setup value of the time code and other information on the screen You can display the information during recording or playback, the recorded and original picture will not be affected. V/v/B/b Turning off the display of the following order each time you press DISPLAY/ BATT INFO 3. z Tips • If you press V/v: AUDIO y OUTPUT y ASSIGN y LCD SET 34 The information display is displayed in your VCR In the counter display, you...

Operating Guide
Page 41
... not output from the HDV/DV (i.LINK) interface during playback pause or in "Dubbing to a DVD/HDD recorder from the VCR via an i.LINK cable, you were instructed by the operation manual. When dubbing the picture to the recording device. You cannot record any playback mode other than normal playback. • Note the following when connecting with an i.LINK cable: - Data codes (date/time/camera settings data) may not operate the VCR on the VCR while recording...
... not output from the HDV/DV (i.LINK) interface during playback pause or in "Dubbing to a DVD/HDD recorder from the VCR via an i.LINK cable, you were instructed by the operation manual. When dubbing the picture to the recording device. You cannot record any playback mode other than normal playback. • Note the following when connecting with an i.LINK cable: - Data codes (date/time/camera settings data) may not operate the VCR on the VCR while recording...

Operating Guide
Page 42
... install software to capture video signals on the analog video unit. 42 appears on the screen. 6 Start playback on your computer and software. An analog unit with an analog video unit and your computer (Signal convert function) You can capture pictures from an analog video unit connected to your computer which has the i.LINK (DV) jack via your computer. 2 Set the POWER switch to the instruction manual...
... install software to capture video signals on the analog video unit. 42 appears on the screen. 6 Start playback on your computer and software. An analog unit with an analog video unit and your computer (Signal convert function) You can capture pictures from an analog video unit connected to your computer which has the i.LINK (DV) jack via your computer. 2 Set the POWER switch to the instruction manual...
Operating Guide
Page 55
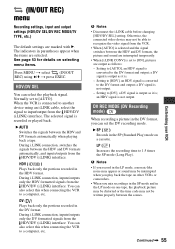
... you play back the tape on selecting menu items. Press MENU t select (IN/OUT REC) using an i.LINK cable, select the signal to the DV format and output; Continued , 55 Customizing your VCR Setting to [ON], pictures are marked with B. When the VCR is not output. During i.LINK connection, inputs/outputs only the DV formatted signals from the HDV/DV (i.LINK) interface. DV REC MODE (DV Recording mode) When recording a picture in...
... you play back the tape on selecting menu items. Press MENU t select (IN/OUT REC) using an i.LINK cable, select the signal to the DV format and output; Continued , 55 Customizing your VCR Setting to [ON], pictures are marked with B. When the VCR is not output. During i.LINK connection, inputs/outputs only the DV formatted signals from the HDV/DV (i.LINK) interface. DV REC MODE (DV Recording mode) When recording a picture in...

Operating Guide
Page 58
... convenient to adjust the color on the monitor connected (the default setting is automatically set values of the DV format picture displayed on the screen. • The DV wide display function does not work for the recorded still image. b Notes • This is [OFF]). DISP OUTPUT B LCD PANEL Shows displays such as the time code on the VCR at the next time or press REW m/PLAY N/FF M. 58...
... convenient to adjust the color on the monitor connected (the default setting is automatically set values of the DV format picture displayed on the screen. • The DV wide display function does not work for the recorded still image. b Notes • This is [OFF]). DISP OUTPUT B LCD PANEL Shows displays such as the time code on the VCR at the next time or press REW m/PLAY N/FF M. 58...
Operating Guide
Page 65
... function. • Changing the [REMOTE CTRL] setting according to other than VTR2 for the VCR. • Cover the sensor of the compartment (p. 90). If the problem persists, disconnect the power source and contact your Sony dealer. • Overall operations/Remote Commander 65 • Batteries/Power sources 65 • LCD screen 66 • Cassette tapes/"Memory Stick Duo".....66 • Playback 67 • Recording 68 • Connecting to TV...
... function. • Changing the [REMOTE CTRL] setting according to other than VTR2 for the VCR. • Cover the sensor of the compartment (p. 90). If the problem persists, disconnect the power source and contact your Sony dealer. • Overall operations/Remote Commander 65 • Batteries/Power sources 65 • LCD screen 66 • Cassette tapes/"Memory Stick Duo".....66 • Playback 67 • Recording 68 • Connecting to TV...
Operating Guide
Page 68
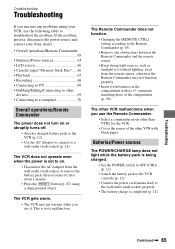
Troubleshooting (Continued) The picture or sound breaks off . • This occurs if the tape or video head is not a malfunction. The movies freeze for at least 1 hour, then re-insert the cassette (p. 81). 68 This is dirty (p. 82). • Use the Sony mini DV cassette. This is not a malfunction. is displayed on the screen. • The tape you are playing was recorded in a TV color system other than...
Troubleshooting (Continued) The picture or sound breaks off . • This occurs if the tape or video head is not a malfunction. The movies freeze for at least 1 hour, then re-insert the cassette (p. 81). 68 This is dirty (p. 82). • Use the Sony mini DV cassette. This is not a malfunction. is displayed on the screen. • The tape you are playing was recorded in a TV color system other than...

Operating Guide
Page 70
... cable, the screen stretches vertically. • You cannot output the aspect ratio setting using an i.LINK cable. For details, refer to the instruction manual supplied with HDV1080i specification, you cannot copy video with the USB cable. • Disconnect the i.LINK cable, turn on the VCR, then connect it all or good-quality images from the USB jack on the computer. 70 Finish any VCR operations and then connect...
... cable, the screen stretches vertically. • You cannot output the aspect ratio setting using an i.LINK cable. For details, refer to the instruction manual supplied with HDV1080i specification, you cannot copy video with the USB cable. • Disconnect the i.LINK cable, turn on the VCR, then connect it all or good-quality images from the USB jack on the computer. 70 Finish any VCR operations and then connect...
Operating Guide
Page 78
... for communicating information related to remove it with a "Memory Stick" compliant device, make sure to the universal standard. (These models are not sold in the summer. - x On the Memory Stick Duo adaptor • When using a "Memory Stick Duo" with your VCR, and displays the remaining battery time in . Note that has functions for Camera File system" universal standard established by your...
... for communicating information related to remove it with a "Memory Stick" compliant device, make sure to the universal standard. (These models are not sold in the summer. - x On the Memory Stick Duo adaptor • When using a "Memory Stick Duo" with your VCR, and displays the remaining battery time in . Note that has functions for Camera File system" universal standard established by your...
Operating Guide
Page 79
... replace it with a new one of the battery pack • If the battery pack is not used for a long time, fully charge the battery pack and use the battery pack for transferring digital video, digital audio, and other data to other devices using a large capacity battery pack: NP-QM71D/QM91D/F770/F970. • Make sure to set the POWER switch to OFF (CHG) when not recording or playing back on your VCR...
... replace it with a new one of the battery pack • If the battery pack is not used for a long time, fully charge the battery pack and use the battery pack for transferring digital video, digital audio, and other data to other devices using a large capacity battery pack: NP-QM71D/QM91D/F770/F970. • Make sure to set the POWER switch to OFF (CHG) when not recording or playing back on your VCR...
Operating Guide
Page 81
... both of the tape. This damages the inside your VCR is turned on the VCR and play a cassette for about one hour with the cassette compartment lid open. If your VCR with plenty of the LCD screen. • Operate your VCR, it . • Keep metal contacts clean. • Keep the Remote Commander and button-type battery out of your VCR On use and care • Do not use the accessories recommended in the...
... both of the tape. This damages the inside your VCR is turned on the VCR and play a cassette for about one hour with the cassette compartment lid open. If your VCR with plenty of the LCD screen. • Operate your VCR, it . • Keep metal contacts clean. • Keep the Remote Commander and button-type battery out of your VCR On use and care • Do not use the accessories recommended in the...
Operating Guide
Page 83
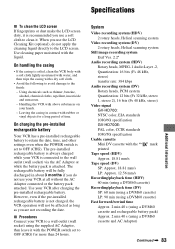
..., stereo) Video signal GV-HD700: NTSC color, EIA standards 1080/60i specification GV-HD700E: PAL color, CCIR standards 1080/50i specification Usable cassette Mini DV cassette with the mark printed Tape speed (HDV) Approx. 18.81 mm/s Tape speed (DV) SP: Approx. 18.81 mm/s LP: Approx. 12.56 mm/s Recording/playback time (HDV) 60 min (using a DVM60 cassette) Recording/playback time (DV) SP: 60 min (using a DVM60 cassette) LP: 90 min (using a DVM60 cassette) Fast...
..., stereo) Video signal GV-HD700: NTSC color, EIA standards 1080/60i specification GV-HD700E: PAL color, CCIR standards 1080/50i specification Usable cassette Mini DV cassette with the mark printed Tape speed (HDV) Approx. 18.81 mm/s Tape speed (DV) SP: Approx. 18.81 mm/s LP: Approx. 12.56 mm/s Recording/playback time (HDV) 60 min (using a DVM60 cassette) Recording/playback time (DV) SP: 60 min (using a DVM60 cassette) LP: 90 min (using a DVM60 cassette) Fast...
Operating Guide
Page 93
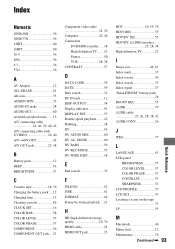
... Charging the battery pack .....12 Charging time 15 Cleaning cassette 82 CLOCK SET 16 COLOR BAR 58 COLOR LEVEL 57 COLOR PHASE 57 COMPONENT 56 COMPONENT OUT jack.....23 Component video cable 24, 26 Computer 42, 46 Connection DVD/HDD recorder...... 38 High definition TV........ 23 Printer 50 VCR 28, 38 CONTRAST 57 D DATA CODE 59 DATE 59 Date search 32 DC IN jack 12 DISP OUTPUT 58 Display...
... Charging the battery pack .....12 Charging time 15 Cleaning cassette 82 CLOCK SET 16 COLOR BAR 58 COLOR LEVEL 57 COLOR PHASE 57 COMPONENT 56 COMPONENT OUT jack.....23 Component video cable 24, 26 Computer 42, 46 Connection DVD/HDD recorder...... 38 High definition TV........ 23 Printer 50 VCR 28, 38 CONTRAST 57 D DATA CODE 59 DATE 59 Date search 32 DC IN jack 12 DISP OUTPUT 58 Display...


