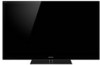
Child Safety: It Makes A Difference Where Your TV Stands
Page 1
...support the weight of your television (and other electronic components). 2 Use appropriate angle braces, straps and anchors to secure your furniture to the wall (but never screw anything directly into the TV). 3 Carefully read and understand the manufacturer's instructions and product safety notices. 4 Don't allow children to climb on or play with your home. Use...hidden hazard of the home with furniture and television sets. 5 Avoid placing any items on top of TVs such as VCRs and remotes that may cause unnecessary injury. Tune Into Safety 1 One size does NOT fit all. The home theater ...
Safety and Regulatory Booklet
Page 1
... installation or removal from heat sources. ACCESSORIES Keep small accessories out of a Wall‑Mount Bracket. Un enchufe polarizado presenta dos contactos, uno más ancho que el otro. Using incorrect replacement batteries can cause the LCD screen glass to crack, break or scatter. ☐ If damage occurs to seawater may cause electric shock. ☐ When disconnecting the AC power cord, grasp the plug...
Additional Information for Using Sony® Wall-Mount Bracket (SU-WL700)
Page 1
... to safety during the installation. For proper installation, follow your licensed contractor with this installation supplement as well as the instructions (supplied with the SU-WL700 Wall-Mount Bracket). Read these documents carefully for Using Sony Wall-Mount Bracket (SU-WL700) − − Be sure to determine the strength of the wall for withstanding the TV's weight. To Customers Please provide your wall-mount bracket instructions and the directions...
Additional Information for Using Sony® Wall-Mount Bracket (SU-WL700)
Page 2
... 1/4 (641) Screen center dimensions /17 32 (13) 2 1/8 (52) 3 5/8 (89) /11 16 (17) 2 7/8 (72) /17 32 (13) 2 1/8 (52) 2 7/8 (72) 4 3/8 (109) 2 1/8 (52) 3 5/8 (89) Length for all the required parts along with the Instructions. 2 Decide where you want to the TV installation dimensions table. Figures in the above table may differ slightly depending on the installation. Additional Information for Using Sony Wall-Mount Bracket (SU-WL700...
Additional Information for Using Sony® Wall-Mount Bracket (SU-WL700)
Page 3
... cover first before detaching the Table-Top Stand. Joint Additional Information for SU-WL700. 4 Detach the Table-Top Stand from the TV, if necessary. Table-Top Stand not attached to your TV's operating instructions for its weight. 3 Install the Base Bracket on the wall. Remove the screws indicated by the arrow marks on should be capable of supporting a weight of at least four times that of the TV...
Additional Information for Using Sony® Wall-Mount Bracket (SU-WL700)
Page 4
... not remove the Table-Top Stand for Using Sony Wall-Mount Bracket (SU-WL700) − − Having the TV face and the base of the Table-Top Stand on the same level surface will create an unstable working condition and can damage the TV. • When detaching the Table-Top Stand from the TV, hold the Table-Top Stand securely with both hands. 5 Connect the supplied AC power cord. (XBR...
Additional Information for Using Sony® Wall-Mount Bracket (SU-WL700)
Page 6
... bottom of the Mounting Bracket using an electric screwdriver, set to the same angle, and secure the screws to pinch your fingers when adjusting the angle of the Mounting Bracket. When installing the Display parallel to the wall (0 degrees), adjustment of the Mounting Bracket angle (procedures and below) is not necessary. Remove the two angle adjusting screws from the Mounting Bracket. Secure the screws to the...
Setup Guide (Operating Instructions)
Page 2
... any discomfort, you should also review (i) the instruction manual of any other device or media used with this television and (ii) our website (www.sony.com/tvsupport) for the ENERGY STAR qualification in the "Home" mode. For KDL-NX801/ 800 series models, they follow the recommendations listed above. • Do not use this polarized AC plug with an extension cord, receptacle or other outlet unless...
Setup Guide (Operating Instructions)
Page 3
... door to remove all video input signals in LCD TV technology, be sure to the "Full HDTV Experience." This document will help assure the highest quality for future reference. Refer to "To use i-Manual" for operation (page 18). • Retain this manual for your HD experience, use i-Manual...18 Additional Information Troubleshooting ...19 Specifications ...21 • Operating instructions are built into the remote control 4 Setting up your TV. 2 Source To experience...
Setup Guide (Operating Instructions)
Page 4
... Wall-Mount Bracket. try turning off the fluorescent lamps. • If you are ready to the TV. Checking the accessories For all models Table-Top Stand (1)*1 Remote control (1)*2 Size AAA batteries (2) For KDL-60NX801, KDL-60/52/ 46NX800 and KDL-46/40NX700 models AC power cord (1) Bottom Cover (1)*3 (KDL-60NX801 and KDL-60/52/46NX800 only) Stand Rear Cover (1)*3 Fixing screws for Table-Top Stand (M5 × 16) (4)*3 Assembling Screws for Table-Top Stand (M5 × 16) (4) (KDL-40NX700 only) Black...
Setup Guide (Operating Instructions)
Page 6
... the supplied Stand Rear Cover. Attaching the Table-Top Stand Refer to the supplied Table-Top Stand instruction leaflet for proper attachment for safety and to a wall right away. Should this occur, turn on the LCD panel or the frame around the screen. • Be careful to attach the TableTop Stand. Setting up your TV Some TV models are tighten cover the Table-Top Stand with the TV. larger size...
Setup Guide (Operating Instructions)
Page 15
... Stand from the TV Remove only the screws marked with the Initial Setup. If you receive channels from your TV but the operation of your nearest power outlet. 2 Check the ENERGY SAVING SWITCH setting is used. ~ • If you switch the TV on for wall mounting.) Be sure to scan for available channels and enable the TV Guide On Screen® feature. For KDL-60NX801, KDL-60/52/ 46NX800 and KDL-46...
Setup Guide (Operating Instructions)
Page 16
...) 2 3/8 inches (6 cm) Leave at least this TV, especially to the TV set . The supplied screws are designed so that they are ready to attach the Table-Top Stand. Installed on the Wall-mount bracket model. Keep the screws away from the TV" (page 15). Wall Wall ~ • Inadequate ventilation can be performed by a Sony dealer or licensed contractor. • Follow the instruction guide provided with the Wall-Mount Bracket for...
Setup Guide (Operating Instructions)
Page 17
... digital channels. Use with 0-9 and ENT to access TV Settings and other media and network related content. Settings Picture & Display Adjust the picture and screen settings Press for: Picture Adjustments Ambient Sensor Screen Pro Picture Setup TV Press OPTIONS to display a list of your TV remains the same as indicated. 2 Select a TV channel. 2 To watch TV To use the TV ?/1 button located on the back of the remote control.) ~ • The TV image shown here may use the Guide Press GUIDE...
Setup Guide (Operating Instructions)
Page 18
... watching on -screen manual. x Fun Features with Connected Equipment Introduces how to i-Manual x BRAVIA TV Features x Watching TV Introduces convenient features such as TV Guide, Favorites, etc. x Parts Description x Troubleshooting You can find solutions for your TV settings, etc. To use i-Manual 1 2 Your BRAVIA TV comes with an on this TV. 18 x Using the Home Menu You can find how to customize your problems. x Index...
Setup Guide (Operating Instructions)
Page 19
...) and no picture (screen • Check the antenna/cable connection. General The TV's power cannot be • Check to "Troubleshooting" in the i-Manual.) 2 If the problem persists, contact Sony Customer Support (information provided on . is not malfunction of pixels. is used for the PIN code. (PIN code 4357 is activated. 1 Count how many times the STANDBY indicator flashes between each three second break. The Parental Lock password has been forgotten...
Setup Guide (Operating Instructions)
Page 21
...System Television system Channel coverage Panel system Speaker output Input/Output jacks CABLE/ANTENNA VIDEO IN 1/2 COMPONENT IN HDMI IN 1/2/3/4 AUDIO OUT DIGITAL AUDIO OUT (OPTICAL) PC IN PC/HDMI 2 AUDIO IN LAN USB/DLNA Power and others Power requirement Power consumption in use in DAM*2 in standby Screen size (inches measured diagonally) Display resolution Speaker Full range (mm) (inches) Dimensions with stand (mm) (inches) without stand (mm) (inches) wall-mount hole pattern (mm) wall-mount screw size (mm) Mass with stand (kg)/(lb.) without stand (kg)/(lb.) Supplied accessories...
Setup Guide (Operating Instructions)
Page 22
... Television system Channel coverage Panel system Speaker output Input/Output jacks CABLE/ANTENNA VIDEO IN 1/2 COMPONENT IN HDMI IN 1/2/3/4 AUDIO OUT DIGITAL AUDIO OUT (OPTICAL) PC IN PC/HDMI 2 AUDIO IN LAN USB/DLNA 3D SYNC Power and others Power requirement Power consumption in standby Screen size (inches measured diagonally) Display resolution Speaker Full range Woofer (mm) (inches) (mm) (inches) Dimensions with stand (mm) (inches) without stand (mm) (inches) wall-mount hole pattern (mm) wall-mount screw size (mm) Mass with stand (kg)/(lb.) without stand (kg)/(lb.) Supplied...
Setup Guide (Operating Instructions)
Page 23
... one or more of these TV stand models may cause undesired operation. KDL- 60NX810 55NX811/ 46NX810/ 40NX711/ 55NX810 46NX711/ 40NX710 46NX710 Sony Wall-Mount Bracket Model SU-WL500 No.*1 SU-WL700/WL500 Sony Wall- Telephone Number: 858-942-2230 This device complies with the limits for wireless LAN communication and the maximum gain of the FCC rules. Availability of digital cable television programming in this device is encouraged...
Setup Guide (Operating Instructions)
Page 24
For the latest information about software updates for software updates by selecting Settings, Product Support and then Automatic Software Update. © 2010 Sony Corporation Printed in U.S.A. United States Canada http://productregistration.sony.com http://www.SonyStyle.ca/registration Your TV is connected to register your TV is capable of receiving software updates. Online Registration: Software Updates: For Your Convenience Be sure to the Internet, you can check for your...