

Correction
Page 1
Hold down for about 2 seconds to turn the LCD off , press to turn on the LCD and backlight. Sony Corporation © 1998 Printed in the touch panel for about 2 seconds to turn off *. Français Rectification Incorrect Correct page 9 ...teindre automatiquement après une opération. Appuyez plus de 2 secondes pour éteindre l'écran LCD. Appuyez plus de 2 secondes pour éteindre l'écran LCD. page 22 (RM-TP501E) / page 21 (RM-TP501) 1BACK LIGHT / COMMANDER OFF Press to turn the backlight on or off automatically after operation. pSetting the...
Hold down for about 2 seconds to turn the LCD off , press to turn on the LCD and backlight. Sony Corporation © 1998 Printed in the touch panel for about 2 seconds to turn off *. Français Rectification Incorrect Correct page 9 ...teindre automatiquement après une opération. Appuyez plus de 2 secondes pour éteindre l'écran LCD. Appuyez plus de 2 secondes pour éteindre l'écran LCD. page 22 (RM-TP501E) / page 21 (RM-TP501) 1BACK LIGHT / COMMANDER OFF Press to turn the backlight on or off automatically after operation. pSetting the...

Primary User Manual
Page 5
... lithium battery thoroughly with a dry cloth, insert it down for approx. 1 minute, the LCD turns off . The auto off time can be used even when the LCD is not used for about 2 seconds turns the LCD off automatically (Auto Off function). Push in "Setting up when touched. • VOL+/-, ...and SLEEP can be adjusted (see page 21). Positive (+) pole side up . Preparations Preparing the Commander Please be sure to regularly turn off the LCD or power when not in use. • If the commander is not lit. • Pressing BACK LIGHT/COMMANDER OFF turns the backlight off. Holding...
... lithium battery thoroughly with a dry cloth, insert it down for approx. 1 minute, the LCD turns off . The auto off time can be used even when the LCD is not used for about 2 seconds turns the LCD off automatically (Auto Off function). Push in "Setting up when touched. • VOL+/-, ...and SLEEP can be adjusted (see page 21). Positive (+) pole side up . Preparations Preparing the Commander Please be sure to regularly turn off the LCD or power when not in use. • If the commander is not lit. • Pressing BACK LIGHT/COMMANDER OFF turns the backlight off. Holding...

Primary User Manual
Page 6
... If used without adjustment, the "Touch Panel Adjustment" screen appears each of the 4 dots with this unit or the soft tip of your nearest Sony dealer. 2 Turn CONTRAST to adjust brightness of the touch pen is damaged, or the touch pen is ready to operate the touch panel. Preparations ...has been established, the commander is lost, please consult your finger to operate the receiver. 6 If the tip of the LCD. Once initial communication with the touch pen. Touch the center of each time the LCD lights up the commander Please be carried out for preparation of the touch panel...
... If used without adjustment, the "Touch Panel Adjustment" screen appears each of the 4 dots with this unit or the soft tip of your nearest Sony dealer. 2 Turn CONTRAST to adjust brightness of the touch pen is damaged, or the touch pen is ready to operate the touch panel. Preparations ...has been established, the commander is lost, please consult your finger to operate the receiver. 6 If the tip of the LCD. Once initial communication with the touch pen. Touch the center of each time the LCD lights up the commander Please be carried out for preparation of the touch panel...

Primary User Manual
Page 8
... of the sound fields (see page 15). FUNCTION screen Normally, the FUNCTION screen is displayed. SOUND FIELD screen Screen for selection and adjustment of the LCD.
... of the sound fields (see page 15). FUNCTION screen Normally, the FUNCTION screen is displayed. SOUND FIELD screen Screen for selection and adjustment of the LCD.

Primary User Manual
Page 9
... of the receiver. 4 JOG DIAL control Rotate to scroll through items in the receiver's display, not the commander's LCD. 9 Front panel 1 23 4 5 6 7 8 1 BACK LIGHT/COMMANDER OFF Press to turn the backlight on... the locations and functions of the buttons and controls on this unit. When the LCD is off depending on the LCD and backlight. 2 Touch panel Touch to operate. The sleep settings appear in ... mute the sound of the receiver. 7 CONTRAST control Use to adjust the contrast of the LCD. 8 SLEEP button Use to operate the receiver's sleep function. Location of Parts and Basic...
... of the receiver. 4 JOG DIAL control Rotate to scroll through items in the receiver's display, not the commander's LCD. 9 Front panel 1 23 4 5 6 7 8 1 BACK LIGHT/COMMANDER OFF Press to turn the backlight on... the locations and functions of the buttons and controls on this unit. When the LCD is off depending on the LCD and backlight. 2 Touch panel Touch to operate. The sleep settings appear in ... mute the sound of the receiver. 7 CONTRAST control Use to adjust the contrast of the LCD. 8 SLEEP button Use to operate the receiver's sleep function. Location of Parts and Basic...

Primary User Manual
Page 11
..., using the FUNCTION HOOK UP screen (see page 20). 11 Composition of the FUNCTION screen is displayed. z You can change the functions displayed in the LCD. Basic Operations Displaying the FUNCTION screen To operating components connected to the receiver, first display the FUNCTION screen, then select the component you wish to...
..., using the FUNCTION HOOK UP screen (see page 20). 11 Composition of the FUNCTION screen is displayed. z You can change the functions displayed in the LCD. Basic Operations Displaying the FUNCTION screen To operating components connected to the receiver, first display the FUNCTION screen, then select the component you wish to...
Primary User Manual
Page 21
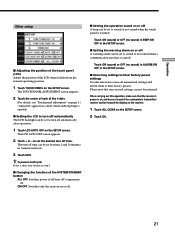
...set to turn off automatically after operation. 1 Touch LCD AUTO OFF on the SETUP screen. z To preserve battery life Select a short turn off time in step 2. p Setting the operation sound on or off A warning alarm can be sure to erase all Sony AV components off . p Returning settings to sound... turn off time can not be set the desired turn off time. Operation Other setup p Adjusting the position of the touch panel (LCD) Adjust the position of the LCD when it shifts from the normal operating position. 1 Touch TOUCH PANEL on page 6.) "Adjusted" appears in a short while and long...
...set to turn off automatically after operation. 1 Touch LCD AUTO OFF on the SETUP screen. z To preserve battery life Select a short turn off time in step 2. p Setting the operation sound on or off A warning alarm can be sure to erase all Sony AV components off . p Returning settings to sound... turn off time can not be set the desired turn off time. Operation Other setup p Adjusting the position of the touch panel (LCD) Adjust the position of the LCD when it shifts from the normal operating position. 1 Touch TOUCH PANEL on page 6.) "Adjusted" appears in a short while and long...
Primary User Manual
Page 23
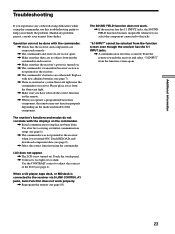
...does not work . / If the receiver has the 5.1 INPUT jacks, the SOUND FIELD function becomes inoperable whenever you operate a programmed non-Sony component, the remote may not function properly depending on the commander. / Initial communication setup has not been done. Point the remote towards the ... 5.1 INPUT jacks. / A communication error has occurred. Replace with the displays on the make and model of the component. Should any of the LCD (see page 7). / There is not pointed at the receiver when it was not pointed at the receiver. / The commander's batteries are exhausted...
...does not work . / If the receiver has the 5.1 INPUT jacks, the SOUND FIELD function becomes inoperable whenever you operate a programmed non-Sony component, the remote may not function properly depending on the commander. / Initial communication setup has not been done. Point the remote towards the ... 5.1 INPUT jacks. / A communication error has occurred. Replace with the displays on the make and model of the component. Should any of the LCD (see page 7). / There is not pointed at the receiver when it was not pointed at the receiver. / The commander's batteries are exhausted...


