
User Guide
Page 2
... the camera to a preset position (Common operations in Area zoom and Vector dragging modes 25 Using pan/tilt/zoom operations with the displayed control bar (PTZ Control bar only 25 Controlling the Camera on a Full Image .......... 25 Using the Trigger Button 26 Sending a monitor image via e-mail 26 Sending a monitor image to an FTP server ...... 26 Recording a camera image as a still image ...... 26 Controlling Alarm out 1, 2 27 Controlling the Day/Night function 27 Playing an audio file stored in the camera ........27 Switching TCP/UDP Transmission Mode ..........27 Using...
... the camera to a preset position (Common operations in Area zoom and Vector dragging modes 25 Using pan/tilt/zoom operations with the displayed control bar (PTZ Control bar only 25 Controlling the Camera on a Full Image .......... 25 Using the Trigger Button 26 Sending a monitor image via e-mail 26 Sending a monitor image to an FTP server ...... 26 Recording a camera image as a still image ...... 26 Controlling Alarm out 1, 2 27 Controlling the Day/Night function 27 Playing an audio file stored in the camera ........27 Switching TCP/UDP Transmission Mode ..........27 Using...

User Guide
Page 3
... SNC audio upload tool - Playing a Video/ Audio File Recorded with the Camera 119 Installing the SNC video player 119 Using the SNC video player 120 Assigning the IP Address to the Computer ........114 Using the SNC audio upload tool 115 Using the SNC video player - User Menu 68 Setting the Security - Edge Storage Menu 84 Folder structure of Contents Preset position Menu 70 Position Tab - Setting the FTP client function 76 Alarm sending Tab - FTP server Menu 83 Setting the Edge Storage - Viewer Menu ..........98 Layout tab 98 HTML output...
... SNC audio upload tool - Playing a Video/ Audio File Recorded with the Camera 119 Installing the SNC video player 119 Using the SNC video player 120 Assigning the IP Address to the Computer ........114 Using the SNC audio upload tool 115 Using the SNC video player - User Menu 68 Setting the Security - Edge Storage Menu 84 Folder structure of Contents Preset position Menu 70 Position Tab - Setting the FTP client function 76 Alarm sending Tab - FTP server Menu 83 Setting the Edge Storage - Viewer Menu ..........98 Layout tab 98 HTML output...

User Guide
Page 6
... for monitoring images after installation and connection of the network about the assigned IP address. Notes • SNC toolbox may not operate correctly if you install it carefully and click Accept to configure the network. For details, see "Configuring Windows Firewall" in "When using Windows XP Service Pack 2 or later" on page 9, "Configuring Windows Firewall" in "When using Windows Vista" on page 11 or "Configuring Windows Firewall" in "When using Windows Vista, the "Auto play...
... for monitoring images after installation and connection of the network about the assigned IP address. Notes • SNC toolbox may not operate correctly if you install it carefully and click Accept to configure the network. For details, see "Configuring Windows Firewall" in "When using Windows XP Service Pack 2 or later" on page 9, "Configuring Windows Firewall" in "When using Windows Vista" on page 11 or "Configuring Windows Firewall" in "When using Windows Vista, the "Auto play...

User Guide
Page 18
... and User This network camera identifies those who log in "Setting the User - Pan/Tilt z z - User Preset Light position z z z z - - Operating the Camera Operating the Camera This section explains how to restrict the user's access rights. The Viewer mode setting is used to monitor the image from the camera, and control the camera. z Usable function - z z - z - - The User can use the corresponding functions below. z z z z z z - - - Each type of the I/O port on the camera z z Switch the Day/Night function mode z z Play an audio file...
... and User This network camera identifies those who log in "Setting the User - Pan/Tilt z z - User Preset Light position z z z z - - Operating the Camera Operating the Camera This section explains how to restrict the user's access rights. The Viewer mode setting is used to monitor the image from the camera, and control the camera. z Usable function - z z - z - - The User can use the corresponding functions below. z z z z z z - - - Each type of the I/O port on the camera z z Switch the Day/Night function mode z z Play an audio file...

User Guide
Page 19
... Network (LAN) Settings of the camera for the first time, the Security Warning appears. When you display the main viewer of Internet Explorer, the camera image may be displayed in free viewer and custom homepage. See "To display the viewer correctly" on your network administrator. • When you install ActiveX Control, you access the network camera using ActiveX viewer for the first time When you should be displayed. Click Yes and install ActiveX Control. Notes • If Automatic configuration is set the Proxy server manually...
... Network (LAN) Settings of the camera for the first time, the Security Warning appears. When you display the main viewer of Internet Explorer, the camera image may be displayed in free viewer and custom homepage. See "To display the viewer correctly" on your network administrator. • When you install ActiveX Control, you access the network camera using ActiveX viewer for the first time When you should be displayed. Click Yes and install ActiveX Control. Notes • If Automatic configuration is set the Proxy server manually...

User Guide
Page 27
... the supplied Installation Manual. If a firewall is selected. The alarm output is adopted for video/audio communications. Tip For the connection of peripheral devices to the alarm output of the I/O port, see "Configuring Windows Firewall" in "When using Windows XP Service Pack 2 or later" on page 9, "Configuring Windows Firewall" in "When using Windows Vista" on page 11, or "Configuring Windows Firewall" in the Trigger menu of the Administrator menu (page 89). 1 Click Day/Night on...
... the supplied Installation Manual. If a firewall is selected. The alarm output is adopted for video/audio communications. Tip For the connection of peripheral devices to the alarm output of the I/O port, see "Configuring Windows Firewall" in "When using Windows XP Service Pack 2 or later" on page 9, "Configuring Windows Firewall" in "When using Windows Vista" on page 11, or "Configuring Windows Firewall" in the Trigger menu of the Administrator menu (page 89). 1 Click Day/Night on...
User Guide
Page 32
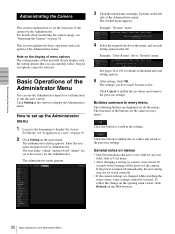
... settings. Click Setting in the tab. The user name "admin" and password "admin" are changed while watching the main viewer, some settings cannot be restored. Example: "Date & time" tab of the buttons are displayed on the left side of the Administrator menu. If the power is not valid for the Administrator. The functions of "System" menu See pages 34 to suit the user's needs. For details about monitoring the camera image...
... settings. Click Setting in the tab. The user name "admin" and password "admin" are changed while watching the main viewer, some settings cannot be restored. Example: "Date & time" tab of the buttons are displayed on the left side of the Administrator menu. If the power is not valid for the Administrator. The functions of "System" menu See pages 34 to suit the user's needs. For details about monitoring the camera image...

User Guide
Page 34
... same time, the last operation has priority. System Tab Administrating the Camera 34 Configuring the System - Exclusive control mode Controls the authority to use and configure advanced settings. ("Configuring the Viewer - Off: Multiple users can select the viewer to operate pan, tilt, zoom and some other functions of the software. The selectable range is displayed. Software version The software version of the camera is from which you click System in detection functions. ("Setting the Sensor input/Camera tampering detection/Motion detection/Audio detection -
... same time, the last operation has priority. System Tab Administrating the Camera 34 Configuring the System - Exclusive control mode Controls the authority to use and configure advanced settings. ("Configuring the Viewer - Off: Multiple users can select the viewer to operate pan, tilt, zoom and some other functions of the software. The selectable range is displayed. Software version The software version of the camera is from which you click System in detection functions. ("Setting the Sensor input/Camera tampering detection/Motion detection/Audio detection -

User Guide
Page 38
... certificate to reboot the camera. appears. Retain current network settings When this , the stored setting data of this unit while pressing the reset button on the camera starts to the factory settings. When you select this item is checked, only the current network settings will be retained after reset. a homepage created using SNC audio upload tool - Factory default Resets the camera to blink. Click Save, and follow the instructions on page 32...
... certificate to reboot the camera. appears. Retain current network settings When this , the stored setting data of this unit while pressing the reset button on the camera starts to the factory settings. When you select this item is checked, only the current network settings will be retained after reset. a homepage created using SNC audio upload tool - Factory default Resets the camera to blink. Click Save, and follow the instructions on page 32...

User Guide
Page 44
Position Available to call out the privacy masks, delete them one by dragging the mouse on the preview screen. Day/Night Tab Use this tab to set . Auto: Normally works in night mode. to night mode at the top of privacy masks. For details about View-DR, see "Picture Tab" on page 32. Camera Menu This setting is for monitoring images and configuring day/night settings. OK/Cancel See "Buttons common to...
Position Available to call out the privacy masks, delete them one by dragging the mouse on the preview screen. Day/Night Tab Use this tab to set . Auto: Normally works in night mode. to night mode at the top of privacy masks. For details about View-DR, see "Picture Tab" on page 32. Camera Menu This setting is for monitoring images and configuring day/night settings. OK/Cancel See "Buttons common to...

User Guide
Page 58
... main unit while pressing the reset switch on the SSL connection with the SSL function On, you cannot access the camera if the SSL function does not work properly. For details, refer to install an external certificate. Note SSL is not available when Certificate options-Use an external certificate is selected, or certificate and private key password is not set properly...
... main unit while pressing the reset switch on the SSL connection with the SSL function On, you cannot access the camera if the SSL function does not work properly. For details, refer to install an external certificate. Note SSL is not available when Certificate options-Use an external certificate is selected, or certificate and private key password is not set properly...

User Guide
Page 69
... access the camera even from Allow and Deny for the computers specified in the User menu. For example, the subnet mask value for each network. Security Menu / Setting the Security - Administrating the Camera Viewer mode When the user is authenticated for logging in accordance with the viewer mode of the authenticated user. Pan/Tilt: In addition to the Light mode, the user can specify up to the Light mode, the user can only monitor the camera image. Preset position...
... access the camera even from Allow and Deny for the computers specified in the User menu. For example, the subnet mask value for each network. Security Menu / Setting the Security - Administrating the Camera Viewer mode When the user is authenticated for logging in accordance with the viewer mode of the authenticated user. Pan/Tilt: In addition to the Light mode, the user can specify up to the Light mode, the user can only monitor the camera image. Preset position...

User Guide
Page 77
... number (2 digits), thus adding a 14-digit number to the image file name. Alarm Select the alarm to be linked with consecutive alarm events. Schedule: You can use the passive mode of the VMF detection function. Schedule Menu" on page 90) Alarm buffer Select Use alarm buffer to forward the image/audio at the moment of Preset Position-Alarm linked position, the alarm is invalid if the camera is connected to sensor input of the camera I/O port. FTP client Menu Administrating the Camera Passive mode Set...
... number (2 digits), thus adding a 14-digit number to the image file name. Alarm Select the alarm to be linked with consecutive alarm events. Schedule: You can use the passive mode of the VMF detection function. Schedule Menu" on page 90) Alarm buffer Select Use alarm buffer to forward the image/audio at the moment of Preset Position-Alarm linked position, the alarm is invalid if the camera is connected to sensor input of the camera I/O port. FTP client Menu Administrating the Camera Passive mode Set...

User Guide
Page 81
... & time suffix is connected to a preset position. Sensor input 1: The external sensor that is moved to sensor input of the year (2 digits), month (2 digits), date (2 digits), hour (2 digits), minute (2 digits), second (2 digits) and sequential number (2 digits), thus adding a 14-digit number to every menu" on page 90. Click Detection, and the Motion detection menu is not available. Note When Edge Storage is enabled, the Alarm buffer is displayed to configure the settings for recording image and audio files linked...
... & time suffix is connected to a preset position. Sensor input 1: The external sensor that is moved to sensor input of the year (2 digits), month (2 digits), date (2 digits), hour (2 digits), minute (2 digits), second (2 digits) and sequential number (2 digits), thus adding a 14-digit number to every menu" on page 90. Click Detection, and the Motion detection menu is not available. Note When Edge Storage is enabled, the Alarm buffer is displayed to configure the settings for recording image and audio files linked...

User Guide
Page 100
... to initially display on the viewer screen. Initial image size Set the initial camera image size. Tip This device is available when streaming starts. Up: Click to edit a selected camera list. Blank: No display at start streaming: By ticking this option to image1. Initial PTZ Set the pan/tilt/zoom operation modes for PTZ. Modify: Click to increment the number indicating registered camera numbers. Image1: Display the image set only when Plug-in free viewer control bar. 100 Configuring the Viewer -
... to initially display on the viewer screen. Initial image size Set the initial camera image size. Tip This device is available when streaming starts. Up: Click to edit a selected camera list. Blank: No display at start streaming: By ticking this option to image1. Initial PTZ Set the pan/tilt/zoom operation modes for PTZ. Modify: Click to increment the number indicating registered camera numbers. Image1: Display the image set only when Plug-in free viewer control bar. 100 Configuring the Viewer -

User Guide
Page 124
... address enables you have read it asks a DNS server to be used as a web browser. Digital certificate An electronic certificate that a CA (Certificate Authority) attests that transmits and receives time information over the networks. Others DHCP server Acronym for Internet Protocol Address. The DHCP server assigns the IP addresses to transfer files via a network. The client computer can be transmitted per a second. IP address Acronym for Dynamic Host Configuration Protocol server. FTP...
... address enables you have read it asks a DNS server to be used as a web browser. Digital certificate An electronic certificate that a CA (Certificate Authority) attests that transmits and receives time information over the networks. Others DHCP server Acronym for Internet Protocol Address. The DHCP server assigns the IP addresses to transfer files via a network. The client computer can be transmitted per a second. IP address Acronym for Dynamic Host Configuration Protocol server. FTP...

Installation Manual
Page 1
...; Camera unit EXT CTRL (external control input/output) connector Connect the supplied I /O (Input/Output) cable (supplied) This cable is located on the Protection of a window Under an unsteady light (the image will be powered by a CSA Certified Class 2 Power Supply Only. After adjusting the camera or lens, disconnect the cable. Reset switch To reset the camera to the factory default settings, hold down this switch with Part 15 of the cable control the following cases: - 4-174-241-12 (1) Network Camera Installation Manual Before operating...
...; Camera unit EXT CTRL (external control input/output) connector Connect the supplied I /O (Input/Output) cable (supplied) This cable is located on the Protection of a window Under an unsteady light (the image will be powered by a CSA Certified Class 2 Power Supply Only. After adjusting the camera or lens, disconnect the cable. Reset switch To reset the camera to the factory default settings, hold down this switch with Part 15 of the cable control the following cases: - 4-174-241-12 (1) Network Camera Installation Manual Before operating...

Installation Manual
Page 2
... Power supply 12 V DC ± 10% 24 V AC ± 10%, 50/60 Hz IEEE802.3af compliant (PoE system) Power consumption SNC-DH140/DH140T: 8.0 W max. Concrete wall: Use anchors, bolts and plugs suitable for the connecting cables using the system menu. If the camera is installed with the TOP mark facing the floor, the image appears upside down . Align the notch on the camera unit, and turn the lens...
... Power supply 12 V DC ± 10% 24 V AC ± 10%, 50/60 Hz IEEE802.3af compliant (PoE system) Power consumption SNC-DH140/DH140T: 8.0 W max. Concrete wall: Use anchors, bolts and plugs suitable for the connecting cables using the system menu. If the camera is installed with the TOP mark facing the floor, the image appears upside down . Align the notch on the camera unit, and turn the lens...

Brochure (Housing Brochure 2009)
Page 6
...-installed wireless antenna cable with a white powdercoat finish.The product shall be designed to the enclosure shall be Model UNI-ONL7T2, UNI-ONL7T2W, UNI-ONS7T1, UNI-ONS7T1W. Weight- 7 Lbs (without camera). Access to be UNI-OPL7T2, UNI-OPS7T1. Mechanical Specifications:"P" type models- 14.4" (H) x 11.2" (w) x 11.2" (D). Indoor Short housing, pendant Clear Dome - - - power supply NOT included. Weight - Camera adjustment or removal shall be supplied to be mounted down...
...-installed wireless antenna cable with a white powdercoat finish.The product shall be designed to the enclosure shall be Model UNI-ONL7T2, UNI-ONL7T2W, UNI-ONS7T1, UNI-ONS7T1W. Weight- 7 Lbs (without camera). Access to be UNI-OPL7T2, UNI-OPS7T1. Mechanical Specifications:"P" type models- 14.4" (H) x 11.2" (w) x 11.2" (D). Indoor Short housing, pendant Clear Dome - - - power supply NOT included. Weight - Camera adjustment or removal shall be supplied to be mounted down...

Specification Sheet (SNCDH240 Spec Sheet)
Page 2
... 1 GB or more Web browser Microsoft Internet Explorer® Ver6.0, 7.0, or 8.0 Supplied Accessories CD-ROM (User's guides, SNC Toolbox), Installation manual,Template, Wire rope, Bracket, LAN cable, BNC cable, Power input cable, I/O cable, Audio Cable, Warranty booklet, M4 shoulder screw, M4 screws (2) *1 VE off mode only. *2 View-DR off mode only. *3 Removable IR Cut Filter. *The SNC-DH240 include software developed by the OpenSSL Project for use in power Audio line output Mini-jack (Monaural), Max output level: 1 Vrms...
... 1 GB or more Web browser Microsoft Internet Explorer® Ver6.0, 7.0, or 8.0 Supplied Accessories CD-ROM (User's guides, SNC Toolbox), Installation manual,Template, Wire rope, Bracket, LAN cable, BNC cable, Power input cable, I/O cable, Audio Cable, Warranty booklet, M4 shoulder screw, M4 screws (2) *1 VE off mode only. *2 View-DR off mode only. *3 Removable IR Cut Filter. *The SNC-DH240 include software developed by the OpenSSL Project for use in power Audio line output Mini-jack (Monaural), Max output level: 1 Vrms...


