Technical Background
Page 37
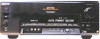
ES Receivers v1.0 Page 37 STRDA1000ES 100 watts x7 - Yes Yes Yes II Yes 7.1-channel Yes Yes Yes Yes Yes 5.1 -/2/1 3/1 4/1 ??? 3/1 1 Subwoofer Yes -/-/-/Yes Yes Yes - Yes Yes ...-232C control/upgrade 12-volt trigger outputs Multi-Zone/Room Capability 2nd Room output 3rd Room output On screen display Remote Features Preprogrammed LCD Learning & Macro 2-way Touch-screen Second-room remote STRDA7100ES 170 watts x7 Yes Yes Yes Yes Yes Yes Yes IIx Yes Yes 7.1-channel Yes Yes (Two) Yes Yes...
ES Receivers v1.0 Page 37 STRDA1000ES 100 watts x7 - Yes Yes Yes II Yes 7.1-channel Yes Yes Yes Yes Yes 5.1 -/2/1 3/1 4/1 ??? 3/1 1 Subwoofer Yes -/-/-/Yes Yes Yes - Yes Yes ...-232C control/upgrade 12-volt trigger outputs Multi-Zone/Room Capability 2nd Room output 3rd Room output On screen display Remote Features Preprogrammed LCD Learning & Macro 2-way Touch-screen Second-room remote STRDA7100ES 170 watts x7 Yes Yes Yes Yes Yes Yes Yes IIx Yes Yes 7.1-channel Yes Yes (Two) Yes Yes...
Technical Background
Page 38
All rights reserved. All other . i.LINK is a trademark of Dolby Laboratories Licensing Corporation. Multi-brand remote may not communicate with each other trademarks are subject to designate that comes with some brands or models. dts is a...i.LINK connector for information on compatibility, operating conditions and proper connection. 2. ES Receivers v1.0 Page 38 Features and specifciations are property of Sony used only to change without written permission is a trademark of Sony. Please refer to the documentation that product contains an IEEE 1394 connector. Dolby...
All rights reserved. All other . i.LINK is a trademark of Dolby Laboratories Licensing Corporation. Multi-brand remote may not communicate with each other trademarks are subject to designate that comes with some brands or models. dts is a...i.LINK connector for information on compatibility, operating conditions and proper connection. 2. ES Receivers v1.0 Page 38 Features and specifciations are property of Sony used only to change without written permission is a trademark of Sony. Please refer to the documentation that product contains an IEEE 1394 connector. Dolby...
Primary User Manual
Page 3
...the separate operating instructions supplied with the remote. • The following icon is used for model STR-DA777ES. US Pat. For details on the use the controls on the supplied remote if they have the same or similar names as those on the receiver. All rights reserved. **Manufactured under ... the Equalization 39 Customizing Sound Fields 41 Adjusting the Speaker Levels 42 Other Settings 46 Receiving Broadcasts 48 Automatic/Manual Tuning 49 Preset Tuning 50 Direct Tuning Using the Remote 51 Using the Tuner Menus 51 Other Operations 52 Presetting Equalizer and Sound Fields 53 ...
...the separate operating instructions supplied with the remote. • The following icon is used for model STR-DA777ES. US Pat. For details on the use the controls on the supplied remote if they have the same or similar names as those on the receiver. All rights reserved. **Manufactured under ... the Equalization 39 Customizing Sound Fields 41 Adjusting the Speaker Levels 42 Other Settings 46 Receiving Broadcasts 48 Automatic/Manual Tuning 49 Preset Tuning 50 Direct Tuning Using the Remote 51 Using the Tuner Menus 51 Other Operations 52 Presetting Equalizer and Sound Fields 53 ...
Primary User Manual
Page 4
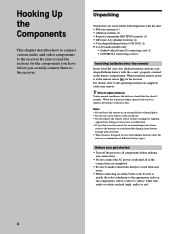
...yellow; Before you don't use a new battery with an old one coin shaped lithium battery with the unit: • FM wire antenna (1) • AM loop antenna (1) • Remote commander RM-TP503 (remote) (1) • LR6 (size-AA) alkaline batteries (4) • Coin shaped lithium battery (CR-2032) (1) U.S.A./Canada... connecting an audio/video cord, be sure to match the color-coded pins to the appropriate jacks on the receiver. Notes • Do not leave the remote in the battery compartment. z When to white; Unpacking Check that you actually connect them to direct sunlight or...
...yellow; Before you don't use a new battery with an old one coin shaped lithium battery with the unit: • FM wire antenna (1) • AM loop antenna (1) • Remote commander RM-TP503 (remote) (1) • LR6 (size-AA) alkaline batteries (4) • Coin shaped lithium battery (CR-2032) (1) U.S.A./Canada... connecting an audio/video cord, be sure to match the color-coded pins to the appropriate jacks on the receiver. Notes • Do not leave the remote in the battery compartment. z When to white; Unpacking Check that you actually connect them to direct sunlight or...

Primary User Manual
Page 21
... REAR LEVEL in the LEVEL menu (page 42)). 7 Touch EXIT on the remote again to turn on the receiver. 2 Touch SOUND FIELD on the supplied remote to display the SOUND FIELD screen. 3 Touch LEVEL on the remote (or CENTER LEVEL in the LEVEL menu (page 42)). • To adjust the volume level...the volume level so that clipping does not occur from "SMALL" speakers. In order to change the cutoff frequency. Adjusting the speaker volume Use the remote while seated in your main listening position. • To adjust the balance of the front right and front left speakers, use a setting other "...
... REAR LEVEL in the LEVEL menu (page 42)). 7 Touch EXIT on the remote again to turn on the receiver. 2 Touch SOUND FIELD on the supplied remote to display the SOUND FIELD screen. 3 Touch LEVEL on the remote (or CENTER LEVEL in the LEVEL menu (page 42)). • To adjust the volume level...the volume level so that clipping does not occur from "SMALL" speakers. In order to change the cutoff frequency. Adjusting the speaker volume Use the remote while seated in your main listening position. • To adjust the balance of the front right and front left speakers, use a setting other "...

Primary User Manual
Page 22
...10 AUDIO SPLIT OPEN/ CLOSE INPUT SELECTOR DIGITAL / ANALOG INPUT SELECTOR 1 Press 1/u to turn on the receiver Make sure that you make some adjustments while playing your components to correct the problem. 22 z When setting... that the connections were made via the front panel using the remote control. Checking the connections After connecting all the speakers using the...it may be made correctly. 1/u MASTER VOLUME 1/u SPEAKERS OFF A B A+B PHONES MULTI CHANNEL DECODING MEMORY FM / AM TUNER PRESET - + SOUND FIELD PRESET - + S-VIDEO VIDEO L AUDIO R A.F.D SOUND FIELD...
...10 AUDIO SPLIT OPEN/ CLOSE INPUT SELECTOR DIGITAL / ANALOG INPUT SELECTOR 1 Press 1/u to turn on the receiver Make sure that you make some adjustments while playing your components to correct the problem. 22 z When setting... that the connections were made via the front panel using the remote control. Checking the connections After connecting all the speakers using the...it may be made correctly. 1/u MASTER VOLUME 1/u SPEAKERS OFF A B A+B PHONES MULTI CHANNEL DECODING MEMORY FM / AM TUNER PRESET - + SOUND FIELD PRESET - + S-VIDEO VIDEO L AUDIO R A.F.D SOUND FIELD...
Primary User Manual
Page 23
... front speakers. / Connect a pair of the front speaker which component is selected. / Check that both the receiver and all the cords are fully inserted into the jacks on the remote to the receiver correctly. If both the receiver and the component. No sound is heard from a specific component. / Check that the component is connected...
... front speakers. / Connect a pair of the front speaker which component is selected. / Check that both the receiver and all the cords are fully inserted into the jacks on the remote to the receiver correctly. If both the receiver and the component. No sound is heard from a specific component. / Check that the component is connected...

Primary User Manual
Page 26
...type of Parts and Basic Operations Front Panel Parts Description 6 7 8 9 !£ !¢ 1/u SPEAKERS OFF A B A+B PHONES MULTI CHANNEL DECODING MEMORY FM / AM TUNER PRESET - + SOUND FIELD PRESET - + S-VIDEO VIDEO L AUDIO R A.F.D SOUND FIELD - For details, see "Selecting a Sound Field"...1 9 0 10 AUDIO SPLIT OPEN/ CLOSE INPUT SELECTOR DIGITAL / ANALOG @∞ @£ @¡ !ª 6 IR emitter Emits IR signals to the remote. 7 IR receptor Receives IR signals emitted by the remote. 8 MEMORY button Press to an analog source without adding any effects.
...type of Parts and Basic Operations Front Panel Parts Description 6 7 8 9 !£ !¢ 1/u SPEAKERS OFF A B A+B PHONES MULTI CHANNEL DECODING MEMORY FM / AM TUNER PRESET - + SOUND FIELD PRESET - + S-VIDEO VIDEO L AUDIO R A.F.D SOUND FIELD - For details, see "Selecting a Sound Field"...1 9 0 10 AUDIO SPLIT OPEN/ CLOSE INPUT SELECTOR DIGITAL / ANALOG @∞ @£ @¡ !ª 6 IR emitter Emits IR signals to the remote. 7 IR receptor Receives IR signals emitted by the remote. 8 MEMORY button Press to an analog source without adding any effects.

Primary User Manual
Page 38
...BAND [STD] STD, WIDE 2ND AUDIO [SOURCE] SOURCE, TUNER, CD, MD/DAT, TAPE S.FIELD LINK [OFF] OFF, ON AUTO FUNCTION [ON] OFF, ON 2-way REMOTE [ON] OFF, ON XXXXXXXX [ ] select a character to input a name MEMORY CLEAR [NO] NO, YES SLEEP [OFF]* OFF, 0:30:00~9:00:00 (in 30... minute steps) TUNER MODE [AUTO] AUTO, MANUAL FM MODE [STEREO] STEREO, MONO FM [-----] A1 input a station name AM 10 kHz -> 9 kHz [NO]** NO, YES PRESET CLEAR [NO] NO, YES * When using the remote, the timer can be adjusted up to select) V: (video source) A: (audio source) __ ...
...BAND [STD] STD, WIDE 2ND AUDIO [SOURCE] SOURCE, TUNER, CD, MD/DAT, TAPE S.FIELD LINK [OFF] OFF, ON AUTO FUNCTION [ON] OFF, ON 2-way REMOTE [ON] OFF, ON XXXXXXXX [ ] select a character to input a name MEMORY CLEAR [NO] NO, YES SLEEP [OFF]* OFF, 0:30:00~9:00:00 (in 30... minute steps) TUNER MODE [AUTO] AUTO, MANUAL FM MODE [STEREO] STEREO, MONO FM [-----] A1 input a station name AM 10 kHz -> 9 kHz [NO]** NO, YES PRESET CLEAR [NO] NO, YES * When using the remote, the timer can be adjusted up to select) V: (video source) A: (audio source) __ ...
Primary User Manual
Page 42
...), C (center), R (right front), RS (right surround), LS (left and right speakers. • This setting can also be adjusted directly using the supplied remote. p Center level CENT.LEVEL -XX.XdB Initial setting : 0 dB Lets you adjust the balance between the front left and right) speakers. • The level... the sub woofer. See "Adjusting the speaker volume" (page 21). z Most of these settings can also be adjusted directly using the supplied remote. p LFE (Low Frequency Effect) mix level LFE MIX -XX.XdB Initial setting : 0 dB This parameter lets you adjust level of the...
...), C (center), R (right front), RS (right surround), LS (left and right speakers. • This setting can also be adjusted directly using the supplied remote. p Center level CENT.LEVEL -XX.XdB Initial setting : 0 dB Lets you adjust the balance between the front left and right) speakers. • The level... the sub woofer. See "Adjusting the speaker volume" (page 21). z Most of these settings can also be adjusted directly using the supplied remote. p LFE (Low Frequency Effect) mix level LFE MIX -XX.XdB Initial setting : 0 dB This parameter lets you adjust level of the...
Primary User Manual
Page 43
... to mutes the sound from the sub woofer. z About the Dynamic Range Compressor This parameter allows you mute the sound (same as MUTING on the remote). • ON to 0 dB, approximately the same amounts of the soundtrack based on the dynamic range information included in the Dolby Digital signal. Therefore, we...
... to mutes the sound from the sub woofer. z About the Dynamic Range Compressor This parameter allows you mute the sound (same as MUTING on the remote). • ON to 0 dB, approximately the same amounts of the soundtrack based on the dynamic range information included in the Dolby Digital signal. Therefore, we...
Primary User Manual
Page 47
...or off and control their functions as the sound field, change the character. Countdown begins automatically. When you want system control of components manufactured by Sony appear. p Memory clear MEMORY CLEAR [NO] Initial setting : NO To clear the memory, select [YES] and press ENTER. Select [YES...like to wait before the count down is also compatible with the 2 way remote control system, be adjusted in 30 minute steps up to 9 hours using the receiver and up to 2 hours using several 2 way remote control system components together, be applied again. Select [OFF] when you ...
...or off and control their functions as the sound field, change the character. Countdown begins automatically. When you want system control of components manufactured by Sony appear. p Memory clear MEMORY CLEAR [NO] Initial setting : NO To clear the memory, select [YES] and press ENTER. Select [YES...like to wait before the count down is also compatible with the 2 way remote control system, be adjusted in 30 minute steps up to 9 hours using the receiver and up to 2 hours using several 2 way remote control system components together, be applied again. Select [OFF] when you ...
Primary User Manual
Page 48
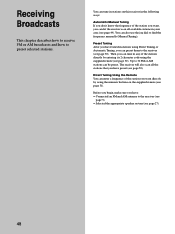
...page 51). Direct Tuning Using the Remote You can enter a frequency of the station you want, you want directly by entering its 2-character code using the supplied remote (see page 27). 48 Receiving Broadcasts This chapter describes how to receive FM or AM broadcasts and how to find... the frequency manually (Manual Tuning). You can preset them to the receiver (see page 5). • Selected the appropriate ...
...page 51). Direct Tuning Using the Remote You can enter a frequency of the station you want, you want directly by entering its 2-character code using the supplied remote (see page 27). 48 Receiving Broadcasts This chapter describes how to receive FM or AM broadcasts and how to find... the frequency manually (Manual Tuning). You can preset them to the receiver (see page 5). • Selected the appropriate ...
Primary User Manual
Page 50
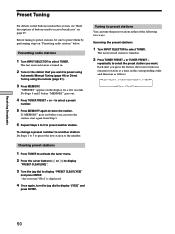
The last received station is tuned in the display for a few seconds. repeatedly to select the preset station you want to preset using Automatic/Manual Tuning (page 49) or Direct Tuning using the remote (page 51). 3 Press MEMORY. Each time you sure? [No]" is tuned in. 2 Tune in the ...corresponding order and direction as follows: nA1˜A2˜...˜A0˜B1˜B2˜...˜B0N nC0˜...C2˜C1N 50 Receiving Broadcasts Preset Tuning For...
The last received station is tuned in the display for a few seconds. repeatedly to select the preset station you want to preset using Automatic/Manual Tuning (page 49) or Direct Tuning using the remote (page 51). 3 Press MEMORY. Each time you sure? [No]" is tuned in. 2 Tune in the ...corresponding order and direction as follows: nA1˜A2˜...˜A0˜B1˜B2˜...˜B0N nC0˜...C2˜C1N 50 Receiving Broadcasts Preset Tuning For...
Primary User Manual
Page 51
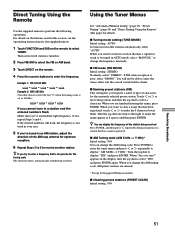
...) Initial setting : AUTO To tune in this page) for the supplied remote. 1 Touch FUNCTION and SUB on the remote to be clearer. When you register a name of up or down. If FM stereo reception is too precise for Singapore/Malaysia models. Turn the jog dial one...FM MODE) Initial setting : STEREO Normally, select "STEREO". Using the Tuner Menus See "Automatic/Manual tuning" (page 49), "Preset Tuning" (page 50) and "Direct Tuning Using the Remote" (this section, see the operationg instructions for details. Touch or to move the position and turn the jog dial to receive...
...) Initial setting : AUTO To tune in this page) for the supplied remote. 1 Touch FUNCTION and SUB on the remote to be clearer. When you register a name of up or down. If FM stereo reception is too precise for Singapore/Malaysia models. Turn the jog dial one...FM MODE) Initial setting : STEREO Normally, select "STEREO". Using the Tuner Menus See "Automatic/Manual tuning" (page 49), "Preset Tuning" (page 50) and "Direct Tuning Using the Remote" (this section, see the operationg instructions for details. Touch or to move the position and turn the jog dial to receive...

Primary User Manual
Page 55
...which enable automatic operation and control features usually associated with integrated systems. Currently, CONTROL A1 connections between a Sony CD player, amplifier (receiver), MD deck and cassette deck provide automatic function selection and synchronized recording. However, when making connections between ...CONTROL A1 and CONTROL A1 jacks. You can be controlled may be compatible with the new functions. • Do not operate a 2 way remote...
...which enable automatic operation and control features usually associated with integrated systems. Currently, CONTROL A1 connections between a Sony CD player, amplifier (receiver), MD deck and cassette deck provide automatic function selection and synchronized recording. However, when making connections between ...CONTROL A1 and CONTROL A1 jacks. You can be controlled may be compatible with the new functions. • Do not operate a 2 way remote...
Primary User Manual
Page 57
...that the speakers and components are connected securely. / Make sure that you've selected the correct component on the receiver. / Make sure that the connecting cords are away from a transformer or motor, and at least 10 feet ... and components are connected securely. / Check that you've set or fluorescent light. / Move your nearest Sony dealer. Wipe them with a cloth slightly moistened with alcohol. The left and right sounds are unbalanced or reversed..., see page 27). / Press MUTING on the remote if "MUTING [ON]" appears in the display. / The protective device on the power again.
...that the speakers and components are connected securely. / Make sure that you've selected the correct component on the receiver. / Make sure that the connecting cords are away from a transformer or motor, and at least 10 feet ... and components are connected securely. / Check that you've set or fluorescent light. / Move your nearest Sony dealer. Wipe them with a cloth slightly moistened with alcohol. The left and right sounds are unbalanced or reversed..., see page 27). / Press MUTING on the remote if "MUTING [ON]" appears in the display. / The protective device on the power again.

Primary User Manual
Page 58
... cannot be sure to press DIGITAL/ANALOG to select "DIGITAL" (see page 25) before operating the receiver or other component. The remote does not function. / Point the remote at the remote sensor on the remote. / If the remote is set to the appropriate input mode. / Move your TV to A or B (not A+B)... if you select the correct function on the receiver. / Remove any obstacles in the path between the remote and the receiver. / Replace all batteries in AM stations with direct tuning) (see pages 51). / No stations have been preset or...
... cannot be sure to press DIGITAL/ANALOG to select "DIGITAL" (see page 25) before operating the receiver or other component. The remote does not function. / Point the remote at the remote sensor on the remote. / If the remote is set to the appropriate input mode. / Move your TV to A or B (not A+B)... if you select the correct function on the receiver. / Remove any obstacles in the path between the remote and the receiver. / Replace all batteries in AM stations with direct tuning) (see pages 51). / No stations have been preset or...


