

HDMI Control Guide
Page 3
... Press X/x to select [CUSTOM SETUP], then press . The Setup item is in stop mode. The Setup Display appears. 2 Press DISPLAY when the system is selected. LANGUAGE SETUP OSD: MENU: AUDIO: SUBTITLE: ENGLISH ENGLISH ORIGINAL AUDIO FOLLOW GUSB 5 Press X/x to select [SETUP], then press . CUSTOM SETUP HDMI CONTROL: PAUSE MODE: TRACK ...CONTROL] function to off. • [ON]: sets the [HDMI CONTROL] function to select the setting. The options for [SETUP] appear. 1 2 ( 2 7 ) 1 8 ( 3 4 ) T 0:00:02 DVD VIDEO QUICK QUICK CUSTOM RESET BNR 4 Press X/x to select [CUSTOM], then press .
... Press X/x to select [CUSTOM SETUP], then press . The Setup item is in stop mode. The Setup Display appears. 2 Press DISPLAY when the system is selected. LANGUAGE SETUP OSD: MENU: AUDIO: SUBTITLE: ENGLISH ENGLISH ORIGINAL AUDIO FOLLOW GUSB 5 Press X/x to select [SETUP], then press . CUSTOM SETUP HDMI CONTROL: PAUSE MODE: TRACK ...CONTROL] function to off. • [ON]: sets the [HDMI CONTROL] function to select the setting. The options for [SETUP] appear. 1 2 ( 2 7 ) 1 8 ( 3 4 ) T 0:00:02 DVD VIDEO QUICK QUICK CUSTOM RESET BNR 4 Press X/x to select [CUSTOM], then press .

HDMI Control Guide
Page 5
By connecting as the following illustration, you can enjoy Multi Channel Broadcasted Audio from the speakers of the system. The setting is in the following connections and settings. Select the HDMI input of your TV connected to [ON]..... The names of HDMI inputs in stop mode. 3 Press X/x to select [SETUP], then press . 4 Press X/x to select [CUSTOM], then press . 5 Press X/x to select [CUSTOM SETUP], then press . 6 Press X/x to select [STB SYNCHRO], then press . 7 Press X/x to connect from the smallest number). Video signal Sound signal TV to HDMI 2 (HDMI cord) to HDMI 1 (HDMI...
By connecting as the following illustration, you can enjoy Multi Channel Broadcasted Audio from the speakers of the system. The setting is in the following connections and settings. Select the HDMI input of your TV connected to [ON]..... The names of HDMI inputs in stop mode. 3 Press X/x to select [SETUP], then press . 4 Press X/x to select [CUSTOM], then press . 5 Press X/x to select [CUSTOM SETUP], then press . 6 Press X/x to select [STB SYNCHRO], then press . 7 Press X/x to connect from the smallest number). Video signal Sound signal TV to HDMI 2 (HDMI cord) to HDMI 1 (HDMI...
Operating Instructions
Page 19
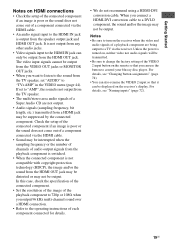
...turn on the receiver's display. For details, see "Naming inputs" (page 72). 19US Unless the power is turned on, neither video nor audio signals will be transmitted. • Be sure to change the factory setting of the VIDEO 2 input button on HDMI connections • Check the setup of the ...Sound may be interrupted when the sampling frequency or the number of channels of audio output signals from the playback component is switched. • When the connected component is not output from any other audio jacks. • Video signals input to the HDMI IN jack can only be output from...
...turn on the receiver's display. For details, see "Naming inputs" (page 72). 19US Unless the power is turned on, neither video nor audio signals will be transmitted. • Be sure to change the factory setting of the VIDEO 2 input button on HDMI connections • Check the setup of the ...Sound may be interrupted when the sampling frequency or the number of channels of audio output signals from the playback component is switched. • When the connected component is not output from any other audio jacks. • Video signals input to the HDMI IN jack can only be output from...

Operating Instructions
Page 26
...VIDEO L AUDIO R MEMORY/ CATEGORY ENTER MODE CATEGORY 2CH A.F.D. MOVIE MUSIC AUTO CAL DIRECT 3 1 Press ?/1 to use the buttons on the receiver for 5 seconds. After "CLEARING" appears on the display alternately. 3 Press MEMORY/ENTER. AC power cord (mains lead) Performing initial setup operations Before using the receiver for the first time, initialize the receiver... the receiver and the remote Connecting the AC power cord (mains lead) Connect the AC power cord (mains lead) to their factory settings. • All settings in the LEVEL, EQ, SUR, TUNER, AUDIO, VIDEO and ...
...VIDEO L AUDIO R MEMORY/ CATEGORY ENTER MODE CATEGORY 2CH A.F.D. MOVIE MUSIC AUTO CAL DIRECT 3 1 Press ?/1 to use the buttons on the receiver for 5 seconds. After "CLEARING" appears on the display alternately. 3 Press MEMORY/ENTER. AC power cord (mains lead) Performing initial setup operations Before using the receiver for the first time, initialize the receiver... the receiver and the remote Connecting the AC power cord (mains lead) Connect the AC power cord (mains lead) to their factory settings. • All settings in the LEVEL, EQ, SUR, TUNER, AUDIO, VIDEO and ...

Operating Instructions
Page 35
...PHONES TUNING MODE TUNING DISPLAY INPUT MODE INPUT SELECTOR MASTER VOLUME VIDEO 3 IN/PORTABLE AV IN VIDEO L AUDIO R MEMORY/ CATEGORY ENTER MODE CATEGORY 2CH A.F.D. Be sure this receiver to select "DVD". 4 Switch the input of the ...the sound format of the DVD player is set up the DVD player. Refer to multi channel sound. - CLEAR D.TUNING 89 D.SKIP MEMORY DVD MENU 0/10 ENTER FM MODE DISPLAY...to the operating instructions supplied with the receiver. 6 Play back the disc. 7 Adjust to a suitable volume. 8 After you cannot listen to "Quick Setup Guide" supplied with the TV and ...
...PHONES TUNING MODE TUNING DISPLAY INPUT MODE INPUT SELECTOR MASTER VOLUME VIDEO 3 IN/PORTABLE AV IN VIDEO L AUDIO R MEMORY/ CATEGORY ENTER MODE CATEGORY 2CH A.F.D. Be sure this receiver to select "DVD". 4 Switch the input of the ...the sound format of the DVD player is set up the DVD player. Refer to multi channel sound. - CLEAR D.TUNING 89 D.SKIP MEMORY DVD MENU 0/10 ENTER FM MODE DISPLAY...to the operating instructions supplied with the receiver. 6 Play back the disc. 7 Adjust to a suitable volume. 8 After you cannot listen to "Quick Setup Guide" supplied with the TV and ...

Operating Instructions
Page 48
...rather wide angle. Tip Surround speaker position is designed specifically for proper implementation of your surround speakers for implementation of the front speakers. This setup item is set to sections B and D. x DIMMER (Brightness of the display) Lets you specify the location of your surround speakers ...that have been set to "SMALL" and the corresponding speaker indicator flashes on the SYSTEM menu. If you play back multi channel surround encoded software and select the setting that provides a good sense of spaciousness and that you are pointing toward the listener from...
...rather wide angle. Tip Surround speaker position is designed specifically for proper implementation of your surround speakers for implementation of the front speakers. This setup item is set to sections B and D. x DIMMER (Brightness of the display) Lets you specify the location of your surround speakers ...that have been set to "SMALL" and the corresponding speaker indicator flashes on the SYSTEM menu. If you play back multi channel surround encoded software and select the setting that provides a good sense of spaciousness and that you are pointing toward the listener from...

Quick Set up Guide
Page 1
... components This is an example of how to connect this receiver for details on the color or mark of the speaker cord to be sure of a 6.1 channel speaker system (six speakers and one sub woofer) confi...STR-DG710 Quick Setup Guide Guide d'installation Sony Corporation © 2007 Printed in Malaysia 1: Installing speakers/ 1: Installation des enceintes 2: Connecting the speakers/ 2: Raccordement des enceintes DIGITAL (ASSIGNABLE) OPTICAL SAT IN ANTENNA VIDEO 1 AM IN COAXIAL DVD IN DMPORT DVD IN VIDEO 2/BD IN OUT HDMI Y XM PB/CB PR/CR VIDEO IN VIDEO IN VIDEO OUT VIDEO IN VIDEO...
... components This is an example of how to connect this receiver for details on the color or mark of the speaker cord to be sure of a 6.1 channel speaker system (six speakers and one sub woofer) confi...STR-DG710 Quick Setup Guide Guide d'installation Sony Corporation © 2007 Printed in Malaysia 1: Installing speakers/ 1: Installation des enceintes 2: Connecting the speakers/ 2: Raccordement des enceintes DIGITAL (ASSIGNABLE) OPTICAL SAT IN ANTENNA VIDEO 1 AM IN COAXIAL DVD IN DMPORT DVD IN VIDEO 2/BD IN OUT HDMI Y XM PB/CB PR/CR VIDEO IN VIDEO IN VIDEO OUT VIDEO IN VIDEO...
Marketing Specifications
Page 1
... transmit control functions to a select number of BRAVIA LCD televisions as well as new DVD players in the Sony line5 . STR-DG710 Key Features 6.1 Channel Audio/Video Receiver 105 Watts X 6 Amplifier Power (8 ohms, 1Khz, 1.0% THD) BRAVIA® Theatre Sync™ technology...(Video and Audio) XM® Connect-and-Play™ Ready1 Portable Audio Enhancer with Front A/V Inputs Digital Cinema Auto Calibration with setup microphone Digital Cinema Sound™ Signal Processing Audio Video Receiver Key Technologies Optimized for Blu-ray Disc™ and most HD Sources2 Sony's A/V Receivers ...
... transmit control functions to a select number of BRAVIA LCD televisions as well as new DVD players in the Sony line5 . STR-DG710 Key Features 6.1 Channel Audio/Video Receiver 105 Watts X 6 Amplifier Power (8 ohms, 1Khz, 1.0% THD) BRAVIA® Theatre Sync™ technology...(Video and Audio) XM® Connect-and-Play™ Ready1 Portable Audio Enhancer with Front A/V Inputs Digital Cinema Auto Calibration with setup microphone Digital Cinema Sound™ Signal Processing Audio Video Receiver Key Technologies Optimized for Blu-ray Disc™ and most HD Sources2 Sony's A/V Receivers ...


