

Instructions
Page 1
2-652-380-11 (1) To Customers and Sony Dealers Wall-Mount Bracket Instructions GB Mode d'emploi FR Instrucciones ES Gebrauchsanweisung DE Instructies NL Istruzioni IT Instruções PT Vejledning DK Bruksanvisning SE SU-WL51 © 2005 Sony Corporation
2-652-380-11 (1) To Customers and Sony Dealers Wall-Mount Bracket Instructions GB Mode d'emploi FR Instrucciones ES Gebrauchsanweisung DE Instructies NL Istruzioni IT Instruções PT Vejledning DK Bruksanvisning SE SU-WL51 © 2005 Sony Corporation

Instructions
Page 2
...as a bruise or a fracture. • If the wall on which the Wall-Mount Bracket is installed is designed for use the product correctly. Be sure to prevent such accidents. Keep this product. Sony is not liable for any damages or injury caused by mishandling or improper installation. Be... to licensed contractors and keep small children away during the installation. To Customers Sufficient expertise is required for installing this Wall-Mount Bracket can result. Sony is used . If the products are not observed or the product is not liable for any damages or injury caused by...
...as a bruise or a fracture. • If the wall on which the Wall-Mount Bracket is installed is designed for use the product correctly. Be sure to prevent such accidents. Keep this product. Sony is not liable for any damages or injury caused by mishandling or improper installation. Be... to licensed contractors and keep small children away during the installation. To Customers Sufficient expertise is required for installing this Wall-Mount Bracket can result. Sony is used . If the products are not observed or the product is not liable for any damages or injury caused by...
Instructions
Page 3
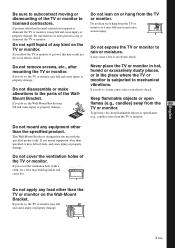
...in hot, humid or excessively dusty places, or in a fire or an electric shock. This Wall-Mount Bracket is subjected to rain or moisture. Do not cover the ventilation holes of the TV or monitor to ...licensed contractors. If you mount equipment other than specified, it may fall on you and cause serious injury. Do not lean on...TV or monitor may fall and cause injury or property damage. Do not lean on the Wall-Mount Bracket. If you do so, it may fall or break, and cause injury or property damage. If you...
...in hot, humid or excessively dusty places, or in a fire or an electric shock. This Wall-Mount Bracket is subjected to rain or moisture. Do not cover the ventilation holes of the TV or monitor to ...licensed contractors. If you mount equipment other than specified, it may fall on you and cause serious injury. Do not lean on...TV or monitor may fall and cause injury or property damage. Do not lean on the Wall-Mount Bracket. If you do so, it may fall or break, and cause injury or property damage. If you...

Instructions
Page 4
... of the TV or monitor protrude away from the wall surface. Precautions • If you use the TV or monitor installed on the Wall-Mount Bracket for a long time, the wall behind or above and pay special attention to safety during the installation, maintenance and checking of this product... to water leaks or air current from radio noise, etc.) before installing. If any of the TV or monitor. Installing the Wall-Mount Bracket To Sony Dealers WARNING to Customers Sufficient expertise is exposed to the wall following instructions are loose or fall out, the TV or monitor may fall...
... of the TV or monitor protrude away from the wall surface. Precautions • If you use the TV or monitor installed on the Wall-Mount Bracket for a long time, the wall behind or above and pay special attention to safety during the installation, maintenance and checking of this product... to water leaks or air current from radio noise, etc.) before installing. If any of the TV or monitor. Installing the Wall-Mount Bracket To Sony Dealers WARNING to Customers Sufficient expertise is exposed to the wall following instructions are loose or fall out, the TV or monitor may fall...

Instructions
Page 5
... wall that is exposed to shock, it may fall and cause injury. Be sure to hurt your hands or fingers when installing the Wall-Mount Bracket or the TV or monitor. Be careful not to subject the TV or monitor to the TV or monitor. Be sure to install.... Use the appropriate screws for the installation 1 Prepare four or more M8 or equivalent screws (not supplied) and a screwdriver. This may cause injury. Plate Unit (1) Mounting Hook Unit (2) Hook (4) Screw (+B6 × L20) (2) Paper Template (1) Screw (+PSW5 × L16) (6) 5 (GB) Be careful not to install a TV or monitor...
... wall that is exposed to shock, it may fall and cause injury. Be sure to hurt your hands or fingers when installing the Wall-Mount Bracket or the TV or monitor. Be careful not to subject the TV or monitor to the TV or monitor. Be sure to install.... Use the appropriate screws for the installation 1 Prepare four or more M8 or equivalent screws (not supplied) and a screwdriver. This may cause injury. Plate Unit (1) Mounting Hook Unit (2) Hook (4) Screw (+B6 × L20) (2) Paper Template (1) Screw (+PSW5 × L16) (6) 5 (GB) Be careful not to install a TV or monitor...

Instructions
Page 7
... 2, refer to the operating instructions or the leaflet ("Installing the WallMount Bracket") supplied with the F marks on the plate unit. 2 Secure the Mounting Hook Unit support shafts using the screws from the top and bottom centre of the arm angle (procedures 1 and 2 below) is not necessary. ...setting to the inner position. 2 Adjust the angle of the arms. When installing the TV or monitor perpendicularly (0 degrees), adjustment of the both Mounting Hook Unit support shafts align with the TV or monitor. • 0 degrees: Leave the white screws tightened as they are installing the KLV-...
... 2, refer to the operating instructions or the leaflet ("Installing the WallMount Bracket") supplied with the F marks on the plate unit. 2 Secure the Mounting Hook Unit support shafts using the screws from the top and bottom centre of the arm angle (procedures 1 and 2 below) is not necessary. ...setting to the inner position. 2 Adjust the angle of the arms. When installing the TV or monitor perpendicularly (0 degrees), adjustment of the both Mounting Hook Unit support shafts align with the TV or monitor. • 0 degrees: Leave the white screws tightened as they are installing the KLV-...

Instructions
Page 9
... connecting the AC power cord and the connecting cable(s), refer to use any screws other than the supplied ones (+PSW5 × L16) when securing the Mounting Hook Units. (Continued) 9 (GB) For details on page 2, be pinched under or between pieces of the TV or monitor. When you may result in a short... the TV or monitor. Be careful not to the wall outlet. Connect the AC power cord and the connecting cable(s) to licensed contractors. 1 Attach the Mounting Hook Units on the hooks on the rear side of the TV or monitor. Notes • You cannot connect the cables to the TV or...
... connecting the AC power cord and the connecting cable(s), refer to use any screws other than the supplied ones (+PSW5 × L16) when securing the Mounting Hook Units. (Continued) 9 (GB) For details on page 2, be pinched under or between pieces of the TV or monitor. When you may result in a short... the TV or monitor. Be careful not to the wall outlet. Connect the AC power cord and the connecting cable(s) to licensed contractors. 1 Attach the Mounting Hook Units on the hooks on the rear side of the TV or monitor. Notes • You cannot connect the cables to the TV or...

Instructions
Page 10
.... Confirming the completion of the installation Check the following points. • The eight hooks of the Mounting Hook Units are securely tightened. Be sure to hitch the lower hooks of the Mounting Hook Unit support shafts, and tighten them temporarily. If you fail to tighten both left and right... sides of the two Mounting Hook Units to the Mounting Hook Unit support shafts. 5 Confirm the eight hooks are firmly hooked on the four shafts on the four shafts of the installation for safety...
.... Confirming the completion of the installation Check the following points. • The eight hooks of the Mounting Hook Units are securely tightened. Be sure to hitch the lower hooks of the Mounting Hook Unit support shafts, and tighten them temporarily. If you fail to tighten both left and right... sides of the two Mounting Hook Units to the Mounting Hook Unit support shafts. 5 Confirm the eight hooks are firmly hooked on the four shafts on the four shafts of the installation for safety...

Instructions
Page 11
... monitor. • Be careful not to hurt your hands or fingers when removing the TV or monitor. When removing the TV Specifications or monitor To Sony Dealers Unit: mm (inches) Weight: 9.5 kg (21 lb) Plate Unit 54 1 Unplug the AC power cord from 670 (26 3/8) (2 1/8) the wall outlet. 420 (16 17.../32) 2 Remove the two securing screws on the right and left Mounting Hook Unit support shafts. 3 Be sure that two or more persons hold the TV or monitor when carrying it upward to remove the TV or...
... monitor. • Be careful not to hurt your hands or fingers when removing the TV or monitor. When removing the TV Specifications or monitor To Sony Dealers Unit: mm (inches) Weight: 9.5 kg (21 lb) Plate Unit 54 1 Unplug the AC power cord from 670 (26 3/8) (2 1/8) the wall outlet. 420 (16 17.../32) 2 Remove the two securing screws on the right and left Mounting Hook Unit support shafts. 3 Be sure that two or more persons hold the TV or monitor when carrying it upward to remove the TV or...

Instructions
Page 12
... (15 15/32) KLV-40U100M 10 393 (15 15/32) Screen centre line Display Dimensions (0º) Unit: mm (inches) Length for each mounting angle Unit: mm (inches) Weight Display Model Mounting A B C D E angle F G H Weight × 4* () KDL-40S2000/ KDL-40S2010 988 664 103 288 83 (39) (26 1/4) (4 1/8) (11 3/8) (3 3/8) 0º 161 ...that the TV or monitor will be installed on should be capable of supporting a weight of at least four times that is mounted on this table to decide on page 2, be sure to refer to this product. TV or monitor installing dimensions table The...
... (15 15/32) KLV-40U100M 10 393 (15 15/32) Screen centre line Display Dimensions (0º) Unit: mm (inches) Length for each mounting angle Unit: mm (inches) Weight Display Model Mounting A B C D E angle F G H Weight × 4* () KDL-40S2000/ KDL-40S2010 988 664 103 288 83 (39) (26 1/4) (4 1/8) (11 3/8) (3 3/8) 0º 161 ...that the TV or monitor will be installed on should be capable of supporting a weight of at least four times that is mounted on this table to decide on page 2, be sure to refer to this product. TV or monitor installing dimensions table The...
