
VAIO User Guide
Page 11
Bottom 1 Port replicator connector 4 RELEASE switch 2 Air vents 5 Battery bay 3 LOCK/UNLOCK switch 6 CONNECT button1 1 O n s elec ted models with Microsoft® Windows® operating system. The drive eject button located next to eject the optical drive tray. Page 11 1 Drive eject button 4 Manual eject hole 2 Optical drive 5 Modem jack 3 Drive eject button You can use either drive eject button to the optical drive functions only with wireles s mous e func tionality.
Bottom 1 Port replicator connector 4 RELEASE switch 2 Air vents 5 Battery bay 3 LOCK/UNLOCK switch 6 CONNECT button1 1 O n s elec ted models with Microsoft® Windows® operating system. The drive eject button located next to eject the optical drive tray. Page 11 1 Drive eject button 4 Manual eject hole 2 Optical drive 5 Modem jack 3 Drive eject button You can use either drive eject button to the optical drive functions only with wireles s mous e func tionality.

VAIO User Guide
Page 18
To override the automatic setting and manually adjust the brightness, follow these steps: Press the Brightness button, located next to the Volume buttons, and select one of the three brightness settings (...
To override the automatic setting and manually adjust the brightness, follow these steps: Press the Brightness button, located next to the Volume buttons, and select one of the three brightness settings (...

VAIO User Guide
Page 40
... external light. Turning on the amount of the computer firmly. If necessary, adjust the brightness of the LCD screen. To override the automatic setting and manually adjust the brightness, follow these steps: Press the Brightness button, located next to press the power button, the computer turns off. 3. Turning on the...
... external light. Turning on the amount of the computer firmly. If necessary, adjust the brightness of the LCD screen. To override the automatic setting and manually adjust the brightness, follow these steps: Press the Brightness button, located next to press the power button, the computer turns off. 3. Turning on the...

VAIO User Guide
Page 44
See Using power saving modes for more information. Page 44 If you are using battery power, save your data frequently to avoid data loss and manually activate a power saving mode. Some programs and peripheral devices prevent the system from automatically entering Hibernate.
See Using power saving modes for more information. Page 44 If you are using battery power, save your data frequently to avoid data loss and manually activate a power saving mode. Some programs and peripheral devices prevent the system from automatically entering Hibernate.

VAIO User Guide
Page 89
The drive tray slides out. Press the Eject button on the drive cover to the Eject button. 4. Page 89 If the Eject button does not work, turn off the computer and insert a thin, straight object (such as a paper clip) into the manual eject hole next to turn off . 3. Push the drive tray gently to open the drive tray. Close all programs that access the optical drive, and wait for the Busy indicator on the drive cover to close it. Lift the disc from the drive. 5. 2.
The drive tray slides out. Press the Eject button on the drive cover to the Eject button. 4. Page 89 If the Eject button does not work, turn off the computer and insert a thin, straight object (such as a paper clip) into the manual eject hole next to turn off . 3. Push the drive tray gently to open the drive tray. Close all programs that access the optical drive, and wait for the Busy indicator on the drive cover to close it. Lift the disc from the drive. 5. 2.

VAIO User Guide
Page 91
The drive tray slides out. Lift the disc from the drive. 5. If the Eject button does not work, turn off the computer and insert a thin, straight object (such as a paper clip) into the manual eject hole next to turn off . 3. Press the Eject button on the drive cover to the Eject button. 4. Push the drive tray gently to open the drive tray. Page 91 Close all programs that access the optical drive, and wait for the Busy indicator on the drive cover to close it. 2.
The drive tray slides out. Lift the disc from the drive. 5. If the Eject button does not work, turn off the computer and insert a thin, straight object (such as a paper clip) into the manual eject hole next to turn off . 3. Press the Eject button on the drive cover to the Eject button. 4. Push the drive tray gently to open the drive tray. Page 91 Close all programs that access the optical drive, and wait for the Busy indicator on the drive cover to close it. 2.

VAIO User Guide
Page 118
... 1. Inserting and removing floppy disks To write data to a disk, use one that access the floppy disk. 2. Inserting a Floppy Disk Do not open the shutter manually and touch the surface of the floppy disk. Close all programs that is on the floppy disk drive to turn off. 3. To avoid losing data...
... 1. Inserting and removing floppy disks To write data to a disk, use one that access the floppy disk. 2. Inserting a Floppy Disk Do not open the shutter manually and touch the surface of the floppy disk. Close all programs that is on the floppy disk drive to turn off. 3. To avoid losing data...

VAIO User Guide
Page 119
Page 119 Protecting floppy disks Do not open the shutter manually or touch the surface of the floppy disk. Keep floppy disks away from magnets, direct sunlight, and heat sources.
Page 119 Protecting floppy disks Do not open the shutter manually or touch the surface of the floppy disk. Keep floppy disks away from magnets, direct sunlight, and heat sources.
VAIO User Guide
Page 138
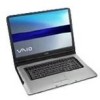
launches Sony Notebook Setup, where you can also select the Setup option to fit within the external display. Select one TV connection at the same time, depending ... if you are using. Plug and Display customizes the screen resolution to adjust the Plug and Display settings. You can always adjust the screen resolution manually. However, if the external display's screen resolution is distorted, you can be able to the computer and instantly view an image on the types of...
launches Sony Notebook Setup, where you can also select the Setup option to fit within the external display. Select one TV connection at the same time, depending ... if you are using. Plug and Display customizes the screen resolution to adjust the Plug and Display settings. You can always adjust the screen resolution manually. However, if the external display's screen resolution is distorted, you can be able to the computer and instantly view an image on the types of...

VAIO User Guide
Page 160
... task tray of the 1st user to follow when using the fast switch feature, the Timer Recording feature is not available to the operating system manual. Do not change the display setup while Giga Pocket software is not available to create a new Video Capsule.
... task tray of the 1st user to follow when using the fast switch feature, the Timer Recording feature is not available to the operating system manual. Do not change the display setup while Giga Pocket software is not available to create a new Video Capsule.

VAIO User Guide
Page 240
Page 240 Your computer can manually activate Hibernate mode. Can my computer enter Hibernate mode while using battery power, but some software programs and peripheral devices prevent the system from entering Hibernate mode, save your data frequently to avoid losing data. If you can enter Hibernate mode while using battery power? See To activate Hibernate mode for information on how you are using a program that prevents the system from entering Hibernate mode.
Page 240 Your computer can manually activate Hibernate mode. Can my computer enter Hibernate mode while using battery power, but some software programs and peripheral devices prevent the system from entering Hibernate mode, save your data frequently to avoid losing data. If you can enter Hibernate mode while using battery power? See To activate Hibernate mode for information on how you are using a program that prevents the system from entering Hibernate mode.

VAIO User Guide
Page 257
Page 257 Right click the optical drive icon, and select Eject from the shortcut menu. If none of the above options work , click Start on the Windows® taskbar, and click My Computer. What do I do if the drive tray won't open? Make sure the computer is on. Press the Eject button on the optical drive. If the Eject button does not work , insert a thin, straight object (such as a paper clip) in the manual eject hole near the Eject button.
Page 257 Right click the optical drive icon, and select Eject from the shortcut menu. If none of the above options work , click Start on the Windows® taskbar, and click My Computer. What do I do if the drive tray won't open? Make sure the computer is on. Press the Eject button on the optical drive. If the Eject button does not work , insert a thin, straight object (such as a paper clip) in the manual eject hole near the Eject button.

VAIO User Guide
Page 306
This manual and the software described herein, in whole or in part without ...Stick logo, OpenMG, SonicStage, i.LINK, CLIÉ, MagicGate, Giga Pocket, PicoPlayer, VAIO Media, and VAIO are trademarks or registered trademarks of their respective owners. SONY CANNOT WARRANT THAT THE FUNCTIONS DESCRIBED IN THIS GUIDE WILL BE UNINTERRUPTED OR ERROR-FREE. ... TEXT, IMAGES, VIDEO, OR AUDIO FROM ANY DESCRIBED WEB SITE. Page 306 Legal Information Notice © 2004 Sony Electronics Inc. Sony, Click to U.S. Reproduction in whole or in part, may not be reproduced, translated, or reduced to any ...
This manual and the software described herein, in whole or in part without ...Stick logo, OpenMG, SonicStage, i.LINK, CLIÉ, MagicGate, Giga Pocket, PicoPlayer, VAIO Media, and VAIO are trademarks or registered trademarks of their respective owners. SONY CANNOT WARRANT THAT THE FUNCTIONS DESCRIBED IN THIS GUIDE WILL BE UNINTERRUPTED OR ERROR-FREE. ... TEXT, IMAGES, VIDEO, OR AUDIO FROM ANY DESCRIBED WEB SITE. Page 306 Legal Information Notice © 2004 Sony Electronics Inc. Sony, Click to U.S. Reproduction in whole or in part, may not be reproduced, translated, or reduced to any ...

VAIO User Guide
Page 307
..., the Memory Stick logo, OpenMG, SonicStage, i.LINK, CLIÉ, MagicGate, Giga Pocket, PicoPlayer, VAIO Media, and VAIO are trademarks or registered trademarks of their respective owners. All rights reserved. SONY CANNOT WARRANT THAT THE FUNCTIONS DESCRIBED IN THIS GUIDE WILL BE UNINTERRUPTED OR ERROR-FREE... without written permission is prohibited. WEB SITE INFORMATION IS OBTAINED FROM VARIOUS SOURCES AND MAY BE INACCURATE. customers only. This manual and the software described herein, in whole or in part without prior written approval. All other trademarks are available to U.S....
..., the Memory Stick logo, OpenMG, SonicStage, i.LINK, CLIÉ, MagicGate, Giga Pocket, PicoPlayer, VAIO Media, and VAIO are trademarks or registered trademarks of their respective owners. All rights reserved. SONY CANNOT WARRANT THAT THE FUNCTIONS DESCRIBED IN THIS GUIDE WILL BE UNINTERRUPTED OR ERROR-FREE... without written permission is prohibited. WEB SITE INFORMATION IS OBTAINED FROM VARIOUS SOURCES AND MAY BE INACCURATE. customers only. This manual and the software described herein, in whole or in part without prior written approval. All other trademarks are available to U.S....

