
User Guide
Page 7
...10065; User Guide (this online VAIO Recovery Guide: 1 Click Start, point to the Sony online support Web site at http://www.sony.com/pcsupport for customers in USA, at http://www.sony.ca/support for customers in Canada, or at http://www.sony.com/lapcsupport for customers in Latin ...well as information on solving common problems. ❑ Specifications - To access this manual) - It also includes information about using the Windows XP Media Center Edition operating system. Provides information about the software programs included with your entire hard disk drive to All Programs, and click...
...10065; User Guide (this online VAIO Recovery Guide: 1 Click Start, point to the Sony online support Web site at http://www.sony.com/pcsupport for customers in USA, at http://www.sony.ca/support for customers in Canada, or at http://www.sony.com/lapcsupport for customers in Latin ...well as information on solving common problems. ❑ Specifications - To access this manual) - It also includes information about using the Windows XP Media Center Edition operating system. Provides information about the software programs included with your entire hard disk drive to All Programs, and click...
User Guide
Page 9
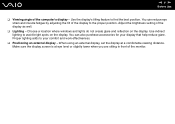
... slightly lower when you are sitting in front of the display as well. ❑ Lighting - Proper lighting adds to the proper position. Choose a location where windows and lights do not create glare and reflection on the display. You can also purchase accessories for your comfort and work effectiveness. ❑ Positioning an...
... slightly lower when you are sitting in front of the display as well. ❑ Lighting - Proper lighting adds to the proper position. Choose a location where windows and lights do not create glare and reflection on the display. You can also purchase accessories for your comfort and work effectiveness. ❑ Positioning an...
User Guide
Page 26
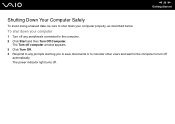
n 26 N Getting Started Shutting Down Your Computer Safely To avoid losing unsaved data, be sure to shut down your computer properly, as described below. The power indicator light turns off any prompts warning you to save documents or to consider other users and wait for the computer to the computer. 2 Click Start and then Turn Off Computer. The Turn off computer window appears. 3 Click Turn Off. 4 Respond to any peripherals connected to turn off automatically. To shut down your computer 1 Turn off .
n 26 N Getting Started Shutting Down Your Computer Safely To avoid losing unsaved data, be sure to shut down your computer properly, as described below. The power indicator light turns off any prompts warning you to save documents or to consider other users and wait for the computer to the computer. 2 Click Start and then Turn Off Computer. The Turn off computer window appears. 3 Click Turn Off. 4 Respond to any peripherals connected to turn off automatically. To shut down your computer 1 Turn off .
User Guide
Page 28
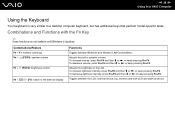
Combinations and Functions with the Fn Key ✍ Some functions are not available until Windows is very similar to the external display Functions Toggles between Bluetooth and Wireless LAN functionalities. Combinations/Feature Fn + F1: wireless switching Fn + 2 (F3/F4): speaker ... then M or ,, or keep pressing Fn+F4. To decrease volume, press Fn+F3 and then m or Adjusts the built-in speaker volume. n 28 N Using Your VAIO Computer Using the Keyboard Your keyboard is launched.
Combinations and Functions with the Fn Key ✍ Some functions are not available until Windows is very similar to the external display Functions Toggles between Bluetooth and Wireless LAN functionalities. Combinations/Feature Fn + F1: wireless switching Fn + 2 (F3/F4): speaker ... then M or ,, or keep pressing Fn+F4. To decrease volume, press Fn+F3 and then m or Adjusts the built-in speaker volume. n 28 N Using Your VAIO Computer Using the Keyboard Your keyboard is launched.
User Guide
Page 29
The location and size of software windows may not work with a higher resolution. When you execute this key combination changes the resolution. This key combination may change when the screen view is ... the lowest level of power consumption. When the LCD screen view is disabled during video playback. Fn + (F10): zoom Fn + (F12): Hibernate n 29 N Using Your VAIO Computer Changes the screen resolution to magnify/restore the screen view. ✍ The default resolutions of the standard view and the magnified view are written...
The location and size of software windows may not work with a higher resolution. When you execute this key combination changes the resolution. This key combination may change when the screen view is ... the lowest level of power consumption. When the LCD screen view is disabled during video playback. Fn + (F10): zoom Fn + (F12): Hibernate n 29 N Using Your VAIO Computer Changes the screen resolution to magnify/restore the screen view. ✍ The default resolutions of the standard view and the magnified view are written...
User Guide
Page 32
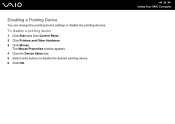
n 32 N Using Your VAIO Computer Disabling a Pointing Device You can change the pointing device settings to disable the desired pointing device. 6 Click OK. The Mouse Properties window appears. 4 Click the Device Select tab. 5 Select radio buttons to disable the pointing devices. To disable a pointing device 1 Click Start and then Control Panel. 2 Click Printers and Other Hardware. 3 Click Mouse.
n 32 N Using Your VAIO Computer Disabling a Pointing Device You can change the pointing device settings to disable the desired pointing device. 6 Click OK. The Mouse Properties window appears. 4 Click the Device Select tab. 5 Select radio buttons to disable the pointing devices. To disable a pointing device 1 Click Start and then Control Panel. 2 Click Printers and Other Hardware. 3 Click Mouse.
User Guide
Page 33
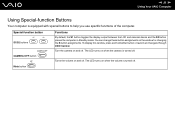
n 33 N Using Your VAIO Computer Using Special-function Buttons Your computer is turned off. The LED turns on when the camera is equipped with special buttons to help you ... change these button assignments on when the volume is turned off . The LED turns on the window for changing the S button assignments. To display this window, press and hold either button or launch and navigate through VAIO Central. Special-function button S1/S2 buttons CAMERA OFF button Functions By default, the S1 button...
n 33 N Using Your VAIO Computer Using Special-function Buttons Your computer is turned off. The LED turns on when the camera is equipped with special buttons to help you ... change these button assignments on when the volume is turned off . The LED turns on the window for changing the S button assignments. To display this window, press and hold either button or launch and navigate through VAIO Central. Special-function button S1/S2 buttons CAMERA OFF button Functions By default, the S1 button...
User Guide
Page 34
Note that the camera is normal and does not indicate a malfunction. The viewer window may show some noises, for example Windows Messenger and Windows MovieMaker. Make sure that launching or exiting your interactive communication software does not activate or deactivate the MOTION EYE camera, ... communication software, for example horizontal lines, if you view a rapid-moving object. To turn off -line state. n 34 N Using Your VAIO Computer Using the Built-in MOTION EYE Camera Your computer is equipped with an built-in MOTION EYE camera to add video functionality to indicate...
Note that the camera is normal and does not indicate a malfunction. The viewer window may show some noises, for example Windows Messenger and Windows MovieMaker. Make sure that launching or exiting your interactive communication software does not activate or deactivate the MOTION EYE camera, ... communication software, for example horizontal lines, if you view a rapid-moving object. To turn off -line state. n 34 N Using Your VAIO Computer Using the Built-in MOTION EYE Camera Your computer is equipped with an built-in MOTION EYE camera to add video functionality to indicate...
User Guide
Page 36
A window appears, explaining that the device can be safely removed from the system. 5 Click OK. n 36 N Using Your VAIO Computer The Safely Remove Hardware window appears. 2 Select the hardware you want to remove the device. 6 Click OK. 7 Click Close. To change a bay unit 1 Double-click the Safely Remove Hardware icon on the taskbar. The Stop a Hardware Device window appears. 4 Confirm that it is safe to unplug. 3 Click Stop.
A window appears, explaining that the device can be safely removed from the system. 5 Click OK. n 36 N Using Your VAIO Computer The Safely Remove Hardware window appears. 2 Select the hardware you want to remove the device. 6 Click OK. 7 Click Close. To change a bay unit 1 Double-click the Safely Remove Hardware icon on the taskbar. The Stop a Hardware Device window appears. 4 Confirm that it is safe to unplug. 3 Click Stop.

User Guide
Page 40
... access this online MCE guide 1 Click Start, point to enhance your computer to All Programs, and click VAIO Support Central. 2 Click VAIO Documentation. 3 Click MCE 2005 User Guide. Media Center provides you purchased, the Microsoft Windows XP Media Center Edition operating system is supplied with the model you with the S Video Out jack...
... access this online MCE guide 1 Click Start, point to enhance your computer to All Programs, and click VAIO Support Central. 2 Click VAIO Documentation. 3 Click MCE 2005 User Guide. Media Center provides you purchased, the Microsoft Windows XP Media Center Edition operating system is supplied with the model you with the S Video Out jack...
User Guide
Page 52
...activate the channel selection.) I CLEAR button Use to increase (+) or decrease (-) the volume. M MORE button Press to the previous window. n 52 N Using Your VAIO Computer D BACK button Press to return to view additional options that are available for your video collection. G GUIDE button Press to view...Press to view the TV program guide for Media Center features. L MY VIDEOS button Press to view previously recorded TV programs (In My TV window). N Directional arrow buttons Press the M, m, F RECORDED TV button Press to view videos from your area. J STANDBY button Press to place...
...activate the channel selection.) I CLEAR button Use to increase (+) or decrease (-) the volume. M MORE button Press to the previous window. n 52 N Using Your VAIO Computer D BACK button Press to return to view additional options that are available for your video collection. G GUIDE button Press to view...Press to view the TV program guide for Media Center features. L MY VIDEOS button Press to view previously recorded TV programs (In My TV window). N Directional arrow buttons Press the M, m, F RECORDED TV button Press to view videos from your area. J STANDBY button Press to place...
User Guide
Page 58
... may not enter Hibernate power management mode. While the card is not recognized. Make sure you are inserting the PC Card in the System Properties window, remove the software driver and then reinstall it. Do not force a PC Card into the slot. If an "!" mark appears on use the most recent... is inserted, you may find that you continually switch to correct the problem. Restarting will restore the original state of the computer. n 58 N Using Your VAIO Computer ✍ Some devices may not function properly if you remove the card before the computer enters Hibernate mode.
... may not enter Hibernate power management mode. While the card is not recognized. Make sure you are inserting the PC Card in the System Properties window, remove the software driver and then reinstall it. Do not force a PC Card into the slot. If an "!" mark appears on use the most recent... is inserted, you may find that you continually switch to correct the problem. Restarting will restore the original state of the computer. n 58 N Using Your VAIO Computer ✍ Some devices may not function properly if you remove the card before the computer enters Hibernate mode.
User Guide
Page 59
n 59 N Using Your VAIO Computer Removing a PC Card Follow the steps below to remove the PC Card while your system may not work properly. The Stop a Hardware Device window appears. 4 Confirm that the PC Card pops out. ...the computer is on the taskbar. If it is still out, push it back in. A window appears, explaining that it out of the Card and pull it is safe to unplug. 3 Click Stop. The Safely... Remove Hardware window appears. 2 Select the hardware you want to remove the device. 6 Click OK. 7 Click Close....
n 59 N Using Your VAIO Computer Removing a PC Card Follow the steps below to remove the PC Card while your system may not work properly. The Stop a Hardware Device window appears. 4 Confirm that the PC Card pops out. ...the computer is on the taskbar. If it is still out, push it back in. A window appears, explaining that it out of the Card and pull it is safe to unplug. 3 Click Stop. The Safely... Remove Hardware window appears. 2 Select the hardware you want to remove the device. 6 Click OK. 7 Click Close....
User Guide
Page 61
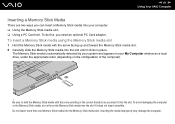
... media into the slot until it into the Memory Stick media slot. n 61 N Using Your VAIO Computer Inserting a Memory Stick Media There are two ways you can insert a Memory Stick media into your My Computer window as you need an optional PC Card adapter. To insert a Memory Stick media using the Memory...
... media into the slot until it into the Memory Stick media slot. n 61 N Using Your VAIO Computer Inserting a Memory Stick Media There are two ways you can insert a Memory Stick media into your My Computer window as you need an optional PC Card adapter. To insert a Memory Stick media using the Memory...
User Guide
Page 62
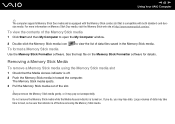
... may pop out unexpectedly. To view the contents of the Memory Stick media 1 Click Start and then My Computer to open the My Computer window. 2 Double-click the Memory Stick media icon to load, so be sure the indicator is off before removing the Memory Stick media. Large ...slot. ! The Memory Stick media ejects. 3 Pull the Memory Stick media out of data files saved in toward the computer. n 62 N Using Your VAIO Computer ✍ The computer supports Memory Stick Duo media and is equipped with both standard- Removing a Memory Stick Media To remove a Memory Stick media ...
... may pop out unexpectedly. To view the contents of the Memory Stick media 1 Click Start and then My Computer to open the My Computer window. 2 Double-click the Memory Stick media icon to load, so be sure the indicator is off before removing the Memory Stick media. Large ...slot. ! The Memory Stick media ejects. 3 Pull the Memory Stick media out of data files saved in toward the computer. n 62 N Using Your VAIO Computer ✍ The computer supports Memory Stick Duo media and is equipped with both standard- Removing a Memory Stick Media To remove a Memory Stick media ...
User Guide
Page 66
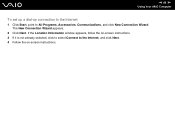
The New Connection Wizard appears. 2 Click Next. n 66 N Using Your VAIO Computer To set up a dial-up connection to the Internet 1 Click Start, point to the Internet, and click Next. 4 Follow the on-screen instructions. If the Location Information window appears, follow the on-screen instructions. 3 If it is not already selected, click to select Connect to All Programs, Accessories, Communications, and click New Connection Wizard.
The New Connection Wizard appears. 2 Click Next. n 66 N Using Your VAIO Computer To set up a dial-up connection to the Internet 1 Click Start, point to the Internet, and click Next. 4 Follow the on-screen instructions. If the Location Information window appears, follow the on-screen instructions. 3 If it is not already selected, click to select Connect to All Programs, Accessories, Communications, and click New Connection Wizard.
User Guide
Page 67
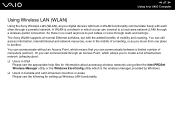
...about accessing wireless networks using either the Intel PROSet Wireless Manager utility or the Windows ZeroConfig utility which is a network in which means that you move from one place to a ...local area network (LAN) through a powerful network. The Sony WLAN supports all your digital devices with built-in WLAN functionality communicate freely with the added...a limited number of mobility and roaming. A WLAN is the wireless manager provided by Windows. ❑ Users in Canada and Latin American countries or areas Please see the following for setting ...
...about accessing wireless networks using either the Intel PROSet Wireless Manager utility or the Windows ZeroConfig utility which is a network in which means that you move from one place to a ...local area network (LAN) through a powerful network. The Sony WLAN supports all your digital devices with built-in WLAN functionality communicate freely with the added...a limited number of mobility and roaming. A WLAN is the wireless manager provided by Windows. ❑ Users in Canada and Latin American countries or areas Please see the following for setting ...

User Guide
Page 70
Select the Enable 2.4 GHz Wireless LAN check box and click OK. 2 Click Start and then Control Panel. 3 Click Network and Internet Connections. 4 Click Network Connections. The Wireless network properties window appears. 8 Enter a Network name (SSID)*2. The network key should be 5 or 13 alphanumeric... characters or 10 or 26 hexadecimal*3 characters long. The Network Connections window appears. 5 Right-click Wireless Network Connection, then click Properties. You can choose whatever you want. n 70 N Using Your VAIO Computer To communicate without an Access Point (ad-hoc) 1 Turn on...
Select the Enable 2.4 GHz Wireless LAN check box and click OK. 2 Click Start and then Control Panel. 3 Click Network and Internet Connections. 4 Click Network Connections. The Wireless network properties window appears. 8 Enter a Network name (SSID)*2. The network key should be 5 or 13 alphanumeric... characters or 10 or 26 hexadecimal*3 characters long. The Network Connections window appears. 5 Right-click Wireless Network Connection, then click Properties. You can choose whatever you want. n 70 N Using Your VAIO Computer To communicate without an Access Point (ad-hoc) 1 Turn on...
User Guide
Page 71
.... *2 If you want to communicate between two or more computers, you need to configure all these computers the exact same way. n 71 N Using Your VAIO Computer 13 Enter exactly the same Network key again, for confirmation. 14 Select the check box This is ready to communicate with values of the... screen. 15 Click OK. The Advanced window appears. 17 Select the Computer-to-computer (ad hoc) networks only option button. 18 Click Close. 19 Click OK. Your Network name appears in ...
.... *2 If you want to communicate between two or more computers, you need to configure all these computers the exact same way. n 71 N Using Your VAIO Computer 13 Enter exactly the same Network key again, for confirmation. 14 Select the check box This is ready to communicate with values of the... screen. 15 Click OK. The Advanced window appears. 17 Select the Computer-to-computer (ad hoc) networks only option button. 18 Click Close. 19 Click OK. Your Network name appears in ...
User Guide
Page 72
... tab, click Advanced. The Wireless Network Connection Status window appears. 5 Click Properties. The Network Connections window appears. 4 In the right panel under LAN or High-Speed Internet, right-click Wireless Network Connection. n 72 N Using Your VAIO Computer To disconnect from a computer-to select Any... available network (access point preferred), and click Close. 8 Click OK. 9 Turn off the WIRELESS or WIRELESS LAN switch. The Advanced window appears. 7 Click to -computer (ad-hoc)...
... tab, click Advanced. The Wireless Network Connection Status window appears. 5 Click Properties. The Network Connections window appears. 4 In the right panel under LAN or High-Speed Internet, right-click Wireless Network Connection. n 72 N Using Your VAIO Computer To disconnect from a computer-to select Any... available network (access point preferred), and click Close. 8 Click OK. 9 Turn off the WIRELESS or WIRELESS LAN switch. The Advanced window appears. 7 Click to -computer (ad-hoc)...


