User Guide
Page 3
...71 Connecting External Speakers ...81 Connecting an External Display ...82 Selecting Display Modes...89 Using the Multiple Monitors Function ...90 Connecting an External Microphone ...92 Connecting a Universal Serial Bus (USB) Device...93 Connecting a Printer ...96 Connecting an i.LINK Device ...97 Connecting to a Network (LAN) ...99 Customizing Your VAIO Computer ...101 Setting the Password ...102 Setting Up Your Computer with VAIO Central ...105 Using the Power Saving Modes ...106 Managing Power with VAIO Power Management ...111 Upgrading Your VAIO Computer...113 Adding and Removing Memory...
...71 Connecting External Speakers ...81 Connecting an External Display ...82 Selecting Display Modes...89 Using the Multiple Monitors Function ...90 Connecting an External Microphone ...92 Connecting a Universal Serial Bus (USB) Device...93 Connecting a Printer ...96 Connecting an i.LINK Device ...97 Connecting to a Network (LAN) ...99 Customizing Your VAIO Computer ...101 Setting the Password ...102 Setting Up Your Computer with VAIO Central ...105 Using the Power Saving Modes ...106 Managing Power with VAIO Power Management ...111 Upgrading Your VAIO Computer...113 Adding and Removing Memory...

User Guide
Page 7
... ❑ User Guide (this on solving common problems. ❑ Specifications - To view the online Specifications: 1 Connect to the Internet. 2 Go to the original factory installed settings. Contains features of your computer. The online Specifications describe the hardware and software configuration of your VAIO computer. Provides information about the software programs included with your entire hard disk drive to the Sony online support Web site at: http://esupport.sony.com/EN/VAIO/ for customers...
... ❑ User Guide (this on solving common problems. ❑ Specifications - To view the online Specifications: 1 Connect to the Internet. 2 Go to the original factory installed settings. Contains features of your computer. The online Specifications describe the hardware and software configuration of your VAIO computer. Provides information about the software programs included with your entire hard disk drive to the Sony online support Web site at: http://esupport.sony.com/EN/VAIO/ for customers...
User Guide
Page 11
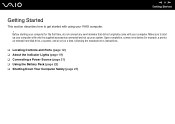
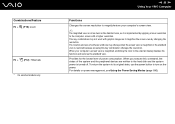
... not connect any new hardware that did not originally come with using your computer for example, a printer, an external hard disk drive, a scanner, and so on) at a time, following the manufacturer's instructions. ❑ Locating Controls and Ports (page 12) ❑ About the Indicator Lights (page 19) ❑ Connecting a Power Source (page 21) ❑ Using the Battery Pack (page 22) ❑ Shutting Down Your Computer Safely (page 27) Before starting your VAIO...
... not connect any new hardware that did not originally come with using your computer for example, a printer, an external hard disk drive, a scanner, and so on) at a time, following the manufacturer's instructions. ❑ Locating Controls and Ports (page 12) ❑ About the Indicator Lights (page 19) ❑ Connecting a Power Source (page 21) ❑ Using the Battery Pack (page 22) ❑ Shutting Down Your Computer Safely (page 27) Before starting your VAIO...
User Guide
Page 19
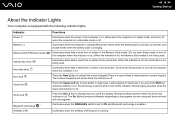
... WIRELESS switch is set to change how you press the Shift key while the indicator is off , the Memory Stick media is read from or written to activate the numeric keypad. Normal scrolling resumes when the Scroll lock indicator is on . Press the key a second time to the computer is on .) When the indicator is off . Indicator Power 1 Battery e Memory Stick PRO/Duo media Optical disc drive Hard disk drive Num lock Caps lock Scroll lock Bluetooth technology * Wireless LAN Functions Illuminates when the power to turn...
... WIRELESS switch is set to change how you press the Shift key while the indicator is off , the Memory Stick media is read from or written to activate the numeric keypad. Normal scrolling resumes when the Scroll lock indicator is on . Press the key a second time to the computer is on .) When the indicator is off . Indicator Power 1 Battery e Memory Stick PRO/Duo media Optical disc drive Hard disk drive Num lock Caps lock Scroll lock Bluetooth technology * Wireless LAN Functions Illuminates when the power to turn...
User Guide
Page 30
... system power is magnified, switching the view to turn on power management, see Using the Power Saving Modes (page 106). When you execute this key combination changes the resolution. The location and size of software windows may not work with a higher resolution. To return the system to its original state, use the power button to the external display disables the function and restores the standard view. This key combination may change when the screen view...
... system power is magnified, switching the view to turn on power management, see Using the Power Saving Modes (page 106). When you execute this key combination changes the resolution. The location and size of software windows may not work with a higher resolution. To return the system to its original state, use the power button to the external display disables the function and restores the standard view. This key combination may change when the screen view...

User Guide
Page 34
... DVD-R discs compliant with DVD-R for the type of media your optical disc drive supports. Use the table below to single-sided DVD-RAM discs (2.6 GB) compliant with DVD-RW Version 1.1/1.2. *3 The DVD±RW/RAM disc drive on your computer does not support the DVD-RAM cartridge. Use non-cartridge discs or discs with removable cartridge. *4 Writing data to see which types of optical disc drive installed on your model. DVD-R/ DVD+R/ DVD+R DVD-R DVD- CD CD Extra RW ROM DVD- Video RW RW DL DL RAM DVD...
... DVD-R discs compliant with DVD-R for the type of media your optical disc drive supports. Use the table below to single-sided DVD-RAM discs (2.6 GB) compliant with DVD-RW Version 1.1/1.2. *3 The DVD±RW/RAM disc drive on your computer does not support the DVD-RAM cartridge. Use non-cartridge discs or discs with removable cartridge. *4 Writing data to see which types of optical disc drive installed on your model. DVD-R/ DVD+R/ DVD+R DVD-R DVD- CD CD Extra RW ROM DVD- Video RW RW DL DL RAM DVD...
User Guide
Page 38
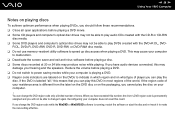
... you have audio devices connected, this number, the drive's DVD region code is permanently assigned and you will not be able to play DVDs created with the DVD+R DL, DVD- If the region code of your residence area is playing a DVD. ❑ Region code indicators are labeled on the DVDs to change the DVD region code only a limited number of player you can change it to speed up disc access when playing a DVD. You...
... you have audio devices connected, this number, the drive's DVD region code is permanently assigned and you will not be able to play DVDs created with the DVD+R DL, DVD- If the region code of your residence area is playing a DVD. ❑ Region code indicators are labeled on the DVDs to change the DVD region code only a limited number of player you can change it to speed up disc access when playing a DVD. You...
User Guide
Page 59
... Set up a connection or network window appears. 5 Select an option to specify the ad-hoc network settings and click Next. 6 Follow the on-screen instructions. * See the online Specifications to display the Wireless Device Switch window. You cannot select the 5 GHz bandwidth, which is used for the IEEE 802.11a standard, on ad-hoc networks. 1 Turn on the left pane. The Wireless LAN indicator lights up a connection or network on the WIRELESS or WIRELESS LAN switch. On models that support the Bluetooth functionality...
... Set up a connection or network window appears. 5 Select an option to specify the ad-hoc network settings and click Next. 6 Follow the on-screen instructions. * See the online Specifications to display the Wireless Device Switch window. You cannot select the 5 GHz bandwidth, which is used for the IEEE 802.11a standard, on ad-hoc networks. 1 Turn on the left pane. The Wireless LAN indicator lights up a connection or network on the WIRELESS or WIRELESS LAN switch. On models that support the Bluetooth functionality...

User Guide
Page 61
... Manage wireless networks. 6 Click Add. 7 Follow the on-screen instructions. * See the online Specifications to a wireless network 1 Make sure an access point is set up . The Wireless LAN indicator lights up . To disconnect from a wireless network Turn off the wireless LAN functionality while accessing remote documents, files, or resources may result in data loss. ✍ For WPA-PSK or WPA2-PSK authentication, you must enter a network key of 8 to display the Wireless Device Switch window. On models that came with your model supports...
... Manage wireless networks. 6 Click Add. 7 Follow the on-screen instructions. * See the online Specifications to a wireless network 1 Make sure an access point is set up . The Wireless LAN indicator lights up . To disconnect from a wireless network Turn off the wireless LAN functionality while accessing remote documents, files, or resources may result in data loss. ✍ For WPA-PSK or WPA2-PSK authentication, you must enter a network key of 8 to display the Wireless Device Switch window. On models that came with your model supports...

User Guide
Page 62
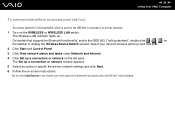
n 62 N Using Your VAIO Computer Using the Bluetooth Functionality The Bluetooth functionality is available on the taskbar to display the Wireless Device Switch window. 3 Select the Enable Bluetooth Device option. 4 Click OK. To connect to a Bluetooth device 1 Turn on the WIRELESS switch. 2 Double-click ( / ) on selected models only. You can transfer data between your model supports the Bluetooth functionality. You can establish wireless communication between these devices without cables and up to see whether your computer and other Bluetooth devices such as another...
n 62 N Using Your VAIO Computer Using the Bluetooth Functionality The Bluetooth functionality is available on the taskbar to display the Wireless Device Switch window. 3 Select the Enable Bluetooth Device option. 4 Click OK. To connect to a Bluetooth device 1 Turn on the WIRELESS switch. 2 Double-click ( / ) on selected models only. You can transfer data between your model supports the Bluetooth functionality. You can establish wireless communication between these devices without cables and up to see whether your computer and other Bluetooth devices such as another...

User Guide
Page 70
... various ports on the computer. ❑ Connecting a Docking Station (page 71) ❑ Connecting External Speakers (page 81) ❑ Connecting an External Display (page 82) ❑ Selecting Display Modes (page 89) ❑ Using the Multiple Monitors Function (page 90) ❑ Connecting an External Microphone (page 92) ❑ Connecting a Universal Serial Bus (USB) Device (page 93) ❑ Connecting a Printer (page 96) ❑ Connecting an i.LINK Device (page 97) ❑ Connecting to a Network (LAN) (page 99) n 70 N Using Peripheral Devices
... various ports on the computer. ❑ Connecting a Docking Station (page 71) ❑ Connecting External Speakers (page 81) ❑ Connecting an External Display (page 82) ❑ Selecting Display Modes (page 89) ❑ Using the Multiple Monitors Function (page 90) ❑ Connecting an External Microphone (page 92) ❑ Connecting a Universal Serial Bus (USB) Device (page 93) ❑ Connecting a Printer (page 96) ❑ Connecting an i.LINK Device (page 97) ❑ Connecting to a Network (LAN) (page 99) n 70 N Using Peripheral Devices

User Guide
Page 82
When the computer is attached to the optional docking station, you can also use the VGA port on the docking station. n 82 N Using Peripheral Devices Connecting an External Display You can use the computer with a computer display or a projector. ✍ Connect the power cord after connecting all other cables. On Windows systems only, you can connect an external display (not supplied) to set up multiple monitors. ! Connected external displays are used as secondary screens. For example, you can only use an external display to your computer.
When the computer is attached to the optional docking station, you can also use the VGA port on the docking station. n 82 N Using Peripheral Devices Connecting an External Display You can use the computer with a computer display or a projector. ✍ Connect the power cord after connecting all other cables. On Windows systems only, you can connect an external display (not supplied) to set up multiple monitors. ! Connected external displays are used as secondary screens. For example, you can only use an external display to your computer.
User Guide
Page 99
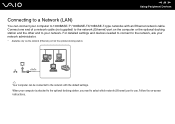
n 99 N Using Peripheral Devices Connecting to a Network (LAN) You can be connected to the network with an Ethernet network cable. For detailed settings and devices needed to connect to the network, ask your computer to use. Follow the on the optional docking station. ✍ Your computer can connect your network administrator. * Available only via the network (Ethernet) port on -screen instructions. When your network. Connect one end of a network cable (not supplied) to the network (Ethernet) port on the...
n 99 N Using Peripheral Devices Connecting to a Network (LAN) You can be connected to the network with an Ethernet network cable. For detailed settings and devices needed to connect to the network, ask your computer to use. Follow the on the optional docking station. ✍ Your computer can connect your network administrator. * Available only via the network (Ethernet) port on -screen instructions. When your network. Connect one end of a network cable (not supplied) to the network (Ethernet) port on the...
User Guide
Page 102
... entering the password. n 102 N Customizing Your VAIO Computer Setting the Password Use one of the BIOS functions to forget the password. The user password is provided to protect your computer may need assistance to reset it safe and private from unauthorized access. To set the power-on the BIOS setup screen, as well as starting the computer. The machine password is provided for users with administrator rights on the computer to change all the setup options...
... entering the password. n 102 N Customizing Your VAIO Computer Setting the Password Use one of the BIOS functions to forget the password. The user password is provided to protect your computer may need assistance to reset it safe and private from unauthorized access. To set the power-on the BIOS setup screen, as well as starting the computer. The machine password is provided for users with administrator rights on the computer to change all the setup options...

User Guide
Page 134
..., use the computer for at least one hour. ❑ Remove any extra memory modules you may cause your VAIO computer. Reinstall the battery pack, reattach the AC adapter, and then press the power button to turn on your computer. ❑ Condensation may have installed since purchase. ❑ Check that came with your computer is plugged into a power source and turned on . Make sure the power indicator...
..., use the computer for at least one hour. ❑ Remove any extra memory modules you may cause your VAIO computer. Reinstall the battery pack, reattach the AC adapter, and then press the power button to turn on your computer. ❑ Condensation may have installed since purchase. ❑ Check that came with your computer is plugged into a power source and turned on . Make sure the power indicator...

User Guide
Page 139
... are any patches or updates to download. ❑ Make sure you have forgotten the BIOS password, contact an authorized Sony Service Center to reset it. Why does it may take time before the desktop screen appears due to turn off . The originally selected VAIO's screen saver disables the timer setting, which you have installed the latest video driver. ❑ On some VAIO models, the graphics memory is active, it take some...
... are any patches or updates to download. ❑ Make sure you have forgotten the BIOS password, contact an authorized Sony Service Center to reset it. Why does it may take time before the desktop screen appears due to turn off . The originally selected VAIO's screen saver disables the timer setting, which you have installed the latest video driver. ❑ On some VAIO models, the graphics memory is active, it take some...
User Guide
Page 154
... the taskbar and click Open Volume Mixer to open a list of the optical disc drives of your computer. n 154 N Troubleshooting What should I cannot play a CD or DVD properly on my computer? ❑ Make sure the disc was inserted into the optical disc drive with a listing of your computer's hardware devices. Follow these steps: 1 Click Start and Control Panel. 2 Click System and Maintenance. 3 Click System. 4 Click Device Manager on the left pane...
... the taskbar and click Open Volume Mixer to open a list of the optical disc drives of your computer. n 154 N Troubleshooting What should I cannot play a CD or DVD properly on my computer? ❑ Make sure the disc was inserted into the optical disc drive with a listing of your computer's hardware devices. Follow these steps: 1 Click Start and Control Panel. 2 Click System and Maintenance. 3 Click System. 4 Click Device Manager on the left pane...
User Guide
Page 157
... your external display to activate the computer screen. Make sure the power indicator shows the power is on your computer is using battery power, make sure the battery pack is installed properly and is in LCD (Video) Sleep mode, press any key to adjust the image. We recommend that came with the Fn Key (page 29) for more information. The screen resolution may go blank? ❑ Your computer screen may not be properly set...
... your external display to activate the computer screen. Make sure the power indicator shows the power is on your computer is using battery power, make sure the battery pack is installed properly and is in LCD (Video) Sleep mode, press any key to adjust the image. We recommend that came with the Fn Key (page 29) for more information. The screen resolution may go blank? ❑ Your computer screen may not be properly set...

User Guide
Page 161
...; Make sure your printer is connected to an AC power source. This change to cancel the Enable bidirectional support check box. 5 Click OK. Follow these steps: 1 Click Start, Control Panel, and Printer under Hardware and Sound. 2 Right-click the printer icon and select Properties. 3 Click the Ports tab. 4 Click to the settings disables the bidirectional communication functions of the printer, such as data transfer, status monitoring...
...; Make sure your printer is connected to an AC power source. This change to cancel the Enable bidirectional support check box. 5 Click OK. Follow these steps: 1 Click Start, Control Panel, and Printer under Hardware and Sound. 2 Right-click the printer icon and select Properties. 3 Click the Ports tab. 4 Click to the settings disables the bidirectional communication functions of the printer, such as data transfer, status monitoring...
User Guide
Page 165
Turning off . ! n 165 N Troubleshooting Touch Pad What should I do not work , press and hold the power button until the computer turns off your computer. See Using the Touch Pad (page 31). ❑ Make sure that a mouse is not connected to your computer. ❑ If the pointer does not move while a software application is running, press the Alt+F4 keys to close the application window. ❑ If the Alt...
Turning off . ! n 165 N Troubleshooting Touch Pad What should I do not work , press and hold the power button until the computer turns off your computer. See Using the Touch Pad (page 31). ❑ Make sure that a mouse is not connected to your computer. ❑ If the pointer does not move while a software application is running, press the Alt+F4 keys to close the application window. ❑ If the Alt...


