

User Guide
Page 3
... External Speakers ...76 Connecting an External Display ...77 Selecting Display Modes...80 Using the Multiple Monitors Function ...81 Connecting an External Microphone ...83 Connecting a Universal Serial Bus (USB) Device...84 Connecting a Printer ...87 Connecting an i.LINK Device ...88 Customizing Your VAIO Computer ...90 Setting the Password ...91 Using Fingerprint Authentication ...98 Setting Up Your Computer with the VAIO Control Center 106 Using the Power Saving Modes ...107 Managing Power with the VAIO Power Management 112 Upgrading Your VAIO Computer...114 Adding and Removing Memory...
... External Speakers ...76 Connecting an External Display ...77 Selecting Display Modes...80 Using the Multiple Monitors Function ...81 Connecting an External Microphone ...83 Connecting a Universal Serial Bus (USB) Device...84 Connecting a Printer ...87 Connecting an i.LINK Device ...88 Customizing Your VAIO Computer ...90 Setting the Password ...91 Using Fingerprint Authentication ...98 Setting Up Your Computer with the VAIO Control Center 106 Using the Power Saving Modes ...107 Managing Power with the VAIO Power Management 112 Upgrading Your VAIO Computer...114 Adding and Removing Memory...

User Guide
Page 8
... Contains safety guidelines and owner information. To view the online specifications: 1 Connect to the Internet. 2 Go to the Internet. ❑ Specifications - Explains features of your VAIO computer. n8 N Before Use Documentation Your documentation includes printed information and user guides to read on solving common problems. ✍ To go to web sites described in this manual) - Printed Documentation ❑ Quick Start Guide - It also includes information...
... Contains safety guidelines and owner information. To view the online specifications: 1 Connect to the Internet. 2 Go to the Internet. ❑ Specifications - Explains features of your VAIO computer. n8 N Before Use Documentation Your documentation includes printed information and user guides to read on solving common problems. ✍ To go to web sites described in this manual) - Printed Documentation ❑ Quick Start Guide - It also includes information...
User Guide
Page 9
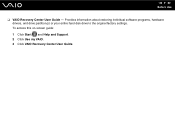
Provides information about restoring individual software programs, hardware drivers, and drive partition(s) or your entire hard disk drive to the original factory settings. To access this on-screen guide: 1 Click Start and Help and Support. 2 Click Use my VAIO. 3 Click VAIO Recovery Center User Guide. n9 N Before Use ❑ VAIO Recovery Center User Guide -
Provides information about restoring individual software programs, hardware drivers, and drive partition(s) or your entire hard disk drive to the original factory settings. To access this on-screen guide: 1 Click Start and Help and Support. 2 Click Use my VAIO. 3 Click VAIO Recovery Center User Guide. n9 N Before Use ❑ VAIO Recovery Center User Guide -

User Guide
Page 20
... you are using and does not work with the following indicator lights: Indicator Power 1 Charge Hard disk drive/Optical disc drive Media Access Built-in MOTION EYE camera Optical disc drive Num lock Caps lock Scroll lock WIRELESS Functions Illuminates in green when the computer is on . When the indicator is unlit, the optical disc media is turned on , blinks slowly in orange while the computer is in Sleep mode, and turns off the indicator. Press the Num Lk key to type letters in...
... you are using and does not work with the following indicator lights: Indicator Power 1 Charge Hard disk drive/Optical disc drive Media Access Built-in MOTION EYE camera Optical disc drive Num lock Caps lock Scroll lock WIRELESS Functions Illuminates in green when the computer is on . When the indicator is unlit, the optical disc media is turned on , blinks slowly in orange while the computer is in Sleep mode, and turns off the indicator. Press the Num Lk key to type letters in...

User Guide
Page 45
n 45 N Using Your VAIO Computer Reading and Writing Optical Discs Your computer plays and records CDs, DVDs, and Blu-ray Disc™ media, depending on your optical disc drive supports. Check your specifications for the type of media your model. Use the table below to see which types of optical disc drive installed on the model you purchased.
n 45 N Using Your VAIO Computer Reading and Writing Optical Discs Your computer plays and records CDs, DVDs, and Blu-ray Disc™ media, depending on your optical disc drive supports. Check your specifications for the type of media your model. Use the table below to see which types of optical disc drive installed on the model you purchased.
User Guide
Page 49
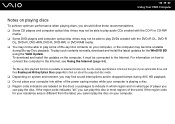
... play DVDs created with the DVD+R DL, DVD-R DL, DVD+R, DVD+RW, DVD-R, DVD-RW, or DVD-RAM media. ❑ You may not be connected to the Internet. The Blu-ray Disc playback function is different from the label, you may become unstable during AVC HD playback. ❑ Do not place your computer into either of the power saving modes while your computer is playing a disc. ❑ Region code indicators...
... play DVDs created with the DVD+R DL, DVD-R DL, DVD+R, DVD+RW, DVD-R, DVD-RW, or DVD-RAM media. ❑ You may not be connected to the Internet. The Blu-ray Disc playback function is different from the label, you may become unstable during AVC HD playback. ❑ Do not place your computer into either of the power saving modes while your computer is playing a disc. ❑ Region code indicators...
User Guide
Page 52
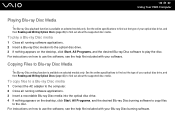
... on selected models only. To copy files to a Blu-ray Disc media 1 Connect the AC adapter to the computer. 2 Close all running software applications. 3 Insert a recordable Blu-ray Disc media into the optical disc drive. 3 If nothing appears on the desktop, click Start, All Programs, and the desired Blu-ray Disc software to the disc. See the online specifications to Blu-ray Disc Media ! n 52 N Using Your VAIO Computer...
... on selected models only. To copy files to a Blu-ray Disc media 1 Connect the AC adapter to the computer. 2 Close all running software applications. 3 Insert a recordable Blu-ray Disc media into the optical disc drive. 3 If nothing appears on the desktop, click Start, All Programs, and the desired Blu-ray Disc software to the disc. See the online specifications to Blu-ray Disc Media ! n 52 N Using Your VAIO Computer...

User Guide
Page 55
... work properly. Insert the ExpressCard slot protector to remove the ExpressCard module. 5 Push in the ExpressCard module toward the computer so that the module pops out. 6 Gently take hold of the slot. To remove an ExpressCard module ✍ To remove an ExpressCard module when your computer is not removed properly, your computer is on -screen instructions to block any particles from entering the slot when not using...
... work properly. Insert the ExpressCard slot protector to remove the ExpressCard module. 5 Push in the ExpressCard module toward the computer so that the module pops out. 6 Gently take hold of the slot. To remove an ExpressCard module ✍ To remove an ExpressCard module when your computer is not removed properly, your computer is on -screen instructions to block any particles from entering the slot when not using...

User Guide
Page 64
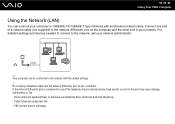
...) ❑ Cable modem ❑ Satellite ❑ Dial-up the wireless LAN network. If your computer is equipped with a built-in modem, you need to connect an external modem device, for example a USB telephone modem, a DSL modem, or a cable modem, to protect the computer against online threats. n 64 N Using Your VAIO Computer Using the Internet Before using the wireless LAN function, you need to the Internet. For the detailed instructions on devices required for...
...) ❑ Cable modem ❑ Satellite ❑ Dial-up the wireless LAN network. If your computer is equipped with a built-in modem, you need to connect an external modem device, for example a USB telephone modem, a DSL modem, or a cable modem, to protect the computer against online threats. n 64 N Using Your VAIO Computer Using the Internet Before using the wireless LAN function, you need to the Internet. For the detailed instructions on devices required for...
User Guide
Page 66
... of the telephone lines mentioned below, high electric current to the network with an Ethernet network cable. PBX (private branch exchange) Do not plug a telephone cable into the network (Ethernet) port on the computer and the other end to your computer to the network, ask your computer. For detailed settings and devices needed to connect to 100BASE-TX/10BASE-T type networks with the default settings. !
... of the telephone lines mentioned below, high electric current to the network with an Ethernet network cable. PBX (private branch exchange) Do not plug a telephone cable into the network (Ethernet) port on the computer and the other end to your computer to the network, ask your computer. For detailed settings and devices needed to connect to 100BASE-TX/10BASE-T type networks with the default settings. !

User Guide
Page 91
... the fingerprint authentication function, you can substitute fingerprint authentication for password entry when turning on password, you forget the power-on password and need to be prompted to enter the password after the VAIO logo appears to protect your computer. To set the user password, you have set the power-on your computer without entering the password. n 91 N Customizing Your VAIO Computer Setting the Password Use one of the BIOS setup options, as well...
... the fingerprint authentication function, you can substitute fingerprint authentication for password entry when turning on password, you forget the power-on password and need to be prompted to enter the password after the VAIO logo appears to protect your computer. To set the user password, you have set the power-on your computer without entering the password. n 91 N Customizing Your VAIO Computer Setting the Password Use one of the BIOS setup options, as well...

User Guide
Page 95
..., press the Enter key. To remove the password, leave the Enter New Password and Confirm New Password fields blank and press the Enter key. 6 Press the < or , key to display the Security tab, select Set User Password, and then press the Enter key. 5 On the password entry screen, enter the current password once and a new password twice, and then press the Enter key. The BIOS setup screen appears. n 95 N Customizing Your VAIO Computer To change or remove the power-on password (user password) 1 Turn on the computer...
..., press the Enter key. To remove the password, leave the Enter New Password and Confirm New Password fields blank and press the Enter key. 6 Press the < or , key to display the Security tab, select Set User Password, and then press the Enter key. 5 On the password entry screen, enter the current password once and a new password twice, and then press the Enter key. The BIOS setup screen appears. n 95 N Customizing Your VAIO Computer To change or remove the power-on password (user password) 1 Turn on the computer...

User Guide
Page 139
... the installed battery pack is changed before the computer completely enters Sleep or Hibernate mode. To restore your computer to Normal mode 1 Close all open programs. 2 Click Start, the arrow next to the Lock button, and Restart. 3 If your computer does not restart, press the Ctrl+Alt+Delete keys and click the arrow next to the Shut down button and Restart. 4 If this problem, turn off...
... the installed battery pack is changed before the computer completely enters Sleep or Hibernate mode. To restore your computer to Normal mode 1 Close all open programs. 2 Click Start, the arrow next to the Lock button, and Restart. 3 If your computer does not restart, press the Ctrl+Alt+Delete keys and click the arrow next to the Shut down button and Restart. 4 If this problem, turn off...
User Guide
Page 141
... I change the boot device order. At the confirmation prompt, press the Enter key. The BIOS setup screen appears. A reset fee will be charged. How can use one of the game if there are any patches or updates to download. ❑ Make sure you want to change. 5 Press the F5 or F6 key to change the boot device order. 6 Press the < or , key to select the drive whose boot device order you have forgotten the power-on password? If...
... I change the boot device order. At the confirmation prompt, press the Enter key. The BIOS setup screen appears. A reset fee will be charged. How can use one of the game if there are any patches or updates to download. ❑ Make sure you want to change. 5 Press the F5 or F6 key to change the boot device order. 6 Press the < or , key to select the drive whose boot device order you have forgotten the power-on password? If...

User Guide
Page 147
... the built-in use the camera under fluorescent lights due to eliminate flicker noise. The battery pack is normal and does not indicate a malfunction. The video input may be suspended for a few seconds if: ❑ a shortcut key with the Fn key is running out of camera images. Connect your computer automatically enters Sleep or Hibernate mode, change the setting, see Using the Power Saving Modes (page 107). Why...
... the built-in use the camera under fluorescent lights due to eliminate flicker noise. The battery pack is normal and does not indicate a malfunction. The video input may be suspended for a few seconds if: ❑ a shortcut key with the Fn key is running out of camera images. Connect your computer automatically enters Sleep or Hibernate mode, change the setting, see Using the Power Saving Modes (page 107). Why...

User Guide
Page 158
... the Fn+F4 keys to turn up the volume loud enough to hear sound. ❑ Right-click the volume icon on the taskbar and click Open Volume Mixer to check the settings. ❑ Check the volume setting in the audio mixer. ❑ If you are using external speakers, check the volume settings on my computer? ❑ Make sure the disc is inserted into the optical disc drive with the...
... the Fn+F4 keys to turn up the volume loud enough to hear sound. ❑ Right-click the volume icon on the taskbar and click Open Volume Mixer to check the settings. ❑ Check the volume setting in the audio mixer. ❑ If you are using external speakers, check the volume settings on my computer? ❑ Make sure the disc is inserted into the optical disc drive with the...
User Guide
Page 160
... VAIO Update. To download and install the updates on how to connect the computer to find out the type of DVD recordable media do not work. For information on the computer, it with one with no affixed adhesive label. n 160 N Troubleshooting What should I do if I cannot play Blu-ray Disc media or my computer becomes unstable during Blu-ray Disc playback. See the online specifications...
... VAIO Update. To download and install the updates on how to connect the computer to find out the type of DVD recordable media do not work. For information on the computer, it with one with no affixed adhesive label. n 160 N Troubleshooting What should I do if I cannot play Blu-ray Disc media or my computer becomes unstable during Blu-ray Disc playback. See the online specifications...
User Guide
Page 161
See the online specifications to find out the type of your optical disc drive supports the Blu-ray Disc writing function. You cannot add or erase data to find out about the supported disc media. ❑ Make sure your optical disc drive, and then Reading and Writing Optical Discs (page 45) to or from the BD-R Disc media. The DVD±RW/±R DL/RAM drive does not support it. ❑ BD-R Disc media are not rewritable. This Q & A entry applies to Blu-ray Disc media? ! n 161 N Troubleshooting Why can't I write data to selected models only.
See the online specifications to find out the type of your optical disc drive supports the Blu-ray Disc writing function. You cannot add or erase data to find out about the supported disc media. ❑ Make sure your optical disc drive, and then Reading and Writing Optical Discs (page 45) to or from the BD-R Disc media. The DVD±RW/±R DL/RAM drive does not support it. ❑ BD-R Disc media are not rewritable. This Q & A entry applies to Blu-ray Disc media? ! n 161 N Troubleshooting Why can't I write data to selected models only.
User Guide
Page 166
... the Windows operating system installed on your computer may need to cancel the Enable bidirectional support check box. 6 Click OK. Follow these steps: 1 Click Start and Control Panel. 2 Click Printer under Hardware and Sound. 3 Right-click the printer icon and select Properties. 4 Click the Ports tab. 5 Click to install the printer driver software before you use your computer. ❑ You may enable printing. This disables the bidirectional communication functions...
... the Windows operating system installed on your computer may need to cancel the Enable bidirectional support check box. 6 Click OK. Follow these steps: 1 Click Start and Control Panel. 2 Click Printer under Hardware and Sound. 3 Right-click the printer icon and select Properties. 4 Click the Ports tab. 5 Click to install the printer driver software before you use your computer. ❑ You may enable printing. This disables the bidirectional communication functions...

User Guide
Page 171
n 171 N Troubleshooting Touch Pad What should I do not work ? ❑ You may cause loss of unsaved data. Turning off your computer with the M or m key, and press the Enter key to your computer. ❑ If this procedure does not work, press and hold the power button until the computer turns off. ! See Using the Touch Pad (page 34). ❑ Make sure that a mouse is not connected to your computer...
n 171 N Troubleshooting Touch Pad What should I do not work ? ❑ You may cause loss of unsaved data. Turning off your computer with the M or m key, and press the Enter key to your computer. ❑ If this procedure does not work, press and hold the power button until the computer turns off. ! See Using the Touch Pad (page 34). ❑ Make sure that a mouse is not connected to your computer...


