
User Guide
Page 9
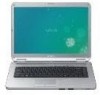
Run utilities that include VAIO Media Setup and Windows Network and Sharing Center, and access to wireless tutorials. ❑ Security Keep your data safe and your computer running efficiently with updates and ... ❑ Manuals & Specifications Here you accomplish a task. Choose from Microsoft and Sony. ❑ VAIO Sites Contains links to other Internet sites you might find interesting and useful. ❑ VAIO Tutorials Sony provides guided help tutorials that help in the form of VAIO tutorials, an escalation page containing support and contact information, and various links...
Run utilities that include VAIO Media Setup and Windows Network and Sharing Center, and access to wireless tutorials. ❑ Security Keep your data safe and your computer running efficiently with updates and ... ❑ Manuals & Specifications Here you accomplish a task. Choose from Microsoft and Sony. ❑ VAIO Sites Contains links to other Internet sites you might find interesting and useful. ❑ VAIO Tutorials Sony provides guided help tutorials that help in the form of VAIO tutorials, an escalation page containing support and contact information, and various links...
User Guide
Page 12
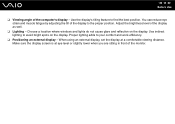
Choose a location where windows and lights do not cause glare and reflection on the display. Proper lighting adds to the proper position. n 12 N Before Use ❑ Viewing angle of ...
Choose a location where windows and lights do not cause glare and reflection on the display. Proper lighting adds to the proper position. n 12 N Before Use ❑ Viewing angle of ...

User Guide
Page 27
n 27 N Using Your VAIO Computer Using the Keyboard Your keyboard is very similar to a desktop computer keyboard, but has additional keys that perform model-specific tasks. Combinations and Functions ...
n 27 N Using Your VAIO Computer Using the Keyboard Your keyboard is very similar to a desktop computer keyboard, but has additional keys that perform model-specific tasks. Combinations and Functions ...

User Guide
Page 30
..., the S1 button turns the volume on VAIO Control Center for changing the S1 button assignment. Launches VAIO Launcher for selecting the desired software. You can change the default software options in the window for the S1 button assignment. To display this window, press and hold the AV MODE button ... on and off. ✍ The default button assignment may be different from the above. n 30 N Using Your VAIO Computer Using Special-function Buttons Your computer is equipped with special buttons to display the setup window. To do so, press and hold the button or launch and navigate through...
..., the S1 button turns the volume on VAIO Control Center for changing the S1 button assignment. Launches VAIO Launcher for selecting the desired software. You can change the default software options in the window for the S1 button assignment. To display this window, press and hold the AV MODE button ... on and off. ✍ The default button assignment may be different from the above. n 30 N Using Your VAIO Computer Using Special-function Buttons Your computer is equipped with special buttons to display the setup window. To do so, press and hold the button or launch and navigate through...
User Guide
Page 38
... to copy and drag them to play an audio CD 1 Insert a disc into the optical disc drive. n 38 N Using Your VAIO Computer Playing CDs To play the CD. If the AutoPlay window appears, click Burn files to disc and follow the on the desktop, then click Start, All Programs, and the desired... CD software to the empty disc folder. 3 Close the disc folder. If the Audio CD window appears, click to a disc ! Copying Files to...
... to copy and drag them to play an audio CD 1 Insert a disc into the optical disc drive. n 38 N Using Your VAIO Computer Playing CDs To play the CD. If the AutoPlay window appears, click Burn files to disc and follow the on the desktop, then click Start, All Programs, and the desired... CD software to the empty disc folder. 3 Close the disc folder. If the Audio CD window appears, click to a disc ! Copying Files to...
User Guide
Page 42
n 42 N Using Your VAIO Computer Removing an ExpressCard Module Follow the steps below to remove the ExpressCard module while your computer is not removed properly, your computer is now safe to remove the device. 6 Click OK. 7 Click Close to close the Safely Remove Hardware window. 8 Push in the ExpressCard module ...taskbar. To remove an ExpressCard module ✍ To remove an ExpressCard module when your system may not work properly. The Safely Remove Hardware window appears. 2 Select the hardware you want to 7. 1 Double-click the Safely Remove Hardware icon on . The Stop a Hardware device...
n 42 N Using Your VAIO Computer Removing an ExpressCard Module Follow the steps below to remove the ExpressCard module while your computer is not removed properly, your computer is now safe to remove the device. 6 Click OK. 7 Click Close to close the Safely Remove Hardware window. 8 Push in the ExpressCard module ...taskbar. To remove an ExpressCard module ✍ To remove an ExpressCard module when your system may not work properly. The Safely Remove Hardware window appears. 2 Select the hardware you want to 7. 1 Double-click the Safely Remove Hardware icon on . The Stop a Hardware device...
User Guide
Page 46
... force the Memory Stick media into the slot. To view the contents on the Memory Stick media 1 Click Start and Computer to open the Computer window. 2 Double-click the Memory Stick media icon to hold the Memory Stick media with the arrow pointing in the Memory Stick media. Improper insertion of... your computer and the media. Do not insert more than one Memory Stick media into the slot if you insert it smoothly. n 46 N Using Your VAIO Computer !
... force the Memory Stick media into the slot. To view the contents on the Memory Stick media 1 Click Start and Computer to open the Computer window. 2 Double-click the Memory Stick media icon to hold the Memory Stick media with the arrow pointing in the Memory Stick media. Improper insertion of... your computer and the media. Do not insert more than one Memory Stick media into the slot if you insert it smoothly. n 46 N Using Your VAIO Computer !

User Guide
Page 47
Do not select NTFS from the slot while formatting the media. n 47 N Using Your VAIO Computer To format a Memory Stick media The Memory Stick media has been formatted in Format options. 5 Click Start. Before formatting the media, make sure that ...is ready for use the device that it clicks into place. 2 Click Start and Computer to open the Computer window. 3 Right-click the Memory Stick media icon and select Format. 4 Click Restore device defaults. ! The size of the allocation unit and file system may cause...
Do not select NTFS from the slot while formatting the media. n 47 N Using Your VAIO Computer To format a Memory Stick media The Memory Stick media has been formatted in Format options. 5 Click Start. Before formatting the media, make sure that ...is ready for use the device that it clicks into place. 2 Click Start and Computer to open the Computer window. 3 Right-click the Memory Stick media icon and select Format. 4 Click Restore device defaults. ! The size of the allocation unit and file system may cause...
User Guide
Page 54
To set up a dial-up connection to the Internet 1 Click Start and Control Panel. 2 Click Connect to the Internet window appears. 3 Click Dial-up. 4 Follow the on-screen instructions. n 54 N Using Your VAIO Computer The Connect to the Internet under Network and Internet.
To set up a dial-up connection to the Internet 1 Click Start and Control Panel. 2 Click Connect to the Internet window appears. 3 Click Dial-up. 4 Follow the on-screen instructions. n 54 N Using Your VAIO Computer The Connect to the Internet under Network and Internet.

User Guide
Page 58
... Network software, see whether your desired wireless option(s) in the VAIO Smart Network window. 3 Click Start and Control Panel. 4 Click View network status and tasks under Network and Internet. 5 Click Set up . You cannot select the 5 GHz bandwidth, which is not displayed on the desktop, follow these steps: 1 Click Start, All Programs, and...
... Network software, see whether your desired wireless option(s) in the VAIO Smart Network window. 3 Click Start and Control Panel. 4 Click View network status and tasks under Network and Internet. 5 Click Set up . You cannot select the 5 GHz bandwidth, which is not displayed on the desktop, follow these steps: 1 Click Start, All Programs, and...

User Guide
Page 60
...to 64 characters long using numbers from 0 to 9 and letters from A to or above your desired wireless option(s) in the VAIO Smart Network window. 4 Right-click or on the WIRELESS or WIRELESS LAN switch. See the manual that came with your model supports the Bluetooth functionality...Click the button next to F. If the VAIO Smart Network window is not displayed on the desktop, follow these steps: 1 Click Start, All Programs, and VAIO Control Center. 2 Double-click Network Connections and VAIO Smart Network. ✍ For information on the VAIO Smart Network software, see whether your access ...
...to 64 characters long using numbers from 0 to 9 and letters from A to or above your desired wireless option(s) in the VAIO Smart Network window. 4 Right-click or on the WIRELESS or WIRELESS LAN switch. See the manual that came with your model supports the Bluetooth functionality...Click the button next to F. If the VAIO Smart Network window is not displayed on the desktop, follow these steps: 1 Click Start, All Programs, and VAIO Control Center. 2 Double-click Network Connections and VAIO Smart Network. ✍ For information on the VAIO Smart Network software, see whether your access ...
User Guide
Page 61
n 61 N Using Your VAIO Computer Stopping Wireless LAN Communication To stop wireless LAN communication Click the button next to or above the WLAN icon in data loss. Turning off the wireless LAN functionality while accessing remote documents, files, or resources may result in the VAIO Smart Network window. !
n 61 N Using Your VAIO Computer Stopping Wireless LAN Communication To stop wireless LAN communication Click the button next to or above the WLAN icon in data loss. Turning off the wireless LAN functionality while accessing remote documents, files, or resources may result in the VAIO Smart Network window. !
User Guide
Page 67
The Display Settings window appears. 3 Follow the on-screen instructions to change the settings. ✍ You may not be used as the primary monitor when an external display (desktop ...
The Display Settings window appears. 3 Follow the on-screen instructions to change the settings. ✍ You may not be used as the primary monitor when an external display (desktop ...
User Guide
Page 68
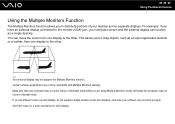
...Hibernate mode while you are using Multiple Monitors mode; Set fewer colors or a lower resolution for each display, do not expand a single window across separate displays. n 68 N Using Peripheral Devices Using the Multiple Monitors Function The Multiple Monitors function allows you to Normal mode. ... computer screen and the external display can move the cursor from one display to the other . You can function as an open application window or a toolbar, from one display to the other . ✍ Your external display may not be compatible with Multiple Monitors settings. ...
...Hibernate mode while you are using Multiple Monitors mode; Set fewer colors or a lower resolution for each display, do not expand a single window across separate displays. n 68 N Using Peripheral Devices Using the Multiple Monitors Function The Multiple Monitors function allows you to Normal mode. ... computer screen and the external display can move the cursor from one display to the other . You can function as an open application window or a toolbar, from one display to the other . ✍ Your external display may not be compatible with Multiple Monitors settings. ...

User Guide
Page 69
To change the S1 button assignment to display the window for each display and customize the Multiple Monitors mode. n 69 N Using Peripheral Devices To select the Multiple Monitors mode 1 Right-click on the S1 button, ... also change the S1 button assignment, press and hold the S1 button to activate the Multiple Monitors mode with the S1 button. The Display Settings window appears. 3 Follow the on-screen instructions to change the settings. ✍ You can set the display colors and resolution for changing the assignment...
To change the S1 button assignment to display the window for each display and customize the Multiple Monitors mode. n 69 N Using Peripheral Devices To select the Multiple Monitors mode 1 Right-click on the S1 button, ... also change the S1 button assignment, press and hold the S1 button to activate the Multiple Monitors mode with the S1 button. The Display Settings window appears. 3 Follow the on-screen instructions to change the settings. ✍ You can set the display colors and resolution for changing the assignment...
User Guide
Page 73
... disk drive. 2 Double-click the Safely Remove Hardware icon on or off , skip steps 1 to unplug. 4 Click Stop. The Stop a Hardware device window appears. 5 Confirm that the floppy disk drive can disconnect a USB floppy disk drive when your computer is in a power saving mode (Sleep or Hibernate)... may cause the computer to close the Safely Remove Hardware window. 9 Disconnect the floppy disk drive from the system. 6 Click OK. To disconnect a USB floppy disk drive ✍ To disconnect a USB floppy ...
... disk drive. 2 Double-click the Safely Remove Hardware icon on or off , skip steps 1 to unplug. 4 Click Stop. The Stop a Hardware device window appears. 5 Confirm that the floppy disk drive can disconnect a USB floppy disk drive when your computer is in a power saving mode (Sleep or Hibernate)... may cause the computer to close the Safely Remove Hardware window. 9 Disconnect the floppy disk drive from the system. 6 Click OK. To disconnect a USB floppy disk drive ✍ To disconnect a USB floppy ...
User Guide
Page 74
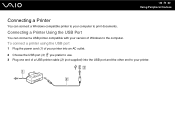
Connecting a Printer Using the USB Port You can connect a Windows-compatible printer to your computer to the computer. To connect a printer using the USB port 1 Plug the power cord (1) of your printer into an AC outlet. 2 Choose the USB port (3) you prefer to use. 3 Plug one end of a USB printer cable (2) (not supplied) into the USB port and the other end to your version of Windows to print documents. n 74 N Using Peripheral Devices Connecting a Printer You can connect a USB printer compatible with your printer.
Connecting a Printer Using the USB Port You can connect a Windows-compatible printer to your computer to the computer. To connect a printer using the USB port 1 Plug the power cord (1) of your printer into an AC outlet. 2 Choose the USB port (3) you prefer to use. 3 Plug one end of a USB printer cable (2) (not supplied) into the USB port and the other end to your version of Windows to print documents. n 74 N Using Peripheral Devices Connecting a Printer You can connect a USB printer compatible with your printer.
User Guide
Page 82
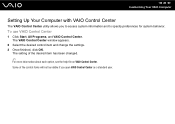
... Center 1 Click Start, All Programs, and VAIO Control Center. The VAIO Control Center window appears. 2 Select the desired control item and change the settings. 3 Once finished, click OK. n 82 N Customizing Your VAIO Computer Setting Up Your Computer with VAIO Control Center The VAIO Control Center utility allows you open VAIO Control Center as a standard user. Some of...
... Center 1 Click Start, All Programs, and VAIO Control Center. The VAIO Control Center window appears. 2 Select the desired control item and change the settings. 3 Once finished, click OK. n 82 N Customizing Your VAIO Computer Setting Up Your Computer with VAIO Control Center The VAIO Control Center utility allows you open VAIO Control Center as a standard user. Some of...
User Guide
Page 88
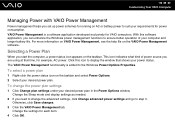
...to ensure better operation of power source you start the computer, a power status icon appears on the taskbar. With this icon to display the window that time, for example, AC power. This icon indicates what kind of your computer and longer battery life. To select a power plan ... icon on the taskbar and select Power Options. 2 Select your desired power plan in the Power Options window. Change the settings for VAIO computers. VAIO Power Management is added to the Windows Power Options Properties. Selecting a Power Plan When you are using at that shows your requirements for power ...
...to ensure better operation of power source you start the computer, a power status icon appears on the taskbar. With this icon to display the window that time, for example, AC power. This icon indicates what kind of your computer and longer battery life. To select a power plan ... icon on the taskbar and select Power Options. 2 Select your desired power plan in the Power Options window. Change the settings for VAIO computers. VAIO Power Management is added to the Windows Power Options Properties. Selecting a Power Plan When you are using at that shows your requirements for power ...

User Guide
Page 90
... it from its power source (that are ready to expand the functionality of your computer, you can increase the memory by the computer or the Windows operating system becomes unstable, contact the sales dealer or the manufacturer of memory modules may cause damage to do not work in the following : ❑... user familiarity with the general terminology associated with personal computers and with your system. Before touching a memory module, ensure the following pages. n 90 N Upgrading Your VAIO Computer Adding and Removing Memory If you want to change the module.
... it from its power source (that are ready to expand the functionality of your computer, you can increase the memory by the computer or the Windows operating system becomes unstable, contact the sales dealer or the manufacturer of memory modules may cause damage to do not work in the following : ❑... user familiarity with the general terminology associated with personal computers and with your system. Before touching a memory module, ensure the following pages. n 90 N Upgrading Your VAIO Computer Adding and Removing Memory If you want to change the module.


