User Guide
Page 3
... an External Microphone ...94 Connecting a Universal Serial Bus (USB) Device...95 Connecting a Printer ...98 Connecting an i.LINK Device ...99 Connecting to a Network (LAN) ...101 Customizing Your VAIO Computer ...103 Selecting Performance Modes ...104 Setting the Password ...105 Using Fingerprint Authentication ...114 Using Trusted Platform Module (TPM)...132 Setting Up Your Computer with VAIO Central ...137 Using the Power Saving Modes ...138 Managing Power with VAIO Power Management ...143 Protecting the Hard Disk ...146 Upgrading Your VAIO Computer...147 Adding and Removing Memory...148
... an External Microphone ...94 Connecting a Universal Serial Bus (USB) Device...95 Connecting a Printer ...98 Connecting an i.LINK Device ...99 Connecting to a Network (LAN) ...101 Customizing Your VAIO Computer ...103 Selecting Performance Modes ...104 Setting the Password ...105 Using Fingerprint Authentication ...114 Using Trusted Platform Module (TPM)...132 Setting Up Your Computer with VAIO Central ...137 Using the Power Saving Modes ...138 Managing Power with VAIO Power Management ...143 Protecting the Hard Disk ...146 Upgrading Your VAIO Computer...147 Adding and Removing Memory...148

User Guide
Page 7
... LAN, and Wireless WAN functionalities. The online Specifications describe the hardware and software configuration of your entire hard disk drive to All Programs, and click VAIO Support Central. 2 Click VAIO Documentation. 3 Click SmartWi Connection Utility Guide. To view the online Specifications: 1 Connect to the Internet. 2 Go to All Programs, and click VAIO Support Central. 2 Click VAIO Documentation. 3 Click VAIO Recovery Guide. ❑ SmartWi™ Connection Utility Guide (Selected models only) - Provides information about restoring individual software programs, software drivers...
... LAN, and Wireless WAN functionalities. The online Specifications describe the hardware and software configuration of your entire hard disk drive to All Programs, and click VAIO Support Central. 2 Click VAIO Documentation. 3 Click SmartWi Connection Utility Guide. To view the online Specifications: 1 Connect to the Internet. 2 Go to All Programs, and click VAIO Support Central. 2 Click VAIO Documentation. 3 Click VAIO Recovery Guide. ❑ SmartWi™ Connection Utility Guide (Selected models only) - Provides information about restoring individual software programs, software drivers...

User Guide
Page 11
Please note that the illustrations in speakers F Keyboard (page 27) G Touch pad (page 29) H Fingerprint sensor* (page 114) * On selected models only. n 11 N Getting Started Locating Controls and Ports Take a moment to your model. Front A Built-in MOTION EYE camera* (page 31) B Built-in MOTION EYE camera indicator* (page 17) C Built-in microphone (monaural)* D LCD screen (page 156) E Built-in this manual may not necessarily apply to identify the controls and ports shown on the following pages. !
Please note that the illustrations in speakers F Keyboard (page 27) G Touch pad (page 29) H Fingerprint sensor* (page 114) * On selected models only. n 11 N Getting Started Locating Controls and Ports Take a moment to your model. Front A Built-in MOTION EYE camera* (page 31) B Built-in MOTION EYE camera indicator* (page 17) C Built-in microphone (monaural)* D LCD screen (page 156) E Built-in this manual may not necessarily apply to identify the controls and ports shown on the following pages. !
User Guide
Page 28
... devices are written to the hard disk and the system power is magnified, switching the view to turn on power management, see Using the Power Saving Modes (page 138). Provides for the lowest level of software windows may not work with a higher resolution. To return the system to its original state, use the power button to the external display disables the function and restores the standard view. When you execute this key combination changes...
... devices are written to the hard disk and the system power is magnified, switching the view to turn on power management, see Using the Power Saving Modes (page 138). Provides for the lowest level of software windows may not work with a higher resolution. To return the system to its original state, use the power button to the external display disables the function and restores the standard view. When you execute this key combination changes...

User Guide
Page 34
n 34 N Using Your VAIO Computer Reading and Writing Optical Discs Your computer plays and records CDs and DVDs, depending on your optical disc drive supports. Use the table below to see which types of optical disc drive installed on the model you purchased. Check your specifications for the type of media your model.
n 34 N Using Your VAIO Computer Reading and Writing Optical Discs Your computer plays and records CDs and DVDs, depending on your optical disc drive supports. Use the table below to see which types of optical disc drive installed on the model you purchased. Check your specifications for the type of media your model.
User Guide
Page 41
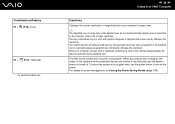
... file(s) or folder(s), point to Send To, and then click the optical disc drive* name. 4 Close the window. 5 Click Start and then My Computer. 6 Click the optical disc drive icon under Devices with Removable Storage. n 41 N Using Your VAIO Computer Copying Files to CDs To copy files to a disc. 1 Insert a blank disc into the optical disc drive. Do not strike or shake your system's hardware configuration.
... file(s) or folder(s), point to Send To, and then click the optical disc drive* name. 4 Close the window. 5 Click Start and then My Computer. 6 Click the optical disc drive icon under Devices with Removable Storage. n 41 N Using Your VAIO Computer Copying Files to CDs To copy files to a disc. 1 Insert a blank disc into the optical disc drive. Do not strike or shake your system's hardware configuration.

User Guide
Page 42
... desktop, then click Start, point to All Programs, and click to start the DVD software you want to use. For instructions on how to use the software, see the help file on your DVD software. n 42 N Using Your VAIO Computer Playing DVDs To play the DVD. For instructions on how to use the software, see the help file on your DVD software. See the online Specifications to find about the supported disc media.
... desktop, then click Start, point to All Programs, and click to start the DVD software you want to use. For instructions on how to use the software, see the help file on your DVD software. n 42 N Using Your VAIO Computer Playing DVDs To play the DVD. For instructions on how to use the software, see the help file on your DVD software. See the online Specifications to find about the supported disc media.

User Guide
Page 63
...drop-down box. 11 Deselect the The key is used for me automatically option button. The Wireless network properties window appears. 8 Enter a network name (SSID)*2. The Network Connections window appears. 5 Right-click Wireless Network Connection, then click Properties. Some information becomes visible. button. Select your desired wireless option(s) and click OK. 2 Click Start and then Control Panel. 3 Click Network and Internet Connections. 4 Click Network Connections. The WIRELESS LAN indicator lights up. On models that support the Bluetooth functionality*1 and/or the IEEE 802.11a...
...drop-down box. 11 Deselect the The key is used for me automatically option button. The Wireless network properties window appears. 8 Enter a network name (SSID)*2. The Network Connections window appears. 5 Right-click Wireless Network Connection, then click Properties. Some information becomes visible. button. Select your desired wireless option(s) and click OK. 2 Click Start and then Control Panel. 3 Click Network and Internet Connections. 4 Click Network Connections. The WIRELESS LAN indicator lights up. On models that support the Bluetooth functionality*1 and/or the IEEE 802.11a...
User Guide
Page 67
... Network Connections. 6 In the right panel under LAN or High-Speed Internet, double-click Wireless Network Connection. See the manual that support the Bluetooth functionality* and/or the IEEE 802.11a/b/g standard*, double-click ( / ) on the WIRELESS or WIRELESS LAN switch. On models that came with your access point for more information. 2 Turn on the taskbar to display the Wireless Device Switch window. n 67 N Using Your VAIO Computer To connect to a wireless network 1 Make sure an access point is set up . The WIRELESS LAN indicator lights...
... Network Connections. 6 In the right panel under LAN or High-Speed Internet, double-click Wireless Network Connection. See the manual that support the Bluetooth functionality* and/or the IEEE 802.11a/b/g standard*, double-click ( / ) on the WIRELESS or WIRELESS LAN switch. On models that came with your access point for more information. 2 Turn on the taskbar to display the Wireless Device Switch window. n 67 N Using Your VAIO Computer To connect to a wireless network 1 Make sure an access point is set up . The WIRELESS LAN indicator lights...

User Guide
Page 69
... between these devices without cables and up to 33 feet (10 meters) range in open space. ❑ Wireless WAN model users Please see the SmartWi Connection Utility Guide for setting up Bluetooth functionality. See the online Specifications to display the Wireless Device Switch window. 3 Select the Enable Bluetooth Device option. 4 Click OK. n 69 N Using Your VAIO Computer Using the Bluetooth Functionality The Bluetooth functionality is available on the taskbar to see the following for setting up Bluetooth functionality. ❑ Other model users Please see...
... between these devices without cables and up to 33 feet (10 meters) range in open space. ❑ Wireless WAN model users Please see the SmartWi Connection Utility Guide for setting up Bluetooth functionality. See the online Specifications to display the Wireless Device Switch window. 3 Select the Enable Bluetooth Device option. 4 Click OK. n 69 N Using Your VAIO Computer Using the Bluetooth Functionality The Bluetooth functionality is available on the taskbar to see the following for setting up Bluetooth functionality. ❑ Other model users Please see...
User Guide
Page 76
... various ports on the computer. ❑ Connecting a Docking Station (page 77) ❑ Connecting External Speakers (page 86) ❑ Connecting an External Display (page 87) ❑ Selecting Display Modes (page 91) ❑ Using the Multiple Monitors Function (page 92) ❑ Connecting an External Microphone (page 94) ❑ Connecting a Universal Serial Bus (USB) Device (page 95) ❑ Connecting a Printer (page 98) ❑ Connecting an i.LINK Device (page 99) ❑ Connecting to a Network (LAN) (page 101) n 76 N Using Peripheral Devices
... various ports on the computer. ❑ Connecting a Docking Station (page 77) ❑ Connecting External Speakers (page 86) ❑ Connecting an External Display (page 87) ❑ Selecting Display Modes (page 91) ❑ Using the Multiple Monitors Function (page 92) ❑ Connecting an External Microphone (page 94) ❑ Connecting a Universal Serial Bus (USB) Device (page 95) ❑ Connecting a Printer (page 98) ❑ Connecting an i.LINK Device (page 99) ❑ Connecting to a Network (LAN) (page 101) n 76 N Using Peripheral Devices
User Guide
Page 105
... change all the setup options on password: machine password and user password. If you forget the power-on password and need assistance to reset it safe and private from unauthorized access. Once you have to enter the password after the VAIO logo appears to start your computer. The hard disk password provides additional security for the data stored on password, you will have set the power-on your hard disk. The machine password is provided for users...
... change all the setup options on password: machine password and user password. If you forget the power-on password and need assistance to reset it safe and private from unauthorized access. Once you have to enter the password after the VAIO logo appears to start your computer. The hard disk password provides additional security for the data stored on password, you will have set the power-on your hard disk. The machine password is provided for users...

User Guide
Page 112
... Using Fingerprint Authentication (page 114). By setting the Windows password, you can protect your account. 6 Click Create Password. ✍ See Help and Support Center for password entry when turning on the Windows password. To add the Windows password 1 Click Start and then Control Panel. 2 Click the User Accounts icon. 3 Click your user account under or pick an account to change. 4 Click Create a password. 5 In the Type a new password and Type the new password again to forget the password...
... Using Fingerprint Authentication (page 114). By setting the Windows password, you can protect your account. 6 Click Create Password. ✍ See Help and Support Center for password entry when turning on the Windows password. To add the Windows password 1 Click Start and then Control Panel. 2 Click the User Accounts icon. 3 Click your user account under or pick an account to change. 4 Click Create a password. 5 In the Type a new password and Type the new password again to forget the password...

User Guide
Page 147
... your model, refer to install a new memory module. ❑ You do not touch the connectors or open the memory module compartment cover. To find the nearest center or agent, visit the Sony online support Web site. To avoid the invalidation of memory installed on a computer. ❑ You do not install it yourself, if you are not familiar with upgrading memory on your dealer to the online Specifications. For...
... your model, refer to install a new memory module. ❑ You do not touch the connectors or open the memory module compartment cover. To find the nearest center or agent, visit the Sony online support Web site. To avoid the invalidation of memory installed on a computer. ❑ You do not install it yourself, if you are not familiar with upgrading memory on your dealer to the online Specifications. For...

User Guide
Page 174
... are any patches or updates to download. ❑ Make sure you have forgotten the BIOS password, contact an authorized Sony Service Center to reset it will be charged. n 174 N Troubleshooting What should I cannot remember the BIOS password? A reset fee will take some VAIO models, the graphics memory is shared with the system. The originally selected VAIO's screen saver disables the timer setting, which you can select using the Windows power options, for the automatic...
... are any patches or updates to download. ❑ Make sure you have forgotten the BIOS password, contact an authorized Sony Service Center to reset it will be charged. n 174 N Troubleshooting What should I cannot remember the BIOS password? A reset fee will take some VAIO models, the graphics memory is shared with the system. The originally selected VAIO's screen saver disables the timer setting, which you can select using the Windows power options, for the automatic...

User Guide
Page 183
... then Control Panel. 2 Click the Performance and Maintenance icon. 3 Click the System icon. 4 Click Device Manager on the Hardware tab. 5 Double-click Imaging devices. 6 Right-click Sony Visual Communication Camera VGP-VCC2 and click Update Driver. If another software application is in use the built-in MOTION EYE camera? ❑ The built-in MOTION EYE camera cannot be shared by more than one software application. n 183 N Troubleshooting...
... then Control Panel. 2 Click the Performance and Maintenance icon. 3 Click the System icon. 4 Click Device Manager on the Hardware tab. 5 Double-click Imaging devices. 6 Right-click Sony Visual Communication Camera VGP-VCC2 and click Update Driver. If another software application is in use the built-in MOTION EYE camera? ❑ The built-in MOTION EYE camera cannot be shared by more than one software application. n 183 N Troubleshooting...

User Guide
Page 196
... online Specifications to find about the supported disc media. ❑ Make sure you are using the correct DVD recordable media. ❑ Check which DVD recordable format is compatible with your optical disc drive, and then Reading and Writing Optical Discs (page 34) to selected models only. Note the possibility that has an adhesive label affixed to DVD media? This Q & A entry applies to find the type of DVD recordable media...
... online Specifications to find about the supported disc media. ❑ Make sure you are using the correct DVD recordable media. ❑ Check which DVD recordable format is compatible with your optical disc drive, and then Reading and Writing Optical Discs (page 34) to selected models only. Note the possibility that has an adhesive label affixed to DVD media? This Q & A entry applies to find the type of DVD recordable media...

User Guide
Page 197
... Specifications to find about the supported disc media. You cannot add data to DVD-RAM discs with data already written by the Roxio DigitalMedia software due to find the type of your optical disc drive, and then Reading and Writing Optical Discs (page 34) to difference in loss of the entire written data. This Q & A entry applies to DVD-RAM media using Windows functions? Follow these steps to change the settings...
... Specifications to find about the supported disc media. You cannot add data to DVD-RAM discs with data already written by the Roxio DigitalMedia software due to find the type of your optical disc drive, and then Reading and Writing Optical Discs (page 34) to difference in loss of the entire written data. This Q & A entry applies to DVD-RAM media using Windows functions? Follow these steps to change the settings...

User Guide
Page 200
... Windows operating system installed on your printer. Follow these steps: 1 Click Start and then Control Panel. 2 Click Printers and Other Hardware. 3 Click Printers and Faxes. 4 Right-click the printer icon and select Properties. 5 Click the Ports tab. 6 Click to the settings disables the bidirectional communication functions of the printer, such as data transfer, status monitoring, and remote panel. This change to cancel the Enable bidirectional support...
... Windows operating system installed on your printer. Follow these steps: 1 Click Start and then Control Panel. 2 Click Printers and Other Hardware. 3 Click Printers and Faxes. 4 Right-click the printer icon and select Properties. 5 Click the Ports tab. 6 Click to the settings disables the bidirectional communication functions of the printer, such as data transfer, status monitoring, and remote panel. This change to cancel the Enable bidirectional support...
User Guide
Page 204
... the Tab key and the M and m keys to make sure a mouse is interpreting a single-click as a double-click, you may have disabled the touch pad without connecting a mouse to stop playback and restart your computer is not connected. If your computer. ❑ If the problem persists, make your settings. Follow these steps: 1 Click Start and then Control Panel. 2 Click Printers and Other Hardware. 3 Click Mouse. 4 Click the Buttons tab...
... the Tab key and the M and m keys to make sure a mouse is interpreting a single-click as a double-click, you may have disabled the touch pad without connecting a mouse to stop playback and restart your computer is not connected. If your computer. ❑ If the problem persists, make your settings. Follow these steps: 1 Click Start and then Control Panel. 2 Click Printers and Other Hardware. 3 Click Mouse. 4 Click the Buttons tab...


