
User Guide
Page 3
... a Universal Serial Bus (USB) Device...98 Connecting a Printer ...101 Connecting an i.LINK Device ...102 Connecting to a Network (LAN) ...104 Customizing Your VAIO Computer ...106 Selecting Performance Modes ...107 Setting the Password ...108 Using Fingerprint Authentication ...119 Using Trusted Platform Module (TPM)...127 Setting Up Your Computer with VAIO Control Center 136 Using VAIO Status Monitor ...137 Using the Power Saving Modes ...138 Managing Power with VAIO Power Management ...143 Protecting the Hard Disk ...145 Upgrading Your VAIO Computer...146 Adding and Removing Memory...147
... a Universal Serial Bus (USB) Device...98 Connecting a Printer ...101 Connecting an i.LINK Device ...102 Connecting to a Network (LAN) ...104 Customizing Your VAIO Computer ...106 Selecting Performance Modes ...107 Setting the Password ...108 Using Fingerprint Authentication ...119 Using Trusted Platform Module (TPM)...127 Setting Up Your Computer with VAIO Control Center 136 Using VAIO Status Monitor ...137 Using the Power Saving Modes ...138 Managing Power with VAIO Power Management ...143 Protecting the Hard Disk ...145 Upgrading Your VAIO Computer...146 Adding and Removing Memory...147

User Guide
Page 8
...and SmartWi Connection Utility. 2 Click SmartWi Connection Utility Help. Provides information about restoring individual software programs, software drivers, and drive partition(s) or your entire hard disk drive to the original factory installed settings. n8 N Before Use ❑ VAIO Recovery Center User Guide - To access this on -screen guide: 1 Click Start and Help and Support. 2 Click Manuals & Specifications. 3 Click VAIO Recovery Center User Guide. ❑ SmartWi™ Connection Utility Help (Selected models only) - Provides information about setting up Bluetooth, wireless LAN...
...and SmartWi Connection Utility. 2 Click SmartWi Connection Utility Help. Provides information about restoring individual software programs, software drivers, and drive partition(s) or your entire hard disk drive to the original factory installed settings. n8 N Before Use ❑ VAIO Recovery Center User Guide - To access this on -screen guide: 1 Click Start and Help and Support. 2 Click Manuals & Specifications. 3 Click VAIO Recovery Center User Guide. ❑ SmartWi™ Connection Utility Help (Selected models only) - Provides information about setting up Bluetooth, wireless LAN...

User Guide
Page 9
... the answers you need. To access Help and Support, click Start and Help and Support. ❑ Manuals & Specifications Here you will find interesting and useful. ❑ VAIO Tutorials Sony provides guided help tutorials that help in the form of VAIO tutorials, an escalation page containing support and contact information, and various links to VAIO online support Web sites. ❑ Backup & Recovery Find information on -screen User Guide, warranty information, other...
... the answers you need. To access Help and Support, click Start and Help and Support. ❑ Manuals & Specifications Here you will find interesting and useful. ❑ VAIO Tutorials Sony provides guided help tutorials that help in the form of VAIO tutorials, an escalation page containing support and contact information, and various links to VAIO online support Web sites. ❑ Backup & Recovery Find information on -screen User Guide, warranty information, other...

User Guide
Page 32
..., use the power button to turn on power management, see Using the Power Saving Modes (page 138). For details on the power. n 32 N Using Your VAIO Computer Functions Changes the screen resolution to the external display disables the function and restores the standard view. When you execute this key combination changes the resolution. When your computer's screen view. ✍ The magnified view is not as clear as the standard view, as it is magnified, switching...
..., use the power button to turn on power management, see Using the Power Saving Modes (page 138). For details on the power. n 32 N Using Your VAIO Computer Functions Changes the screen resolution to the external display disables the function and restores the standard view. When you execute this key combination changes the resolution. When your computer's screen view. ✍ The magnified view is not as clear as the standard view, as it is magnified, switching...

User Guide
Page 33
... Right-click Drag Scroll Slide your preference for vertical scrolling while the Scroll lock indicator is available only with VAIO Control Center (page 136) to connect a mouse before disabling the touch pad. Press the right button (4) once. Press the Fn+Scr Lk keys to use the fingerprint sensor for using the touch pad. See Setting Up Your Computer with applications that support a touch pad scroll feature). ✍ You can disable/enable the touch pad to suit your...
... Right-click Drag Scroll Slide your preference for vertical scrolling while the Scroll lock indicator is available only with VAIO Control Center (page 136) to connect a mouse before disabling the touch pad. Press the right button (4) once. Press the Fn+Scr Lk keys to use the fingerprint sensor for using the touch pad. See Setting Up Your Computer with applications that support a touch pad scroll feature). ✍ You can disable/enable the touch pad to suit your...

User Guide
Page 38
Check your specifications for the type of media your model. Use the table below to see which types of optical disc drive installed on the model you purchased. n 38 N Using Your VAIO Computer Reading and Writing Optical Discs Your computer plays and records CDs, DVDs, and Blu-ray Disc™ media, depending on your optical disc drive supports.
Check your specifications for the type of media your model. Use the table below to see which types of optical disc drive installed on the model you purchased. n 38 N Using Your VAIO Computer Reading and Writing Optical Discs Your computer plays and records CDs, DVDs, and Blu-ray Disc™ media, depending on your optical disc drive supports.

User Guide
Page 67
... whether your model supports the Bluetooth functionality, the IEEE 802.11a/b/g standard, and/or the IEEE 802.11n draft standard. n 67 N Using Your VAIO Computer To communicate without an access point (ad-hoc) ! The Set up a connection or network on the WIRELESS switch. You cannot select the 5 GHz bandwidth, which is not available on ad-hoc networks. 1 Turn on the left pane. The Wireless LAN indicator lights up.
... whether your model supports the Bluetooth functionality, the IEEE 802.11a/b/g standard, and/or the IEEE 802.11n draft standard. n 67 N Using Your VAIO Computer To communicate without an access point (ad-hoc) ! The Set up a connection or network on the WIRELESS switch. You cannot select the 5 GHz bandwidth, which is not available on ad-hoc networks. 1 Turn on the left pane. The Wireless LAN indicator lights up.

User Guide
Page 69
.... 2 Turn on the taskbar and select Connect to a wireless network 1 Make sure an access point is case sensitive and must enter a passphrase. The Wireless LAN indicator lights up to 64 characters long using numbers from 0 to 9 and letters from A to see the help file on the software. 3 Click the button next to or above your desired wireless option(s) in the VAIO Smart Network window. 4 Right-click or on the WIRELESS switch. n 69 N Using...
.... 2 Turn on the taskbar and select Connect to a wireless network 1 Make sure an access point is case sensitive and must enter a passphrase. The Wireless LAN indicator lights up to 64 characters long using numbers from 0 to 9 and letters from A to see the help file on the software. 3 Click the button next to or above your desired wireless option(s) in the VAIO Smart Network window. 4 Right-click or on the WIRELESS switch. n 69 N Using...

User Guide
Page 71
... for setting up . For instructions on how to 33 feet (10 meters) range in the VAIO Smart Network window. If the VAIO Smart Network window is not displayed on the desktop, follow these devices without cables and up to access the SmartWi Connection Utility Help, see the help file on the software. 2 Click the button next to or above the Bluetooth icon in open space. ❑ Wireless WAN models See...
... for setting up . For instructions on how to 33 feet (10 meters) range in the VAIO Smart Network window. If the VAIO Smart Network window is not displayed on the desktop, follow these devices without cables and up to access the SmartWi Connection Utility Help, see the help file on the software. 2 Click the button next to or above the Bluetooth icon in open space. ❑ Wireless WAN models See...

User Guide
Page 78
... various ports on the computer. ❑ Connecting a Docking Station (page 79) ❑ Connecting External Speakers (page 88) ❑ Connecting an External Display (page 89) ❑ Selecting Display Modes (page 93) ❑ Using the Multiple Monitors Function (page 95) ❑ Connecting an External Microphone (page 97) ❑ Connecting a Universal Serial Bus (USB) Device (page 98) ❑ Connecting a Printer (page 101) ❑ Connecting an i.LINK Device (page 102) ❑ Connecting to a Network (LAN) (page 104) n 78 N Using Peripheral Devices
... various ports on the computer. ❑ Connecting a Docking Station (page 79) ❑ Connecting External Speakers (page 88) ❑ Connecting an External Display (page 89) ❑ Selecting Display Modes (page 93) ❑ Using the Multiple Monitors Function (page 95) ❑ Connecting an External Microphone (page 97) ❑ Connecting a Universal Serial Bus (USB) Device (page 98) ❑ Connecting a Printer (page 101) ❑ Connecting an i.LINK Device (page 102) ❑ Connecting to a Network (LAN) (page 104) n 78 N Using Peripheral Devices

User Guide
Page 108
Adding the Power-on Password The power-on password is installed in another computer. Write down your password and keep it , a password reset fee will be prompted to enter the password after the VAIO logo appears to start the computer. To set the user password, you can use BIOS functions to set two types of passwords to protect your computer without knowing the password, even if the password-protected hard disk drive is removed from your computer and...
Adding the Power-on Password The power-on password is installed in another computer. Write down your password and keep it , a password reset fee will be prompted to enter the password after the VAIO logo appears to start the computer. To set the user password, you can use BIOS functions to set two types of passwords to protect your computer without knowing the password, even if the password-protected hard disk drive is removed from your computer and...

User Guide
Page 133
... to restore any defects arising out of TPM-protected data must have administrator rights on -screen documentation for any TPM-protected data or backup files. Be sure to set a few passwords while installing the Infineon TPM Professional Package. You need to write down the passwords and keep them safe and private from other people. n 133 N Customizing Your VAIO Computer To install...
... to restore any defects arising out of TPM-protected data must have administrator rights on -screen documentation for any TPM-protected data or backup files. Be sure to set a few passwords while installing the Infineon TPM Professional Package. You need to write down the passwords and keep them safe and private from other people. n 133 N Customizing Your VAIO Computer To install...

User Guide
Page 135
... a USB flash memory device To unlock the encrypted data with updating software, such as VAIO Update, changes the BIOS settings back to the default. Follow these steps to configure the boot order in the window for External Drive Boot. 5 Press the < or , key to select Boot, select Internal Hard Disk Drive, and press Shift + = keys to move Internal Optical Drive to the top of the list to recover the computer system from your recovery discs. 6 Press the < or , key to select Exit, select Exit Setup...
... a USB flash memory device To unlock the encrypted data with updating software, such as VAIO Update, changes the BIOS settings back to the default. Follow these steps to configure the boot order in the window for External Drive Boot. 5 Press the < or , key to select Boot, select Internal Hard Disk Drive, and press Shift + = keys to move Internal Optical Drive to the top of the list to recover the computer system from your recovery discs. 6 Press the < or , key to select Exit, select Exit Setup...
User Guide
Page 139
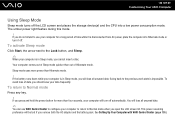
... key. ! To return to the previous work state is disconnected from AC power, place the computer into a low power consumption mode. If you open the LCD screen lid. n 139 N Customizing Your VAIO Computer Using Sleep Mode Sleep mode turns off the LCD screen and places the storage device(s) and the CPU into Hibernate mode or turn off . Sleep mode uses more than out of time while it off automatically. See Setting Up Your Computer with VAIO Control...
... key. ! To return to the previous work state is disconnected from AC power, place the computer into a low power consumption mode. If you open the LCD screen lid. n 139 N Customizing Your VAIO Computer Using Sleep Mode Sleep mode turns off the LCD screen and places the storage device(s) and the CPU into Hibernate mode or turn off . Sleep mode uses more than out of time while it off automatically. See Setting Up Your Computer with VAIO Control...
User Guide
Page 145
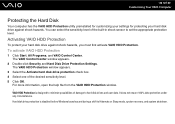
... user data. VAIO HDD Protection is disabled before Windows launches and during a shift to set the appropriate protection level. The VAIO Control Center window appears. 2 Double-click Security and Hard Disk Drive Protection Settings. For more information, open the help file from the VAIO HDD Protection window. ! The VAIO HDD Protection window appears. 3 Select the Activate hard disk drive protection check box. 4 Select one of the built-in shock sensor to Hibernate or Sleep mode, system recovery...
... user data. VAIO HDD Protection is disabled before Windows launches and during a shift to set the appropriate protection level. The VAIO Control Center window appears. 2 Double-click Security and Hard Disk Drive Protection Settings. For more information, open the help file from the VAIO HDD Protection window. ! The VAIO HDD Protection window appears. 3 Select the Activate hard disk drive protection check box. 4 Select one of the built-in shock sensor to Hibernate or Sleep mode, system recovery...

User Guide
Page 185
Follow these steps: 1 Click Start, Control Panel, Hardware and Sound, and Device Manager. 2 Double-click Imaging devices. 3 Right-click the device name for the camera. For changing the setting, see Using the Power Saving Modes (page 138). n 185 N Troubleshooting Why can't I do if my computer becomes unstable when it enters a power saving mode while the built-in MOTION EYE camera is using the camera, exit the application before using the built-in MOTION EYE...
Follow these steps: 1 Click Start, Control Panel, Hardware and Sound, and Device Manager. 2 Double-click Imaging devices. 3 Right-click the device name for the camera. For changing the setting, see Using the Power Saving Modes (page 138). n 185 N Troubleshooting Why can't I do if my computer becomes unstable when it enters a power saving mode while the built-in MOTION EYE camera is using the camera, exit the application before using the built-in MOTION EYE...

User Guide
Page 203
... from a power saving mode (Sleep or Hibernate), then restart the computer. ❑ If the bidirectional communication functions are provided with the Windows operating system installed on your computer may need to an AC power source. Follow these steps: 1 Click Start and Control Panel. 2 Click Printer under Hardware and Sound. 3 Right-click the printer icon and select Properties. 4 Click the Ports tab. 5 Click to the settings disables the...
... from a power saving mode (Sleep or Hibernate), then restart the computer. ❑ If the bidirectional communication functions are provided with the Windows operating system installed on your computer may need to an AC power source. Follow these steps: 1 Click Start and Control Panel. 2 Click Printer under Hardware and Sound. 3 Right-click the printer icon and select Properties. 4 Click the Ports tab. 5 Click to the settings disables the...
User Guide
Page 208
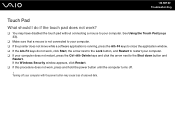
... N Troubleshooting Touch Pad What should I do not work, click Start, the arrow next to the Lock button, and Restart to restart your computer. ❑ If your computer does not restart, press the Ctrl+Alt+Delete keys and click the arrow next to the Shut down button and Restart. Turning off . ! See Using the Touch Pad (page 33). ❑ Make sure that a mouse is not connected to...
... N Troubleshooting Touch Pad What should I do not work, click Start, the arrow next to the Lock button, and Restart to restart your computer. ❑ If your computer does not restart, press the Ctrl+Alt+Delete keys and click the arrow next to the Shut down button and Restart. Turning off . ! See Using the Touch Pad (page 33). ❑ Make sure that a mouse is not connected to...

User Guide
Page 211
... display the properties window. 6 Select the Driver tab and click Update Driver. Why doesn't my computer recognize connected devices? For some PC Cards, if you are not using a Sony PC Card. ❑ If your PC Card, which worked normally before, does not work ? ❑ Make sure the PC Card is inserted into the PC Card slot, your computer may need to install driver software if you alternate between Normal mode and Sleep or Hibernate mode...
... display the properties window. 6 Select the Driver tab and click Update Driver. Why doesn't my computer recognize connected devices? For some PC Cards, if you are not using a Sony PC Card. ❑ If your PC Card, which worked normally before, does not work ? ❑ Make sure the PC Card is inserted into the PC Card slot, your computer may need to install driver software if you alternate between Normal mode and Sleep or Hibernate mode...

Safety Guide
Page 2
.... SONY CANNOT WARRANT THAT THE FUNCTIONS DESCRIBED IN THIS GUIDE WILL BE UNINTERRUPTED OR ERROR-FREE. The software described herein is prohibited. Reproduction in whole or in part without prior written approval. SONY ELECTRONICS INC. WEB SITE INFORMATION IS OBTAINED FROM VARIOUS SOURCES AND MAY BE INACCURATE. Sony Electronics Inc. Some of a separate user license agreement. Model Number: Serial Number: Notice © 2008 Sony Electronics...
.... SONY CANNOT WARRANT THAT THE FUNCTIONS DESCRIBED IN THIS GUIDE WILL BE UNINTERRUPTED OR ERROR-FREE. The software described herein is prohibited. Reproduction in whole or in part without prior written approval. SONY ELECTRONICS INC. WEB SITE INFORMATION IS OBTAINED FROM VARIOUS SOURCES AND MAY BE INACCURATE. Sony Electronics Inc. Some of a separate user license agreement. Model Number: Serial Number: Notice © 2008 Sony Electronics...


