
User Guide
Page 3
...Display ...84 Selecting Display Modes...90 Using the Multiple Monitors Function ...91 Connecting an External Microphone ...93 Connecting a Universal Serial Bus (USB) Device...94 Connecting a Printer ...97 Connecting an i.LINK Device ...98 Connecting to a Network (LAN) ...100 Customizing Your VAIO Computer ...102 Setting the Password ...103 Using Fingerprint Authentication ...115 Using Trusted Platform Module (TPM)...123 Setting Up Your Computer with VAIO Central ...130 Using VAIO Status Monitor ...131 Using the Power Saving Modes ...132 Managing Power with VAIO Power Management ...137 Changing...
...Display ...84 Selecting Display Modes...90 Using the Multiple Monitors Function ...91 Connecting an External Microphone ...93 Connecting a Universal Serial Bus (USB) Device...94 Connecting a Printer ...97 Connecting an i.LINK Device ...98 Connecting to a Network (LAN) ...100 Customizing Your VAIO Computer ...102 Setting the Password ...103 Using Fingerprint Authentication ...115 Using Trusted Platform Module (TPM)...123 Setting Up Your Computer with VAIO Central ...130 Using VAIO Status Monitor ...131 Using the Power Saving Modes ...132 Managing Power with VAIO Power Management ...137 Changing...

User Guide
Page 7
... up Bluetooth, wireless LAN, and wireless WAN functionalities. To view the online Specifications: 1 Connect to the Internet. 2 Go to the original factory installed settings. Contains features of your computer. To access this on -screen guide: 1 Click Start and Help and Support. 2 Click Manuals & Specifications. 3 Click VAIO Recovery Center User Guide. ❑ SmartWi™ Connection Utility Help (Selected models only) - n7 N Before Use Non-printed Documentation ❑ User Guide (this manual) - Provides information about restoring individual software programs, software drivers...
... up Bluetooth, wireless LAN, and wireless WAN functionalities. To view the online Specifications: 1 Connect to the Internet. 2 Go to the original factory installed settings. Contains features of your computer. To access this on -screen guide: 1 Click Start and Help and Support. 2 Click Manuals & Specifications. 3 Click VAIO Recovery Center User Guide. ❑ SmartWi™ Connection Utility Help (Selected models only) - n7 N Before Use Non-printed Documentation ❑ User Guide (this manual) - Provides information about restoring individual software programs, software drivers...
User Guide
Page 8
... links to VAIO online support Web sites. ❑ Backup & Recovery Find information on how to find interesting and useful. Run utilities that include VAIO Media Setup and Windows Network and Sharing, and access to wireless tutorials. ❑ Security Keep your data safe and your computer running efficiently with updates and maintenance programs from the following categories to back up and restore your operating system, system software, and your VAIO computer...
... links to VAIO online support Web sites. ❑ Backup & Recovery Find information on how to find interesting and useful. Run utilities that include VAIO Media Setup and Windows Network and Sharing, and access to wireless tutorials. ❑ Security Keep your data safe and your computer running efficiently with updates and maintenance programs from the following categories to back up and restore your operating system, system software, and your VAIO computer...

User Guide
Page 18
... the optical disc media. Indicator Power 1 Battery e Media Access Built-in Hibernate mode or off the indicator. Illuminates when data is charging. Press the Num Lk key to a memory card. (Do not enter Sleep mode or turn off the computer when this indicator is on , blinks when the computer is in Sleep mode, and turns off when the computer is in MOTION EYE camera*1 Optical disc drive Hard disk drive Num lock Caps lock Scroll lock Bluetooth technology Functions Illuminates when the power of the...
... the optical disc media. Indicator Power 1 Battery e Media Access Built-in Hibernate mode or off the indicator. Illuminates when data is charging. Press the Num Lk key to a memory card. (Do not enter Sleep mode or turn off the computer when this indicator is on , blinks when the computer is in Sleep mode, and turns off when the computer is in MOTION EYE camera*1 Optical disc drive Hard disk drive Num lock Caps lock Scroll lock Bluetooth technology Functions Illuminates when the power of the...

User Guide
Page 33
... the model you use specific functions of a CD or DVD disc media or a music/video file stored on the builtin flash memory storage or hard disk drive* without launching Windows. If this button does not work, try the substitute drive eject button on the optical disc drive. * Your computer is equipped with special buttons to find about your storage device configuration. See the printed Instant Mode booklet for selecting the desired software. Previous track button Plays...
... the model you use specific functions of a CD or DVD disc media or a music/video file stored on the builtin flash memory storage or hard disk drive* without launching Windows. If this button does not work, try the substitute drive eject button on the optical disc drive. * Your computer is equipped with special buttons to find about your storage device configuration. See the printed Instant Mode booklet for selecting the desired software. Previous track button Plays...

User Guide
Page 37
n 37 N Using Your VAIO Computer Reading and Writing Optical Discs Your computer plays and records CDs, DVDs, or Blu-ray Discs, depending on your optical disc drive supports. Use the table below to see which types of optical disc drive installed on the model you purchased. Check your specifications for the type of media your model.
n 37 N Using Your VAIO Computer Reading and Writing Optical Discs Your computer plays and records CDs, DVDs, or Blu-ray Discs, depending on your optical disc drive supports. Use the table below to see which types of optical disc drive installed on the model you purchased. Check your specifications for the type of media your model.

User Guide
Page 39
... is not supported. ! As with a VAIO computer, be standard definition or prohibit analog video output at high bit rates. If the region setting and the region of a DualDisc may restrict video output to update the AACS key. Due to the multiple formats of VAIO CD drives with the official "CD" format standard (or "DVD" standard in relation to DVD drives, or "Blu-ray Disc" standard...
... is not supported. ! As with a VAIO computer, be standard definition or prohibit analog video output at high bit rates. If the region setting and the region of a DualDisc may restrict video output to update the AACS key. Due to the multiple formats of VAIO CD drives with the official "CD" format standard (or "DVD" standard in relation to DVD drives, or "Blu-ray Disc" standard...

User Guide
Page 59
... setting up wireless LAN functionality. For instructions on how to create a full infrastructure network (infrastructure). ❑ Wireless WAN models See the SmartWi Connection Utility Help for setting up wireless LAN and wireless WAN functionalities. The Sony WLAN supports all your digital devices with built-in the middle of mobility and roaming. n 59 N Using Your VAIO Computer Using Wireless LAN (WLAN) Using the Sony Wireless LAN (WLAN), all normal Ethernet activities, but with each other through a network. You can still access information, Internet...
... setting up wireless LAN functionality. For instructions on how to create a full infrastructure network (infrastructure). ❑ Wireless WAN models See the SmartWi Connection Utility Help for setting up wireless LAN and wireless WAN functionalities. The Sony WLAN supports all your digital devices with built-in the middle of mobility and roaming. n 59 N Using Your VAIO Computer Using Wireless LAN (WLAN) Using the Sony Wireless LAN (WLAN), all normal Ethernet activities, but with each other through a network. You can still access information, Internet...
User Guide
Page 63
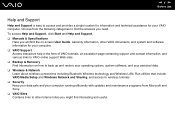
... Wireless LAN indicator lights up a connection or network on the taskbar to see whether your desired wireless option(s) and click OK. 3 Click Start and Control Panel. 4 Click View network status and tasks under Network and Internet. 5 Click Set up . 2 Double-click ( / ) on the left pane. The IEEE 802.11n standard, using the 2.4 or 5 GHz bandwidth, is used for the IEEE 802.11a standard, on the WIRELESS switch. Select your model supports...
... Wireless LAN indicator lights up a connection or network on the taskbar to see whether your desired wireless option(s) and click OK. 3 Click Start and Control Panel. 4 Click View network status and tasks under Network and Internet. 5 Click Set up . 2 Double-click ( / ) on the left pane. The IEEE 802.11n standard, using the 2.4 or 5 GHz bandwidth, is used for the IEEE 802.11a standard, on the WIRELESS switch. Select your model supports...

User Guide
Page 66
... in open space. ❑ Wireless WAN models See the SmartWi Connection Utility Help for setting up Bluetooth functionality. For instructions on the taskbar to display the Wireless Device Switch window. 3 Select the Enable Bluetooth Device option. 4 Click OK. To connect to a Bluetooth device 1 Turn on the WIRELESS switch. 2 Double-click ( / ) on how to access the SmartWi Connection Utility Help, see Non-printed Documentation (page 7). ❑ Other models See the following for setting up Bluetooth functionality. n 66 N Using Your VAIO Computer Using the Bluetooth Functionality You...
... in open space. ❑ Wireless WAN models See the SmartWi Connection Utility Help for setting up Bluetooth functionality. For instructions on the taskbar to display the Wireless Device Switch window. 3 Select the Enable Bluetooth Device option. 4 Click OK. To connect to a Bluetooth device 1 Turn on the WIRELESS switch. 2 Double-click ( / ) on how to access the SmartWi Connection Utility Help, see Non-printed Documentation (page 7). ❑ Other models See the following for setting up Bluetooth functionality. n 66 N Using Your VAIO Computer Using the Bluetooth Functionality You...

User Guide
Page 74
... your VAIO computer by using the various ports on the computer. ❑ Connecting a Docking Station (page 75) ❑ Connecting External Speakers (page 83) ❑ Connecting an External Display (page 84) ❑ Selecting Display Modes (page 90) ❑ Using the Multiple Monitors Function (page 91) ❑ Connecting an External Microphone (page 93) ❑ Connecting a Universal Serial Bus (USB) Device (page 94) ❑ Connecting a Printer (page 97) ❑ Connecting an i.LINK Device (page 98) ❑ Connecting to a Network (LAN...
... your VAIO computer by using the various ports on the computer. ❑ Connecting a Docking Station (page 75) ❑ Connecting External Speakers (page 83) ❑ Connecting an External Display (page 84) ❑ Selecting Display Modes (page 90) ❑ Using the Multiple Monitors Function (page 91) ❑ Connecting an External Microphone (page 93) ❑ Connecting a Universal Serial Bus (USB) Device (page 94) ❑ Connecting a Printer (page 97) ❑ Connecting an i.LINK Device (page 98) ❑ Connecting to a Network (LAN...

User Guide
Page 104
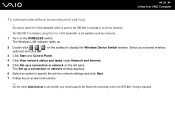
... types of the BIOS setup options, as well as to start your computer. Once you have set the machine password. ! Make sure not to be charged, and your computer from other standard users to allow for users with the fingerprint authentication functionality, you can substitute fingerprint recognition for password entry when turning on your computer without entering the password. The machine password is provided to change all the setup options...
... types of the BIOS setup options, as well as to start your computer. Once you have set the machine password. ! Make sure not to be charged, and your computer from other standard users to allow for users with the fingerprint authentication functionality, you can substitute fingerprint recognition for password entry when turning on your computer without entering the password. The machine password is provided to change all the setup options...

User Guide
Page 108
... computer and press the F2 key several times when the VAIO logo appears. 3 Enter the user password and press the Enter key. 4 Press the < or , key to select Security to select Exit, select Exit Setup, and then press the Enter key. n 108 N Customizing Your VAIO Computer To change or remove the power-on password (user password) 1 Turn on the computer. 2 Press the F2 key when the VAIO logo appears. The BIOS setup screen appears.
... computer and press the F2 key several times when the VAIO logo appears. 3 Enter the user password and press the Enter key. 4 Press the < or , key to select Security to select Exit, select Exit Setup, and then press the Enter key. n 108 N Customizing Your VAIO Computer To change or remove the power-on password (user password) 1 Turn on the computer. 2 Press the F2 key when the VAIO logo appears. The BIOS setup screen appears.
User Guide
Page 109
... and lose all the data stored on the original hard disk drive. See the online Specifications to reset the user password on the BIOS setup screen. Once you set the user password, you will have to replace the hard disk drive at your storage device configuration. If you have to enter the password along with the fingerprint authentication functionality, you must set ), after the VAIO logo appears. ! Be sure to write down the master...
... and lose all the data stored on the original hard disk drive. See the online Specifications to reset the user password on the BIOS setup screen. Once you set the user password, you will have to replace the hard disk drive at your storage device configuration. If you have to enter the password along with the fingerprint authentication functionality, you must set ), after the VAIO logo appears. ! Be sure to write down the master...

User Guide
Page 129
... carried out at your data maintenance and management. n 129 N Customizing Your VAIO Computer To install the Infineon TPM Professional Package Read the Readme.txt in the C:\Infineon\Readme folder. You need to install the package. Then, double-click C:\Infineon\setup.exe to set a few passwords while installing Infineon TPM Professional Package. To open the documentation, click Start, All Programs, Infineon Security Platform...
... carried out at your data maintenance and management. n 129 N Customizing Your VAIO Computer To install the Infineon TPM Professional Package Read the Readme.txt in the C:\Infineon\Readme folder. You need to install the package. Then, double-click C:\Infineon\setup.exe to set a few passwords while installing Infineon TPM Professional Package. To open the documentation, click Start, All Programs, Infineon Security Platform...

User Guide
Page 143
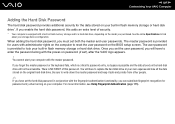
... flash memory storage is not included in shock sensor to Hibernate or Sleep mode, Instant Mode, system recovery, and system shutdown. The setup window appears. 3 Select the Activate hard disk drive protection check box. 4 Select one of the VAIO HDD Protection utility. Activating VAIO HDD Protection To protect your hard disk drive against shock hazards. For more information, click Help on the Categories tab and double-click Hard Disk Drive Protection Settings. See the online Specifications...
... flash memory storage is not included in shock sensor to Hibernate or Sleep mode, Instant Mode, system recovery, and system shutdown. The setup window appears. 3 Select the Activate hard disk drive protection check box. 4 Select one of the VAIO HDD Protection utility. Activating VAIO HDD Protection To protect your hard disk drive against shock hazards. For more information, click Help on the Categories tab and double-click Hard Disk Drive Protection Settings. See the online Specifications...

User Guide
Page 145
... assume user familiarity with the general terminology associated with personal computers and with your computer. Install the memory module only at an ESD workstation. Improper installation of your manufacturer's warranty. ❑ Only use memory modules that is, battery pack or AC adapter) and from any cover or panel from ESD. Notes on replacing memory modules ❑ Be careful when changing memory. If a memory module is not available, do not work...
... assume user familiarity with the general terminology associated with personal computers and with your computer. Install the memory module only at an ESD workstation. Improper installation of your manufacturer's warranty. ❑ Only use memory modules that is, battery pack or AC adapter) and from any cover or panel from ESD. Notes on replacing memory modules ❑ Be careful when changing memory. If a memory module is not available, do not work...

User Guide
Page 179
...: 1 Click Start, Control Panel, Hardware and Sound, and Device Manager. 2 Double-click Imaging devices. 3 Right-click the device name for the camera. What should I use ? ❑ Do not place your computer into Sleep or Hibernate mode while you must reinstall the driver software for your computer automatically enters Sleep or Hibernate mode, change the corresponding power saving mode setting. n 179 N Troubleshooting Why can't I do if my computer becomes unstable when it enters a power saving mode while...
...: 1 Click Start, Control Panel, Hardware and Sound, and Device Manager. 2 Double-click Imaging devices. 3 Right-click the device name for the camera. What should I use ? ❑ Do not place your computer into Sleep or Hibernate mode while you must reinstall the driver software for your computer automatically enters Sleep or Hibernate mode, change the corresponding power saving mode setting. n 179 N Troubleshooting Why can't I do if my computer becomes unstable when it enters a power saving mode while...
User Guide
Page 190
... button and Restart to restart the computer. 2 Remove the disc from the optical disc drive. 3 Check the disc for instructions. ❑ If you are using external speakers, check the volume settings on the speakers and the connections between the speakers and your computer. If you need to enable the device or reinstall the drivers. 5 Double-click the optical disc drive device to open a list of the optical disc drives of your computer's hardware devices. n 190 N Troubleshooting...
... button and Restart to restart the computer. 2 Remove the disc from the optical disc drive. 3 Check the disc for instructions. ❑ If you are using external speakers, check the volume settings on the speakers and the connections between the speakers and your computer. If you need to enable the device or reinstall the drivers. 5 Double-click the optical disc drive device to open a list of the optical disc drives of your computer's hardware devices. n 190 N Troubleshooting...
User Guide
Page 197
... bidirectional communication functions are provided with the Windows operating system installed on your computer may need to install the printer driver software before you use your printer. Follow these steps: 1 Click Start and Control Panel. 2 Click Printer under Hardware and Sound. 3 Right-click the printer icon and select Properties. 4 Click the Ports tab. 5 Click to cancel the Enable bidirectional support check box. 6 Click OK. n 197 N Troubleshooting Printing What...
... bidirectional communication functions are provided with the Windows operating system installed on your computer may need to install the printer driver software before you use your printer. Follow these steps: 1 Click Start and Control Panel. 2 Click Printer under Hardware and Sound. 3 Right-click the printer icon and select Properties. 4 Click the Ports tab. 5 Click to cancel the Enable bidirectional support check box. 6 Click OK. n 197 N Troubleshooting Printing What...


