User Guide
Page 3
...Connecting an External Microphone ...99 Connecting a Universal Serial Bus (USB) Device...100 Connecting a Printer ...103 Connecting an i.LINK Device ...104 Connecting to a Network (LAN) ...106 Customizing Your VAIO Computer ...108 Selecting Performance Modes ...109 Setting the Password ...110 Using Fingerprint Authentication ...122 Using Trusted Platform Module (TPM)...130 Setting Up Your Computer with VAIO Control Center 140 Using VAIO Status Monitor ...141 Using the Power Saving Modes ...142 Managing Power with VAIO Power Management ...147 Protecting the Hard Disk ...149 Upgrading Your VAIO...
...Connecting an External Microphone ...99 Connecting a Universal Serial Bus (USB) Device...100 Connecting a Printer ...103 Connecting an i.LINK Device ...104 Connecting to a Network (LAN) ...106 Customizing Your VAIO Computer ...108 Selecting Performance Modes ...109 Setting the Password ...110 Using Fingerprint Authentication ...122 Using Trusted Platform Module (TPM)...130 Setting Up Your Computer with VAIO Control Center 140 Using VAIO Status Monitor ...141 Using the Power Saving Modes ...142 Managing Power with VAIO Power Management ...147 Protecting the Hard Disk ...149 Upgrading Your VAIO...

User Guide
Page 9
... information about setting up Bluetooth, wireless LAN, and wireless WAN functionalities. Provides information about restoring individual software programs, hardware drivers, and drive partition(s) or your entire hard disk drive to the original factory installed settings. To access this on-screen guide: 1 Click Start, All Programs, and SmartWi Connection Utility. 2 Click SmartWi Connection Utility Help. n9 N Before Use ❑ VAIO Recovery Center User Guide - To access this on -screen guide: 1 Click Start and Help and Support. 2 Click Manuals & Specifications. 3 Click Other...
... information about setting up Bluetooth, wireless LAN, and wireless WAN functionalities. Provides information about restoring individual software programs, hardware drivers, and drive partition(s) or your entire hard disk drive to the original factory installed settings. To access this on-screen guide: 1 Click Start, All Programs, and SmartWi Connection Utility. 2 Click SmartWi Connection Utility Help. n9 N Before Use ❑ VAIO Recovery Center User Guide - To access this on -screen guide: 1 Click Start and Help and Support. 2 Click Manuals & Specifications. 3 Click Other...

User Guide
Page 10
... contact information, and various links to VAIO online support Web sites. ❑ Backup & Recovery Find information on -screen User Guide, warranty information, other Internet sites you might find the answers you need. n 10 N Before Use Help and Support Help and Support is easy to access and provides a single location for information and technical assistance for your personal data. ❑ Wireless & Networking Learn about wireless connections including Bluetooth Wireless technology and Wireless LAN.
... contact information, and various links to VAIO online support Web sites. ❑ Backup & Recovery Find information on -screen User Guide, warranty information, other Internet sites you might find the answers you need. n 10 N Before Use Help and Support Help and Support is easy to access and provides a single location for information and technical assistance for your personal data. ❑ Wireless & Networking Learn about wireless connections including Bluetooth Wireless technology and Wireless LAN.
User Guide
Page 33
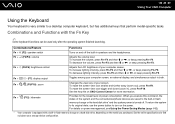
... Fn Key ✍ Some keyboard functions can be used only after the operating system finished launching. n 33 N Using Your VAIO Computer Using the Keyboard Your keyboard is very similar to a desktop computer keyboard, but has additional keys that perform model-specific tasks. To increase the volume, press Fn+F4 and then M or ,, or keep pressing Fn+F4. Fn + 2 (F3/F4): volume Fn + 8 (F5/F6): brightness control Adjusts the volume level...
... Fn Key ✍ Some keyboard functions can be used only after the operating system finished launching. n 33 N Using Your VAIO Computer Using the Keyboard Your keyboard is very similar to a desktop computer keyboard, but has additional keys that perform model-specific tasks. To increase the volume, press Fn+F4 and then M or ,, or keep pressing Fn+F4. Fn + 2 (F3/F4): volume Fn + 8 (F5/F6): brightness control Adjusts the volume level...

User Guide
Page 41
Use the table below to see which types of optical disc drive installed on the model you purchased. n 41 N Using Your VAIO Computer Reading and Writing Optical Discs Your computer plays and records CDs, DVDs, and Blu-ray Disc™ media, depending on your optical disc drive supports. Check your specifications for the type of media your model.
Use the table below to see which types of optical disc drive installed on the model you purchased. n 41 N Using Your VAIO Computer Reading and Writing Optical Discs Your computer plays and records CDs, DVDs, and Blu-ray Disc™ media, depending on your optical disc drive supports. Check your specifications for the type of media your model.

User Guide
Page 48
... to a Blu-ray Disc media 1 Connect the AC adapter to find out about the supported disc media. See the online specifications to find out the type of your optical disc drive, and then Reading and Writing Optical Discs (page 41) to the disc. n 48 N Using Your VAIO Computer Playing Blu-ray Disc Media ! The Blu-ray Disc playback function is available on the desktop, then click Start, All Programs, and...
... to a Blu-ray Disc media 1 Connect the AC adapter to find out about the supported disc media. See the online specifications to find out the type of your optical disc drive, and then Reading and Writing Optical Discs (page 41) to the disc. n 48 N Using Your VAIO Computer Playing Blu-ray Disc Media ! The Blu-ray Disc playback function is available on the desktop, then click Start, All Programs, and...

User Guide
Page 51
... N Using Your VAIO Computer Removing an ExpressCard Module Follow the steps below to remove the ExpressCard module while your computer is off, skip steps 1 to 4. 1 Double-click the Safely Remove Hardware icon on the taskbar. 2 Select the hardware you want to unplug. 3 Click Stop. 4 Follow the on-screen instructions to remove the ExpressCard module. 5 Push in the ExpressCard module toward the computer so that the module...
... N Using Your VAIO Computer Removing an ExpressCard Module Follow the steps below to remove the ExpressCard module while your computer is off, skip steps 1 to 4. 1 Double-click the Safely Remove Hardware icon on the taskbar. 2 Select the hardware you want to unplug. 3 Click Stop. 4 Follow the on-screen instructions to remove the ExpressCard module. 5 Push in the ExpressCard module toward the computer so that the module...

User Guide
Page 71
... SmartWi Connection Utility Help for setting up Bluetooth functionality. To start Bluetooth communications 1 Turn on how to access the SmartWi Connection Utility Help, see Non-printed Documentation (page 8). ❑ Other models See the following for setting up Bluetooth functionality. Make sure the WIRELESS indicator is lit. You can establish wireless communication between these devices without cables and up to 33 feet (10 meters) range in the VAIO Smart Network window. n 71 N Using Your VAIO Computer Using the Bluetooth Functionality...
... SmartWi Connection Utility Help for setting up Bluetooth functionality. To start Bluetooth communications 1 Turn on how to access the SmartWi Connection Utility Help, see Non-printed Documentation (page 8). ❑ Other models See the following for setting up Bluetooth functionality. Make sure the WIRELESS indicator is lit. You can establish wireless communication between these devices without cables and up to 33 feet (10 meters) range in the VAIO Smart Network window. n 71 N Using Your VAIO Computer Using the Bluetooth Functionality...
User Guide
Page 76
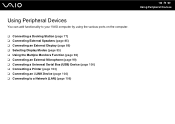
... your VAIO computer by using the various ports on the computer. ❑ Connecting a Docking Station (page 77) ❑ Connecting External Speakers (page 85) ❑ Connecting an External Display (page 86) ❑ Selecting Display Modes (page 93) ❑ Using the Multiple Monitors Function (page 96) ❑ Connecting an External Microphone (page 99) ❑ Connecting a Universal Serial Bus (USB) Device (page 100) ❑ Connecting a Printer (page 103) ❑ Connecting an i.LINK Device (page 104) ❑ Connecting to a Network (LAN...
... your VAIO computer by using the various ports on the computer. ❑ Connecting a Docking Station (page 77) ❑ Connecting External Speakers (page 85) ❑ Connecting an External Display (page 86) ❑ Selecting Display Modes (page 93) ❑ Using the Multiple Monitors Function (page 96) ❑ Connecting an External Microphone (page 99) ❑ Connecting a Universal Serial Bus (USB) Device (page 100) ❑ Connecting a Printer (page 103) ❑ Connecting an i.LINK Device (page 104) ❑ Connecting to a Network (LAN...
User Guide
Page 86
... on-screen instructions to change when you connect an HDMI cable to the HDMI port on your computer or a display cable to the DVI-D port on the docking station are available only when your computer is in SPEED mode. To connect a computer display ! The monitor port on the docking station. For example, you want to connect a TFT/DVI monitor, use the computer with a computer display or a projector. ! n 86 N Using Peripheral Devices Connecting an External Display...
... on-screen instructions to change when you connect an HDMI cable to the HDMI port on your computer or a display cable to the DVI-D port on the docking station are available only when your computer is in SPEED mode. To connect a computer display ! The monitor port on the docking station. For example, you want to connect a TFT/DVI monitor, use the computer with a computer display or a projector. ! n 86 N Using Peripheral Devices Connecting an External Display...

User Guide
Page 138
... of the list to recover the computer system using your recovery discs. 8 Press the < or , key to the USB flash memory device in Windows Help and Support to enable BitLocker Drive Encryption. 11 Save the recovery password to select Exit, select Exit Setup, and then press the Enter key. 9 After your computer. 2 Press the F2 key when the VAIO logo appears. The BIOS setup screen appears. Follow these steps to configure the boot order in the BIOS setup screen: 1 Turn on...
... of the list to recover the computer system using your recovery discs. 8 Press the < or , key to the USB flash memory device in Windows Help and Support to enable BitLocker Drive Encryption. 11 Save the recovery password to select Exit, select Exit Setup, and then press the Enter key. 9 After your computer. 2 Press the F2 key when the VAIO logo appears. The BIOS setup screen appears. Follow these steps to configure the boot order in the BIOS setup screen: 1 Turn on...

User Guide
Page 145
The power indicator light is off in this mode. * Your computer is equipped with a built-in flash memory storage or a hard disk drive, depending on the built-in Hibernate mode, you the time of shutting down , no data will be activated. See the online specifications to use your storage device configuration. ✍ If you purchased. Alternatively, you can click Start, the arrow next to the Lock button, and Hibernate...
The power indicator light is off in this mode. * Your computer is equipped with a built-in flash memory storage or a hard disk drive, depending on the built-in Hibernate mode, you the time of shutting down , no data will be activated. See the online specifications to use your storage device configuration. ✍ If you purchased. Alternatively, you can click Start, the arrow next to the Lock button, and Hibernate...

User Guide
Page 149
...-in hard disk drive, then it has the VAIO HDD Protection utility preinstalled for customizing your settings for protecting your hard disk drive against shock hazards. To activate VAIO HDD Protection 1 Click Start, All Programs, and VAIO Control Center. 2 Click Security and Hard Disk Drive Protection Settings. 3 Select the Activate hard disk drive protection check box. 4 Select one of the VAIO HDD Protection utility. VAIO HDD Protection is designed to minimize possibilities of damage to Hibernate or Sleep mode, system recovery, and...
...-in hard disk drive, then it has the VAIO HDD Protection utility preinstalled for customizing your settings for protecting your hard disk drive against shock hazards. To activate VAIO HDD Protection 1 Click Start, All Programs, and VAIO Control Center. 2 Click Security and Hard Disk Drive Protection Settings. 3 Select the Activate hard disk drive protection check box. 4 Select one of the VAIO HDD Protection utility. VAIO HDD Protection is designed to minimize possibilities of damage to Hibernate or Sleep mode, system recovery, and...

User Guide
Page 186
...: 1 Click Start, Control Panel, Hardware and Sound, and Device Manager. 2 Double-click Imaging devices. 3 Right-click the device name for the camera. What should I use ? ❑ Do not place your computer into Sleep or Hibernate mode while you are using the built-in MOTION EYE camera. ❑ If the problem persists, you must reinstall the driver software for your computer automatically enters Sleep or Hibernate mode, change the corresponding power saving mode setting. n 186 N Troubleshooting Why...
...: 1 Click Start, Control Panel, Hardware and Sound, and Device Manager. 2 Double-click Imaging devices. 3 Right-click the device name for the camera. What should I use ? ❑ Do not place your computer into Sleep or Hibernate mode while you are using the built-in MOTION EYE camera. ❑ If the problem persists, you must reinstall the driver software for your computer automatically enters Sleep or Hibernate mode, change the corresponding power saving mode setting. n 186 N Troubleshooting Why...

User Guide
Page 200
... supported disc media. To download and install the updates on the computer, it with one with your optical disc drive. Note the possibility that some Blu-ray Disc contents on how to connect the computer to the Internet, see Using the Internet (page 61). n 200 N Troubleshooting What should I do if I cannot write data to DVD media? ❑ Make sure you are using the correct DVD recordable media. ❑ Check which DVD...
... supported disc media. To download and install the updates on the computer, it with one with your optical disc drive. Note the possibility that some Blu-ray Disc contents on how to connect the computer to the Internet, see Using the Internet (page 61). n 200 N Troubleshooting What should I do if I cannot write data to DVD media? ❑ Make sure you are using the correct DVD recordable media. ❑ Check which DVD...

User Guide
Page 201
See the online specifications to find out the type of your optical disc drive supports the Blu-ray Disc writing function. You cannot add or erase data to find out about the supported disc media. ❑ Make sure your optical disc drive, and then Reading and Writing Optical Discs (page 41) to or from the BD-R Disc media. n 201 N Troubleshooting Why can't I write data to selected models only. The DVD±RW/±R DL/RAM drive does not support it. ❑ BD-R Disc media are not rewritable. This Q & A entry applies to Blu-ray Disc media? !
See the online specifications to find out the type of your optical disc drive supports the Blu-ray Disc writing function. You cannot add or erase data to find out about the supported disc media. ❑ Make sure your optical disc drive, and then Reading and Writing Optical Discs (page 41) to or from the BD-R Disc media. n 201 N Troubleshooting Why can't I write data to selected models only. The DVD±RW/±R DL/RAM drive does not support it. ❑ BD-R Disc media are not rewritable. This Q & A entry applies to Blu-ray Disc media? !

User Guide
Page 206
... install the printer driver software before you use your printer. Follow these steps: 1 Click Start and Control Panel. 2 Click Printer under Hardware and Sound. 3 Right-click the printer icon and select Properties. 4 Click the Ports tab. 5 Click to the settings disables the bidirectional communication functions of the printer, such as data transfer, status monitoring, and remote panel. When your computer. ❑ You may enable printing. This change...
... install the printer driver software before you use your printer. Follow these steps: 1 Click Start and Control Panel. 2 Click Printer under Hardware and Sound. 3 Right-click the printer icon and select Properties. 4 Click the Ports tab. 5 Click to the settings disables the bidirectional communication functions of the printer, such as data transfer, status monitoring, and remote panel. When your computer. ❑ You may enable printing. This change...

User Guide
Page 211
n 211 N Troubleshooting Touch Pad What should I do not work, click Start, the arrow next to the Lock button, and Restart to the Shut down button and Restart. See Using the Touch Pad (page 34). ❑ Make sure that a mouse is not connected to your computer. ❑ If the pointer does not move while a software application is running, press the Alt+F4 keys to close the application window. ❑...
n 211 N Troubleshooting Touch Pad What should I do not work, click Start, the arrow next to the Lock button, and Restart to the Shut down button and Restart. See Using the Touch Pad (page 34). ❑ Make sure that a mouse is not connected to your computer. ❑ If the pointer does not move while a software application is running, press the Alt+F4 keys to close the application window. ❑...
User Guide
Page 222
... countries or areas http://esupport.sony.com/ES/VAIO/BR/ for answers in flash memory storage or the hard disk drive as on commonly encountered problems. Type a description of the problem and the Knowledge Database searches for the corresponding solutions online. These guides are stored on the built-in the sequence listed below. 1 VAIO Computer Documentation This on-screen User Guide (this manual) and the printed Welcome...
... countries or areas http://esupport.sony.com/ES/VAIO/BR/ for answers in flash memory storage or the hard disk drive as on commonly encountered problems. Type a description of the problem and the Knowledge Database searches for the corresponding solutions online. These guides are stored on the built-in the sequence listed below. 1 VAIO Computer Documentation This on-screen User Guide (this manual) and the printed Welcome...
User Guide
Page 229
... the software; Product activation procedures will not be detailed during setup and paying the required fees. n 229 N Support Options Microsoft® Office Professional 2007 60-Day Trial Version ! You can use , at which time the software will work only for evaluation purposes only. You can convert online by Internet: Internet service charges may apply. This trial software will operate under reduced-functionality mode, limiting end-user options and operations.
... the software; Product activation procedures will not be detailed during setup and paying the required fees. n 229 N Support Options Microsoft® Office Professional 2007 60-Day Trial Version ! You can use , at which time the software will work only for evaluation purposes only. You can convert online by Internet: Internet service charges may apply. This trial software will operate under reduced-functionality mode, limiting end-user options and operations.


