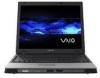

User Guide
Page 3
... Display Modes...100 Using the Multiple Monitors Function ...103 Connecting an External Microphone ...106 Connecting a Universal Serial Bus (USB) Device...107 Connecting a Printer ...110 Connecting an i.LINK Device ...112 Connecting to a Network (LAN) ...114 Customizing Your VAIO Computer ...116 Setting the Password ...117 Using Fingerprint Authentication ...126 Using Trusted Platform Module (TPM)...144 Setting Up Your Computer with VAIO Central ...149 Using the Power Saving Modes ...150 Managing Power with VAIO Power Management ...155 Upgrading Your VAIO Computer...157 Adding and Removing...
... Display Modes...100 Using the Multiple Monitors Function ...103 Connecting an External Microphone ...106 Connecting a Universal Serial Bus (USB) Device...107 Connecting a Printer ...110 Connecting an i.LINK Device ...112 Connecting to a Network (LAN) ...114 Customizing Your VAIO Computer ...116 Setting the Password ...117 Using Fingerprint Authentication ...126 Using Trusted Platform Module (TPM)...144 Setting Up Your Computer with VAIO Central ...149 Using the Power Saving Modes ...150 Managing Power with VAIO Power Management ...155 Upgrading Your VAIO Computer...157 Adding and Removing...

User Guide
Page 7
... VAIO Support Central. 2 Click VAIO Documentation. 3 Click VAIO Recovery Guide. To view the online Specifications: 1 Connect to the Internet. 2 Go to the original factory installed settings. Contains features of your computer. n7 N Before Use Non-printed Documentation ❑ User Guide (this on solving common problems. ❑ Specifications - The online Specifications describe the hardware and software configuration of your VAIO computer. Provides information about the software programs included with your entire hard disk drive to the Sony online support...
... VAIO Support Central. 2 Click VAIO Documentation. 3 Click VAIO Recovery Guide. To view the online Specifications: 1 Connect to the Internet. 2 Go to the original factory installed settings. Contains features of your computer. n7 N Before Use Non-printed Documentation ❑ User Guide (this on solving common problems. ❑ Specifications - The online Specifications describe the hardware and software configuration of your VAIO computer. Provides information about the software programs included with your entire hard disk drive to the Sony online support...

User Guide
Page 18
... in MOTION EYE camera is off . Indicator Power 1 Battery e Media Access Muting % Hard disk drive Num lock Caps lock Scroll lock Bluetooth technology * CAMERA OFF * WIRELESS LAN * On selected models only. Functions Illuminates when the power of power, and double-blinks when the battery is charging. Illuminates when the volume is turned off . Normal typing resumes when the Caps lock indicator is off . The numeric keypad is not active when the indicator is off . Press the Caps Lock key to activate the numeric keypad...
... in MOTION EYE camera is off . Indicator Power 1 Battery e Media Access Muting % Hard disk drive Num lock Caps lock Scroll lock Bluetooth technology * CAMERA OFF * WIRELESS LAN * On selected models only. Functions Illuminates when the power of power, and double-blinks when the battery is charging. Illuminates when the volume is turned off . Normal typing resumes when the Caps lock indicator is off . The numeric keypad is not active when the indicator is off . Press the Caps Lock key to activate the numeric keypad...
User Guide
Page 55
... taskbar to display the Wireless Device Switch window. The WIRELESS LAN indicator lights up. You can choose a 32-digit alphanumeric name. 9 Select Open from the Network Authentication drop-down box. 10 Select WEP from the Data Encryption drop-down box. 11 Deselect the The key is used for me automatically option button. The Wireless Network Connection Properties window appears. 6 Select the Wireless Networks tab. 7 Click the Add... button. On models that support the Bluetooth functionality*1 and...
... taskbar to display the Wireless Device Switch window. The WIRELESS LAN indicator lights up. You can choose a 32-digit alphanumeric name. 9 Select Open from the Network Authentication drop-down box. 10 Select WEP from the Data Encryption drop-down box. 11 Deselect the The key is used for me automatically option button. The Wireless Network Connection Properties window appears. 6 Select the Wireless Networks tab. 7 Click the Add... button. On models that support the Bluetooth functionality*1 and...

User Guide
Page 59
... access point is set up . On models that came with your access point for more information. 2 Turn on the WIRELESS or WIRELESS LAN switch. The WIRELESS LAN indicator lights up . The Wireless Network Connection window appears. 7 Follow the on the taskbar to see whether your desired wireless option(s) and click OK. 3 Click Start and then Control Panel. 4 Click Network and Internet Connections. 5 Click Network Connections. 6 In the right panel under LAN or High-Speed Internet, double-click Wireless Network Connection. Select your model supports the Bluetooth functionality...
... access point is set up . On models that came with your access point for more information. 2 Turn on the WIRELESS or WIRELESS LAN switch. The WIRELESS LAN indicator lights up . The Wireless Network Connection window appears. 7 Follow the on the taskbar to see whether your desired wireless option(s) and click OK. 3 Click Start and then Control Panel. 4 Click Network and Internet Connections. 5 Click Network Connections. 6 In the right panel under LAN or High-Speed Internet, double-click Wireless Network Connection. Select your model supports the Bluetooth functionality...

User Guide
Page 61
To connect to a Bluetooth device 1 Turn on the WIRELESS switch. 2 Double-click ( / ) on selected models only. You can establish wireless communication between these devices without cables and up to 33 feet (10 meters) range in open space. n 61 N Using Your VAIO Computer Using the Bluetooth Functionality The Bluetooth functionality is available on the taskbar to display the Wireless Device Switch window. 3 Select the Enable Bluetooth Device option. 4 Click OK. See the online Specifications to see whether your computer and...
To connect to a Bluetooth device 1 Turn on the WIRELESS switch. 2 Double-click ( / ) on selected models only. You can establish wireless communication between these devices without cables and up to 33 feet (10 meters) range in open space. n 61 N Using Your VAIO Computer Using the Bluetooth Functionality The Bluetooth functionality is available on the taskbar to display the Wireless Device Switch window. 3 Select the Enable Bluetooth Device option. 4 Click OK. See the online Specifications to see whether your computer and...
User Guide
Page 68
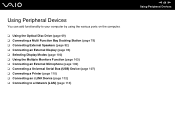
... Disc Drive (page 69) ❑ Connecting a Multi Function Bay Docking Station (page 79) ❑ Connecting External Speakers (page 92) ❑ Connecting an External Display (page 93) ❑ Selecting Display Modes (page 100) ❑ Using the Multiple Monitors Function (page 103) ❑ Connecting an External Microphone (page 106) ❑ Connecting a Universal Serial Bus (USB) Device (page 107) ❑ Connecting a Printer (page 110) ❑ Connecting an i.LINK Device (page 112) ❑ Connecting to a Network (LAN) (page 114) n 68 N Using Peripheral Devices
... Disc Drive (page 69) ❑ Connecting a Multi Function Bay Docking Station (page 79) ❑ Connecting External Speakers (page 92) ❑ Connecting an External Display (page 93) ❑ Selecting Display Modes (page 100) ❑ Using the Multiple Monitors Function (page 103) ❑ Connecting an External Microphone (page 106) ❑ Connecting a Universal Serial Bus (USB) Device (page 107) ❑ Connecting a Printer (page 110) ❑ Connecting an i.LINK Device (page 112) ❑ Connecting to a Network (LAN) (page 114) n 68 N Using Peripheral Devices

User Guide
Page 77
... the optical disc drive. A new window appears with Removable Storage. If the CD Drive window appears, click Take no action and then click OK. 2 Right-click Start and then click Explore. 3 In the Folders panel on your system's hardware configuration. Do not strike or shake your optical disc drive, and then Reading and Writing CDs and DVDs (page 71) to find the type of your...
... the optical disc drive. A new window appears with Removable Storage. If the CD Drive window appears, click Take no action and then click OK. 2 Right-click Start and then click Explore. 3 In the Folders panel on your system's hardware configuration. Do not strike or shake your optical disc drive, and then Reading and Writing CDs and DVDs (page 71) to find the type of your...

User Guide
Page 104
n 104 N Using Peripheral Devices To find which video controller your model includes, see the printed Specifications sheet. If the Monitor Settings window appears, click Yes. Models with the ATI video controller 1 Click Start and then Control Panel. 2 Click Appearance and Themes. 3 Click Display. 4 Select the Settings tab. 5 Click the monitor icon marked 2. 6 Select the Extend my Windows desktop onto this monitor option. 7 Click Apply and then OK. To select the Multiple Monitors mode !
n 104 N Using Peripheral Devices To find which video controller your model includes, see the printed Specifications sheet. If the Monitor Settings window appears, click Yes. Models with the ATI video controller 1 Click Start and then Control Panel. 2 Click Appearance and Themes. 3 Click Display. 4 Select the Settings tab. 5 Click the monitor icon marked 2. 6 Select the Extend my Windows desktop onto this monitor option. 7 Click Apply and then OK. To select the Multiple Monitors mode !
User Guide
Page 117
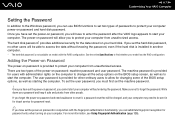
... the BIOS setup options, as well as to start your computer. If you forget the power-on password and need to be able to access the data without entering the password. To set the user password, you can use BIOS functions to set the hard disk password, no other users will allow for changing some of the power-on password in conjunction with the RAID configuration. Adding the Power-on Password The power-on password is not available on models...
... the BIOS setup options, as well as to start your computer. If you forget the power-on password and need to be able to access the data without entering the password. To set the user password, you can use BIOS functions to set the hard disk password, no other users will allow for changing some of the power-on password in conjunction with the RAID configuration. Adding the Power-on Password The power-on password is not available on models...

User Guide
Page 124
... Start and then Control Panel. 2 Click the User Accounts icon. 3 Click your user account under or pick an account to change. 4 Click Create a password. 5 In the Type a new password and Type the new password again to confirm fields, enter the password for your account. 6 Click Create Password. ✍ See Help and Support Center for password entry when turning on the Windows password. By setting the Windows password, you can substitute fingerprint recognition for more information, see Using...
... Start and then Control Panel. 2 Click the User Accounts icon. 3 Click your user account under or pick an account to change. 4 Click Create a password. 5 In the Type a new password and Type the new password again to confirm fields, enter the password for your account. 6 Click Create Password. ✍ See Help and Support Center for password entry when turning on the Windows password. By setting the Windows password, you can substitute fingerprint recognition for more information, see Using...

User Guide
Page 147
... at computer startup. ✍ You can also disable the TPM and clear the TPM configuration on the Security tab. 4 Press the < or , key to set the power-on password and the hard disk password (on the BIOS setup screen. 2 Install the Infineon TPM Professional Package. 3 Initialize and configure the TPM. and press the Enter key. ! Before enabling the TPM, make backup copies of the TPM configuration. n 147 N Customizing Your VAIO Computer Configuring the TPM...
... at computer startup. ✍ You can also disable the TPM and clear the TPM configuration on the Security tab. 4 Press the < or , key to set the power-on password and the hard disk password (on the BIOS setup screen. 2 Install the Infineon TPM Professional Package. 3 Initialize and configure the TPM. and press the Enter key. ! Before enabling the TPM, make backup copies of the TPM configuration. n 147 N Customizing Your VAIO Computer Configuring the TPM...

User Guide
Page 157
.... n 157 N Upgrading Your VAIO Computer Upgrading Your VAIO Computer Your computer and memory modules use high precision components and electronic connectors technology. For assistance, contact an authorized Sony Service Center. For the type of module and amount of your guarantee due to mishandling, we recommend that: ❑ You contact your model, refer to install a new memory module. ❑ You do not touch the connectors or open the memory module compartment cover.
.... n 157 N Upgrading Your VAIO Computer Upgrading Your VAIO Computer Your computer and memory modules use high precision components and electronic connectors technology. For assistance, contact an authorized Sony Service Center. For the type of module and amount of your guarantee due to mishandling, we recommend that: ❑ You contact your model, refer to install a new memory module. ❑ You do not touch the connectors or open the memory module compartment cover.

User Guide
Page 181
... have installed the latest video driver. ❑ On some time before the desktop screen appears due to network security checkups. ❑ If the TPM is not guaranteed. Why does it take time before my computer starts? ❑ If Norton Internet Security's Personal Firewall is active, it . n 181 N Troubleshooting What should I cannot remember the BIOS password? The originally selected VAIO's screen saver disables the timer setting...
... have installed the latest video driver. ❑ On some time before the desktop screen appears due to network security checkups. ❑ If the TPM is not guaranteed. Why does it take time before my computer starts? ❑ If Norton Internet Security's Personal Firewall is active, it . n 181 N Troubleshooting What should I cannot remember the BIOS password? The originally selected VAIO's screen saver disables the timer setting...

User Guide
Page 189
... driver software for the camera. Follow these steps: 1 Click Start and then Control Panel. 2 Click the Performance and Maintenance icon. 3 Click the System icon. 4 Click Device Manager on the Hardware tab. 5 Double-click Imaging devices. 6 Right-click Sony Visual Communication Camera VGP-VCC1 and click Update Driver. What should I use ? ❑ Do not place your computer automatically enters Standby or Hibernate mode, change the corresponding power saving mode setting. For changing the setting, see Using...
... driver software for the camera. Follow these steps: 1 Click Start and then Control Panel. 2 Click the Performance and Maintenance icon. 3 Click the System icon. 4 Click Device Manager on the Hardware tab. 5 Double-click Imaging devices. 6 Right-click Sony Visual Communication Camera VGP-VCC1 and click Update Driver. What should I use ? ❑ Do not place your computer automatically enters Standby or Hibernate mode, change the corresponding power saving mode setting. For changing the setting, see Using...

User Guide
Page 207
... bidirectional communication functions are provided with the Windows operating system installed on your computer may need to install the printer driver software before you use your printer. Follow these steps: 1 Click Start and then Control Panel. 2 Click Printers and Other Hardware. 3 Click Printers and Faxes. 4 Right-click the printer icon and select Properties. 5 Click the Ports tab. 6 Click to an AC power source. n 207 N Troubleshooting Printing...
... bidirectional communication functions are provided with the Windows operating system installed on your computer may need to install the printer driver software before you use your printer. Follow these steps: 1 Click Start and then Control Panel. 2 Click Printers and Other Hardware. 3 Click Printers and Faxes. 4 Right-click the printer icon and select Properties. 5 Click the Ports tab. 6 Click to an AC power source. n 207 N Troubleshooting Printing...
User Guide
Page 210
... the problem persists, make your selections. 6 Click OK to your preferences in the Pad Buttons or Stick Buttons box, and then click Apply to change the left and right button assignments? Press the Ctrl+Alt+Delete keys simultaneously. Follow these steps: 1 Click Start and then Control Panel. 2 Click Printers and Other Hardware. 3 Click Mouse. 4 Click the Buttons tab. 5 Select your computer. n 210 N Troubleshooting Pointing Device What...
... the problem persists, make your selections. 6 Click OK to your preferences in the Pad Buttons or Stick Buttons box, and then click Apply to change the left and right button assignments? Press the Ctrl+Alt+Delete keys simultaneously. Follow these steps: 1 Click Start and then Control Panel. 2 Click Printers and Other Hardware. 3 Click Mouse. 4 Click the Buttons tab. 5 Select your computer. n 210 N Troubleshooting Pointing Device What...
User Guide
Page 217
... to a power source. Why can 't I use my TFT/DVI monitor connected to the DVI-D port? n 217 N Troubleshooting Multi Function Bay Docking Station What should be used for a Why can 't I cannot use the devices connected to the multi function bay docking station? The printer port printer only. Make sure to use the AC adapter supplied with the ATI video controller is internally connected to the USB and should I do if I use the device connected to...
... to a power source. Why can 't I use my TFT/DVI monitor connected to the DVI-D port? n 217 N Troubleshooting Multi Function Bay Docking Station What should be used for a Why can 't I cannot use the devices connected to the multi function bay docking station? The printer port printer only. Make sure to use the AC adapter supplied with the ATI video controller is internally connected to the USB and should I do if I use the device connected to...

User Guide
Page 218
... USB001 is internally connected to the USB. Follow these steps to check the printer port settings: 1 Click Start and then Control Panel. 2 Click the Printers and Other Hardware icon. 3 Click the Printers and Faxes icon. 4 Right-click the printer icon to delete the printer. Then, install the printer driver once again. Ask the manufacturer of your printer for the driver that supports Windows XP...
... USB001 is internally connected to the USB. Follow these steps to check the printer port settings: 1 Click Start and then Control Panel. 2 Click the Printers and Other Hardware icon. 3 Click the Printers and Faxes icon. 4 Right-click the printer icon to delete the printer. Then, install the printer driver once again. Ask the manufacturer of your printer for the driver that supports Windows XP...

User Guide
Page 220
... service provides instant access to information on where to go for answers to questions about your computer is connected to open the VAIO Support web site and view the information. n 220 N Support Options Support Options The section contains information on commonly encountered problems. Type a description of the problem and the Knowledge Database searches for the corresponding solutions online. Click the VAIO Update notice to the Internet, VAIO Update...
... service provides instant access to information on where to go for answers to questions about your computer is connected to open the VAIO Support web site and view the information. n 220 N Support Options Support Options The section contains information on commonly encountered problems. Type a description of the problem and the Knowledge Database searches for the corresponding solutions online. Click the VAIO Update notice to the Internet, VAIO Update...


