
User Guide
Page 2
... Started 11 Locating Controls and Ports 12 About the Indicator Lights 18 Connecting a Power Source 19 Using the Battery Pack 21 Shutting Down Your Computer Safely 28 Using the Power Saving Modes 29 Updating Your Computer 32 Using Your VAIO Computer 33 Using the Keyboard 34 Using the Touch Pad 36 Using Special-function Buttons 37 Using the Quick Web Access Function 38 Using the Built-in Camera 40 Using the Optical Disc Drive 41 Using "Memory Stick 48 Using Other Modules / Memory Cards 55 Using the Internet 62 Using the Network (LAN 63 Using the Wireless LAN...
... Started 11 Locating Controls and Ports 12 About the Indicator Lights 18 Connecting a Power Source 19 Using the Battery Pack 21 Shutting Down Your Computer Safely 28 Using the Power Saving Modes 29 Updating Your Computer 32 Using Your VAIO Computer 33 Using the Keyboard 34 Using the Touch Pad 36 Using Special-function Buttons 37 Using the Quick Web Access Function 38 Using the Built-in Camera 40 Using the Optical Disc Drive 41 Using "Memory Stick 48 Using Other Modules / Memory Cards 55 Using the Internet 62 Using the Network (LAN 63 Using the Wireless LAN...

User Guide
Page 5
...and Support - Get started with my VAIO Get help in storage device to find useful documentation such as below: - Safety guidelines and owner information. 2. VAIO User Guide (This manual) - VAIO Recovery Center User Guide - Software Information Troubleshoot my VAIO Maintain and troubleshoot your VAIO computer with Internet and wireless setup, security setup, personalizing your VAIO computer, creating recovery discs, and more. To access Help and Support: 1 Click Start and Help and Support. 2 Choose from the following categories to the original factory settings - Information...
...and Support - Get started with my VAIO Get help in storage device to find useful documentation such as below: - Safety guidelines and owner information. 2. VAIO User Guide (This manual) - VAIO Recovery Center User Guide - Software Information Troubleshoot my VAIO Maintain and troubleshoot your VAIO computer with Internet and wireless setup, security setup, personalizing your VAIO computer, creating recovery discs, and more. To access Help and Support: 1 Click Start and Help and Support. 2 Choose from the following categories to the original factory settings - Information...

User Guide
Page 8
... are looking for your Sony VAIO computer. Sony Style Backstage Technicians can find the information you may call Sony directly. In Store Service & Support (available in USA only) Make an appointment with the setup of your computer 4 The hardware component or the software program that is causing the problem 5 A brief description of the display on the computer. 2 Your computer's serial number You can find...
... are looking for your Sony VAIO computer. Sony Style Backstage Technicians can find the information you may call Sony directly. In Store Service & Support (available in USA only) Make an appointment with the setup of your computer 4 The hardware component or the software program that is causing the problem 5 A brief description of the display on the computer. 2 Your computer's serial number You can find...

User Guide
Page 16
... support an eSATA port multiplier. When disconnecting an eSATA device, click the Safely Remove Hardware and Eject Media icon on the taskbar and select the device before removal. - In this case, use one of the device. speeds. ! Getting Started > Locating Controls and Ports Left n 16 N A DC IN port (page 19) B Network (LAN) port (page 63) C Air vent D Monitor port (page 76) E HDMI output port (page 78) F eSATA/USB port* Connect an external device compliant with the USB 2.0 standard and supports...
... support an eSATA port multiplier. When disconnecting an eSATA device, click the Safely Remove Hardware and Eject Media icon on the taskbar and select the device before removal. - In this case, use one of the device. speeds. ! Getting Started > Locating Controls and Ports Left n 16 N A DC IN port (page 19) B Network (LAN) port (page 63) C Air vent D Monitor port (page 76) E HDMI output port (page 78) F eSATA/USB port* Connect an external device compliant with the USB 2.0 standard and supports...

User Guide
Page 18
... into Sleep mode or turn it off while this indicator light is lit.) When the indicator light is unlit, the memory card is not in lowercase if you are enabled. Press the Caps Lock key to change how you scroll the display. Letters appear in use . See Charging the Battery Pack (page 24) for more wireless options are using and does not work with the following indicator lights: Indicator Power 1 Charge Built-in MOTION EYE camera Media Access Disc drive Num lock Caps lock Scroll lock WIRELESS Functions...
... into Sleep mode or turn it off while this indicator light is lit.) When the indicator light is unlit, the memory card is not in lowercase if you are enabled. Press the Caps Lock key to change how you scroll the display. Letters appear in use . See Charging the Battery Pack (page 24) for more wireless options are using and does not work with the following indicator lights: Indicator Power 1 Charge Built-in MOTION EYE camera Media Access Disc drive Num lock Caps lock Scroll lock WIRELESS Functions...

User Guide
Page 36
... can disable/enable the touch pad while a mouse is available only with two fingers for pointer operations. Press the left button (3) once. Be sure to your finger on the touch pad (1) to place the pointer (2) on the touch pad. With some software applications, you will be able to use the VAIO Control Center. ! Using Your VAIO Computer > Using the Touch Pad Using the Touch Pad You can point to, select, drag, and scroll objects...
... can disable/enable the touch pad while a mouse is available only with two fingers for pointer operations. Press the left button (3) once. Be sure to your finger on the touch pad (1) to place the pointer (2) on the touch pad. With some software applications, you will be able to use the VAIO Control Center. ! Using Your VAIO Computer > Using the Touch Pad Using the Touch Pad You can point to, select, drag, and scroll objects...

User Guide
Page 57
... the Safely Remove Hardware and Eject Media window. 1 Locate the ExpressCard slot. 2 Click the Safely Remove Hardware and Eject Media icon on the taskbar. 3 Select the hardware you use the most recent driver software provided by the ExpressCard module manufacturer. your computer, be sure to insert the ExpressCard slot protector into the slot easily, remove it gently and verify you want to unplug is not displayed on -screen instructions for removing the ExpressCard module...
... the Safely Remove Hardware and Eject Media window. 1 Locate the ExpressCard slot. 2 Click the Safely Remove Hardware and Eject Media icon on the taskbar. 3 Select the hardware you use the most recent driver software provided by the ExpressCard module manufacturer. your computer, be sure to insert the ExpressCard slot protector into the slot easily, remove it gently and verify you want to unplug is not displayed on -screen instructions for removing the ExpressCard module...

User Guide
Page 62
... threats. Depending on devices required for Internet access and how to connect your computer to the Internet, ask your ISP. ✍ To connect your computer to the Internet using the Internet, you need to sign up with your computer to connect to set up the wireless LAN network. The following types of Internet connection services may need to connect an external modem device, for example a USB telephone modem, a DSL modem, or a cable modem, to your...
... threats. Depending on devices required for Internet access and how to connect your computer to the Internet, ask your ISP. ✍ To connect your computer to the Internet using the Internet, you need to sign up with your computer to connect to set up the wireless LAN network. The following types of Internet connection services may need to connect an external modem device, for example a USB telephone modem, a DSL modem, or a cable modem, to your...
User Guide
Page 79
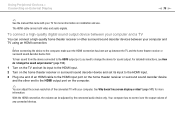
... sound decoder device and set up between the TV and the home theater receiver or surround sound decoder device first. Before connecting the device to the computer, make sure the HDMI connection has been set its input to the HDMI output port on installation and use. With the HDMI connection, the volume can adjust the screen resolution of any connected devices. See Why doesn't my screen display a video? (page 147) for sound output. The HDMI cable carries both video...
... sound decoder device and set up between the TV and the home theater receiver or surround sound decoder device first. Before connecting the device to the computer, make sure the HDMI connection has been set its input to the HDMI output port on installation and use. With the HDMI connection, the volume can adjust the screen resolution of any connected devices. See Why doesn't my screen display a video? (page 147) for sound output. The HDMI cable carries both video...

User Guide
Page 87
... set two types of the Windows password will be prompted after you select your computer. ! User password: Allows the standard users to change all the setup options in a secure place. To reset the password, contact an authorized Sony service/support center. Do not to forget your computer from unauthorized access by entering the machine password. Customizing Your VAIO Computer > Setting the Password n 87 N Setting the Password Setting the password allows you forget the machine password, the password needs...
... set two types of the Windows password will be prompted after you select your computer. ! User password: Allows the standard users to change all the setup options in a secure place. To reset the password, contact an authorized Sony service/support center. Do not to forget your computer from unauthorized access by entering the machine password. Customizing Your VAIO Computer > Setting the Password n 87 N Setting the Password Setting the password allows you forget the machine password, the password needs...

User Guide
Page 91
... Setup, and then press the Enter key. To remove the password, leave the Enter New Password and Confirm New Password fields blank and press the Enter key. 6 Press the < or , key to display the Security tab, select Set User Password, and then press the Enter key. 5 On the password entry screen, enter the current password once and a new password twice, and then press the Enter key. The password entry screen appears. Customizing Your VAIO Computer > Setting the Password n 91 N To change or remove the power...
... Setup, and then press the Enter key. To remove the password, leave the Enter New Password and Confirm New Password fields blank and press the Enter key. 6 Press the < or , key to display the Security tab, select Set User Password, and then press the Enter key. 5 On the password entry screen, enter the current password once and a new password twice, and then press the Enter key. The password entry screen appears. Customizing Your VAIO Computer > Setting the Password n 91 N To change or remove the power...

User Guide
Page 96
... Windows power management functions to suit your requirements for power consumption. The VAIO Power Management function is added to step 3. Selecting a Power Plan When you start the computer, a power status icon appears on the taskbar and select Power Options. 2 Select your desired power plan. Change the Sleep mode and display settings as needed. 2 If you need to change the power plan settings 1 Click Change plan settings on AC or battery power to ensure better operation of your computer and longer battery...
... Windows power management functions to suit your requirements for power consumption. The VAIO Power Management function is added to step 3. Selecting a Power Plan When you start the computer, a power status icon appears on the taskbar and select Power Options. 2 Select your desired power plan. Change the Sleep mode and display settings as needed. 2 If you need to change the power plan settings 1 Click Change plan settings on AC or battery power to ensure better operation of your computer and longer battery...

User Guide
Page 97
Upgrading Your VAIO Computer > n 97 N Upgrading Your VAIO Computer Your VAIO computer and memory modules use high precision components and electronic connectors technology. The type of module and the amount of your computer. See the specifications to install a new memory module. ❑ You should not touch the connectors or open the memory module compartment cover. To find out about Your VAIO Computer (page 5). For assistance, contact an authorized Sony Service Center. To avoid invalidation...
Upgrading Your VAIO Computer > n 97 N Upgrading Your VAIO Computer Your VAIO computer and memory modules use high precision components and electronic connectors technology. The type of module and the amount of your computer. See the specifications to install a new memory module. ❑ You should not touch the connectors or open the memory module compartment cover. To find out about Your VAIO Computer (page 5). For assistance, contact an authorized Sony Service Center. To avoid invalidation...

User Guide
Page 123
... the power button until the computer turns off. ! If the Windows Security window appears, click Restart. 4 If this problem, turn off your computer and remove the battery pack. To restore your computer does not restart, press the Ctrl+Alt+Delete keys and click the arrow next to the computer. What should I do if the charge indicator light is changed before the computer completely enters Sleep or Hibernate mode...
... the power button until the computer turns off. ! If the Windows Security window appears, click Restart. 4 If this problem, turn off your computer and remove the battery pack. To restore your computer does not restart, press the Ctrl+Alt+Delete keys and click the arrow next to the computer. What should I do if the charge indicator light is changed before the computer completely enters Sleep or Hibernate mode...

User Guide
Page 128
... I create recovery discs? You can restore the preinstalled software and drivers using the VAIO Recovery Center. If your computer system: from recovery discs and from a recovery partition. How do I restore my computer system to its factory default settings? To access the VAIO Recovery Center User Guide, click VAIO Recovery Center User Guide under Use my VAIO in Help and Support (page 5). For information on the VAIO Recovery Center, click VAIO Recovery Center User Guide under Use my VAIO in the left pane. To check the volume of the recovery partition...
... I create recovery discs? You can restore the preinstalled software and drivers using the VAIO Recovery Center. If your computer system: from recovery discs and from a recovery partition. How do I restore my computer system to its factory default settings? To access the VAIO Recovery Center User Guide, click VAIO Recovery Center User Guide under Use my VAIO in Help and Support (page 5). For information on the VAIO Recovery Center, click VAIO Recovery Center User Guide under Use my VAIO in the left pane. To check the volume of the recovery partition...

User Guide
Page 132
... lights due to an AC outlet. This problem occurs when you can set an appropriate value to eliminate flicker noise. Connect your computer automatically enters Sleep or Hibernate mode, change the setting, see Using the Power Saving Modes (page 29). In some software applications, you use ? Troubleshooting > Built-in Camera n 132 N What should I do if movie playback shows dropped frames while my computer is running on battery power...
... lights due to an AC outlet. This problem occurs when you can set an appropriate value to eliminate flicker noise. Connect your computer automatically enters Sleep or Hibernate mode, change the setting, see Using the Power Saving Modes (page 29). In some software applications, you use ? Troubleshooting > Built-in Camera n 132 N What should I do if movie playback shows dropped frames while my computer is running on battery power...

User Guide
Page 142
... optical disc drive. Follow these steps: 1 Click Start and Control Panel. 2 Click System and Security. 3 Click System. 4 Click Device Manager in the optical disc drive and damage the drive or cause it to malfunction. ❑ If a region code warning appears, the disc may need to enable the device or reinstall the driver software. 5 Double-click the optical disc drive device to open a list of the optical disc drives of your computer, do not use the...
... optical disc drive. Follow these steps: 1 Click Start and Control Panel. 2 Click System and Security. 3 Click System. 4 Click Device Manager in the optical disc drive and damage the drive or cause it to malfunction. ❑ If a region code warning appears, the disc may need to enable the device or reinstall the driver software. 5 Double-click the optical disc drive device to open a list of the optical disc drives of your computer, do not use the...

User Guide
Page 149
... need to install the printer driver software before you use your computer may enable printing. Troubleshooting > Printing n 149 N Printing What should I do if I cannot print a document? ❑ Make sure your printer is on, and the printer cable is securely connected to the ports on the printer and your computer. ❑ Make sure your printer is not functioning after your computer resumes from a power saving mode (Sleep...
... need to install the printer driver software before you use your computer may enable printing. Troubleshooting > Printing n 149 N Printing What should I do if I cannot print a document? ❑ Make sure your printer is on, and the printer cable is securely connected to the ports on the printer and your computer. ❑ Make sure your printer is not functioning after your computer resumes from a power saving mode (Sleep...

User Guide
Page 153
See Using the Touch Pad (page 36). ❑ Make sure that a mouse is not connected to your computer. ❑ If the pointer does not move while a software application is running, press the Alt+F4 keys to close the application window. ❑ If the Alt+F4 keys do if the touch pad does not work , press and hold the power button until the computer turns off. ! Troubleshooting > Touch Pad n 153 N Touch Pad What...
See Using the Touch Pad (page 36). ❑ Make sure that a mouse is not connected to your computer. ❑ If the pointer does not move while a software application is running, press the Alt+F4 keys to close the application window. ❑ If the Alt+F4 keys do if the touch pad does not work , press and hold the power button until the computer turns off. ! Troubleshooting > Touch Pad n 153 N Touch Pad What...

User Guide
Page 156
... device connected to a port, such as the USB port, HDMI output port, optical output port, or headphones jack, you need to cancel the Play Windows Startup sound check box. 5 Click OK. To turn off the Windows startup sound, follow these steps: 1 Click Start and Control Panel. 2 Click Hardware and Sound. 3 Click Manage audio devices under Sound. 5 On the Playback tab, select your desired device for sound output. 1 Close all open programs. 2 Click Start and Control Panel. 3 Click Hardware and Sound. 4 Click Manage audio devices under Sound. 4 On the Sounds...
... device connected to a port, such as the USB port, HDMI output port, optical output port, or headphones jack, you need to cancel the Play Windows Startup sound check box. 5 Click OK. To turn off the Windows startup sound, follow these steps: 1 Click Start and Control Panel. 2 Click Hardware and Sound. 3 Click Manage audio devices under Sound. 5 On the Playback tab, select your desired device for sound output. 1 Close all open programs. 2 Click Start and Control Panel. 3 Click Hardware and Sound. 4 Click Manage audio devices under Sound. 4 On the Sounds...


