
User Manual
Page 2
... Started 9 Locating Controls and Ports 10 About the Indicator Lights 16 Connecting a Power Source 17 Using the Battery Pack 19 Shutting Down Your Computer Safely 26 Using the Power Saving Modes 27 Updating Your Computer 30 Using Your VAIO Computer 31 Using the Keyboard 32 Using the Touch Pad 34 Using Special-function Buttons 35 Using the Quick Web Access Function 36 Using the Built-in Camera 38 Using the Optical Disc Drive 39 Using "Memory Stick 46 Using Other Modules / Memory Cards 53 Using the Internet 60 Using the Network (LAN 61 Using the Wireless LAN 62 Using...
... Started 9 Locating Controls and Ports 10 About the Indicator Lights 16 Connecting a Power Source 17 Using the Battery Pack 19 Shutting Down Your Computer Safely 26 Using the Power Saving Modes 27 Updating Your Computer 30 Using Your VAIO Computer 31 Using the Keyboard 32 Using the Touch Pad 34 Using Special-function Buttons 35 Using the Quick Web Access Function 36 Using the Built-in Camera 38 Using the Optical Disc Drive 39 Using "Memory Stick 46 Using Other Modules / Memory Cards 53 Using the Internet 60 Using the Network (LAN 61 Using the Wireless LAN 62 Using...

User Manual
Page 14
... USB dedicated ports. - speeds. ! When disconnecting an eSATA device, click the Safely Remove Hardware and Eject Media icon on using the eSATA/USB port: - The port does not support an eSATA port multiplier. In this case, use one of the device. Getting Started > Locating Controls and Ports Left n 14 N A DC IN port (page 17) B Network (LAN) port (page 61) C Air vent D Monitor port (page 76) E HDMI output port (page 78) F eSATA/USB port* Connect an external device compliant with the USB 2.0 standard and supports...
... USB dedicated ports. - speeds. ! When disconnecting an eSATA device, click the Safely Remove Hardware and Eject Media icon on using the eSATA/USB port: - The port does not support an eSATA port multiplier. In this case, use one of the device. Getting Started > Locating Controls and Ports Left n 14 N A DC IN port (page 17) B Network (LAN) port (page 61) C Air vent D Monitor port (page 76) E HDMI output port (page 78) F eSATA/USB port* Connect an external device compliant with the USB 2.0 standard and supports...

User Manual
Page 16
... press the Shift key while the indicator light is lit. See Charging the Battery Pack (page 22) for more wireless options are using and does not work with the following indicator lights: Indicator Power 1 Charge Built-in MOTION EYE camera Media Access Disc drive Num lock Caps lock Scroll lock WIRELESS Functions Illuminates in uppercase. Do not place the computer into Sleep mode or turn off while this indicator light is lit. Getting Started > About the Indicator Lights n 16 N About the Indicator Lights Your computer...
... press the Shift key while the indicator light is lit. See Charging the Battery Pack (page 22) for more wireless options are using and does not work with the following indicator lights: Indicator Power 1 Charge Built-in MOTION EYE camera Media Access Disc drive Num lock Caps lock Scroll lock WIRELESS Functions Illuminates in uppercase. Do not place the computer into Sleep mode or turn off while this indicator light is lit. Getting Started > About the Indicator Lights n 16 N About the Indicator Lights Your computer...

User Manual
Page 34
... to zoom out. ✍ You can disable/enable the touch pad while a mouse is connected to your finger along the right edge of the touch pad to scroll vertically. Press the right button (4) once. Slide your computer. Once vertical or horizontal scrolling is available only with two fingers for pointer operations. To change the touch pad settings, use only the keyboard for zooming. Press the left to move...
... to zoom out. ✍ You can disable/enable the touch pad while a mouse is connected to your finger along the right edge of the touch pad to scroll vertically. Press the right button (4) once. Slide your computer. Once vertical or horizontal scrolling is available only with two fingers for pointer operations. To change the touch pad settings, use only the keyboard for zooming. Press the left to move...

User Manual
Page 44
...), you can play this disc in most regions of the drive. Any difficulties caused by the warranty. Unless the region code indicates "2" (Europe belongs to region "2"), "5" (Russia belongs to change the region code while the WinDVD or WinDVD BD software is running, restart the software or eject the disc and re-insert it to make the new setting effective. ❑ Do not...
...), you can play this disc in most regions of the drive. Any difficulties caused by the warranty. Unless the region code indicates "2" (Europe belongs to region "2"), "5" (Russia belongs to change the region code while the WinDVD or WinDVD BD software is running, restart the software or eject the disc and re-insert it to make the new setting effective. ❑ Do not...

User Manual
Page 55
the Safely Remove Hardware and Eject Media icon is not displayed on -screen instructions for removing the ExpressCard module. 5 Push in the ExpressCard module toward the computer so that the module pops out. 6 Gently take hold of the slot. Insert the ExpressCard slot protector to unplug is off. - Before moving your computer is not displayed in the proper direction. Make sure you use the most recent driver software provided...
the Safely Remove Hardware and Eject Media icon is not displayed on -screen instructions for removing the ExpressCard module. 5 Push in the ExpressCard module toward the computer so that the module pops out. 6 Gently take hold of the slot. Insert the ExpressCard slot protector to unplug is off. - Before moving your computer is not displayed in the proper direction. Make sure you use the most recent driver software provided...

User Manual
Page 60
...; To connect your computer to the Internet using the Internet, you need to sign up with an Internet Service Provider (ISP) and set up the wireless LAN network. For detailed instructions on connection setups and modem configuration, see the manual that came with your ISP: ❑ Fiber to the Home (FTTH) ❑ Digital Subscriber Line (DSL) ❑ Cable modem ❑ Satellite ❑ Dial-up devices required for example a USB telephone...
...; To connect your computer to the Internet using the Internet, you need to sign up with an Internet Service Provider (ISP) and set up the wireless LAN network. For detailed instructions on connection setups and modem configuration, see the manual that came with your ISP: ❑ Fiber to the Home (FTTH) ❑ Digital Subscriber Line (DSL) ❑ Cable modem ❑ Satellite ❑ Dial-up devices required for example a USB telephone...

User Manual
Page 79
... end of an HDMI cable to the HDMI input. 2 Turn on the home theater receiver or surround sound decoder device and set up between your computer and TV using an HDMI connection. ! With the HDMI connection, the volume can adjust the screen resolution of the connected TV with your computer. To hear sound from the device connected to the HDMI output port, you need to change the sound output device? (page 158). 1 Turn on the TV...
... end of an HDMI cable to the HDMI input. 2 Turn on the home theater receiver or surround sound decoder device and set up between your computer and TV using an HDMI connection. ! With the HDMI connection, the volume can adjust the screen resolution of the connected TV with your computer. To hear sound from the device connected to the HDMI output port, you need to change the sound output device? (page 158). 1 Turn on the TV...

User Manual
Page 87
... own password. ✍ Entry of Password Power-on or returns to start the computer. - Type of the Windows password will be prompted after you select your user account. Customizing Your VAIO Computer > Setting the Password n 87 N Setting the Password Setting the password allows you to protect your computer from Sleep mode or Hibernate mode. ! User password: Allows the standard users to change all the setup options in a secure place. To reset the password, contact an authorized Sony service/support...
... own password. ✍ Entry of Password Power-on or returns to start the computer. - Type of the Windows password will be prompted after you select your user account. Customizing Your VAIO Computer > Setting the Password n 87 N Setting the Password Setting the password allows you to protect your computer from Sleep mode or Hibernate mode. ! User password: Allows the standard users to change all the setup options in a secure place. To reset the password, contact an authorized Sony service/support...

User Manual
Page 91
Customizing Your VAIO Computer > Setting the Password n 91 N To change or remove the power-on password (user password) 1 Turn on the computer. 2 Press the F2 key when the VAIO logo appears. To remove the password, leave the Enter New Password and Confirm New Password fields blank and press the Enter key. 6 Press the < or , key to display the Security tab, select Set User Password, and then press the Enter key. 5 On the password entry screen, enter the current password once and a new password twice, and...
Customizing Your VAIO Computer > Setting the Password n 91 N To change or remove the power-on password (user password) 1 Turn on the computer. 2 Press the F2 key when the VAIO logo appears. To remove the password, leave the Enter New Password and Confirm New Password fields blank and press the Enter key. 6 Press the < or , key to display the Security tab, select Set User Password, and then press the Enter key. 5 On the password entry screen, enter the current password once and a new password twice, and...

User Manual
Page 96
... indicates what kind of your computer and longer battery life. Change the Sleep mode and display settings as needed. 2 If you need to change the power plan settings 1 Click Change plan settings on the taskbar. Otherwise, click Save changes. 3 Click the VAIO Power Management tab. With this icon to step 3. Click this software application, you can check the current power plan settings with the VAIO Power Management Viewer in the Power Options window. Selecting a Power Plan When you start...
... indicates what kind of your computer and longer battery life. Change the Sleep mode and display settings as needed. 2 If you need to change the power plan settings 1 Click Change plan settings on the taskbar. Otherwise, click Save changes. 3 Click the VAIO Power Management tab. With this icon to step 3. Click this software application, you can check the current power plan settings with the VAIO Power Management Viewer in the Power Options window. Selecting a Power Plan When you start...

User Manual
Page 97
... dealer to find out about the configuration of memory installed on a computer. ❑ You should not touch the connectors or open the memory module compartment cover. Contact VAIO-Link if you purchased. Upgrading Your VAIO Computer > n 97 N Upgrading Your VAIO Computer Your VAIO computer and memory modules use high precision components and electronic connectors technology. See the specifications to install a new memory module. ❑ You should not install it yourself, if you are...
... dealer to find out about the configuration of memory installed on a computer. ❑ You should not touch the connectors or open the memory module compartment cover. Contact VAIO-Link if you purchased. Upgrading Your VAIO Computer > n 97 N Upgrading Your VAIO Computer Your VAIO computer and memory modules use high precision components and electronic connectors technology. See the specifications to install a new memory module. ❑ You should not install it yourself, if you are...

User Manual
Page 128
... the discs, click Start, All Programs, VAIO Recovery Center, and Create Recovery Discs. ! You can create recovery discs using the VAIO Recovery Center. See the Recovery and Troubleshooting Guide for more information. If your computer system: from recovery discs and from a recovery partition. Troubleshooting > Recovery n 128 N Recovery How can I reinstall the original software and drivers? There are used to restore your computer system to recover your computer is not equipped with a built-in optical disc drive, you need to its factory default settings. The discs...
... the discs, click Start, All Programs, VAIO Recovery Center, and Create Recovery Discs. ! You can create recovery discs using the VAIO Recovery Center. See the Recovery and Troubleshooting Guide for more information. If your computer system: from recovery discs and from a recovery partition. Troubleshooting > Recovery n 128 N Recovery How can I reinstall the original software and drivers? There are used to restore your computer system to recover your computer is not equipped with a built-in optical disc drive, you need to its factory default settings. The discs...

User Manual
Page 133
... CPU load increases. To reduce flicker noise, change the corresponding power saving mode setting. If your computer to one of power. This problem occurs when you can set an appropriate value to an AC outlet. To change the setting, see Using the Power Saving Modes (page 27). The battery pack is the video input from the built-in camera suspended for a few seconds? Connect your computer automatically enters Sleep...
... CPU load increases. To reduce flicker noise, change the corresponding power saving mode setting. If your computer to one of power. This problem occurs when you can set an appropriate value to an AC outlet. To change the setting, see Using the Power Saving Modes (page 27). The battery pack is the video input from the built-in camera suspended for a few seconds? Connect your computer automatically enters Sleep...

User Manual
Page 134
... check the settings: 1 Click Start and Control Panel. 2 Click View network status and tasks under Network and Internet. 3 Click Connect to a network to confirm that your computer to a wireless LAN access point using . ❑ Make sure the WIRELESS switch is on and the WIRELESS indicator light is lit on your computer. ❑ Make sure power to the access point is on selected models only, is disabled by distance and obstructions. You may need to move...
... check the settings: 1 Click Start and Control Panel. 2 Click View network status and tasks under Network and Internet. 3 Click Connect to a network to confirm that your computer to a wireless LAN access point using . ❑ Make sure the WIRELESS switch is on and the WIRELESS indicator light is lit on your computer. ❑ Make sure power to the access point is on selected models only, is disabled by distance and obstructions. You may need to move...

User Manual
Page 144
... computer's hardware devices. Follow these steps: 1 Click Start and Control Panel. 2 Click System and Security. 3 Click System. 4 Click Device Manager in the optical disc drive and damage the drive or cause it to make sure the region code is installed. Check the package to malfunction. ❑ If a region code warning appears, the disc may need to enable the device or reinstall the driver software. 5 Double-click the optical disc drive device to a disc. Adhesive...
... computer's hardware devices. Follow these steps: 1 Click Start and Control Panel. 2 Click System and Security. 3 Click System. 4 Click Device Manager in the optical disc drive and damage the drive or cause it to make sure the region code is installed. Check the package to malfunction. ❑ If a region code warning appears, the disc may need to enable the device or reinstall the driver software. 5 Double-click the optical disc drive device to a disc. Adhesive...

User Manual
Page 151
... need to install the printer driver software before you use your computer may enable printing. Troubleshooting > Printing n 151 N Printing What should I do if I cannot print a document? ❑ Make sure your printer is on, and the printer cable is securely connected to the ports on the printer and your computer. ❑ Make sure your printer is not functioning after your computer resumes from a power saving mode (Sleep...
... need to install the printer driver software before you use your computer may enable printing. Troubleshooting > Printing n 151 N Printing What should I do if I cannot print a document? ❑ Make sure your printer is on, and the printer cable is securely connected to the ports on the printer and your computer. ❑ Make sure your printer is not functioning after your computer resumes from a power saving mode (Sleep...

User Manual
Page 155
.... See Using the Touch Pad (page 34). ❑ Make sure that a mouse is not connected to your computer. ❑ If the pointer does not move while a software application is running, press the Alt+F4 keys to close the application window. ❑ If the Alt+F4 keys do if the touch pad does not work , press and hold the power button until the computer turns off. ! Turning off...
.... See Using the Touch Pad (page 34). ❑ Make sure that a mouse is not connected to your computer. ❑ If the pointer does not move while a software application is running, press the Alt+F4 keys to close the application window. ❑ If the Alt+F4 keys do if the touch pad does not work , press and hold the power button until the computer turns off. ! Turning off...

User Manual
Page 158
.... 2 Click Start and Control Panel. 3 Click Hardware and Sound. 4 Click Manage audio devices under Sound. 4 On the Sounds tab, click to change the sound output device? If you do not hear sound from the device connected to a port, such as the USB port, HDMI output port, optical output port, or headphones jack, you need to cancel the Play Windows Startup sound check box. 5 Click OK. How do I turn off the Windows startup sound? Troubleshooting > Audio/Video n 158 N Audio/Video How do I change the device for sound output and click Set Default.
.... 2 Click Start and Control Panel. 3 Click Hardware and Sound. 4 Click Manage audio devices under Sound. 4 On the Sounds tab, click to change the sound output device? If you do not hear sound from the device connected to a port, such as the USB port, HDMI output port, optical output port, or headphones jack, you need to cancel the Play Windows Startup sound check box. 5 Click OK. How do I turn off the Windows startup sound? Troubleshooting > Audio/Video n 158 N Audio/Video How do I change the device for sound output and click Set Default.
Brochure
Page 2
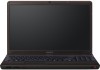
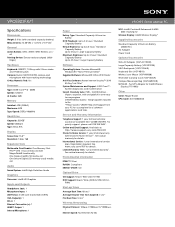
... preserving Hard Drive precious battery life. Registration required. See actual warranty for Intel® Wireless Display (PTV1000) Type: Intel® Core™ i3 - 350M Enjoy the powerful performaSynscteemodf iagnnInosteticl®s aCnodrem™aini3te-n3a5n0cMe processor (2.26GHz1 ) and 4GB of pre-installed system Speed: 2.26GHz1 memory. VPCEB23FX/T VAIO® E Series Laptop PC Specifications Standout from Suspend: 2 sec16 VGA Output(s): 1 First Boot Time: 5 min17 DC-In: 1 Ethernet Connection (s): 1 Wireless/Networking HDMI...
... preserving Hard Drive precious battery life. Registration required. See actual warranty for Intel® Wireless Display (PTV1000) Type: Intel® Core™ i3 - 350M Enjoy the powerful performaSynscteemodf iagnnInosteticl®s aCnodrem™aini3te-n3a5n0cMe processor (2.26GHz1 ) and 4GB of pre-installed system Speed: 2.26GHz1 memory. VPCEB23FX/T VAIO® E Series Laptop PC Specifications Standout from Suspend: 2 sec16 VGA Output(s): 1 First Boot Time: 5 min17 DC-In: 1 Ethernet Connection (s): 1 Wireless/Networking HDMI...


