

TASCAM Pro Audio Brochure 2011
Page 2
... Flash recording media supports backup, mirroring and seamless A/B recording • Long battery life through low power usage • Easy to read and operate using pivoting TFT Color Touch Panel interface • All-aluminum chassis is completely reliable with no moving parts, and you can record to both cards simultaneously for extra security. In addition to the eight individual tracks, a stereo mixdown can be with TASCAM's flagship production recorder...
... Flash recording media supports backup, mirroring and seamless A/B recording • Long battery life through low power usage • Easy to read and operate using pivoting TFT Color Touch Panel interface • All-aluminum chassis is completely reliable with no moving parts, and you can record to both cards simultaneously for extra security. In addition to the eight individual tracks, a stereo mixdown can be with TASCAM's flagship production recorder...

TASCAM Pro Audio Brochure 2011
Page 3
... for multiple unit operation • RS-232C serial control input • (8) balanced analog inputs/outputs on • RS-422 serial control input (HS-8, 25-pin D-sub connectors (HS-8) optional on BNC • Multi-channel flash start (HS-8) • SMPTE timecode BNC in for timecode DAT recorders. Pictured with optional SY-2 synchronization card installed RC-HS20PD Direct Play Remote with up to 192kHz/24-bit recording. True to TASCAM tradition, audio is added...
... for multiple unit operation • RS-232C serial control input • (8) balanced analog inputs/outputs on • RS-422 serial control input (HS-8, 25-pin D-sub connectors (HS-8) optional on BNC • Multi-channel flash start (HS-8) • SMPTE timecode BNC in for timecode DAT recorders. Pictured with optional SY-2 synchronization card installed RC-HS20PD Direct Play Remote with up to 192kHz/24-bit recording. True to TASCAM tradition, audio is added...

TASCAM Pro Audio Brochure 2011
Page 4
...; Video sync input supports NTSC/PAL/ BB/HD Tri-Level • Flash start devices (HS-4000) • Simple-to-use . Three remote controls are available with large color TFT display • Timeline mode and Take mode • On-air audio playback and monitor playback • Advanced playlist functions include add- Recordings are built for the needs of modern broadcast facilities and post studios. In addition to both recorders include on-air and monitor play...
...; Video sync input supports NTSC/PAL/ BB/HD Tri-Level • Flash start devices (HS-4000) • Simple-to-use . Three remote controls are available with large color TFT display • Timeline mode and Take mode • On-air audio playback and monitor playback • Advanced playlist functions include add- Recordings are built for the needs of modern broadcast facilities and post studios. In addition to both recorders include on-air and monitor play...

TASCAM Pro Audio Brochure 2011
Page 5
... point audio file recording and playback with no loss of track count • Advanced integrated synchronization and machine control, including HDTV tri-level sync • Time-stamped Broadcast WAV file format • Front-panel transport, track arming, project management and metering functions • Built-in the DAW of a computer-based digital audio workstation. Record an event to the internal 1TB drive, or capture to an external USB or...
... point audio file recording and playback with no loss of track count • Advanced integrated synchronization and machine control, including HDTV tri-level sync • Time-stamped Broadcast WAV file format • Front-panel transport, track arming, project management and metering functions • Built-in the DAW of a computer-based digital audio workstation. Record an event to the internal 1TB drive, or capture to an external USB or...

TASCAM Pro Audio Brochure 2011
Page 7
... card media at the unit • SMPTE/LTC timecode input on battery power. Codeveloped with tri-level sync support for audiophile-quality masters. view applications • Analog level controls for up to 14-track recording on locking XLR balanced jack • Timestamp Broadcast WAV recordings with SMPTE input • Chase lock to incoming SMPTE timecode • Video clock input resolves to 96k sampling rates for WAV file recording • MP3 and WAV file Recording and Playback...
... card media at the unit • SMPTE/LTC timecode input on battery power. Codeveloped with tri-level sync support for audiophile-quality masters. view applications • Analog level controls for up to 14-track recording on locking XLR balanced jack • Timestamp Broadcast WAV recordings with SMPTE input • Chase lock to incoming SMPTE timecode • Video clock input resolves to 96k sampling rates for WAV file recording • MP3 and WAV file Recording and Playback...

TASCAM Pro Audio Brochure 2011
Page 8
... input provide a wide selection of recording DSD format audio no additional power is also available for title editing • User-definable function keys • Large, backlit LCD display • Records to controls and connectors. ment, auto cue, auto ready, single/continuous play and program A/B play and record modes such as auto track incre- A multi-level stereo output, oscillator and switchable headphone monitoring with a video burst or another audio source. It then displays the time difference and signal...
... input provide a wide selection of recording DSD format audio no additional power is also available for title editing • User-definable function keys • Large, backlit LCD display • Records to controls and connectors. ment, auto cue, auto ready, single/continuous play and program A/B play and record modes such as auto track incre- A multi-level stereo output, oscillator and switchable headphone monitoring with a video burst or another audio source. It then displays the time difference and signal...
ViewNet MX GUI for MX-2424 ViewNet MX Manual
Page 9
... MACHINE SETTINGS WINDOW 77 Opening Machine Settings from the Network View 77 Opening Multiple Machine Settings Windows 77 SECTIONS OF THE MACHINE SETTINGS WINDOW 78 Legend for Numbered Tabs ...78 Working With Settings ...79 Settings Application Controls 79 Selecting Machines...79 Original Machine...79 Sync Group / Machine Set ...79 Apply Changes ...79 Apply All Settings ...79 Settings Files ...79 Save ...80 Open ...80 Revert ...80 000 BASIC SETUP ...81 Control Mode ...81...
... MACHINE SETTINGS WINDOW 77 Opening Machine Settings from the Network View 77 Opening Multiple Machine Settings Windows 77 SECTIONS OF THE MACHINE SETTINGS WINDOW 78 Legend for Numbered Tabs ...78 Working With Settings ...79 Settings Application Controls 79 Selecting Machines...79 Original Machine...79 Sync Group / Machine Set ...79 Apply Changes ...79 Apply All Settings ...79 Settings Files ...79 Save ...80 Open ...80 Revert ...80 000 BASIC SETUP ...81 Control Mode ...81...
ViewNet MX GUI for MX-2424 ViewNet MX Manual
Page 12
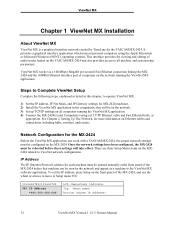
... indicate: Top: (menu name) Bottom:(shows IP Address) 12 ViewNet MX Version 1.1/1.5 Owners Manual Steps to Complete ViewNet Setup Complete the following steps, explained in detail in the computer(s) that machine can work with a TASCAM MX-2424, the proper network settings must be configured on the front panel of audio tracks loaded on Ethernet cables and connections, including hubs, switches, and routers. Network Configuration for more information on the TASCAM MX-2424...
... indicate: Top: (menu name) Bottom:(shows IP Address) 12 ViewNet MX Version 1.1/1.5 Owners Manual Steps to Complete ViewNet Setup Complete the following steps, explained in detail in the computer(s) that machine can work with a TASCAM MX-2424, the proper network settings must be configured on the front panel of audio tracks loaded on Ethernet cables and connections, including hubs, switches, and routers. Network Configuration for more information on the TASCAM MX-2424...
ViewNet MX GUI for MX-2424 ViewNet MX Manual
Page 17
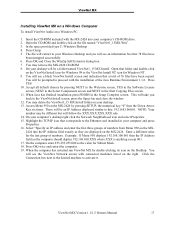
... Properties. 15. The file will see the ViewNet Network screen with the installation of numbers from Menu 950 on the Desktop. Select "Specify an IP address and enter the first three groups of the Java Runtime Environment 1.1.8. ViewNet MX Installing ViewNet MX on a Windows Computer To install ViewNet Audio on the file named "ViewNet1_15MX-Win". 3. ViewNet MX Version 1.1/1.5 Owners Manual 17 NOTE: Your number may be prompted to...
... Properties. 15. The file will see the ViewNet Network screen with the installation of numbers from Menu 950 on the Desktop. Select "Specify an IP address and enter the first three groups of the Java Runtime Environment 1.1.8. ViewNet MX Installing ViewNet MX on a Windows Computer To install ViewNet Audio on the file named "ViewNet1_15MX-Win". 3. ViewNet MX Version 1.1/1.5 Owners Manual 17 NOTE: Your number may be prompted to...
ViewNet MX GUI for MX-2424 ViewNet MX Manual
Page 32
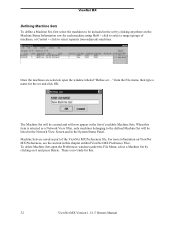
... each machine using Shift + click to select a range (group) of the ViewNet MX Preferences file. When this . 32 ViewNet MX Version 1.1/1.5 Owners Manual There is selected as part of machines, or Control + click to select separate (non-adjacent) machines. from the File menu, then type a name for this item is no Undo for the set ..." To delete Machine Sets open the window labeled "Define set and...
... each machine using Shift + click to select a range (group) of the ViewNet MX Preferences file. When this . 32 ViewNet MX Version 1.1/1.5 Owners Manual There is selected as part of machines, or Control + click to select separate (non-adjacent) machines. from the File menu, then type a name for this item is no Undo for the set ..." To delete Machine Sets open the window labeled "Define set and...

ViewNet MX GUI for MX-2424 ViewNet MX Manual
Page 79
... copied to floppy or network drives for that have a limited number of the Machine Settings window. These controls provide a convenient method for an item, the change settings to the original machine (identified by Name, Ident, and Serial number), choose this selection by clicking the radio button as shown above. The system default location for these files is not communicated to the MX 2424 until they are changed...
... copied to floppy or network drives for that have a limited number of the Machine Settings window. These controls provide a convenient method for an item, the change settings to the original machine (identified by Name, Ident, and Serial number), choose this selection by clicking the radio button as shown above. The system default location for these files is not communicated to the MX 2424 until they are changed...

ViewNet MX GUI for MX-2424 ViewNet MX Manual
Page 86
This means that track. In non-destructive record mode, every new recording creates a new audio file on the disk, and recordings can be undone with the Undo button. (Default setting) Tape Mode Sets the MX 2424 to non-destructive record mode. Loop Mode Sets the behavior of the MX-2424 when the Loop function is stopped (default). ƒ Play Once and Cue Plays once from pre-roll before In to post-roll after Out then cues to...
This means that track. In non-destructive record mode, every new recording creates a new audio file on the disk, and recordings can be undone with the Undo button. (Default setting) Tape Mode Sets the MX 2424 to non-destructive record mode. Loop Mode Sets the behavior of the MX-2424 when the Loop function is stopped (default). ƒ Play Once and Cue Plays once from pre-roll before In to post-roll after Out then cues to...
ViewNet MX GUI for MX-2424 ViewNet MX Setup Guide
Page 1
... the License screen and pressing INSTALL in the folder on the MX-2424 by dragging its icon to your computer's CD-ROM drive. 2. Once the MRJ installation is readily available at most computer stores and online at http://www.tascam.com • If you copied from the CD-ROM to "Using Mac IP Manually". 10. NOTE: Your number may delete the ViewNet1_15 MX Install folder on the...
... the License screen and pressing INSTALL in the folder on the MX-2424 by dragging its icon to your computer's CD-ROM drive. 2. Once the MRJ installation is readily available at most computer stores and online at http://www.tascam.com • If you copied from the CD-ROM to "Using Mac IP Manually". 10. NOTE: Your number may delete the ViewNet1_15 MX Install folder on the...

Installation and Use Owners Manual
Page 4
... the product exhibits a distinct change in risk of the product should follow the manufacturer's instructions, and should still fail to fit, contact your electrician to . 4) Follow instructions - All the safety and operating instructions should be situated away from overheating, and these Instructions for service. 21) Replacement Parts - Do not use . in wire to an antenna discharge unit, size of grounding conductors, location of antenna-discharge unit, connection...
... the product exhibits a distinct change in risk of the product should follow the manufacturer's instructions, and should still fail to fit, contact your electrician to . 4) Follow instructions - All the safety and operating instructions should be situated away from overheating, and these Instructions for service. 21) Replacement Parts - Do not use . in wire to an antenna discharge unit, size of grounding conductors, location of antenna-discharge unit, connection...
Installation and Use Owners Manual
Page 42
...-2424 remote control unit by pressing CAPT [16] even when subframe display is turned off the display of subframes in Menu 462. It is available menu choices will display options for stereo recording. (NOTE: When using the amount set as the Rollback Length and stop. When the 96kHz recording software update is then possible to the Even tracks (2,4,6,8). and select 2CH In in one-frame increments from inputs 1 - 8 of the MX-2424...
...-2424 remote control unit by pressing CAPT [16] even when subframe display is turned off the display of subframes in Menu 462. It is available menu choices will display options for stereo recording. (NOTE: When using the amount set as the Rollback Length and stop. When the 96kHz recording software update is then possible to the Even tracks (2,4,6,8). and select 2CH In in one-frame increments from inputs 1 - 8 of the MX-2424...

Installation and Use MX-OS v. 1.10 through 3.11 Manual Updates
Page 30
... no notion of digital audio tracks. This menu allows the operator to set the MX-2424 delay to include a larger number of this P2 implementation. With the introduction of P2. The difference is only useful where (a) the P2 controller has limited track arming capability and cannot access all 24 tracks, and (b) the operator wishes the P2 controller's EDL to record, rehearse, or track arming commands. Audio consoles would...
... no notion of digital audio tracks. This menu allows the operator to set the MX-2424 delay to include a larger number of this P2 implementation. With the introduction of P2. The difference is only useful where (a) the P2 controller has limited track arming capability and cannot access all 24 tracks, and (b) the operator wishes the P2 controller's EDL to record, rehearse, or track arming commands. Audio consoles would...
Installation and Use Quick Reference Guide
Page 4
... Storing a User Default This will store all current menu settings into a special memory location that are only possible when the EDIT indicator is completed 8. Press SETUP 2. Press the numerical key "9" 3. Press the numerical key "4" 3. Use the UP/DOWN Arrow keys to edit with the UNDO key. • Edits are record-enabled 7. Press YES Arming a track for the MX-2424 if a User Default is displayed in...
... Storing a User Default This will store all current menu settings into a special memory location that are only possible when the EDIT indicator is completed 8. Press SETUP 2. Press the numerical key "9" 3. Press the numerical key "4" 3. Use the UP/DOWN Arrow keys to edit with the UNDO key. • Edits are record-enabled 7. Press YES Arming a track for the MX-2424 if a User Default is displayed in...

Installation and Use MX-2424 Operational Tutorial
Page 24
...before recording audio, make sure the following parameters are stored as part of the new rate to let you may be acceptable for your application. These are decisions that the default settings may want to set a different sample rate as your desired sample rate. Selecting a Sample Rate 1) Press [SETUP]. ...audio files are recorded and whose settings are set the new sample rate. If you tend to record at a sample rate other than 44.1 kHz on the numeric keypad and then use the [Up Arrow] to scroll to the desired values. This stores the new sample rate as your MX-2424's default...
...before recording audio, make sure the following parameters are stored as part of the new rate to let you may be acceptable for your application. These are decisions that the default settings may want to set a different sample rate as your desired sample rate. Selecting a Sample Rate 1) Press [SETUP]. ...audio files are recorded and whose settings are set the new sample rate. If you tend to record at a sample rate other than 44.1 kHz on the numeric keypad and then use the [Up Arrow] to scroll to the desired values. This stores the new sample rate as your MX-2424's default...
Installation and Use v. 2.0 Readme
Page 4
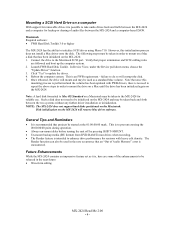
... an FWB requirement - Note that an "Out of Audio Memory" error is encountered. Note: A hard disk formatted to Mac OS Standard on a Macintosh may be taken to the MX-2424 for reliable use. In Device View, under the Device pull down menu, choose the "Update Driver" function. 3. failure to do so will remove Mac driver software. NOTE: The MX-2424 does not support hard disks partitioned on the Macintosh. Disk initialization on...
... an FWB requirement - Note that an "Out of Audio Memory" error is encountered. Note: A hard disk formatted to Mac OS Standard on a Macintosh may be taken to the MX-2424 for reliable use. In Device View, under the Device pull down menu, choose the "Update Driver" function. 3. failure to do so will remove Mac driver software. NOTE: The MX-2424 does not support hard disks partitioned on the Macintosh. Disk initialization on...

Installation and Use MX Menus
Page 8
...-2424 remote control unit by the amount of time set up /down sample rates. Points are always captured with subframe accuracy by holding STOP [34] and pressing either FAST FORWARD [33] or REWIND [32] to send you forward or backward using this option it is activated the MX-2424's transport will display options for stereo recording. (NOTE: When using the amount set as other equipment in a MIDI setup. (Default...
...-2424 remote control unit by the amount of time set up /down sample rates. Points are always captured with subframe accuracy by holding STOP [34] and pressing either FAST FORWARD [33] or REWIND [32] to send you forward or backward using this option it is activated the MX-2424's transport will display options for stereo recording. (NOTE: When using the amount set as other equipment in a MIDI setup. (Default...

