
User's Guide
Page 4
... YOUR REFERENCE ONLY. Please note that the illustrations or setting values in this manual are not sure about the respective information, please ask your network administrator or MIS staff for the camera. z Chapter 2, Hardware Installation, describes the hardware installation procedure for help. ... Pro, helps you to use the software. z Chapter 7, Appendix. The actual settings and values depend on your TV-IP301/TV-IP301W Advanced Day/Night (Wireless) Internet Camera Server with Audio, includes: z Chapter 1, Introduction, provides the general information on how to install and use your ...
... YOUR REFERENCE ONLY. Please note that the illustrations or setting values in this manual are not sure about the respective information, please ask your network administrator or MIS staff for the camera. z Chapter 2, Hardware Installation, describes the hardware installation procedure for help. ... Pro, helps you to use the software. z Chapter 7, Appendix. The actual settings and values depend on your TV-IP301/TV-IP301W Advanced Day/Night (Wireless) Internet Camera Server with Audio, includes: z Chapter 1, Introduction, provides the general information on how to install and use your ...
User's Guide
Page 21
... can access and manage the Advance Day/Night (Wireless) Internet Camera through: 1) a web browser, and 2) the enclosed software IPView Pro. When the login page appears, type admin in the Address bar and press [Enter]. NOTE: The computer's IP address must correspond with a web browser. Internet Explorer in this manual), and type the default IP address http://192...
... can access and manage the Advance Day/Night (Wireless) Internet Camera through: 1) a web browser, and 2) the enclosed software IPView Pro. When the login page appears, type admin in the Address bar and press [Enter]. NOTE: The computer's IP address must correspond with a web browser. Internet Explorer in this manual), and type the default IP address http://192...
User's Guide
Page 34
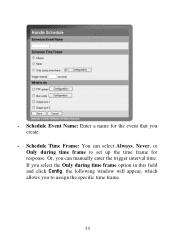
Or, you can select Always, Never, or Only during time frame option in this field and click Config, the following window will appear, which allows you create. - Schedule Time Frame: You can manually enter the trigger interval time. Schedule Event Name: Enter a name for the event that you to set up the time frame for response. - If you select the Only during time frame to assign the specific time frame. 33
Or, you can select Always, Never, or Only during time frame option in this field and click Config, the following window will appear, which allows you create. - Schedule Time Frame: You can manually enter the trigger interval time. Schedule Event Name: Enter a name for the event that you to set up the time frame for response. - If you select the Only during time frame to assign the specific time frame. 33
User's Guide
Page 43
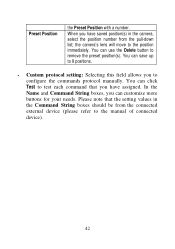
the camera's lens will move to remove the preset position(s). You can click Test to 8 positions. - In the Name and Command String boxes, you to the manual of connected device). 42 When you have saved position(s) in the Command String boxes should be from the pull-down... field allows you can save up to test each command that the setting values in the camera, select the position number from the connected external device (please refer to configure the commands protocol manually. Please note that you have assigned. Preset Position the Preset Position with a number.
the camera's lens will move to remove the preset position(s). You can click Test to 8 positions. - In the Name and Command String boxes, you to the manual of connected device). 42 When you have saved position(s) in the Command String boxes should be from the pull-down... field allows you can save up to test each command that the setting values in the camera, select the position number from the connected external device (please refer to configure the commands protocol manually. Please note that you have assigned. Preset Position the Preset Position with a number.
User's Guide
Page 46
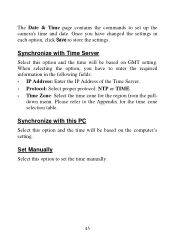
... the IP Address of the Time Server. - Please refer to store the settings. The Date & Time page contains the commands to set up the camera's time and date. Time Zone: Select the time zone for the time zone selection table. Synchronize with this PC Select this option and the time... will be based on the computer's setting. Protocol: Select proper protocol: NTP or TIME. - Set Manually Select this option to set the time manually. 45 When selecting the option, you have to enter the required information in each option, click Save to the Appendix for ...
... the IP Address of the Time Server. - Please refer to store the settings. The Date & Time page contains the commands to set up the camera's time and date. Time Zone: Select the time zone for the time zone selection table. Synchronize with this PC Select this option and the time... will be based on the computer's setting. Protocol: Select proper protocol: NTP or TIME. - Set Manually Select this option to set the time manually. 45 When selecting the option, you have to enter the required information in each option, click Save to the Appendix for ...

User's Guide
Page 53
...Length: Select the proper setting for digital information. 52 In this mode, the user has to manually enter the starting password in their access point or gateway, as well as an eight-bit value...'. In general, a larger key length creates a stronger cipher. the camera will automatically pad your keyboard's typing zone are valid. These character counts result in hexadecimal (base 16) ...type to a bit count of 40 and 104, respectively; AES AES (Advanced Encryption Standard) is used to network authentication servers. These character counts result in upper or lower case) are ...
...Length: Select the proper setting for digital information. 52 In this mode, the user has to manually enter the starting password in their access point or gateway, as well as an eight-bit value...'. In general, a larger key length creates a stronger cipher. the camera will automatically pad your keyboard's typing zone are valid. These character counts result in hexadecimal (base 16) ...type to a bit count of 40 and 104, respectively; AES AES (Advanced Encryption Standard) is used to network authentication servers. These character counts result in upper or lower case) are ...
User's Guide
Page 59
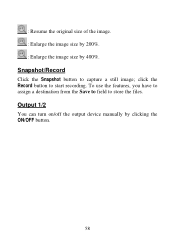
: Resume the original size of the image. : Enlarge the image size by 200%. : Enlarge the image size by clicking the ON/OFF button. 58 Snapshot/Record Click the Snapshot button to start recording. click the Record button to capture a still image; Output 1/2 You can turn on/off the output device manually by 400%. To use the features, you have to assign a destination from the Save to field to store the files.
: Resume the original size of the image. : Enlarge the image size by 200%. : Enlarge the image size by clicking the ON/OFF button. 58 Snapshot/Record Click the Snapshot button to start recording. click the Record button to capture a still image; Output 1/2 You can turn on/off the output device manually by 400%. To use the features, you have to assign a destination from the Save to field to store the files.
User's Guide
Page 69
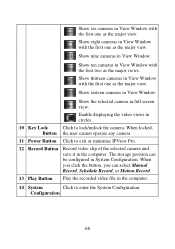
... System Configuration. The storage position can select Manual Record, Schedule Record, or Motion Record. 13 Play Button Play the recorded video file in full screen view. Show six cameras in the computer. When locked, Button the user cannot operate any camera. 11 Power Button Click to exit or minimize IPView... When you click the button, you can be configured in View Window with the first one as the major view. Show thirteen cameras in circles. 10 Key Lock Click to enter the System Configuration. Enable displaying the video views in View Window with the first ...
... System Configuration. The storage position can select Manual Record, Schedule Record, or Motion Record. 13 Play Button Play the recorded video file in full screen view. Show six cameras in the computer. When locked, Button the user cannot operate any camera. 11 Power Button Click to exit or minimize IPView... When you click the button, you can be configured in View Window with the first one as the major view. Show thirteen cameras in circles. 10 Key Lock Click to enter the System Configuration. Enable displaying the video views in View Window with the first ...
User's Guide
Page 75
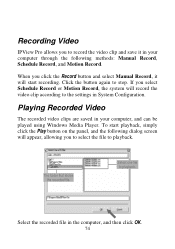
... allows you to record the video clip and save it will start playback, simply click the Play button on the panel, and the following methods: Manual Record, Schedule Record, and Motion Record. When you click the Record button and select...
... allows you to record the video clip and save it will start playback, simply click the Play button on the panel, and the following methods: Manual Record, Schedule Record, and Motion Record. When you click the Record button and select...

User's Guide
Page 98
... no adaptor fitted with your desktop. A: A probable cause might be noisy if the camera is used is too bright such as direct exposure to adjust the focus manually as this will produce dithering artifacts in Adjust Camera Focus. A: A likely issue is that the CCD sensor becomes overloaded when the light ...lens without fitting the adaptor first. You need to show at least 16-bit. NOTE: Applying only 16 or 256 colors on the MPEG4 Internet CCD Camera, what should be correctly adjusted for the line of broad vertical white line appear through out the image? A: The focus might be the...
... no adaptor fitted with your desktop. A: A probable cause might be noisy if the camera is used is too bright such as direct exposure to adjust the focus manually as this will produce dithering artifacts in Adjust Camera Focus. A: A likely issue is that the CCD sensor becomes overloaded when the light ...lens without fitting the adaptor first. You need to show at least 16-bit. NOTE: Applying only 16 or 256 colors on the MPEG4 Internet CCD Camera, what should be correctly adjusted for the line of broad vertical white line appear through out the image? A: The focus might be the...

User's Guide
Page 109
... workstation to communicate with each other . With dynamic addressing, a device can have a different IP address every time it connects to a network without the hassle of manually assigning it is an Internet protocol that can be added to the network. The cabling or transmission method they send is the medium.
... workstation to communicate with each other . With dynamic addressing, a device can have a different IP address every time it connects to a network without the hassle of manually assigning it is an Internet protocol that can be added to the network. The cabling or transmission method they send is the medium.