
User's Guide
Page 4
... OF THE CAMERA 15 CHAPTER 3 16 ACCESSING THE CAMERA 16 3.1 USING IP SETUP 16 3.2 ACCESSING TO THE CAMERA 21 3.3 CONFIGURING THE IP ADDRESS OF THE PC 24 CHAPTER 4 25 CONFIGURING THE CAMERA 25 4.1 USING THE WEB CONFIGURATION 25 4.2 USING SMART WIZARD 26 4.3 BASIC SETUP 31 4.4 NETWORK SETTINGS 36 4.5 SETTING UP VIDEO & AUDIO 44 4.6 EVENT SERVER CONFIGURATION 49...
... OF THE CAMERA 15 CHAPTER 3 16 ACCESSING THE CAMERA 16 3.1 USING IP SETUP 16 3.2 ACCESSING TO THE CAMERA 21 3.3 CONFIGURING THE IP ADDRESS OF THE PC 24 CHAPTER 4 25 CONFIGURING THE CAMERA 25 4.1 USING THE WEB CONFIGURATION 25 4.2 USING SMART WIZARD 26 4.3 BASIC SETUP 31 4.4 NETWORK SETTINGS 36 4.5 SETTING UP VIDEO & AUDIO 44 4.6 EVENT SERVER CONFIGURATION 49...

User's Guide
Page 17
Click the IP Setup from the Auto-Run menu screen. CHAPTER 3 ACCESSING THE CAMERA 3.1 Using IP Setup The camera comes with a conveniently utility, IP Setup, which is included in the Installation CD-ROM, allowing you to search the camera on your computer's CD-ROM drive to the IPSetup Setup Wizard appears. - 16 - Insert the Installation CD-ROM into your network easily. 1. Click "Next" when the Welcome to initiate the Auto-Run program. 2. Then IP Setup Wizard will appear.
Click the IP Setup from the Auto-Run menu screen. CHAPTER 3 ACCESSING THE CAMERA 3.1 Using IP Setup The camera comes with a conveniently utility, IP Setup, which is included in the Installation CD-ROM, allowing you to search the camera on your computer's CD-ROM drive to the IPSetup Setup Wizard appears. - 16 - Insert the Installation CD-ROM into your network easily. 1. Click "Next" when the Welcome to initiate the Auto-Run program. 2. Then IP Setup Wizard will appear.

User's Guide
Page 23
NOTE If you are initially access to the camera, you with many useful information and functions, including: - 22 - After you login into the Web Configuration of the camera, the main page will be ask to proceed. Permission request depends on the Internet security settings of the Web Configuration provides you will appear as below: Camera Information Zoom In Live View/ Setup Compression Function Night Mode Live View Image The main page of your computer. Click Yes to install a new plug-in for the camera.
NOTE If you are initially access to the camera, you with many useful information and functions, including: - 22 - After you login into the Web Configuration of the camera, the main page will be ask to proceed. Permission request depends on the Internet security settings of the Web Configuration provides you will appear as below: Camera Information Zoom In Live View/ Setup Compression Function Night Mode Live View Image The main page of your computer. Click Yes to install a new plug-in for the camera.

User's Guide
Page 24
...reduce the frame rate of the connected camera. Zoom In - Display the camera's location and the current date & time. Click the buttons to deliver clearer images in the dark environment. Displays the real-time image of video setting. (TV-IP312/TV-IP312W only) Live View Image... - However, this function at the same time. Listen allows you receive the on-site sound and voice from the camera. - 23 - Click the button to enable the "nightshot mode" to zoom in the Web Configuration. Nightmode- Click Setup...
...reduce the frame rate of the connected camera. Zoom In - Display the camera's location and the current date & time. Click the buttons to deliver clearer images in the dark environment. Displays the real-time image of video setting. (TV-IP312/TV-IP312W only) Live View Image... - However, this function at the same time. Listen allows you receive the on-site sound and voice from the camera. - 23 - Click the button to enable the "nightshot mode" to zoom in the Web Configuration. Nightmode- Click Setup...

User's Guide
Page 26
The Web Configuration will start from the SecurView™ software (see chapter 5 in more detail). CHAPTER 4 CONFIGURING THE CAMERA 4.1 Using the Web Configuration You can access and manage the camera through the configuration of Web Configuration. This chapter describes the Web Configuration, and guides you through the Web browser or from the Basic page. - 25 - To configure the camera, click Setup on the main page of the camera by using the web browser.
The Web Configuration will start from the SecurView™ software (see chapter 5 in more detail). CHAPTER 4 CONFIGURING THE CAMERA 4.1 Using the Web Configuration You can access and manage the camera through the configuration of Web Configuration. This chapter describes the Web Configuration, and guides you through the Web browser or from the Basic page. - 25 - To configure the camera, click Setup on the main page of the camera by using the web browser.

User's Guide
Page 32
4.3 Basic Setup The Basic menu contains three sub-menus that provide the system settings for the camera, such as the Camera Name, Location, Date & Time, and User management. - 31 -
4.3 Basic Setup The Basic menu contains three sub-menus that provide the system settings for the camera, such as the Camera Name, Location, Date & Time, and User management. - 31 -

User's Guide
Page 70
NOTE To use SecurView™, you to install it during the process of installing SecurView™. - 69 - The setup wizard will detect it and, if the program is not installed yet, ask you must have Microsoft .NET Framework 2.0 installed in the computer.
NOTE To use SecurView™, you to install it during the process of installing SecurView™. - 69 - The setup wizard will detect it and, if the program is not installed yet, ask you must have Microsoft .NET Framework 2.0 installed in the computer.

User's Guide
Page 71
Click "Next" when the Welcome to the SecurView Setup Wizard appears - 70 - 3. Then SecurView Setup Wizard will appear.
Click "Next" when the Welcome to the SecurView Setup Wizard appears - 70 - 3. Then SecurView Setup Wizard will appear.

User's Guide
Page 97
... Enter a subject for the notification email. Trigger Out: If the selected camera supports Trigger Out connector, select this option to login the mail server. - Account Click SETTING > Account to setup the username & password to lock & unlock the main screen of the user who ...setup the scanning time between 2 ~ 20 seconds. - 96 - The default setting is 2 seconds. - Mail To: Enter the email address of the user who will receive the email. - Mail From: Enter the email address of the SecurView. For example, [email protected]. - You can set the interval time between cameras...
... Enter a subject for the notification email. Trigger Out: If the selected camera supports Trigger Out connector, select this option to login the mail server. - Account Click SETTING > Account to setup the username & password to lock & unlock the main screen of the user who ...setup the scanning time between 2 ~ 20 seconds. - 96 - The default setting is 2 seconds. - Mail To: Enter the email address of the user who will receive the email. - Mail From: Enter the email address of the SecurView. For example, [email protected]. - You can set the interval time between cameras...
Quick Installation Guide
Page 5
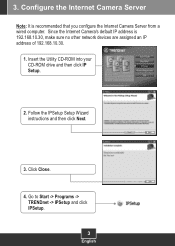
Configure the Internet Camera Server Note: It is 192.168.10.30, make sure no other network devices are assigned an IP address of 192.168.10.30. 1. Follow the IPSetup Setup Wizard instructions and then click Next. 3. Since the Internet Camera's default IP address is recommended that you configure the Internet Camera Server from a wired computer. Click Close. 4. Go to Start -> Programs -> TRENDnet -> IPSetup and click IPSetup. 3 English 3. Insert the Utility CD-ROM into your CD-ROM drive and then click IP Setup. 2.
Configure the Internet Camera Server Note: It is 192.168.10.30, make sure no other network devices are assigned an IP address of 192.168.10.30. 1. Follow the IPSetup Setup Wizard instructions and then click Next. 3. Since the Internet Camera's default IP address is recommended that you configure the Internet Camera Server from a wired computer. Click Close. 4. Go to Start -> Programs -> TRENDnet -> IPSetup and click IPSetup. 3 English 3. Insert the Utility CD-ROM into your CD-ROM drive and then click IP Setup. 2.

Quick Installation Guide
Page 7
10. Right click and select Install Active X Control. 12. Click Install. 13. Enter the User name and Password, and then click OK. By default: User Name: admin Password: admin 11. Click Setup, Network and then click Wireless. Contact your wireless network is encrypted. Configure your wireless settings to match your wireless network's settings and then click Apply (Enable/Enter the WEP/WPA key when your network administrator for more information). (TV-IP212W/ TV-IP312W only) 5 English
10. Right click and select Install Active X Control. 12. Click Install. 13. Enter the User name and Password, and then click OK. By default: User Name: admin Password: admin 11. Click Setup, Network and then click Wireless. Contact your wireless network is encrypted. Configure your wireless settings to match your wireless network's settings and then click Apply (Enable/Enter the WEP/WPA key when your network administrator for more information). (TV-IP212W/ TV-IP312W only) 5 English

Quick Installation Guide
Page 9
... Troubleshooting Q1: The IPSetup Setup Wizard does not detect my Internet Camera Server. Then click on Use the following IP address, and make sure that you are using Windows XP or Windows Vista, disable the built in the wireless section of the Internet Camera Server into the Control Panel and... to have the same SSID, encryption mode and key (if enabled). Second, disable any questions regarding the TV-IP212/TV-IP212W/ TV-IP312/TV-IP312W, please contact TRENDnet's Technical Support Department. 7 Put a static IP address on Search in Section 3: Configure the Internet Camera Server.
... Troubleshooting Q1: The IPSetup Setup Wizard does not detect my Internet Camera Server. Then click on Use the following IP address, and make sure that you are using Windows XP or Windows Vista, disable the built in the wireless section of the Internet Camera Server into the Control Panel and... to have the same SSID, encryption mode and key (if enabled). Second, disable any questions regarding the TV-IP212/TV-IP212W/ TV-IP312/TV-IP312W, please contact TRENDnet's Technical Support Department. 7 Put a static IP address on Search in Section 3: Configure the Internet Camera Server.