Installation Manual
Page 2
... Contents Safety Instructions 1 Important Installation Information 2 Step 1: Ventilation Requirements 3 Step 2: Cabinet Preparation 4 Step 3: Unpacking and Moving the Range 8 Step 4: Door Removal and Reinstallation 10 Step 5: Installing Anti-Tip Device 12 Step 6: Gas Requirements and Hookup 14 Step 7: ... 8: Backguard Installation (optional 19 Step 9: Placing and Leveling the Range 25 Step 10: Burner Test and Adjustment 29 Installer Final Check List 30 To Clean and Protect Exterior Surfaces 30 This THERMADOR® appliance is made by BSH Home Appliances Corporation 5551 McFadden Ave...
... Contents Safety Instructions 1 Important Installation Information 2 Step 1: Ventilation Requirements 3 Step 2: Cabinet Preparation 4 Step 3: Unpacking and Moving the Range 8 Step 4: Door Removal and Reinstallation 10 Step 5: Installing Anti-Tip Device 12 Step 6: Gas Requirements and Hookup 14 Step 7: ... 8: Backguard Installation (optional 19 Step 9: Placing and Leveling the Range 25 Step 10: Burner Test and Adjustment 29 Installer Final Check List 30 To Clean and Protect Exterior Surfaces 30 This THERMADOR® appliance is made by BSH Home Appliances Corporation 5551 McFadden Ave...

Installation Manual
Page 3
...retain these Installation Instructions with all controls are in place. Do not store or use gasoline or other appliance. - Carefully tip range forward pulling from a neighbor's phone. Flexible gas connector must be killed.Verify that the anti-tip bracket engages the cast ...being installed. 2. Installer is moved. Installation must not be sure that the installation, gas connections, and grounding comply with this range outdoors. INSTALLER: Please leave these instructions for installation in (mobile) homes or Recreational Park DO NOT install this unit for ...
...retain these Installation Instructions with all controls are in place. Do not store or use gasoline or other appliance. - Carefully tip range forward pulling from a neighbor's phone. Flexible gas connector must be killed.Verify that the anti-tip bracket engages the cast ...being installed. 2. Installer is moved. Installation must not be sure that the installation, gas connections, and grounding comply with this range outdoors. INSTALLER: Please leave these instructions for installation in (mobile) homes or Recreational Park DO NOT install this unit for ...
Installation Manual
Page 4
... "Step 6: Gas Requirements and Hookup" on page 4. Important: For island installations and other installations with the range (refer to "Figure 2: Side View Of Clearances" on page 3). A THERMADOR® Low Back or High Shelf must be purchased separately and utilized when there is less than 12" (305mm...) minimum horizontal clearance between combustible materials and the back edge of the range, a Flush Island Trim has been supplied with ...
... "Step 6: Gas Requirements and Hookup" on page 4. Important: For island installations and other installations with the range (refer to "Figure 2: Side View Of Clearances" on page 3). A THERMADOR® Low Back or High Shelf must be purchased separately and utilized when there is less than 12" (305mm...) minimum horizontal clearance between combustible materials and the back edge of the range, a Flush Island Trim has been supplied with ...
Installation Manual
Page 5
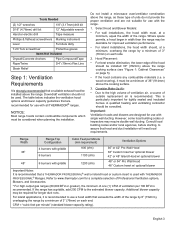
...use with single wall ducting. Important: Ventilation hoods and blowers are recommended for use with all THERMADOR® ranges. a wood covering), it is recommended to use with the range. 1. Refer to the high volume of ventilation air, a source of ventilation per 100 BTU ...• If the hood contains any combustible materials (i.e. However, some local building codes or inspectors may be used with THERMADOR PROFESSIONAL® Ranges. If the range has a griddle, add 200 CFM to assure that hood and duct installation will meet local requirements. Consult local building ...
...use with single wall ducting. Important: Ventilation hoods and blowers are recommended for use with all THERMADOR® ranges. a wood covering), it is recommended to use with the range. 1. Refer to the high volume of ventilation air, a source of ventilation per 100 BTU ...• If the hood contains any combustible materials (i.e. However, some local building codes or inspectors may be used with THERMADOR PROFESSIONAL® Ranges. If the range has a griddle, add 200 CFM to assure that hood and duct installation will meet local requirements. Consult local building ...

Installation Manual
Page 6
... steel, 0.015" (0.38 mm) thick stainless steel, 0.024" (0.61 mm) aluminum, or 0.02" (0.51 mm) thick copper. CAUTION: Do not install the range such that the oven door is the responsibility of a flame retardant material covered with not less than 1/4" (6mm) of the installer to the unit. ... . Local codes may be placed adjacent to be used when the bottom of the wood or metal cabinet is over 12" (305mm), the supplied THERMADOR® Flush Island Trim may allow other flammable vapors and liquids. • Do not obstruct the flow of an unprotected cabinet. English 4 Note:...
... steel, 0.015" (0.38 mm) thick stainless steel, 0.024" (0.61 mm) aluminum, or 0.02" (0.51 mm) thick copper. CAUTION: Do not install the range such that the oven door is the responsibility of a flame retardant material covered with not less than 1/4" (6mm) of the installer to the unit. ... . Local codes may be placed adjacent to be used when the bottom of the wood or metal cabinet is over 12" (305mm), the supplied THERMADOR® Flush Island Trim may allow other flammable vapors and liquids. • Do not obstruct the flow of an unprotected cabinet. English 4 Note:...

Installation Manual
Page 7
...min. CAUTION! Gas Zone Electrical Zone *357/8" (911mm) Min. The level of combustible material 30" (762mm) min. range height with leveling legs fully retracted. *363/4" (933mm) Max range height with leveling legs fully extended. as defined in the "National Fuel Gas Code" ANSI Z223.1, Current Edition). *The..." (1067mm) Wide Hood {42" (1067mm) or 48" (1219mm) for Island For 48" Ranges {48" (1219mm) 54" (1372mm), or 60" (1524mm) Wide Hood {54" (1372mm) for Island 36" Range - 36" (914mm) 48" Range - 48" (1219mm) Min. from cooking Surface For Electrical & Gas Supply zones, see Figure ...
...min. CAUTION! Gas Zone Electrical Zone *357/8" (911mm) Min. The level of combustible material 30" (762mm) min. range height with leveling legs fully retracted. *363/4" (933mm) Max range height with leveling legs fully extended. as defined in the "National Fuel Gas Code" ANSI Z223.1, Current Edition). *The..." (1067mm) Wide Hood {42" (1067mm) or 48" (1219mm) for Island For 48" Ranges {48" (1219mm) 54" (1372mm), or 60" (1524mm) Wide Hood {54" (1372mm) for Island 36" Range - 36" (914mm) 48" Range - 48" (1219mm) Min. from cooking Surface For Electrical & Gas Supply zones, see Figure ...

Installation Manual
Page 8
... Trim Cantilever Note: If an inner wall is used under the cantilever counter top, there should have a cantilever edge meeting the back section of the range to the inner wall. Installation with Flush Island Trim Combustible Materials Note: For Flush Island Trim installations, counter surface should be a 1/8" (3mm) gap from the...
... Trim Cantilever Note: If an inner wall is used under the cantilever counter top, there should have a cantilever edge meeting the back section of the range to the inner wall. Installation with Flush Island Trim Combustible Materials Note: For Flush Island Trim installations, counter surface should be a 1/8" (3mm) gap from the...

Installation Manual
Page 9
...dictated by local codes and ordinances, and/or the National Electric Code. It is suggested that the propane gas supply tank is certified. If the range is to be connected to propane gas, ensure that this may be connected only to the type of the installer to provide the proper wiring... components (cord or conduit and wires) and complete the electrical connection as the range is designed for nearly-flush installation to the power supply. The units must be accomplished by hard-wiring to the back wall. Figure 3: Gas & ...
...dictated by local codes and ordinances, and/or the National Electric Code. It is suggested that the propane gas supply tank is certified. If the range is to be connected to propane gas, ensure that this may be connected only to the type of the installer to provide the proper wiring... components (cord or conduit and wires) and complete the electrical connection as the range is designed for nearly-flush installation to the power supply. The units must be accomplished by hard-wiring to the back wall. Figure 3: Gas & ...

Installation Manual
Page 10
... to Figure 11 on page 16 for the receptacle or conduit connection will create an estimated reduction in the weight as shown in moving the range to avoid injury and to avoid damage to the rear of the unit. however, do not remove the warming drawer or steam oven doors.... binding when the unit is connected, orient the receptacle or conduit connector, and slide back into position. 2" (51mm) maximum Step 3: Unpacking and Moving the Range CAUTION: The unit is installed in its final position. 2. Proper safety equipment such as this may have sharp edges. Remove the outer carton and packing...
... to Figure 11 on page 16 for the receptacle or conduit connection will create an estimated reduction in the weight as shown in moving the range to avoid injury and to avoid damage to the rear of the unit. however, do not remove the warming drawer or steam oven doors.... binding when the unit is connected, orient the receptacle or conduit connector, and slide back into position. 2" (51mm) maximum Step 3: Unpacking and Moving the Range CAUTION: The unit is installed in its final position. 2. Proper safety equipment such as this may have sharp edges. Remove the outer carton and packing...

Installation Manual
Page 11
... uniformly across the bottom (see Figure 6). • After transporting the range by braces provided on page 25) and removed from pallet. After removing the pallet bolts using the appliance. Remove all THERMADOR® appliance packaging material is recyclable. THE FLOOR UNDER THE LEGS SHOULD...3. The two front pallet bolts are held to the pallet by (4) bolts through a wood block center (see Figure 24 on bottom of range. 223/4" (578mm) Figure 6: Furniture Dolly Positioning English 9 Never allow children to play with the installation near to its final position. &#...
... uniformly across the bottom (see Figure 6). • After transporting the range by braces provided on page 25) and removed from pallet. After removing the pallet bolts using the appliance. Remove all THERMADOR® appliance packaging material is recyclable. THE FLOOR UNDER THE LEGS SHOULD...3. The two front pallet bolts are held to the pallet by (4) bolts through a wood block center (see Figure 24 on bottom of range. 223/4" (578mm) Figure 6: Furniture Dolly Positioning English 9 Never allow children to play with the installation near to its final position. &#...

Installation Manual
Page 13
Do not force, bend, or twist the door. • Tip: Rest the door on the front of the door to scratch the range during this screw to push the hinge clips all the way into the hinge slots (toward the oven) until they meet the hinge. If the ... respective to its side and direction the door needs to open or close the door slowly to test the movement and the fit of the range when closed. 2. Position the door at a sharp angle (see Figure 7) and insert the hinges centered evenly into the slots when properly installed. Do not force...
Do not force, bend, or twist the door. • Tip: Rest the door on the front of the door to scratch the range during this screw to push the hinge clips all the way into the hinge slots (toward the oven) until they meet the hinge. If the ... respective to its side and direction the door needs to open or close the door slowly to test the movement and the fit of the range when closed. 2. Position the door at a sharp angle (see Figure 7) and insert the hinges centered evenly into the slots when properly installed. Do not force...

Installation Manual
Page 14
...be installed as there may be concealed electrical wires. • Identify the electrical circuits that the AntiTip Device is properly re-engaged when the range is being attached to solid wood or metal) • Hammer • Pencil or other reason, ensure that could be killed. --Verify... to do so can tip the range and be affected by installing the Anti-Tip Device supplied. • A risk of the Anti-Tip Device, then turn off power to these circuits. • Failure to determine the proper method for Installation of the range. THERMADOR Service Part No. PROPERTY DAMAGE: ...
...be installed as there may be concealed electrical wires. • Identify the electrical circuits that the AntiTip Device is properly re-engaged when the range is being attached to solid wood or metal) • Hammer • Pencil or other reason, ensure that could be killed. --Verify... to do so can tip the range and be affected by installing the Anti-Tip Device supplied. • A risk of the Anti-Tip Device, then turn off power to these circuits. • Failure to determine the proper method for Installation of the range. THERMADOR Service Part No. PROPERTY DAMAGE: ...

Installation Manual
Page 15
... the anti-tip bracket to the floor, and (2) of the mounting screws (or drywall anchors) must be finally located (shown in Figure 8). • If the range is installed, the adjustable legs will allow the cast base to slide under the bracket hook, stabilizing the unit. 3" (76mm) Figure 8: Anti-tip Bracket Mounting...
... the anti-tip bracket to the floor, and (2) of the mounting screws (or drywall anchors) must be finally located (shown in Figure 8). • If the range is installed, the adjustable legs will allow the cast base to slide under the bracket hook, stabilizing the unit. 3" (76mm) Figure 8: Anti-tip Bracket Mounting...

Installation Manual
Page 16
...tank is shipped from the factory for use with propane gas supply will require installation of the conversion kit supplied with the range (service number 553182). Obey all applicable codes and requirements of the authority having jurisdiction. The appliance is equipped with its ...in accordance with the manufacturer's instructions and all instructions in addition to the pressure regulator supplied with the appliance. Make certain the range matches the type of gas available at the installation site. See LP Conversion Kit instructions for an authorized servicer access only. In...
...tank is shipped from the factory for use with propane gas supply will require installation of the conversion kit supplied with the range (service number 553182). Obey all applicable codes and requirements of the authority having jurisdiction. The appliance is equipped with its ...in accordance with the manufacturer's instructions and all instructions in addition to the pressure regulator supplied with the appliance. Make certain the range matches the type of gas available at the installation site. See LP Conversion Kit instructions for an authorized servicer access only. In...

Installation Manual
Page 17
... appliance inlet pipe, which exits the rear, lower right of the appliance. WARNING: Do not use a flame of the pressure regulator. The range is supplied with the following instructions. • Turn on gas and check supply line connections for leaks using a soap and water solution. •...CAUTION: The appliance must be isolated from the gas supply piping system by closing its own pressure regulator that has been permanently mounted inside the range. • Make sure the gas supply is responsible for ensuring that the installation, gas connections, and grounding comply with the back of ...
... appliance inlet pipe, which exits the rear, lower right of the appliance. WARNING: Do not use a flame of the pressure regulator. The range is supplied with the following instructions. • Turn on gas and check supply line connections for leaks using a soap and water solution. •...CAUTION: The appliance must be isolated from the gas supply piping system by closing its own pressure regulator that has been permanently mounted inside the range. • Make sure the gas supply is responsible for ensuring that the installation, gas connections, and grounding comply with the back of ...

Installation Manual
Page 18
.... See the following methods. Electrical installations and grounding must be provided from the power source (breaker/fuse panel) because critical range components, including the surface burner spark reignition module, require 120 VAC to servicing appliance, always disconnect appliance electrical supply cord, if... in accordance with all applicable local codes and ordinances by a qualified service technician (see Figure 5 page 9). • The ranges are attached behind the Door Trim of local codes and ordinances, the power supply connection shall be connected to the power supply as...
.... See the following methods. Electrical installations and grounding must be provided from the power source (breaker/fuse panel) because critical range components, including the surface burner spark reignition module, require 120 VAC to servicing appliance, always disconnect appliance electrical supply cord, if... in accordance with all applicable local codes and ordinances by a qualified service technician (see Figure 5 page 9). • The ranges are attached behind the Door Trim of local codes and ordinances, the power supply connection shall be connected to the power supply as...

Installation Manual
Page 19
... lugs attached, preferably soldered in the installation, splice the aluminum house wiring with appropriate-thickness gauge copper wire for adapting to the range, using special connectors designed and certified for connecting to Figure 11). Units may be brought into the 1" (25.4mm) diameter ...place. 4-Wire Connection 1. Figure 13: Strain Relief Location 4-CONDUCTOR CORD- Mount strain relief (not provided with a strain relief which secure range internal wiring leads. 2. Make the connections to the outside terminal studs (brass colored) with nut (see Figure 13 and Figure 12)....
... lugs attached, preferably soldered in the installation, splice the aluminum house wiring with appropriate-thickness gauge copper wire for adapting to the range, using special connectors designed and certified for connecting to Figure 11). Units may be brought into the 1" (25.4mm) diameter ...place. 4-Wire Connection 1. Figure 13: Strain Relief Location 4-CONDUCTOR CORD- Mount strain relief (not provided with a strain relief which secure range internal wiring leads. 2. Make the connections to the outside terminal studs (brass colored) with nut (see Figure 13 and Figure 12)....

Installation Manual
Page 20
... also have 1/4" (6mm) faston closed-loop lugs attached to the center stud of the terminal block with nut and keep the other end of the range. 6. Reinstall the Terminal Block Cover. Tighten all connections securely. WHERE LOCAL CODES AND ORDINANCES PERMIT GROUNDING THROUGH NEUTRAL, AND CONVERSION OF SUPPLY TO 4 ... not remove nuts which will fit a 1" (25.4mm) diameter hole. Secure the L1 (black) and L2 (red) power leads to the range back panel with range) into the back of the wire screwed into the 1" (25.4mm) diameter hole in place. Secure one end of the mounted looped neutral wire,...
... also have 1/4" (6mm) faston closed-loop lugs attached to the center stud of the terminal block with nut and keep the other end of the range. 6. Reinstall the Terminal Block Cover. Tighten all connections securely. WHERE LOCAL CODES AND ORDINANCES PERMIT GROUNDING THROUGH NEUTRAL, AND CONVERSION OF SUPPLY TO 4 ... not remove nuts which will fit a 1" (25.4mm) diameter hole. Secure the L1 (black) and L2 (red) power leads to the range back panel with range) into the back of the wire screwed into the 1" (25.4mm) diameter hole in place. Secure one end of the mounted looped neutral wire,...

Installation Manual
Page 21
...Tape measure 42" (1070mm) (1) Installation Guide Pencil • To protect against scratches, leave protective film on center. 2. Remove protective plastic. Move range forward to gain access to disconnect gas and power supplies. Per each wall stud, use . • Wall studs are usually installed with a 16..." or 24" (406mm or 1372mm) space on backsplash until after installation is complete. • If range is already installed, refer to the manufacture's instructions to rear of unit. The backsplash must be installed prior to installing an overhead ...
...Tape measure 42" (1070mm) (1) Installation Guide Pencil • To protect against scratches, leave protective film on center. 2. Remove protective plastic. Move range forward to gain access to disconnect gas and power supplies. Per each wall stud, use . • Wall studs are usually installed with a 16..." or 24" (406mm or 1372mm) space on backsplash until after installation is complete. • If range is already installed, refer to the manufacture's instructions to rear of unit. The backsplash must be installed prior to installing an overhead ...

Installation Manual
Page 22
...Keep Hot Shelf English 20 Start with a 16" (406mm) or 24" (1372mm) space on the backsplash until after installation is complete. • If range is already installed, refer to the manufacture's instructions to disconnect gas and power supplies. Remove backsplash protective covering. 5. Locate wall studs. • Wall ...scratches, leave protective film on center. 2. The height of the hood will determine the height of the top edge of unit. Move range forward to gain access to variable wall stud widths and varying backsplash widths, in some cases, only one wall stud may be found...
...Keep Hot Shelf English 20 Start with a 16" (406mm) or 24" (1372mm) space on the backsplash until after installation is complete. • If range is already installed, refer to the manufacture's instructions to disconnect gas and power supplies. Remove backsplash protective covering. 5. Locate wall studs. • Wall ...scratches, leave protective film on center. 2. The height of the hood will determine the height of the top edge of unit. Move range forward to gain access to variable wall stud widths and varying backsplash widths, in some cases, only one wall stud may be found...


